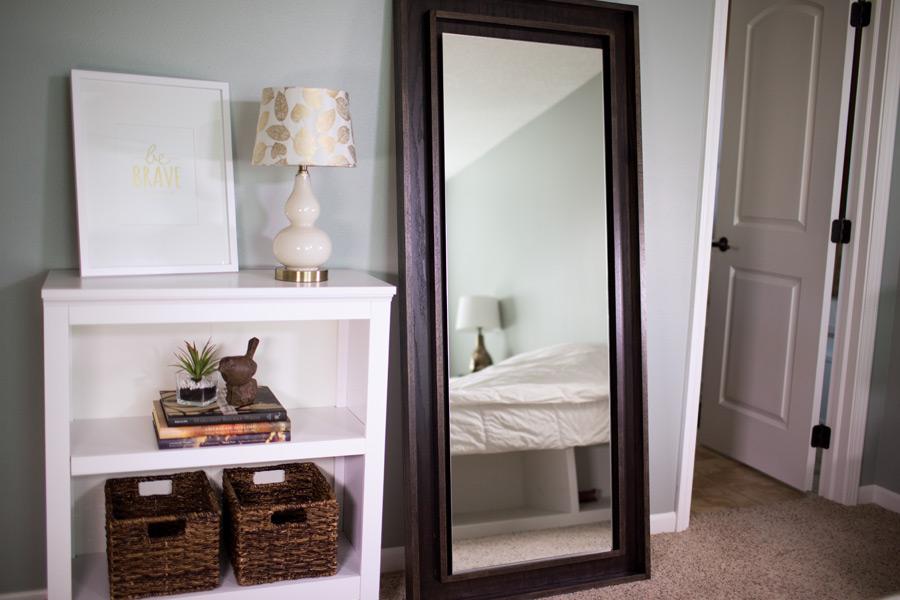
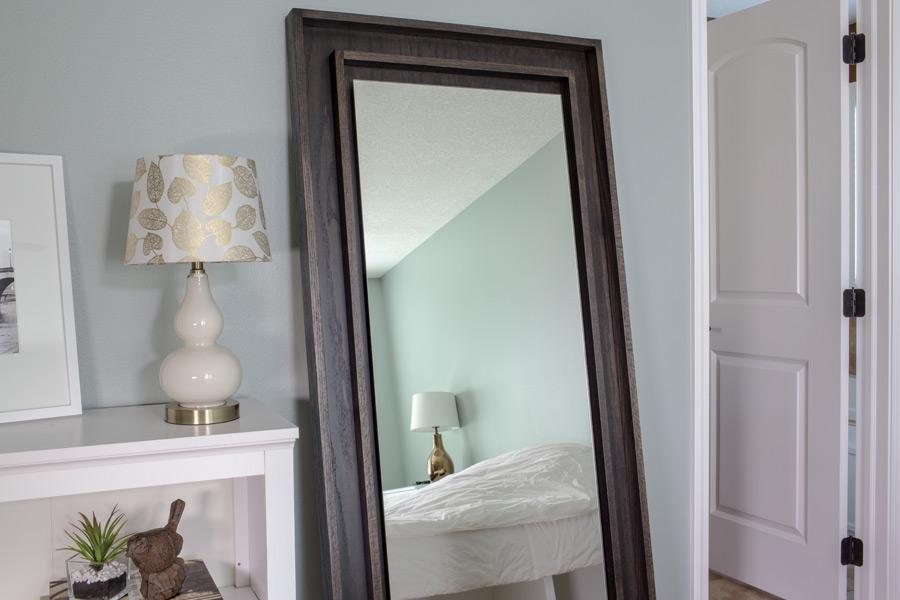
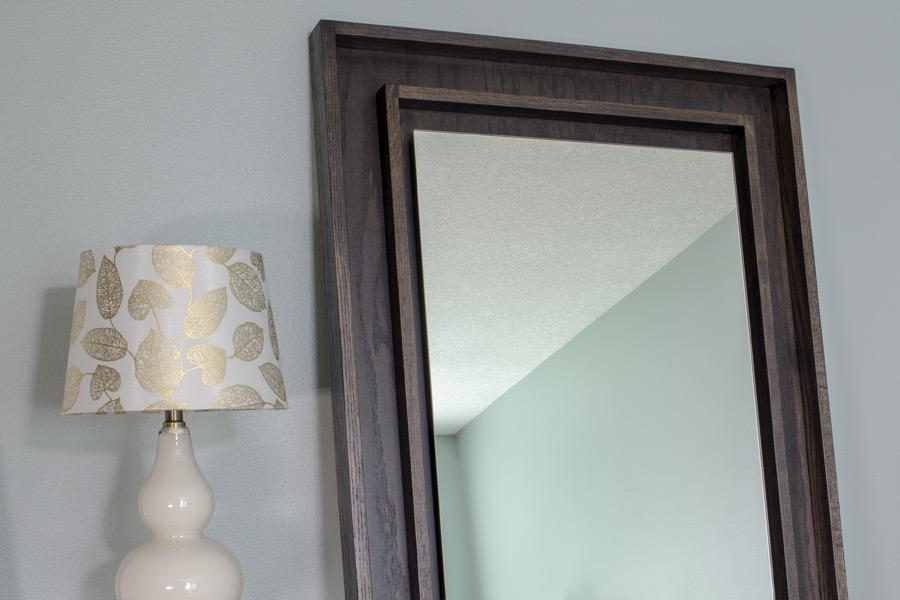
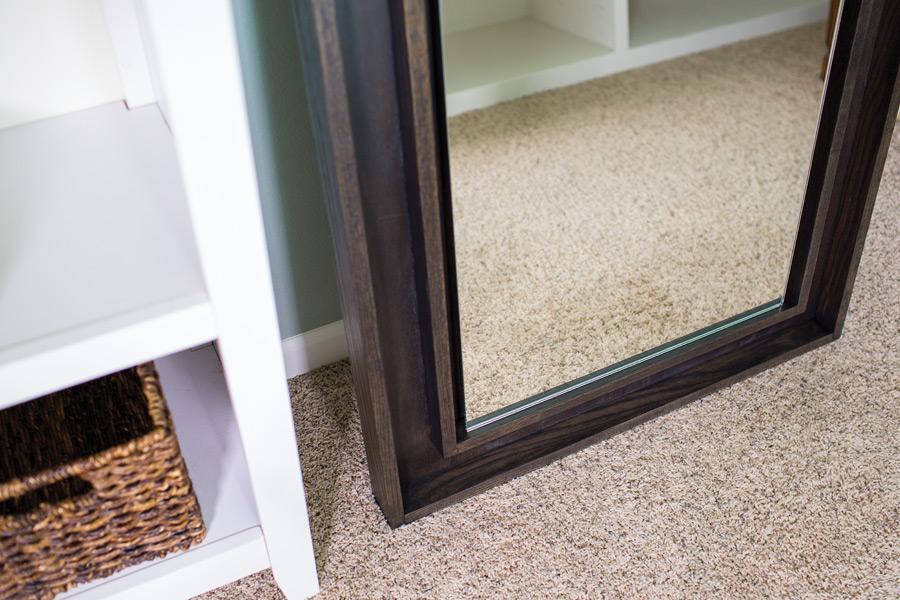


This stunning mirror makes a bold style statement wherever you place it in your home, whether you mount it to the wall or set it on the floor and let it lean. The fantastic looks belie how simple it is to build from plywood and a few off-the-shelf boards.
Tools
Kreg Tools

Other Tools
-
Circular Saw (cordless)

-
Miter Saw
-
Tape Measure
-
Drill (corded)
-
Sander
Materials
Wood Products
- 2 Board , 1x2 , 96"
- 2 Board , 1x3 , 96"
- 1 Plywood , 3/4" Thick , Full Sheet
Hardware & Supplies
- 38 1 1/4" fine-thread pocket-hole screws
- 16 1 1/4" flathead woodscrews
- 16 Pocket-hole plugs
- 1 1/4" (6mm) mirror, 20" x 60"
- 1 Mirror adhesive
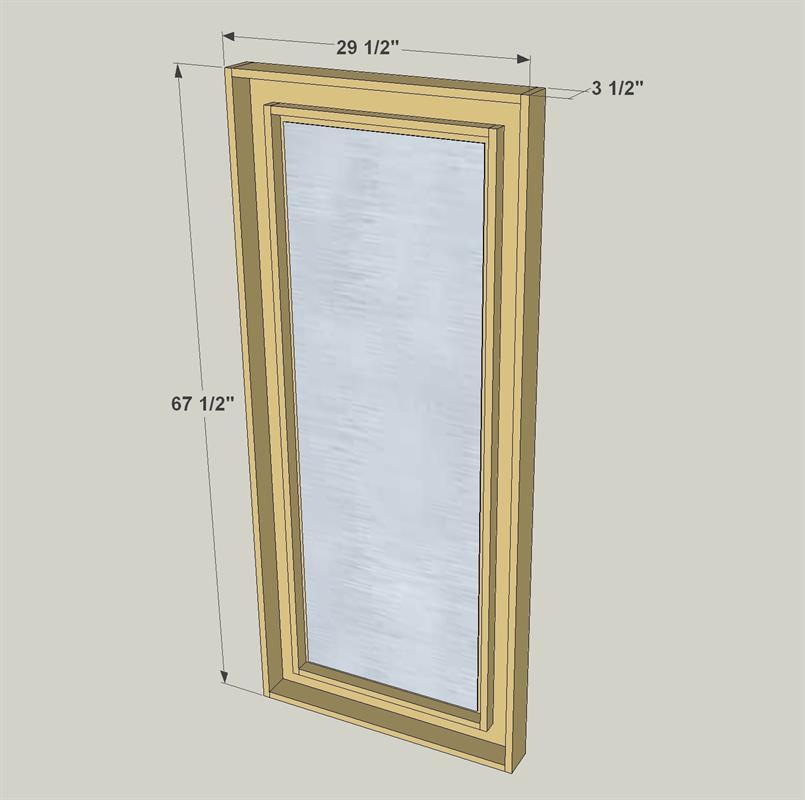
Cut List & Parts
- 1 Frame Back , 3/4" plywood x 28" x 66"
- 1 Mirror Backer , 3/4" plywood x 18" x 56"
- 1 Frame Top , 3/4" x 2 1/2" x 28"
- 1 Frame Bottom , 3/4" x 2 1/2" x 28"
- 2 Frame Sides , 3/4" x 2 1/2" x 67 1/2"
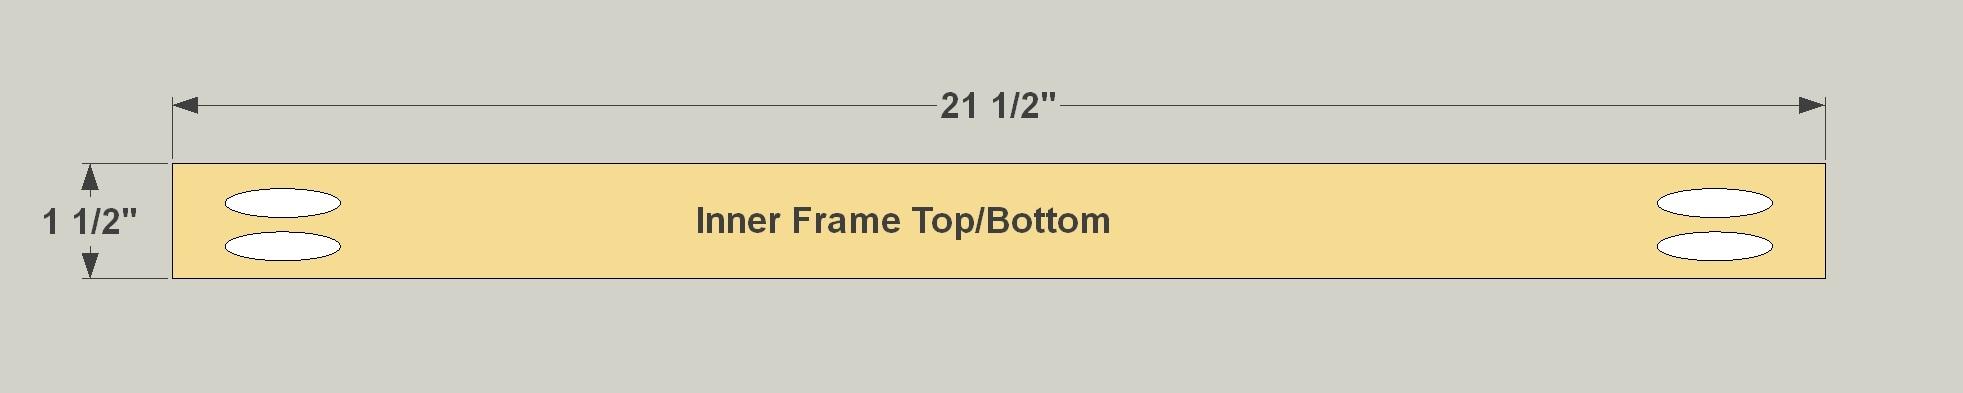
- 1 Inner Frame Top , 3/4" x 1 1/2" x 21 1/2"
- 1 Inner Frame Bottom , 3/4" x 1 1/2" x 21 1/2"
- 2 Inner Frame Sides , 3/4" x 1 1/2" x 61"
Directions
-
Make the Frame Back
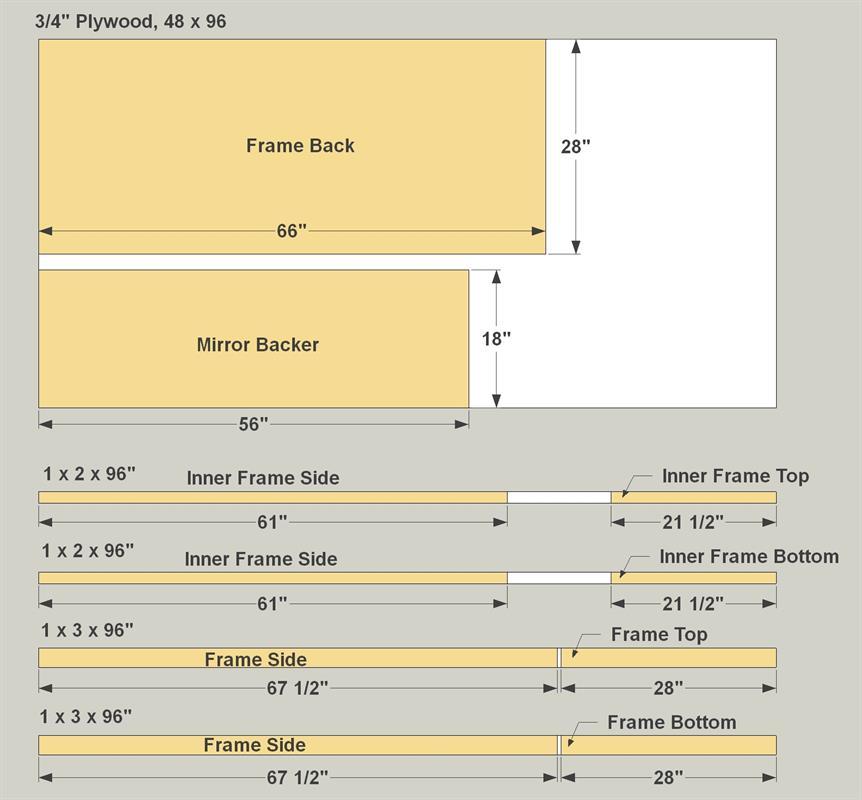
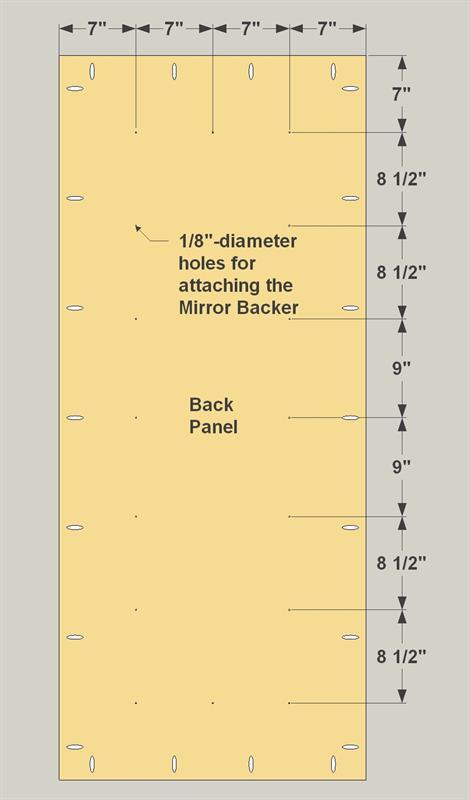
Cut one Mirror Backer and one Frame Back to size from a sheet of 3/4" plywood, as shown in the cutting diagram. Then, with your pocket-hole jig set up for 3/4" material, drill pocket holes in the Frame Back as shown.
-
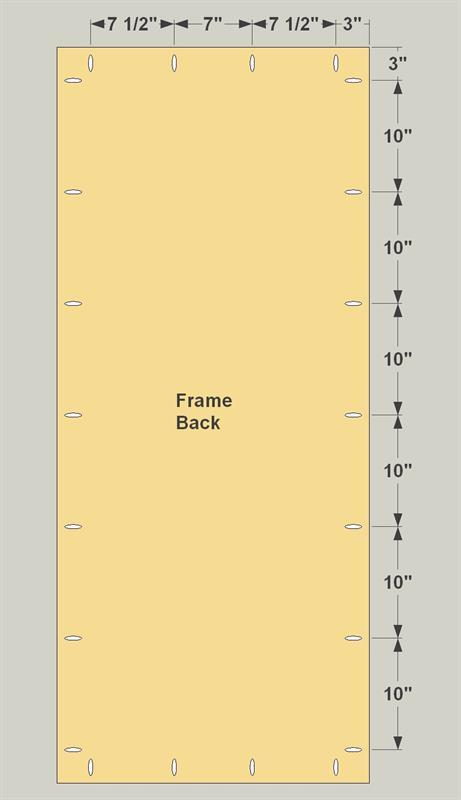
Add Holes to Attach the Mirror
Now you need to drill a series of holes through the Frame Back. These will be used to attach the Mirror Backer later.
-
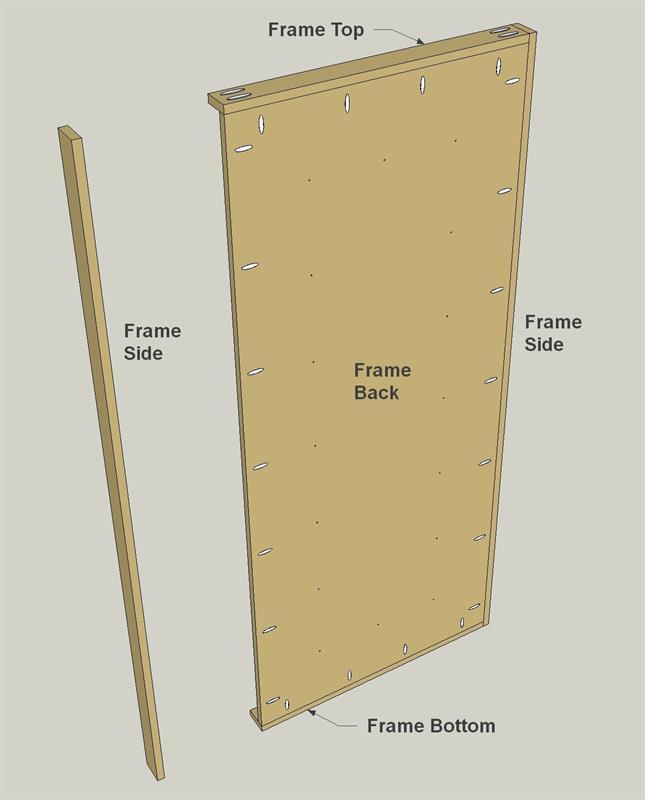
Create the Outer Frame
Cut two Frame Sides, one Frame Top, and one Frame Bottom to length from 1x3 boards, as shown in the cutting diagram. Then, with your pocket-hole jig set up for 3/4" material, drill pocket holes in the Frame Top and Frame Bottom as shown.

-
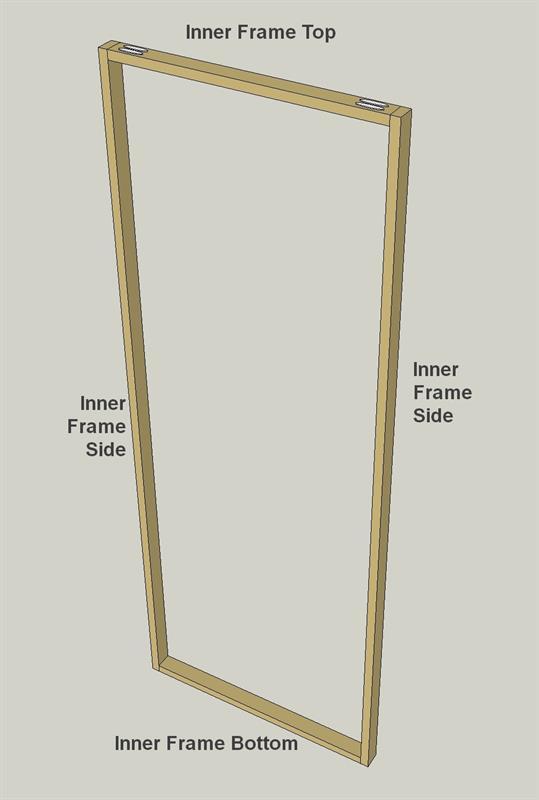
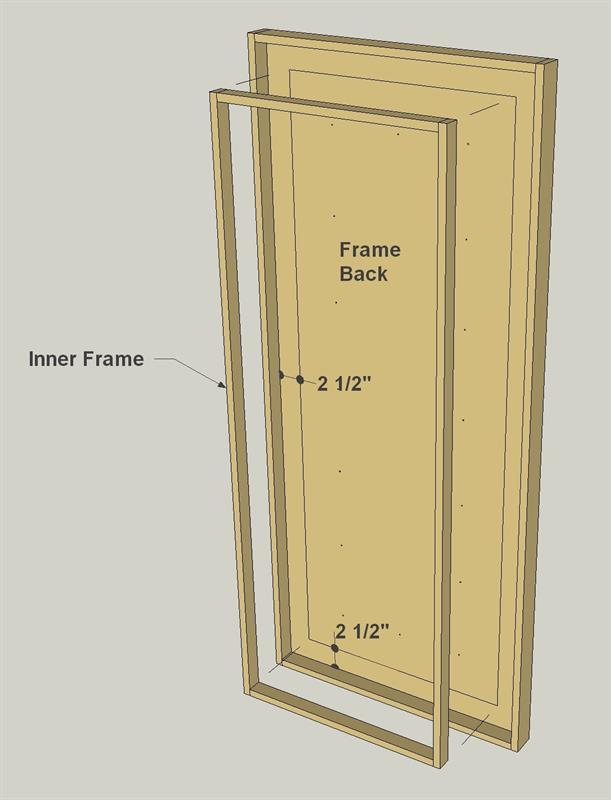
Create the Inner Frame
Cut two Inner Frame Sides, one Inner Frame Top, and one Inner Frame Bottom to length from a 1x3 board, as shown in the cutting diagram. Then, with your pocket-hole jig set up for 3/4" material, drill pocket holes in the Inner Frame Top and Inner Frame Bottom, as shown.
-
Assemble the Outer Frame
After sanding the Frame Back, Frame Top and Bottom, and the Frame Sides, you can assemble them using 1 1/4" fine-thread pocket-hole screws. After assembly, glue pocket-hole plugs into the Frame Top and Bottom, and then sand the plugs flush.
-
Assemble the Inner Frame
After sanding the Inner Frame Top, Bottom, and Sides, you can assemble them using 1 1/4" fine-thread pocket-hole screws. After assembly, glue pocket-hole plugs into the Inner Frame Top and Bottom, and then sand the plugs flush.
-
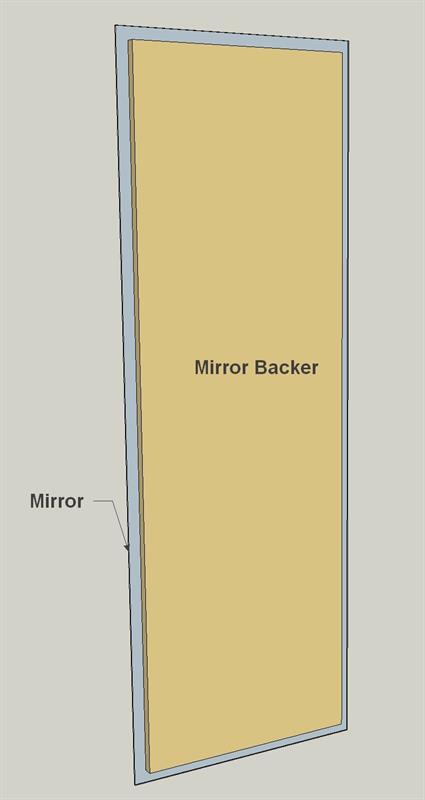
Attach the Mirror to the Backer
Have a Mirror cut to size at a local glass shop. You can usually get one in just a couple of days. Then you can prepare to adhere it to the Mirror Backer. First, stain or paint the edges of the Mirror Backer. They won’t be very visible, but could be seen, and it’s much easier to stain them now. Once the stain dries, lay the backer on a flat, sold surface, and then adhere the mirror using mirror adhesive. Place weights on the mirror and let the adhesive set up.
-
Attach the Inner Frame
While you’re waiting for the mirror adhesive to set, you can complete the rest of the frame. First, center the Inner Frame and glue it to the Frame Back. Then, once the glue sets, go ahead and stain or paint the frame assembly.
-
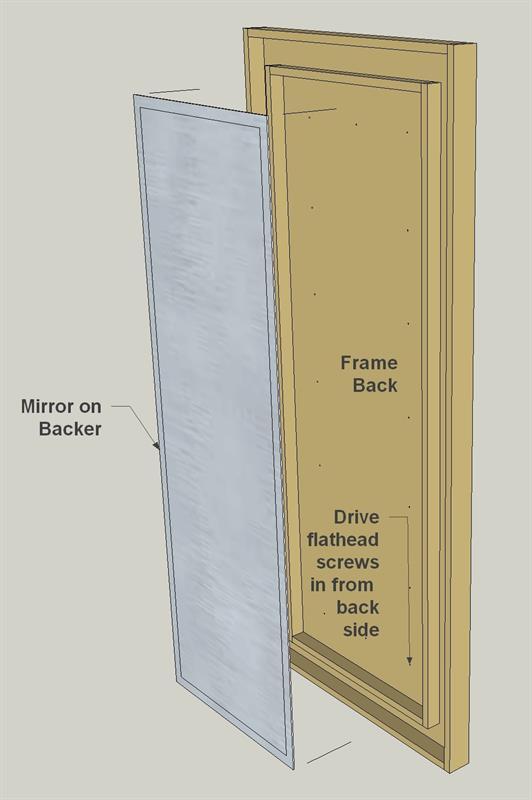
Add the Mirror and Backer
Once the stain is dry and the mirror adhesive has set up, center the mirror/backer assembly inside the inner frame, and attach it by driving 1 1/4" flat-head screws into the Mirror Backer from the backside of the frame. These screws are 1/4" shorter than the combined thickness of the Frame Back and Mirror Backer, but you’ll still want to use caution to avoid driving the screws too deep and potentially cracking the mirror.