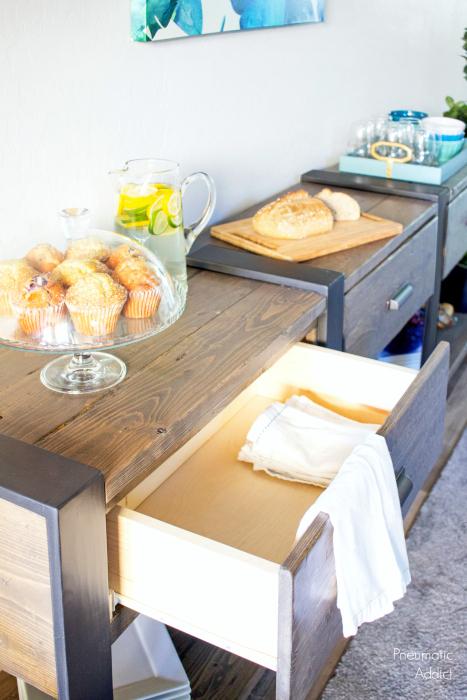
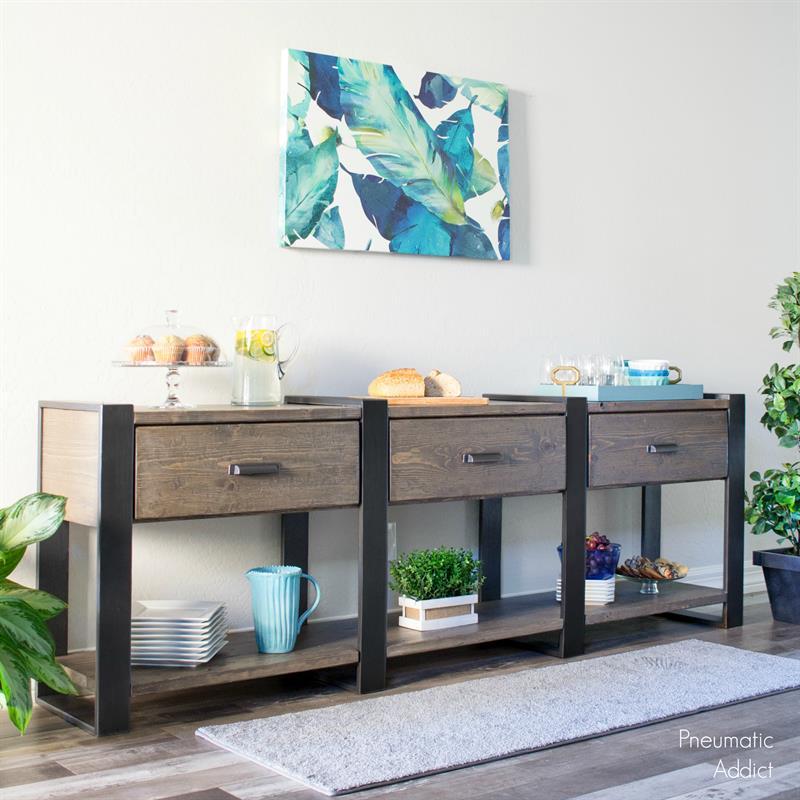


A simple build that can be made with off-the-shelf lumber. At over 8 feet long, with 3 drawers and a lower shelf, this buffet /sideboard has plenty of storage and display space. A functional piece in the kitchen, dining, or living room.
Tools
Kreg Tools


Other Tools
-
Circular Saw (cordless)

-
Miter Saw
-
Square
-
Tape Measure
-
Drill (cordless)
-
Hammer
-
Nail Gun
-
Sander
-
Workbench
Materials
Wood Products
- 6 Board , 2x6 , 96"
- 1 Board , 2x2 , 96"
- 4 Board , 1x4 , 96"
- 1 Board , 1x12 , 48"
- 1 Board , 1x10 , 96"
- 3 Board , 1x3 , 96"
- 3 Board , 1x2 , 96"
- 1 Plywood , 1/4" Thick , Full Sheet
Hardware & Supplies
- 50 2-1/2" pocket hole screws
- 50 2" pocket hole screws
- 50 1-1/4" pocket hole screws
- 12 3/4" wood screws
- 3 14" drawer slides
- 3 Drawer knobs or pulls
- 200 1-1/4" 18-gauge brads
Directions
-
Make Table Top and Shelf
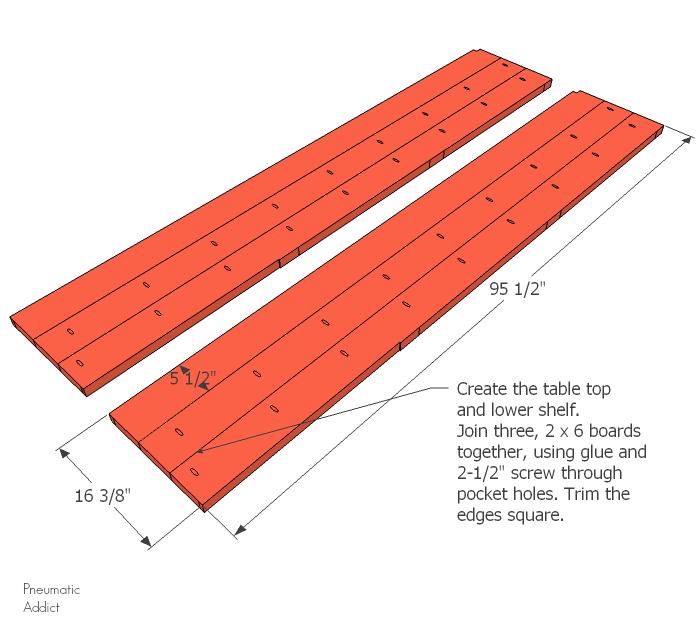
Create the table top and lower shelf. Join three, 2 x 6 boards together, using glue and 2-1/2" screw through pocket holes. Once the glue is fully dried, trim the edges square. The finished dimensions should be approximately 16-1/2" x 95-1/2".
-
Notch Table Top and Shelf
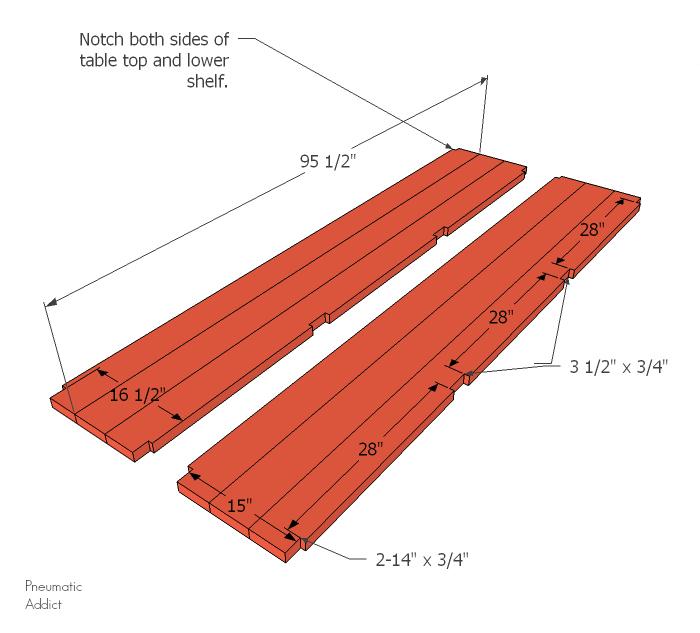
Following the diagram, create 3/4" deep notches on both sides of table top and lower shelf. You can use a jigsaw or circular saw. There should be 28" lengths between the center notches.
-
Build Legs
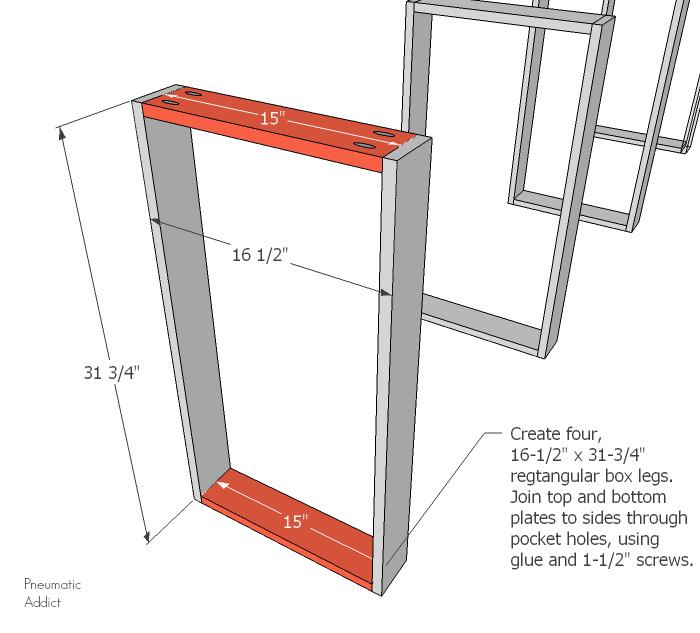
Create four, 16-1/2" x 31-3/4" rectangular box legs. Join top and bottom plates to sides through pocket holes, using glue and 1-1/2" screws.
-
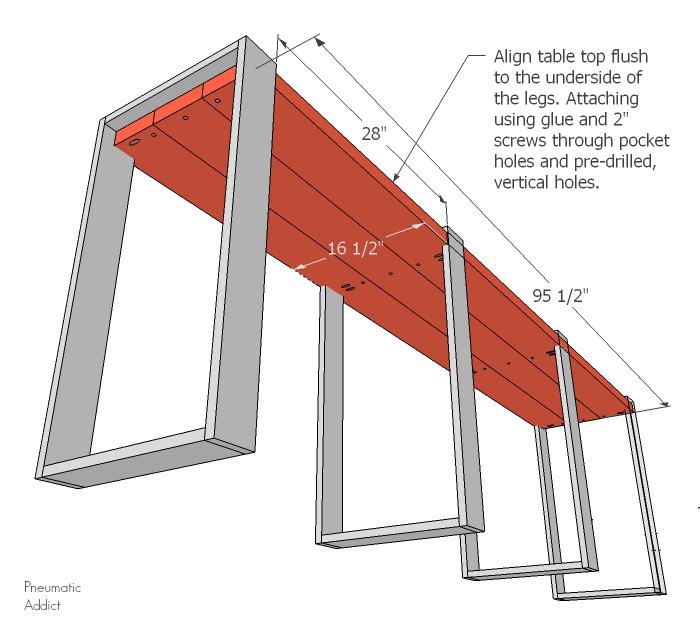
Attach Top to Legs
Align table top flush to the underside of the legs. Attach using glue and 2" screws through pocket holes and pre-drilled, vertical holes.
-
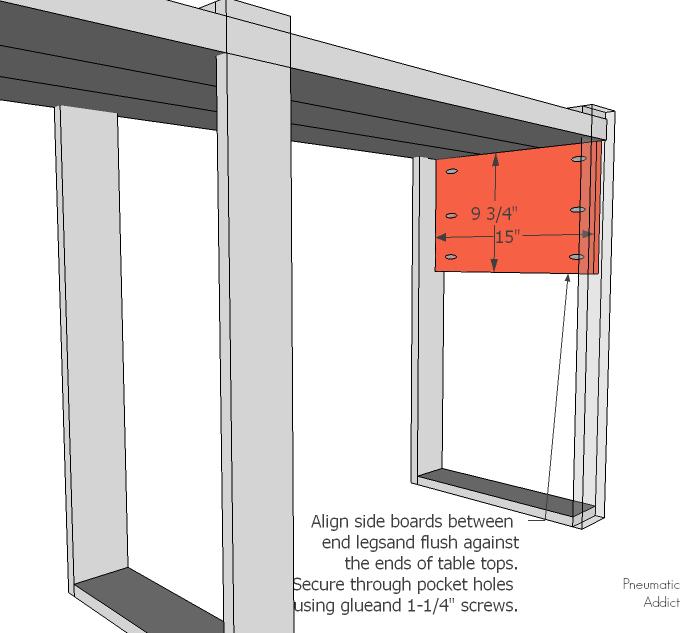
Add End Boards
Align side boards between end legs and flush against the ends of table tops. Secure through pocket holes using glue and 1-1/4" screws.
-
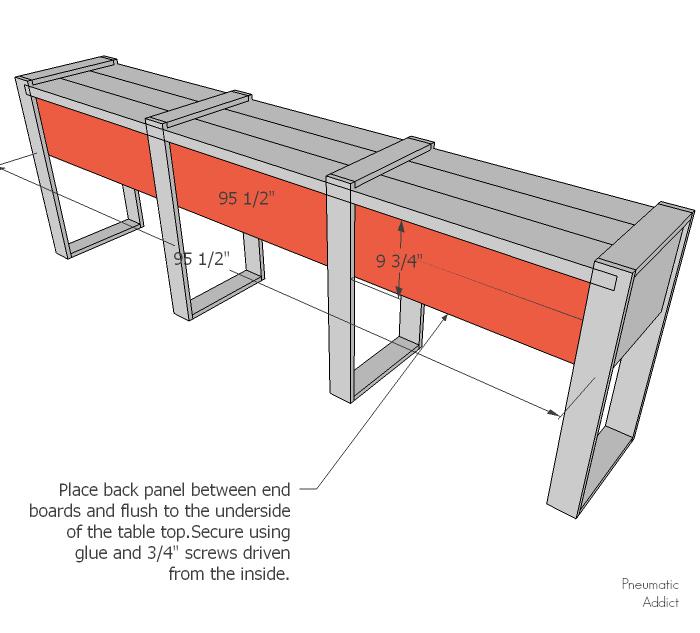
Add Back Panel
Place back panel between end boards and flush to the underside of the table top. Secure using glue and 3/4" screws driven from the inside.
-
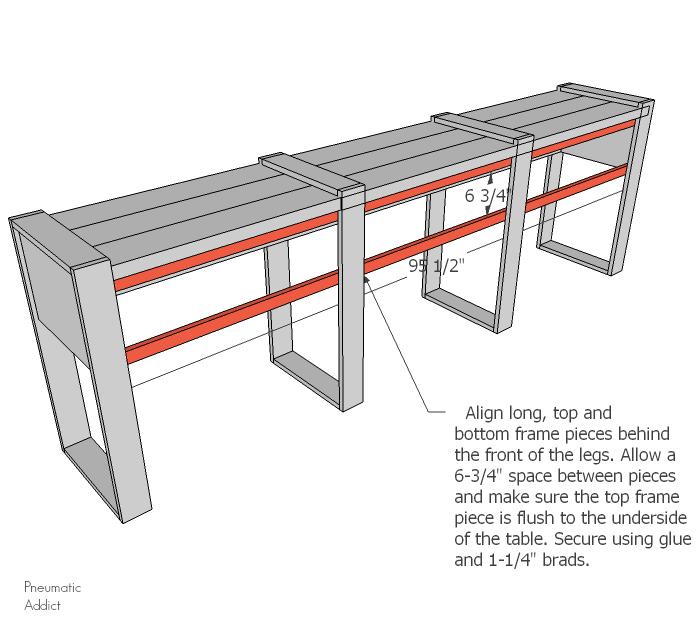
Drawer Frame Top & Bottom
Align long, top and bottom frame pieces behind the front of the legs. Allow a 6-3/4" space between pieces and make sure the top frame piece is flush to the underside of the table. Secure using glue and 1-1/4" brads.
-
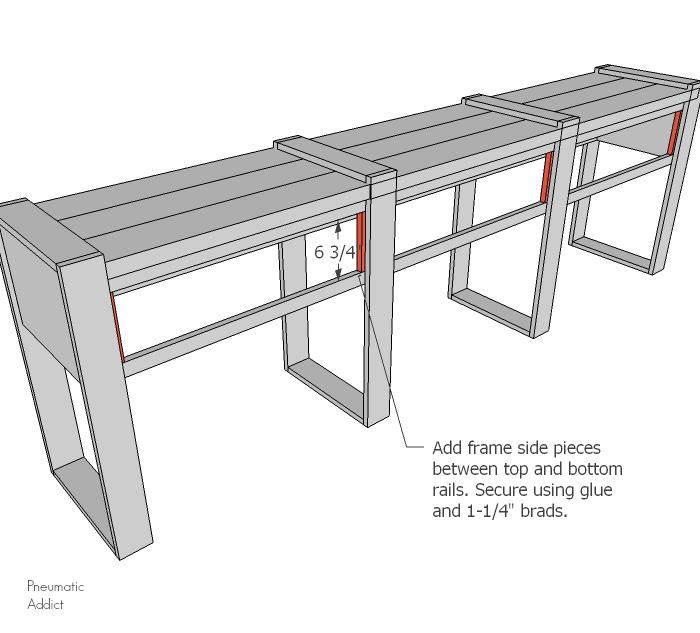
Drawer Frame Sides
Add frame side pieces between top and bottom rails. Secure using glue and 1-1/4" brads from the backside.
-
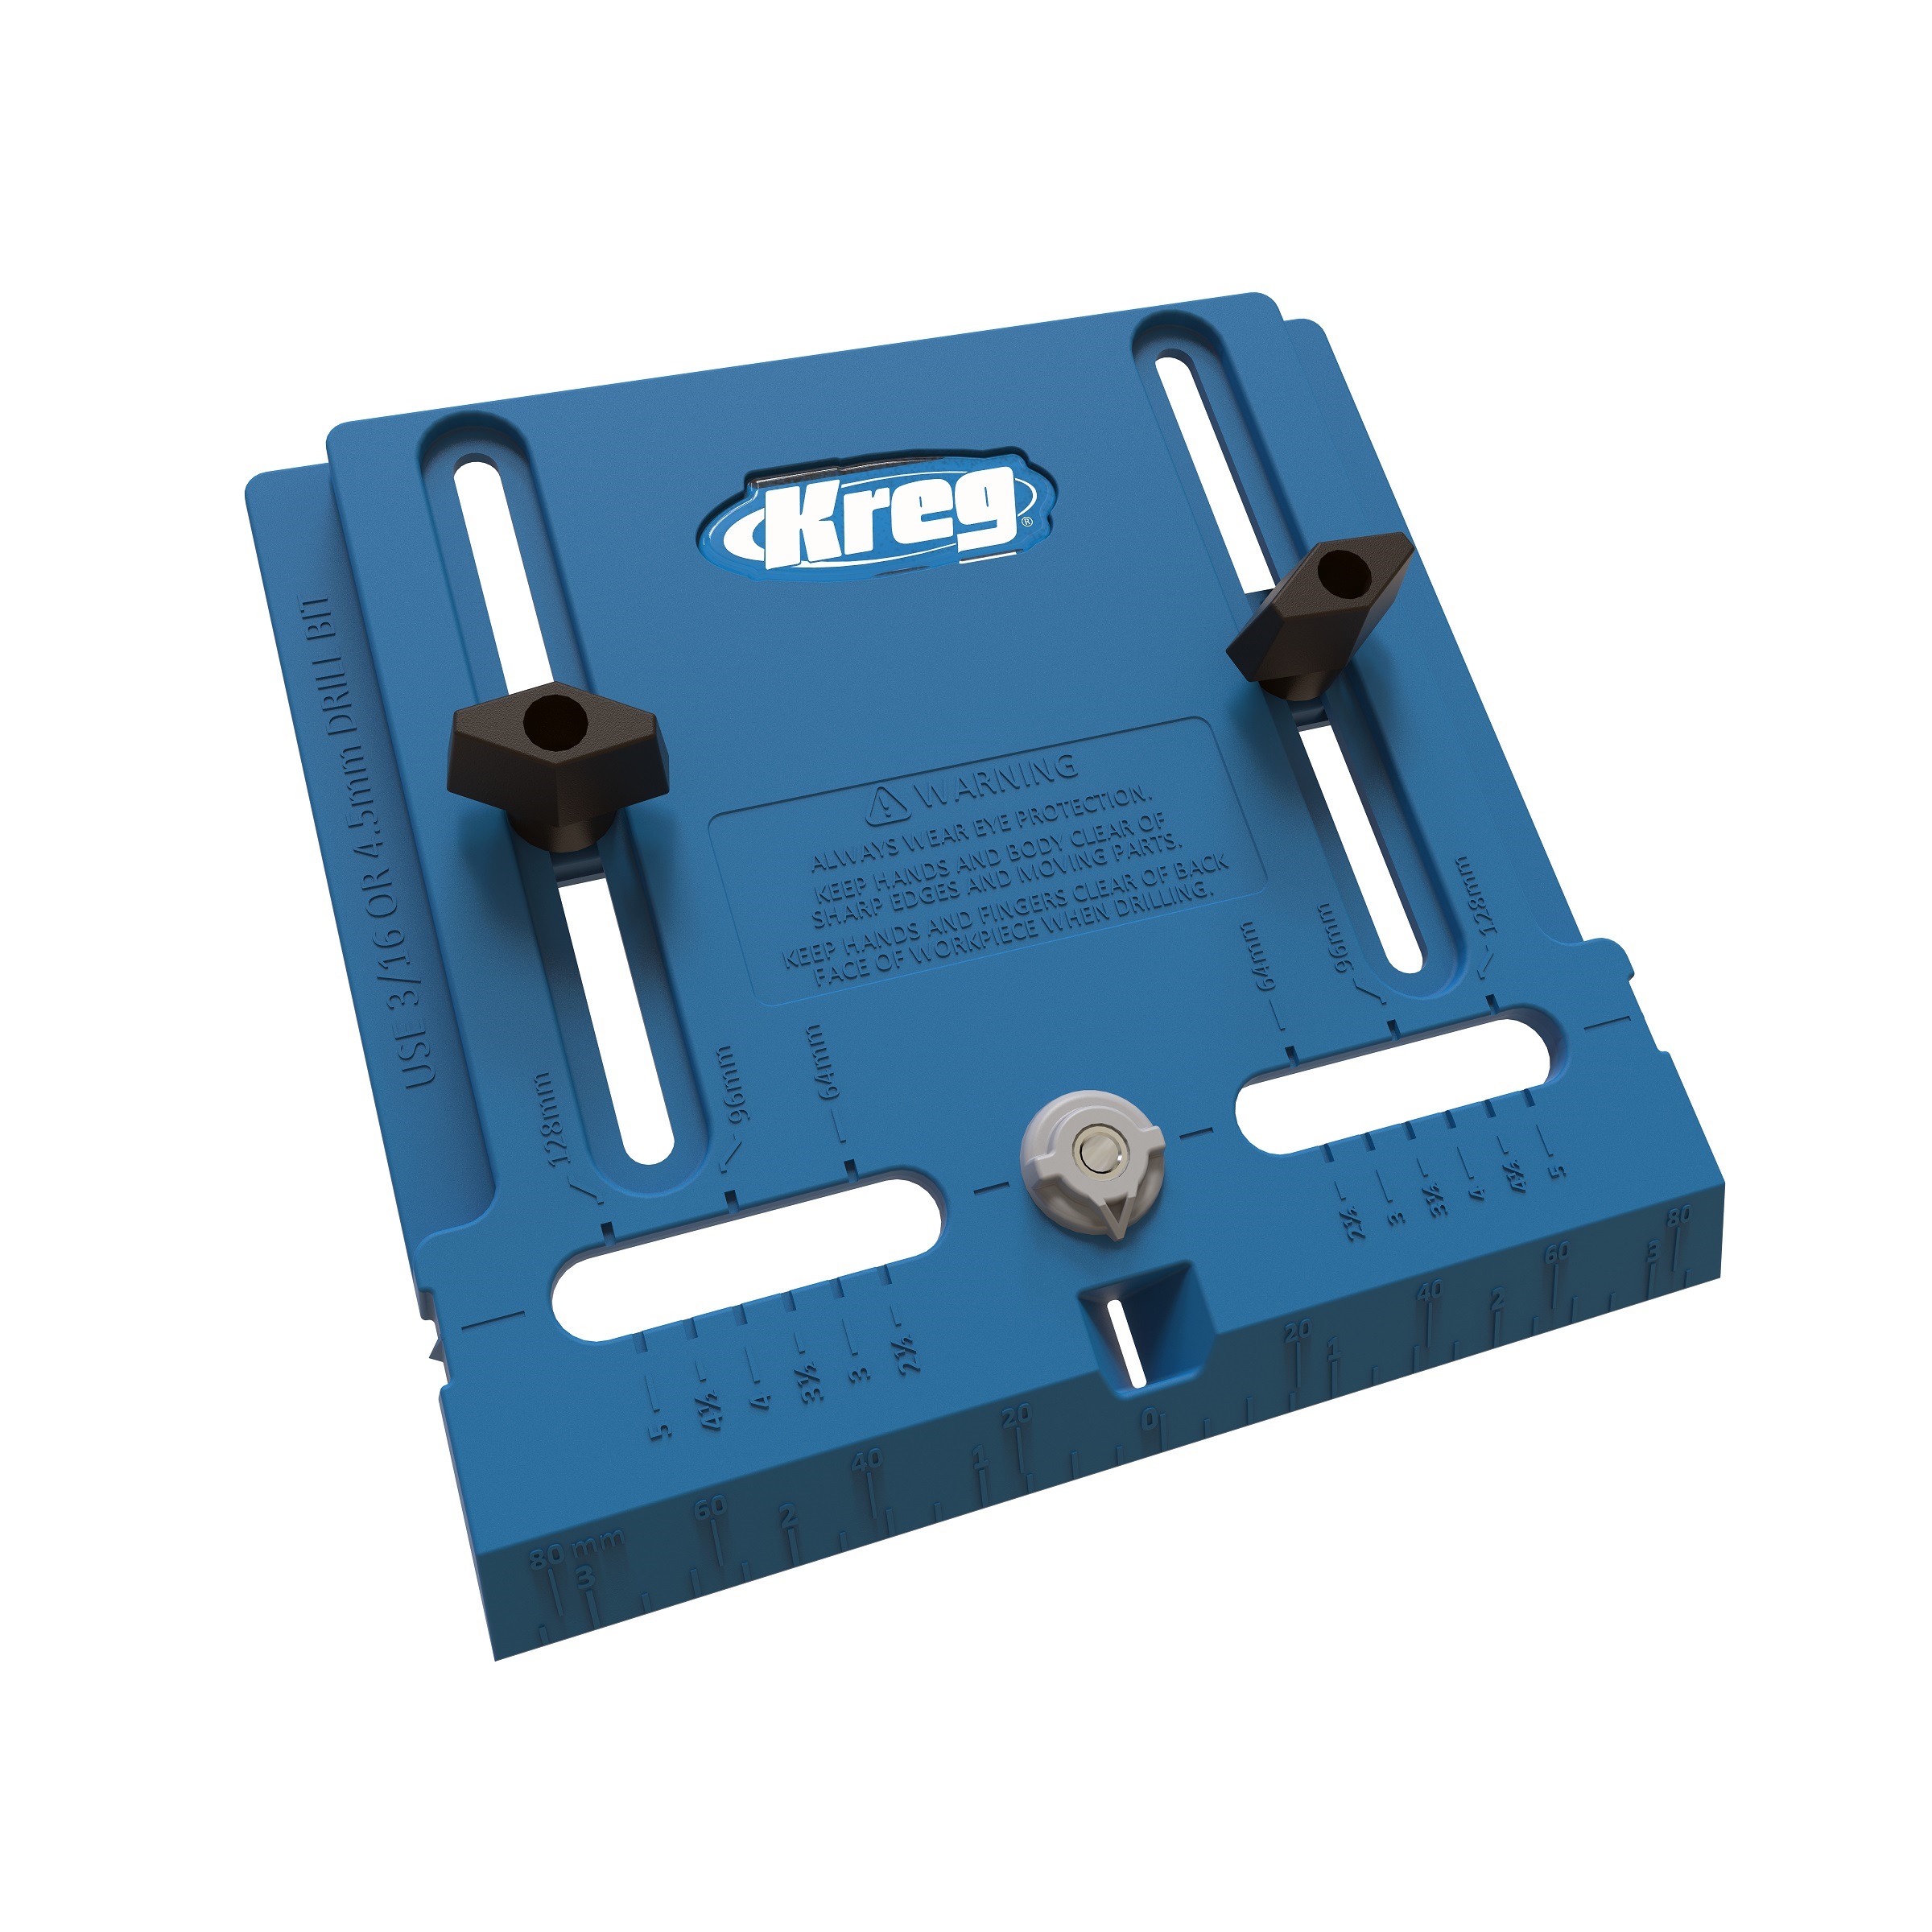
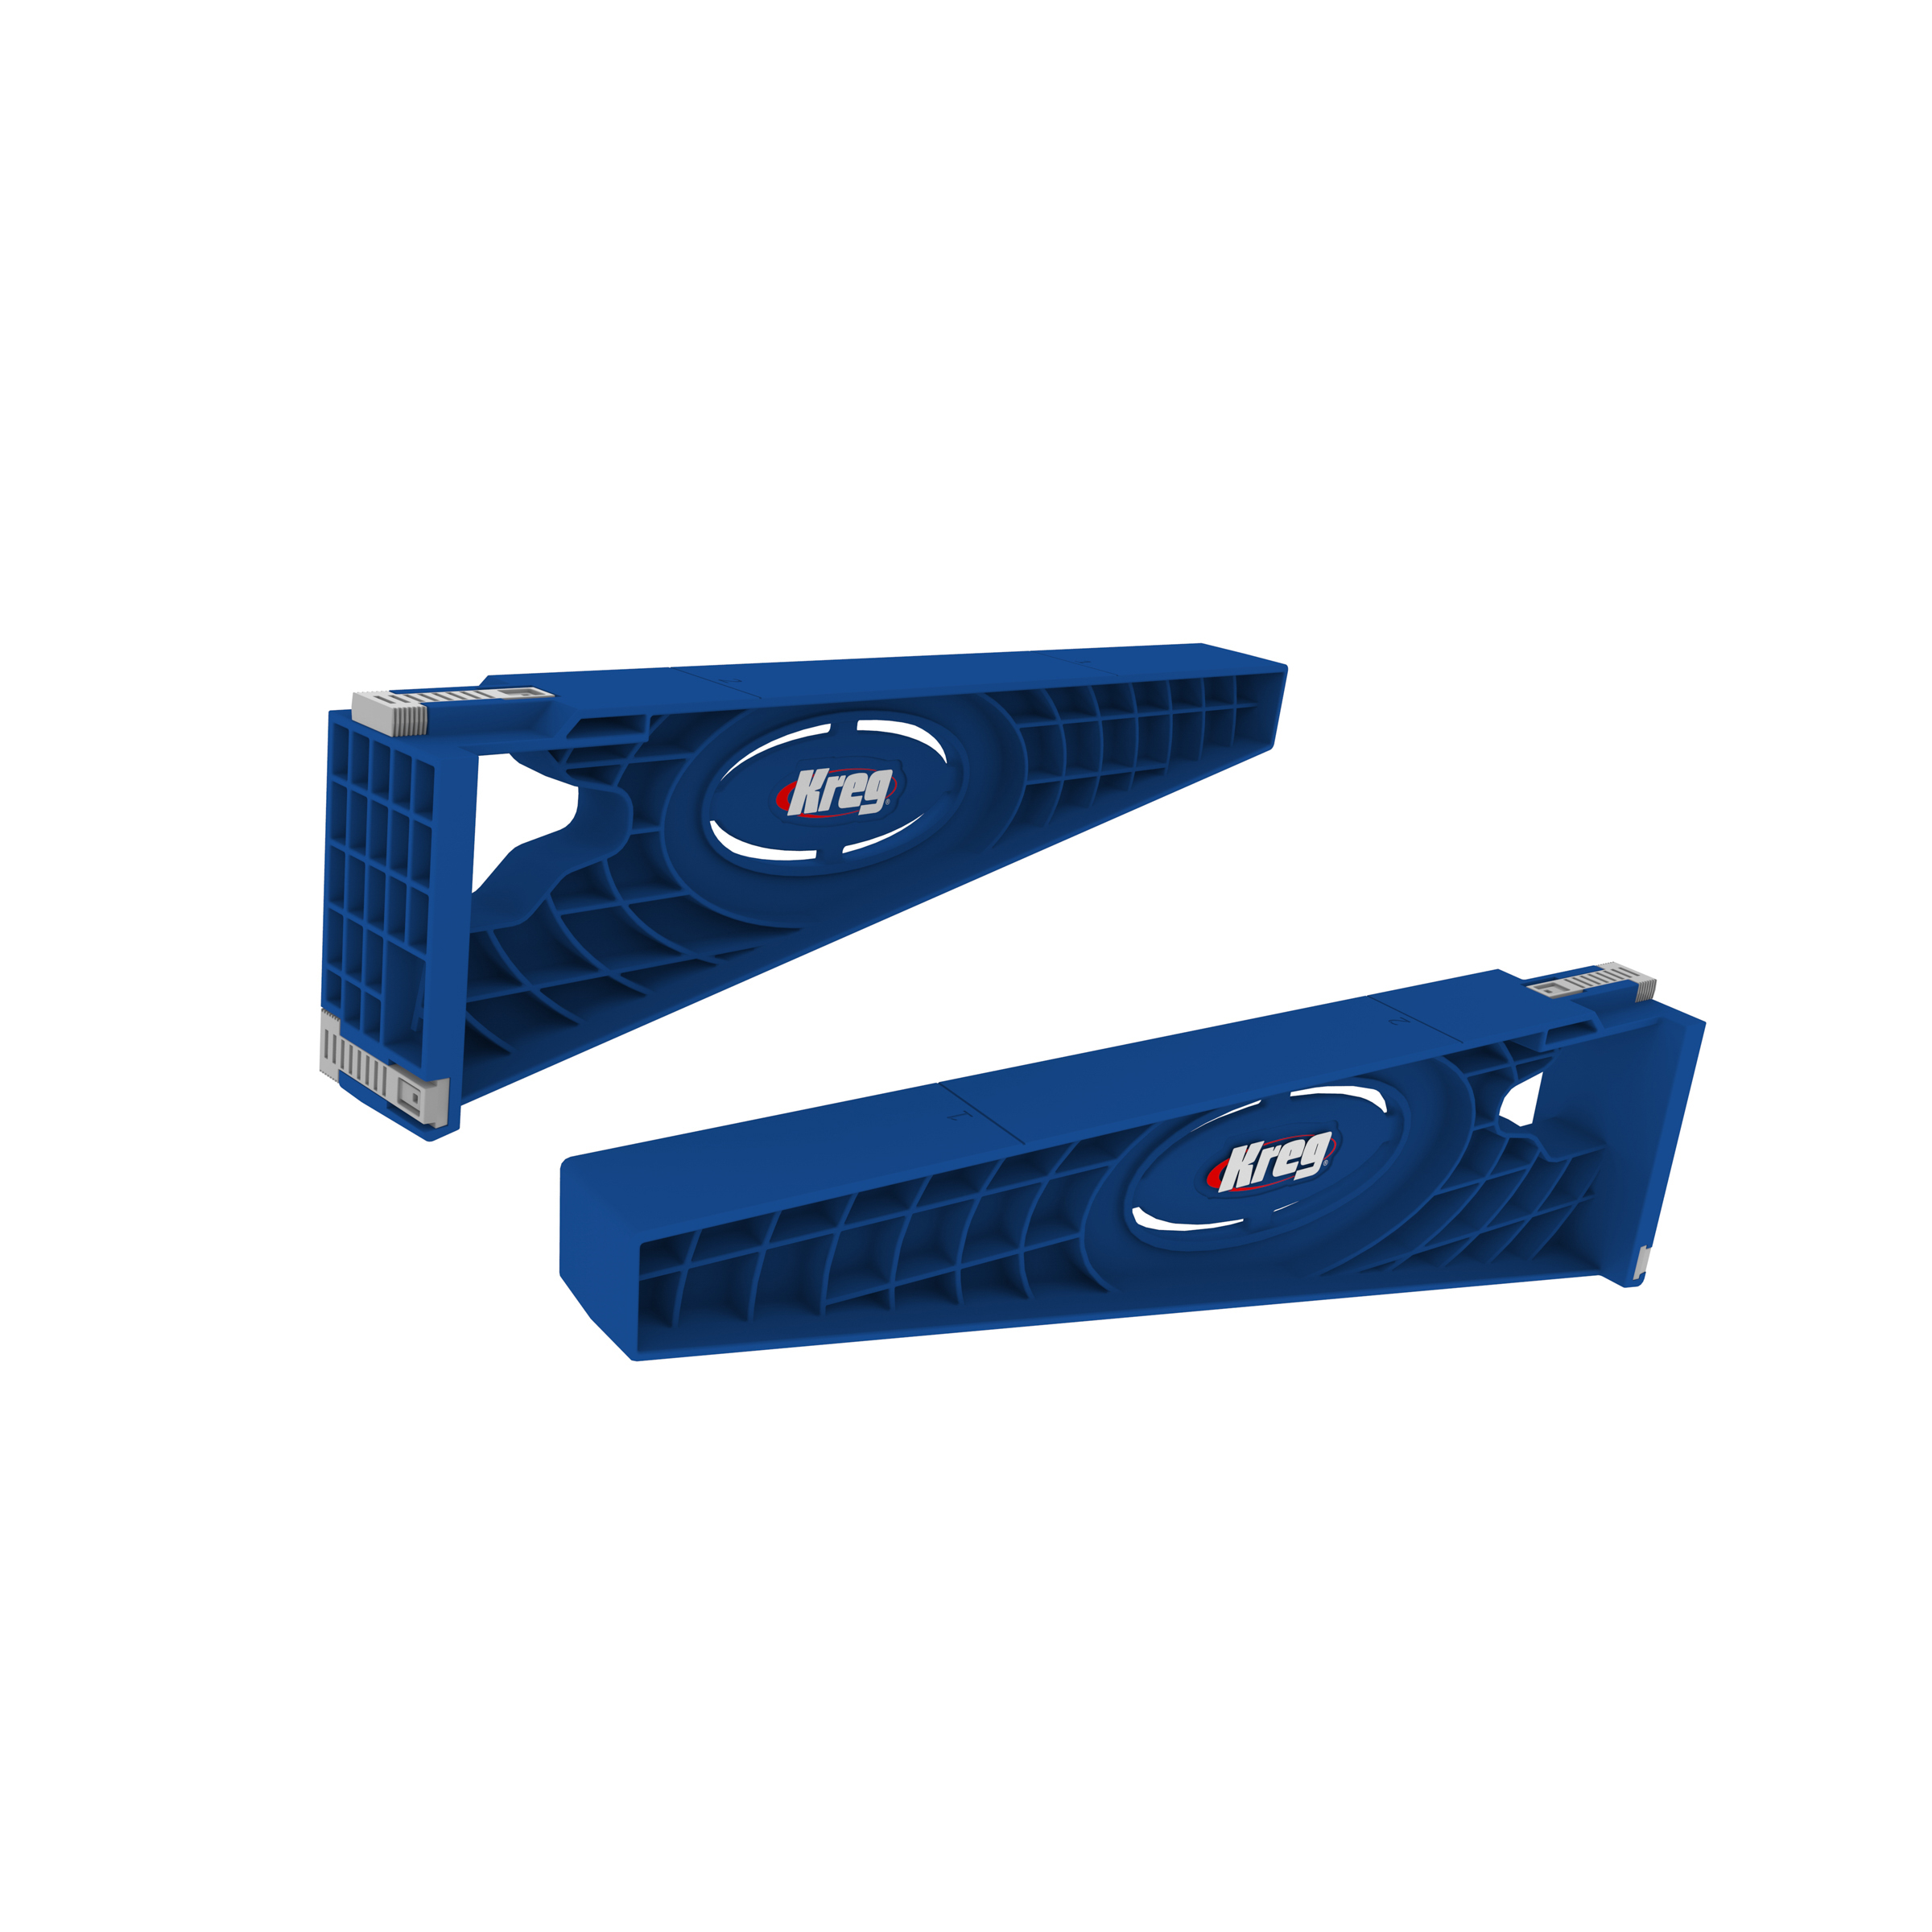
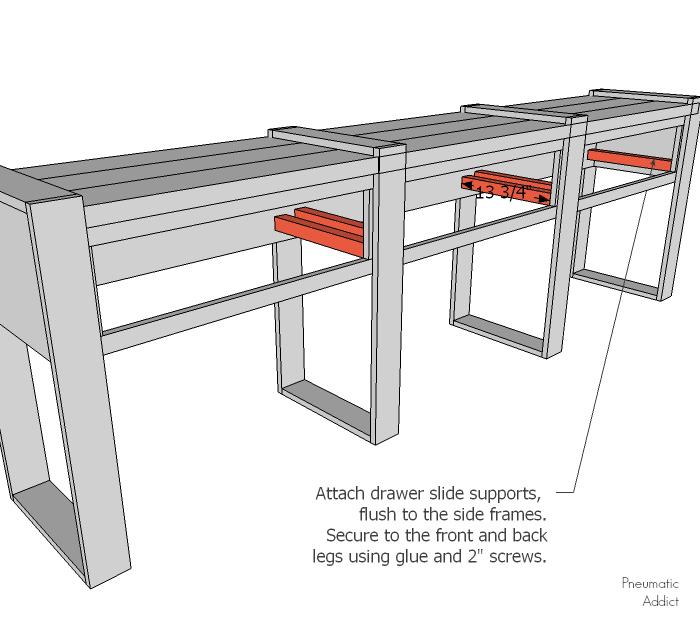
Attach Slide Supports
Use the Kreg Drawer Slide Jig to attach drawer slide supports, flush to the side frames. Secure to the front and back legs using glue and 2" screws.
-
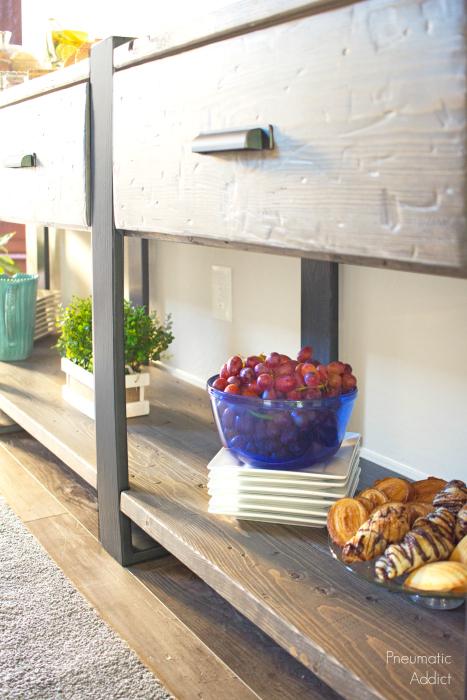
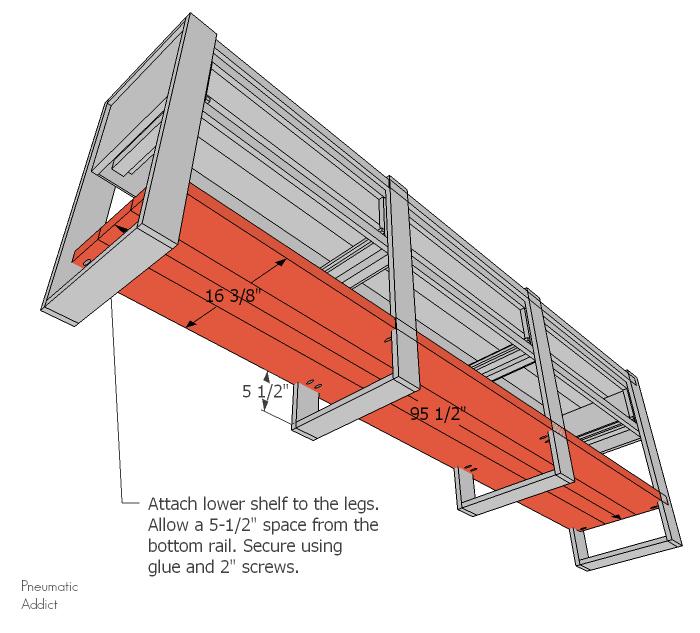
Add Lower Shelf
Attach lower shelf to the legs. Allow a 5-1/2" space from the bottom rail. Secure using glue and 2" screws.
-
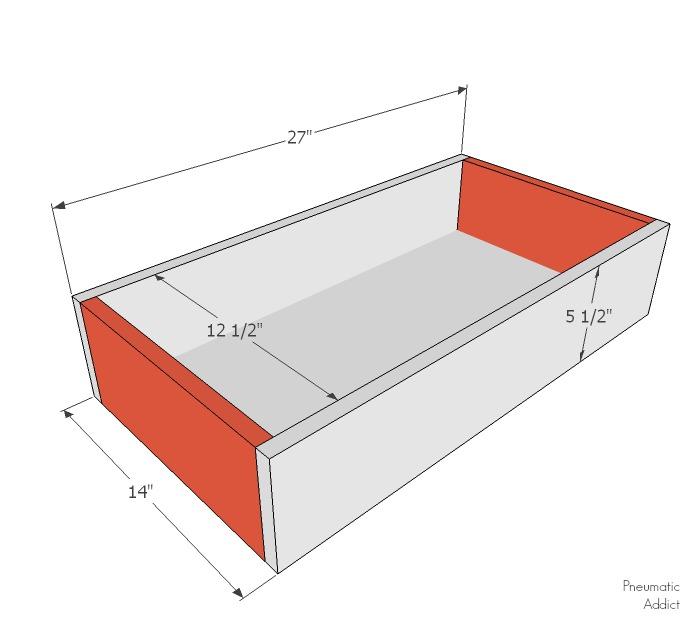
Build Drawer Boxes
Use your favorite technique to build three drawer boxes approximately 27" x 14". Before building, measure the exact width between slide supports and use that specific measurement as your drawer box width.
Install drawer boxes inside frames using 14" slides.
-
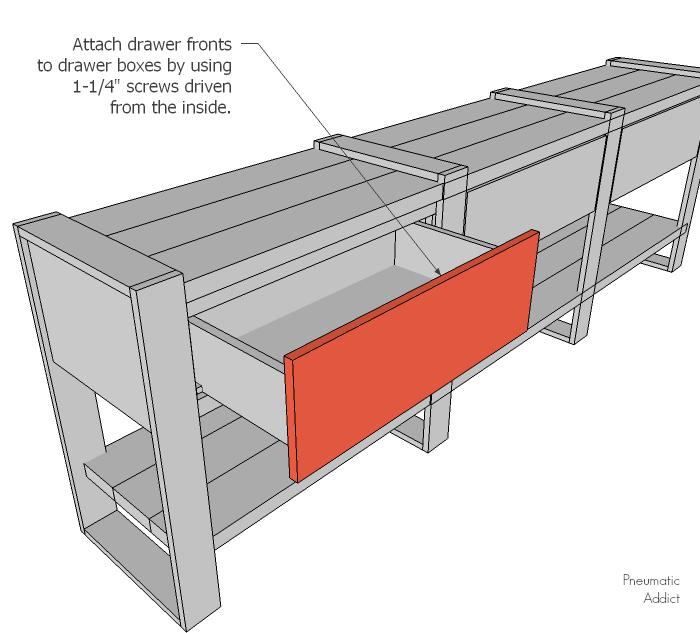
Attach Drawer Fronts
Attach drawer fronts to drawer boxes by using 1-1/4" screws driven from the inside.
-
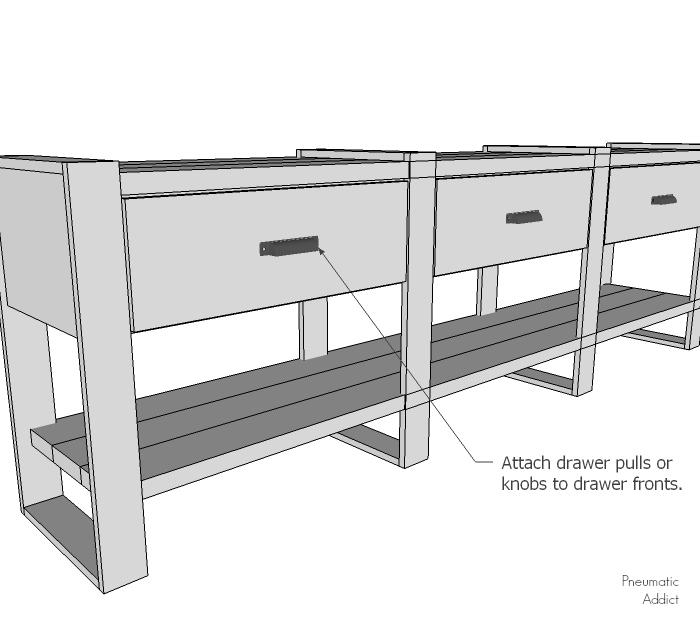
Add Drawer Pulls
Use the Kreg Cabinet Hardware Jig to attach drawer pulls or knobs to drawer fronts.
-
Head to Pneumatic Addict
Head to PneumaticAddict.com for finishing and painting tips, as well more free building plan and ideas.