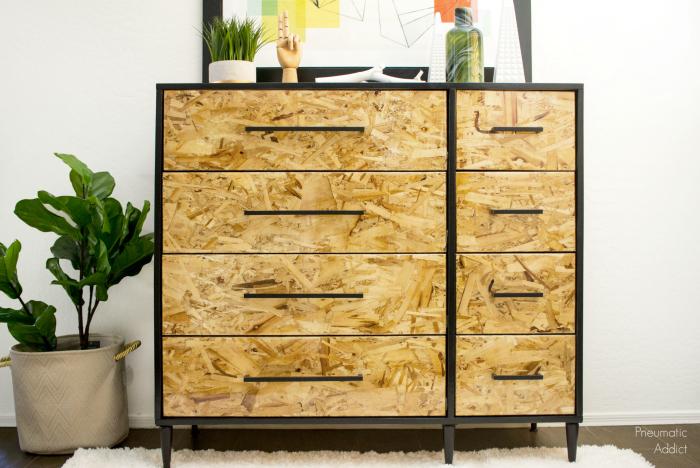
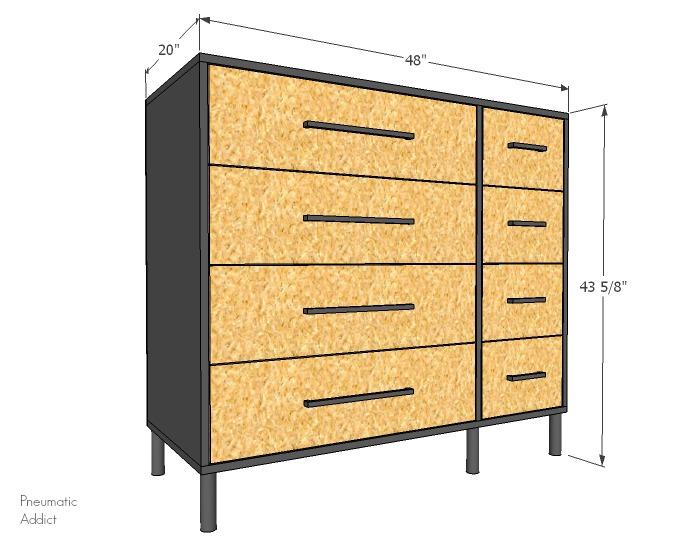


A simple dresser with modern design. The asymmetrical design allows for 4 large drawers and 4 medium sized drawers. Very efficient use of space! The drawer faces can be modified to your own taste.
Tools
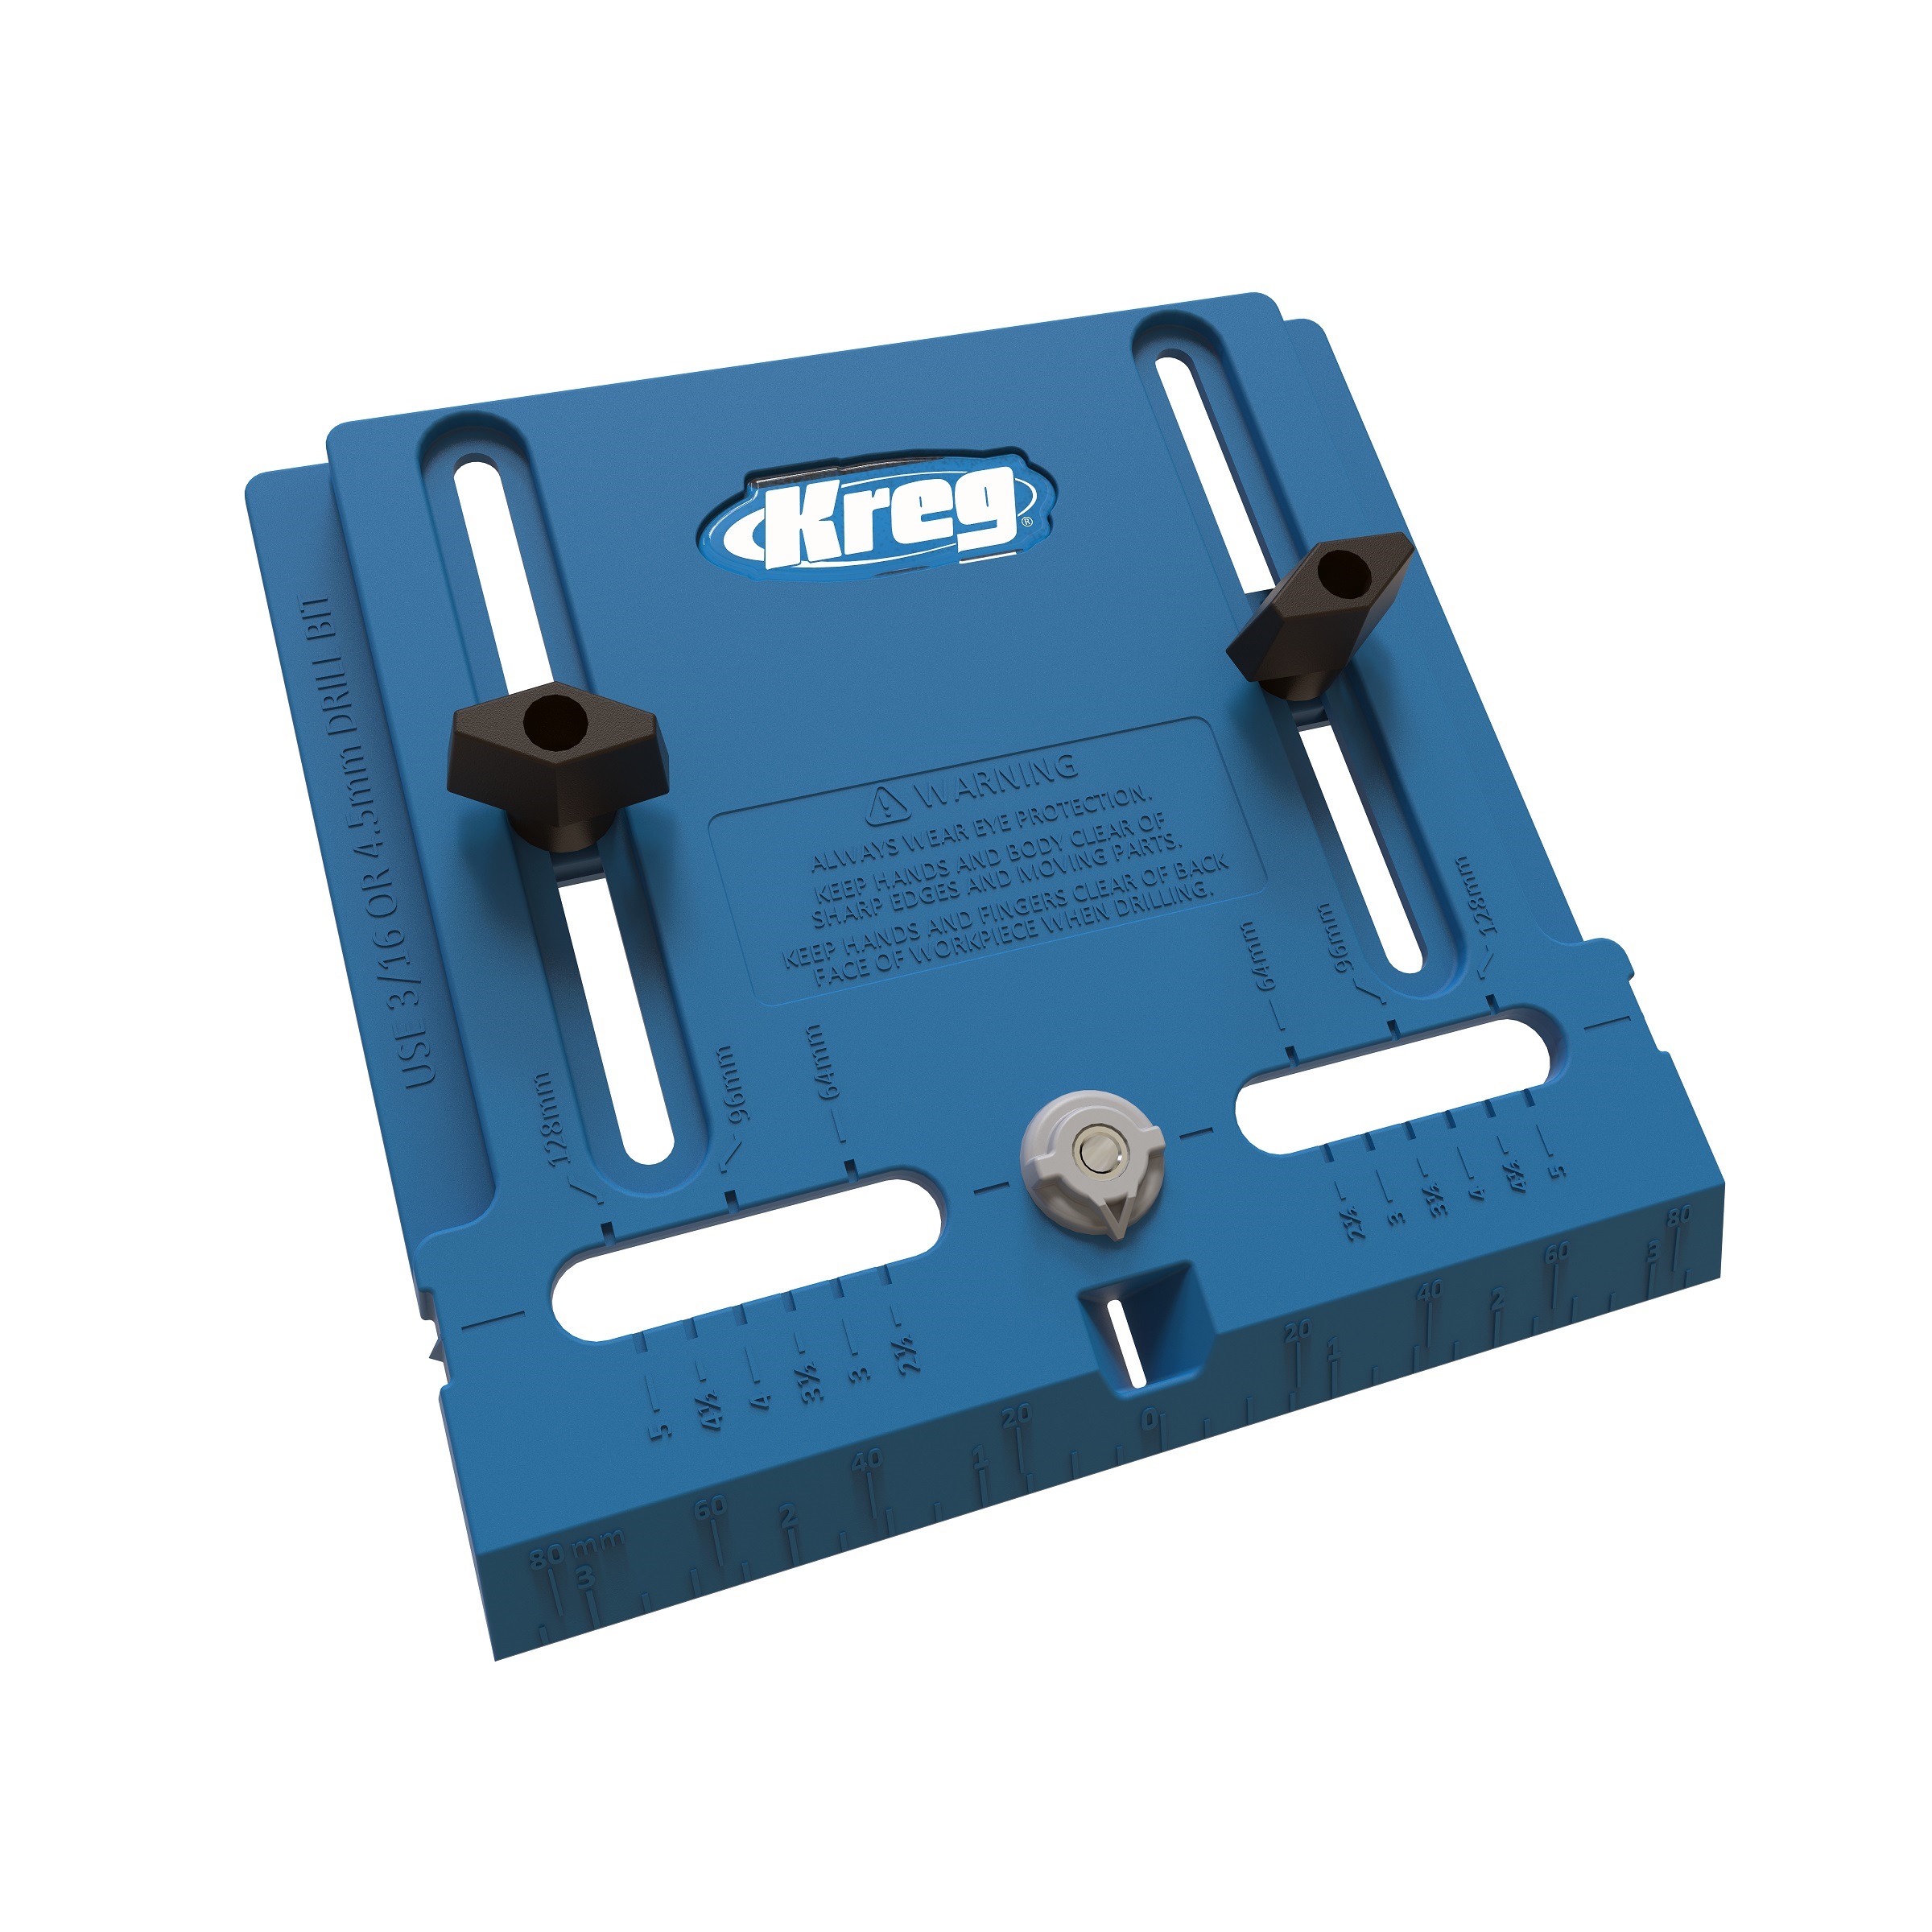
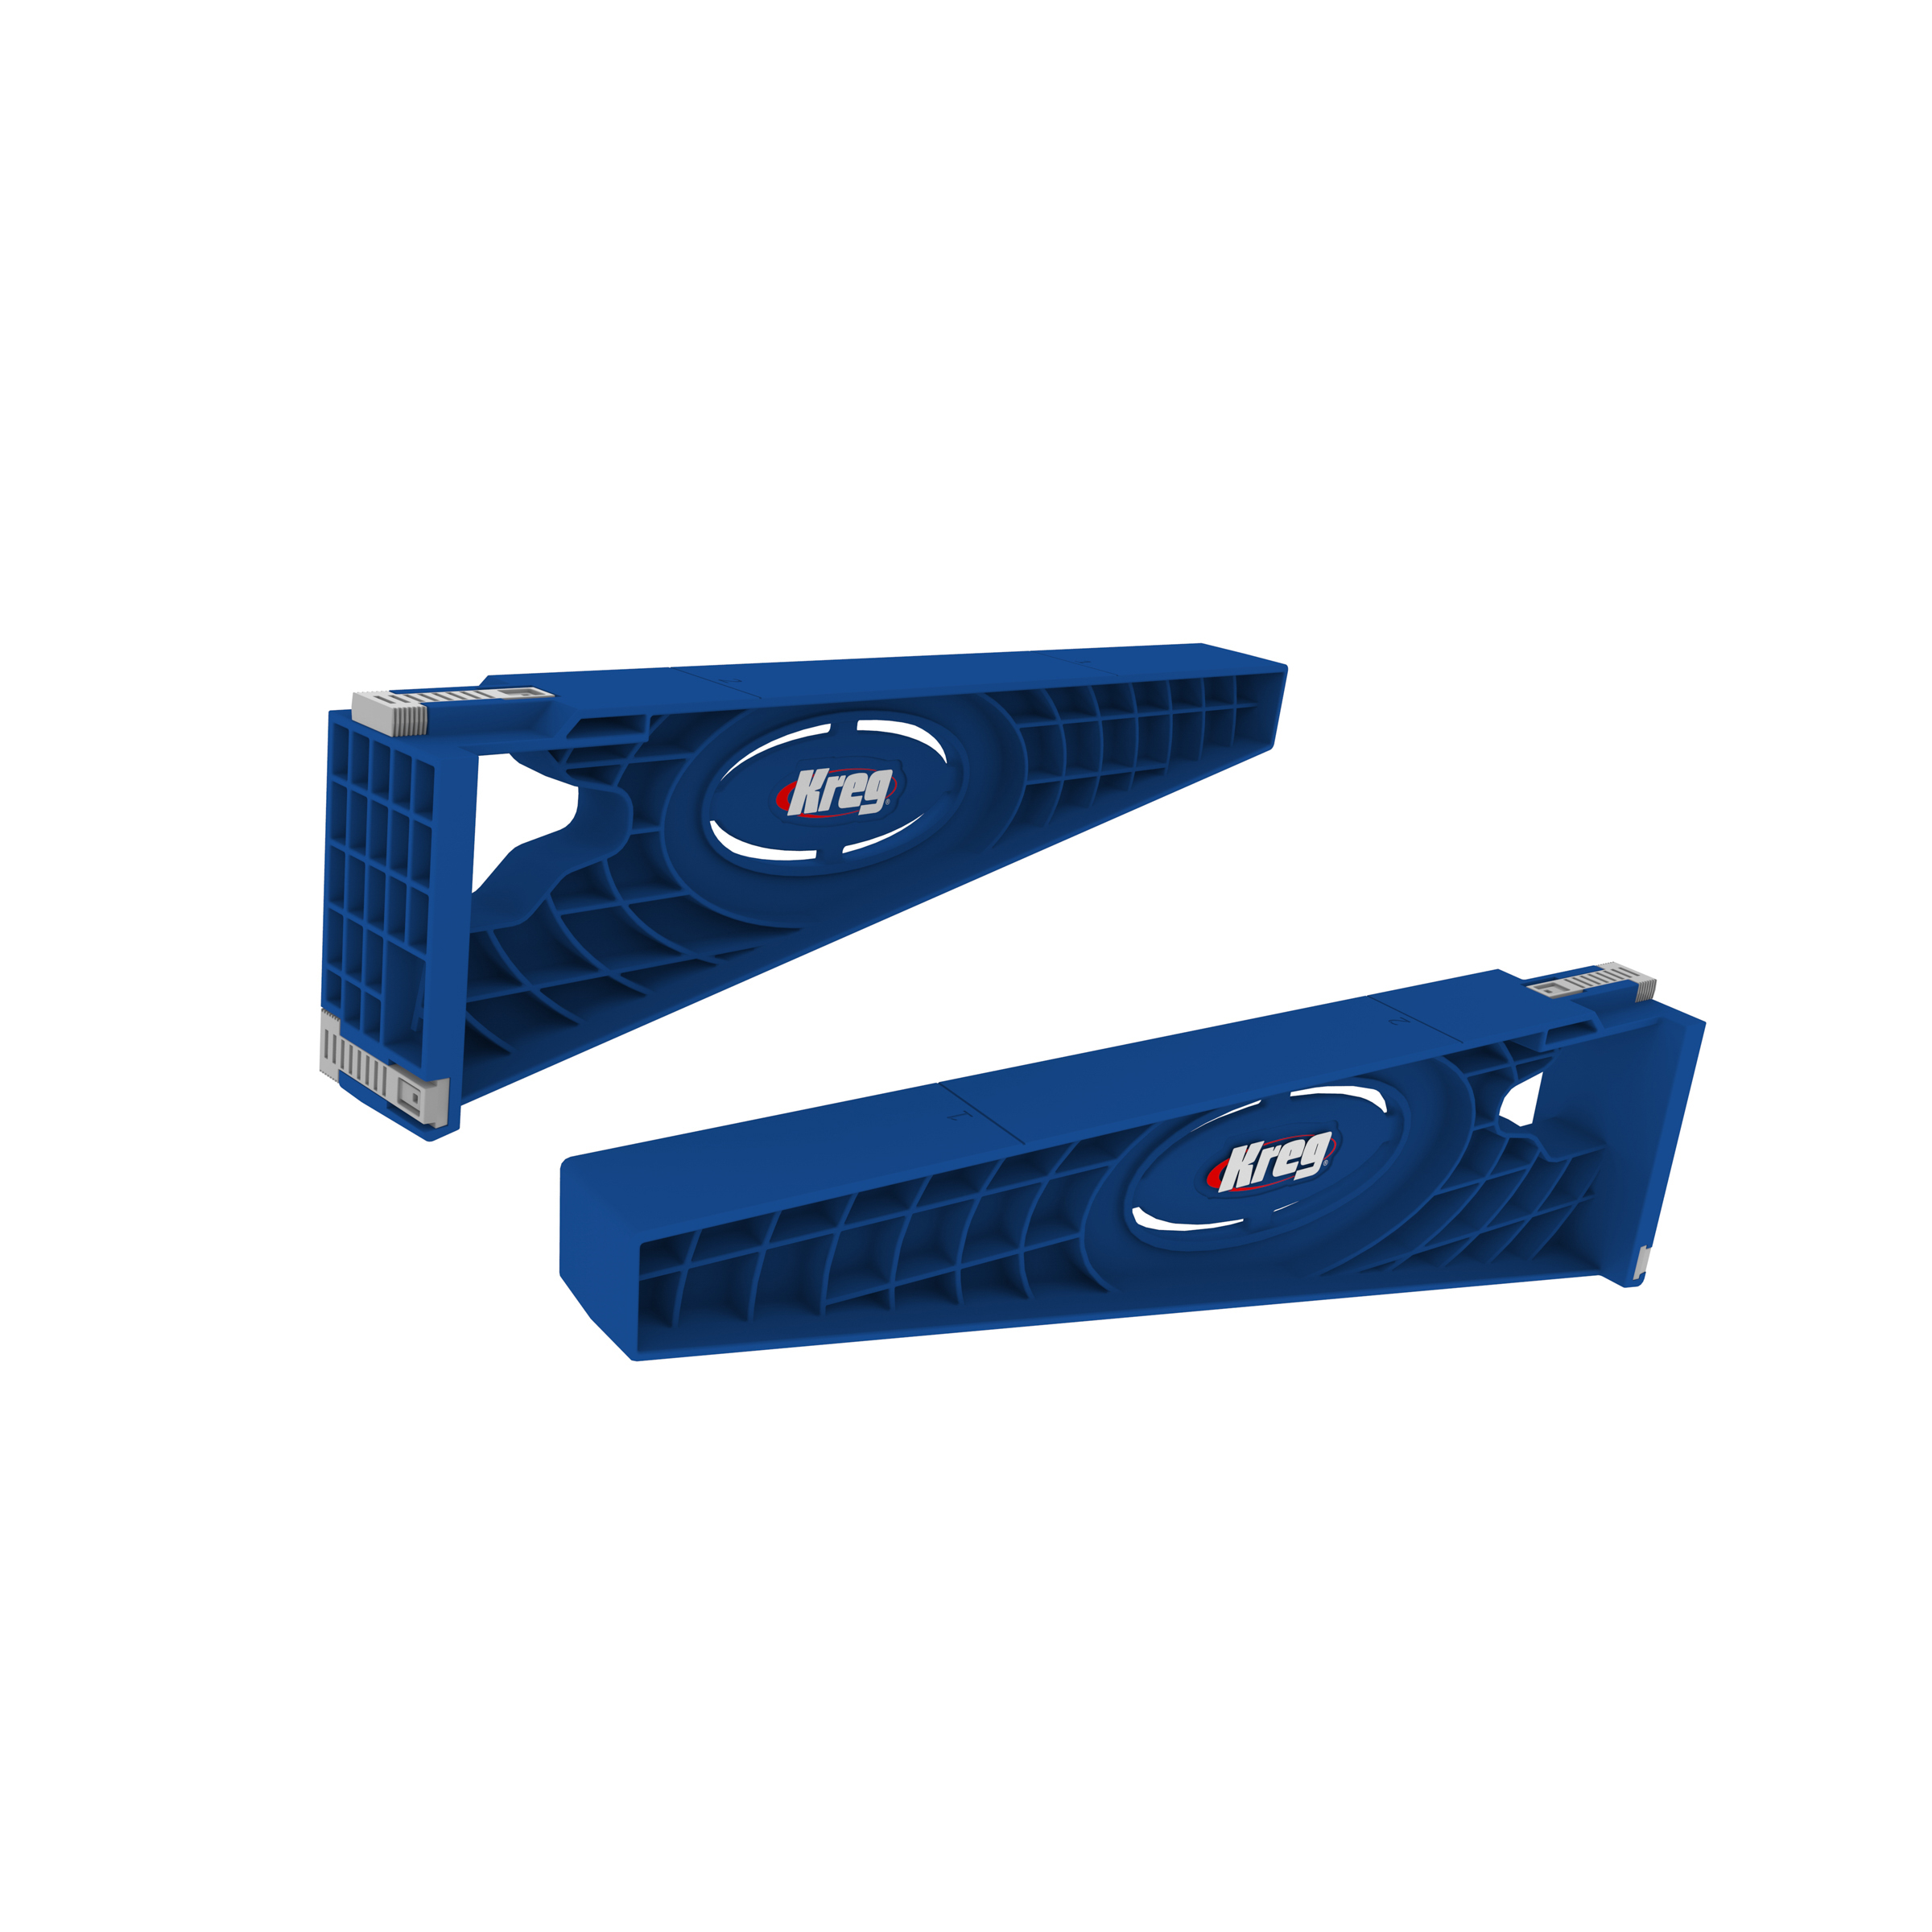
Kreg Tools


Other Tools
-
Circular Saw (cordless)

-
Square
-
Tape Measure
-
Drill (cordless)
-
Sander
Materials
Wood Products
- 2 Plywood , 3/4" Thick , Full Sheet
- 1 Plywood , 1/4" Thick , Half Sheet
- 1 OSB , 3/4" Thick , Full Sheet
Hardware & Supplies
- 6 5-1/2" tapered furniture legs
- 8 18" drawer slides
- 6 Furniture leg top plates
- 4 12" drawer pulls
- 4 4" drawer pulls
- 1 Roll of iron-on edge banding
Cut List & Parts
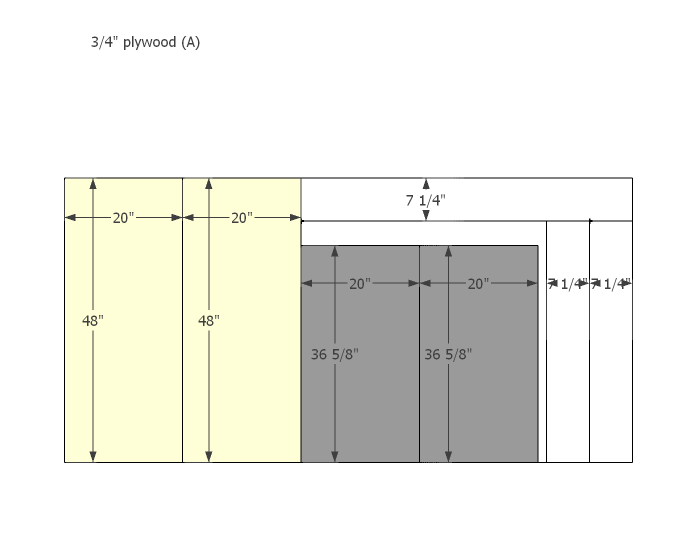
- 1 Top Panel , 48" x 20" x 3/4"
- 1 Bottom Panel , 48" x 20" x 3/4"
- 2 Side Panel , 20" x 36-5/8" x 3/4"
- 1 Center Panel , 20" x 36-5/8" x 3/4"
- 1 Backer Panel , 48" x 38-1/8" x 1/4"
- 1 Long Center Stretcher , 1 x 4 @ 32"
- 1 Short Center Stretcher , 1 x 4 @ 13-3/4"
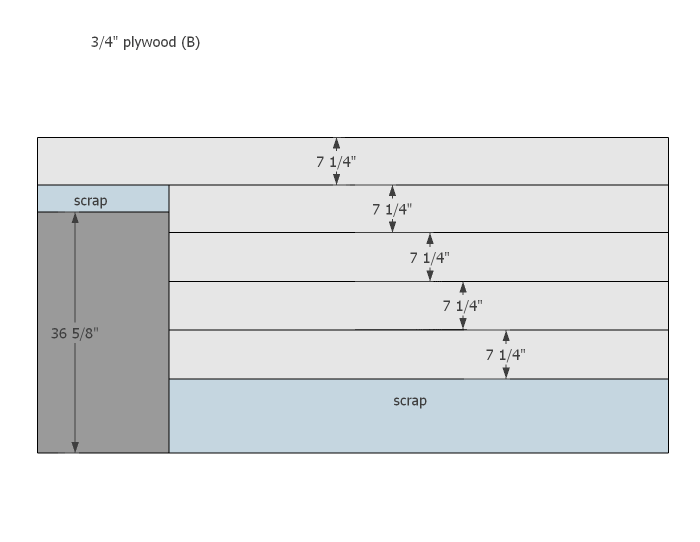
- 16 Drawer Box Sides , 7-1/4" x 18" x 3/4"
- 4 Drawer Box Back , APPROX 7-1/4" x 29-1/4" x 3/4"
- 4 Drawer Box Back , APPROX 7-1/4" x 11" x 3/4"
- 4 Drawer Box Front , APPROX 7-1/4" x 29-1/4" x 3/4
- 4 Drawer Box Front , APPROX 7-1/4" x 11" x 3/4"
- 4 Drawer Bottom , APPROX 30-3/4" x 18" x 1/4"
- 4 Drawer Bottom , APPROX 12-1/2" x 18" x 1/4"
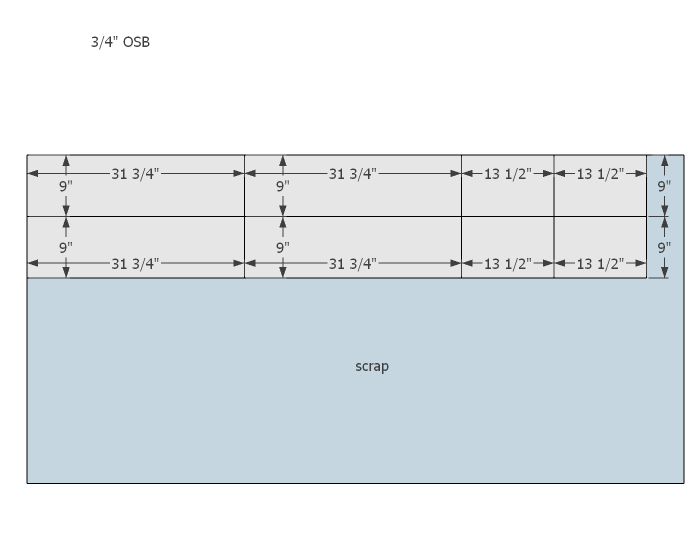
- 4 Long OSB Drawer Face , APPROX 31-3/4" x 9" x 3/4"
- 4 Short OSB Drawer Face , APPROX 13-1/2" x 9" x 3/4"
Directions
-
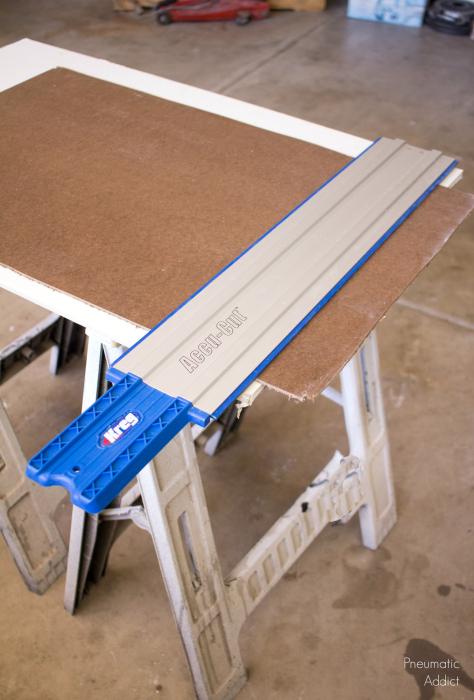
Cut Plywood and Add Edge Banding
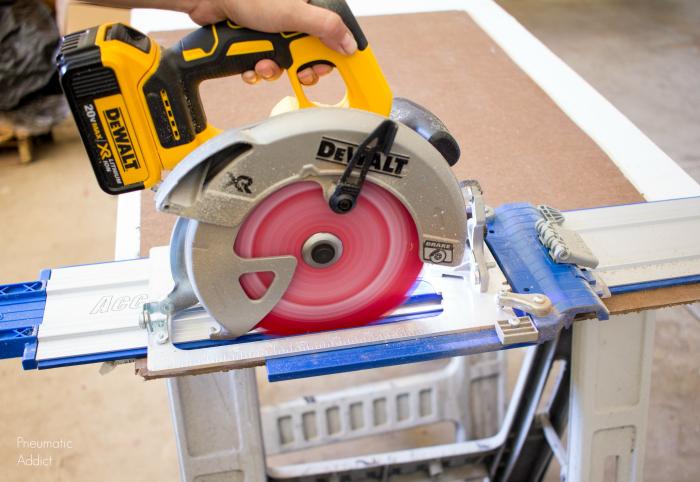
Use the Kreg© Accu-Cut™ Circular Saw Guide Track System and a circular saw to cut plywood panels to size. Cut large plywood panels, then rip the remaining plywood into 7-1/2" wide boards to use in lieu of 1 x 8 boards for the drawer boxes.
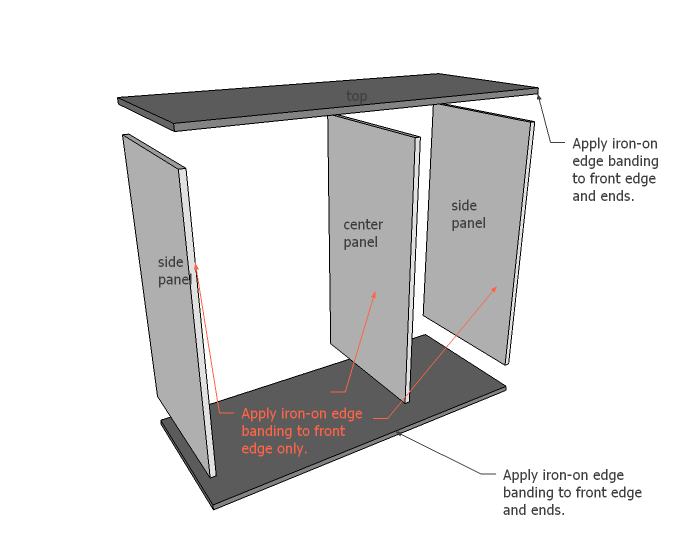
Apply iron-on edge banding to top, bottom, sides and center panels, following the diagram.
-
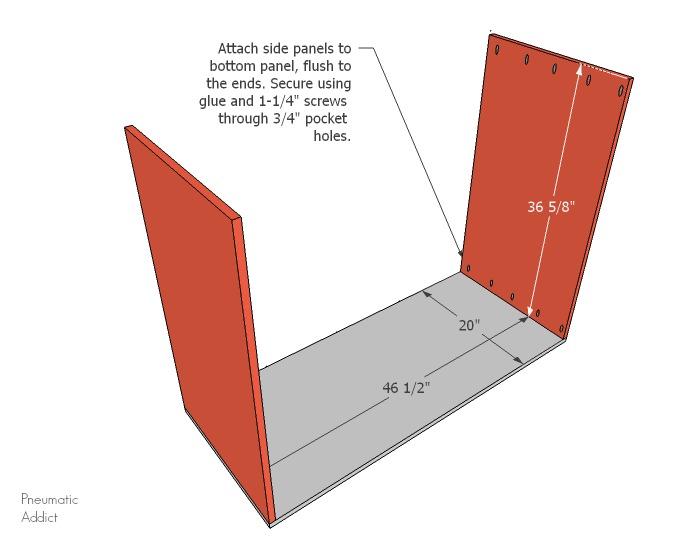
Attach Cabinet Side Panels
Attach side panels perpendicular to the bottom panel, flush to the ends. Secure using glue and 1-1/4" screws through 3/4" pocket holes.
-
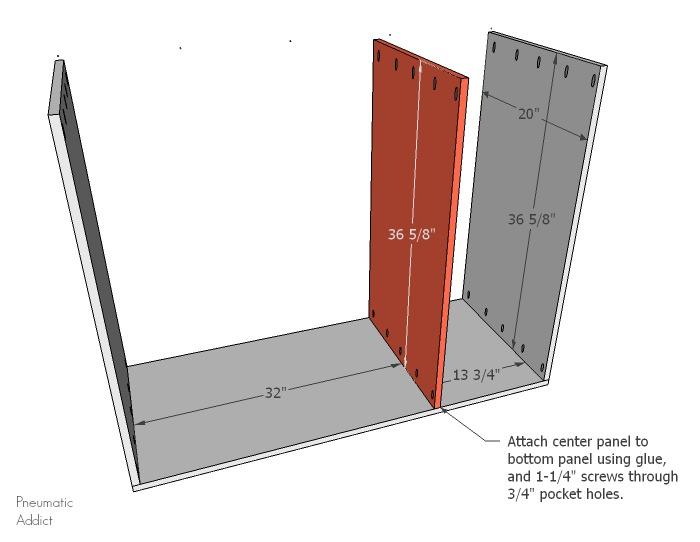
Attach Cabinet Center Panel
Attach the center panel perpendicular to the bottom panel. Allow a 32" distance between left side panel and center panel. Secure in place using glue, and 1-1/4" screws through 3/4" pocket holes.
-
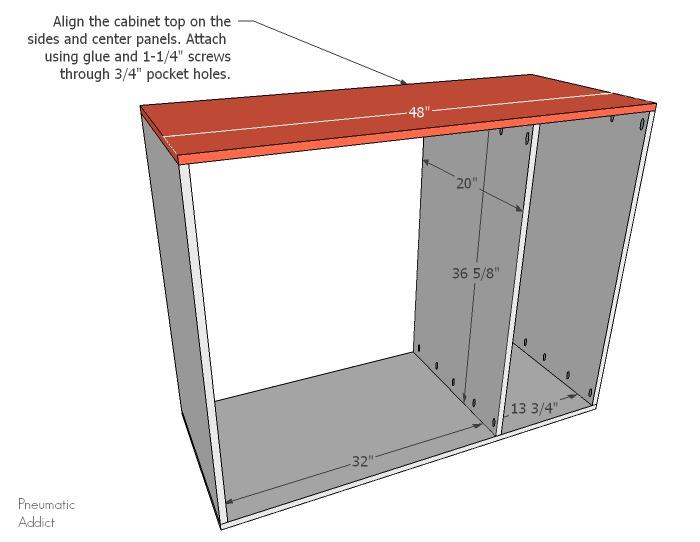
Attach Cabinet Top
Align the cabinet top on the sides and center panels. Attach using glue and 1-1/4" screws through 3/4" pocket holes.
-
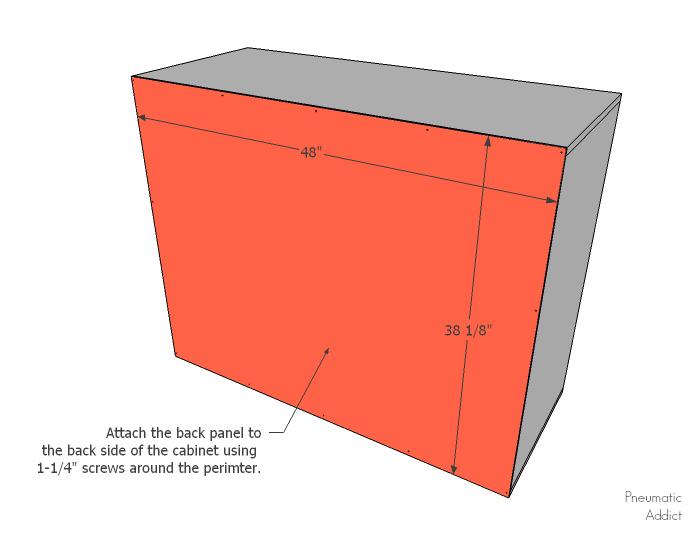
Attach Backer Panel
Measure the cabinet box from opposite corners to ensure the box is square. Attach the backer panel to the back side of the cabinet using 1-1/4" screws around the perimeter.
-
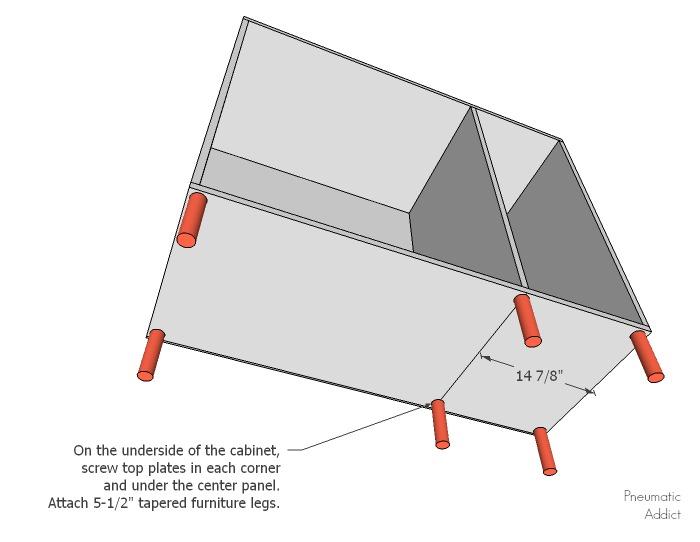
Add Furniture Legs
On the underside of the cabinet, screw furniture leg top plates in each corner and centered under the center panel. Attach 5-1/2" tapered furniture legs.
-
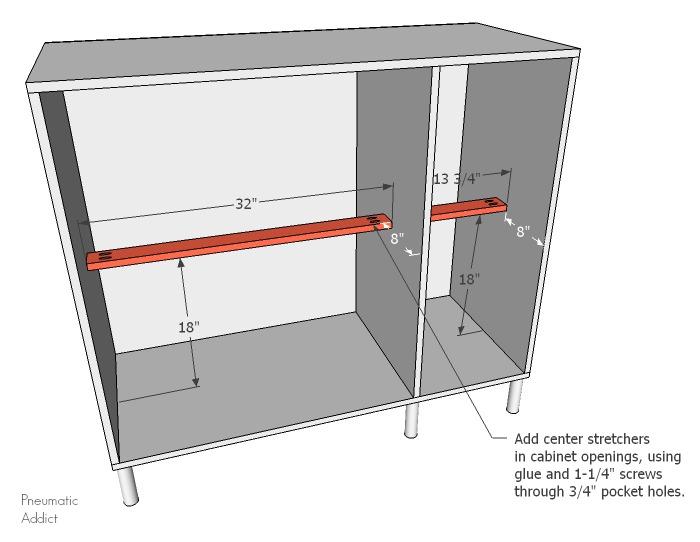
Add Center Stretchers
Cut a 32" length and a 13-3/4" length of 1 x 4 board to create center stretchers. They will help keep the cabinet openings square and make adding drawer boxes easier. Find the center of each opening and align the stretchers. Attach center stretchers in cabinet openings, using glue and 1-1/4" screws through 3/4" pocket holes.
-
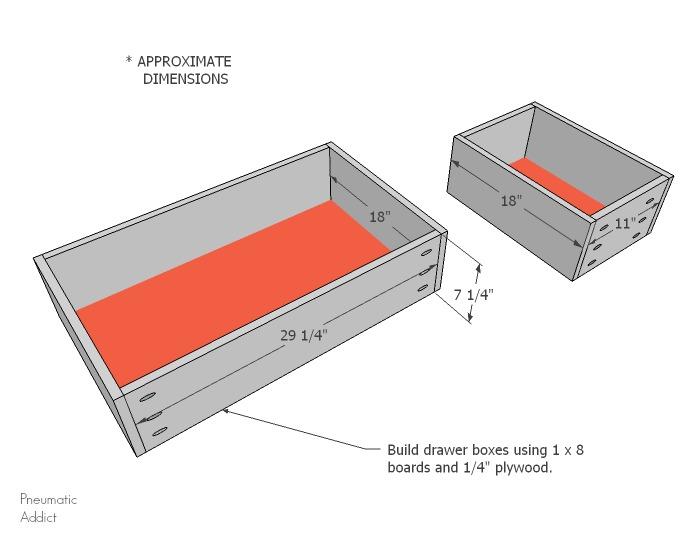
Build Drawer Boxes
I built my drawers using a 1/4" groove cut into the sides, back and front pieces. You can use whatever technique works best for you.
Measure the exact width of each cabinet opening. Include the thickness of your drawer slides and calculate the width for each drawer box. You will need four drawers, approximately 29-1/4" x 18" and four drawers, approximately 11" x 18".
-
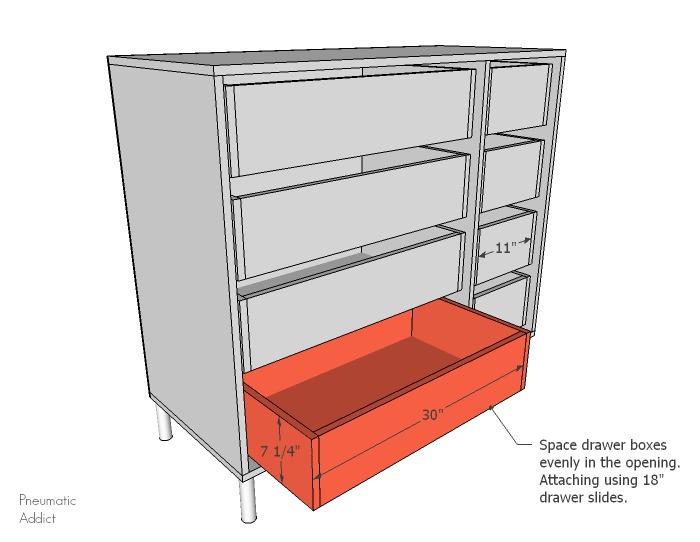
Attach Drawer Slides
Space drawer boxes evenly in the opening. There will be two drawers above and below each stretcher. Use a Kreg Drawer Slide Jig© to attach 18" drawer slides and insert drawer boxes.
-
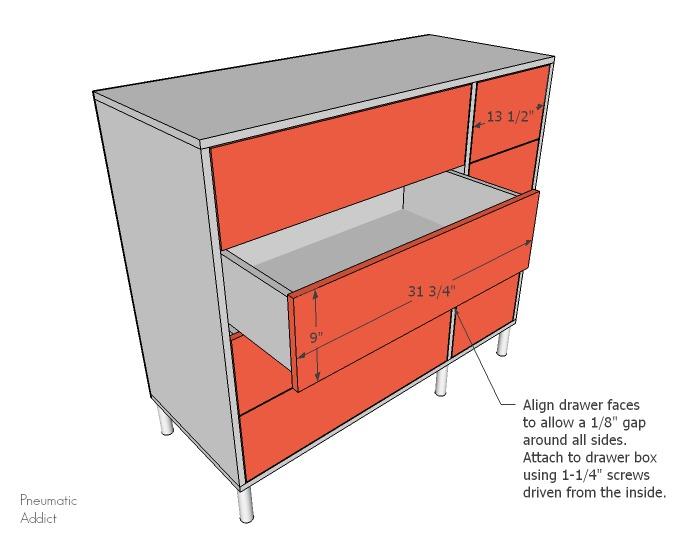
Attach Drawer Faces
Measure the exact height and width of the cabinet openings. Subtract 1/4" and use that measurement to determine the drawer face dimensions. You will need four drawer faces approximately 31-3/4" x 9", and four drawer faces approximately 13-1/2" x 9".
Align drawer faces to allow a 1/8" gap around all sides. Attach faces to drawer boxes using 1-1/4" screws driven from the inside of the drawer boxes.
-
Add Hardware
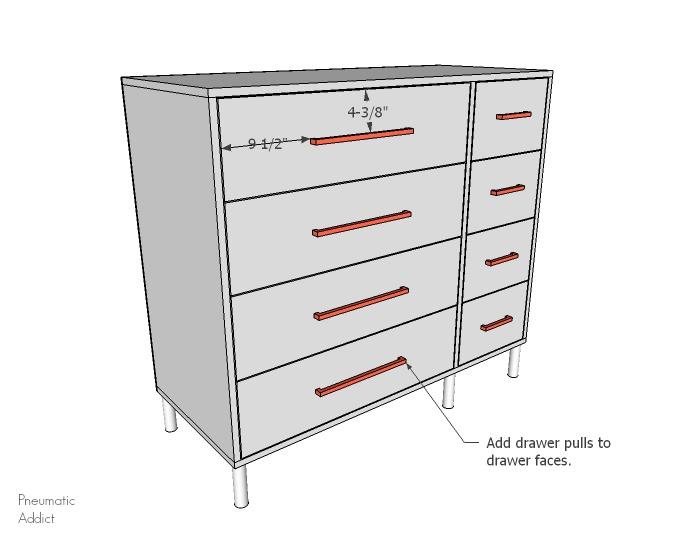
Add drawer pulls or knobs to drawer faces.
-
Find More Building Plans
Head to www.PneumaticAddict.com for addtional building plans and DIY tips!