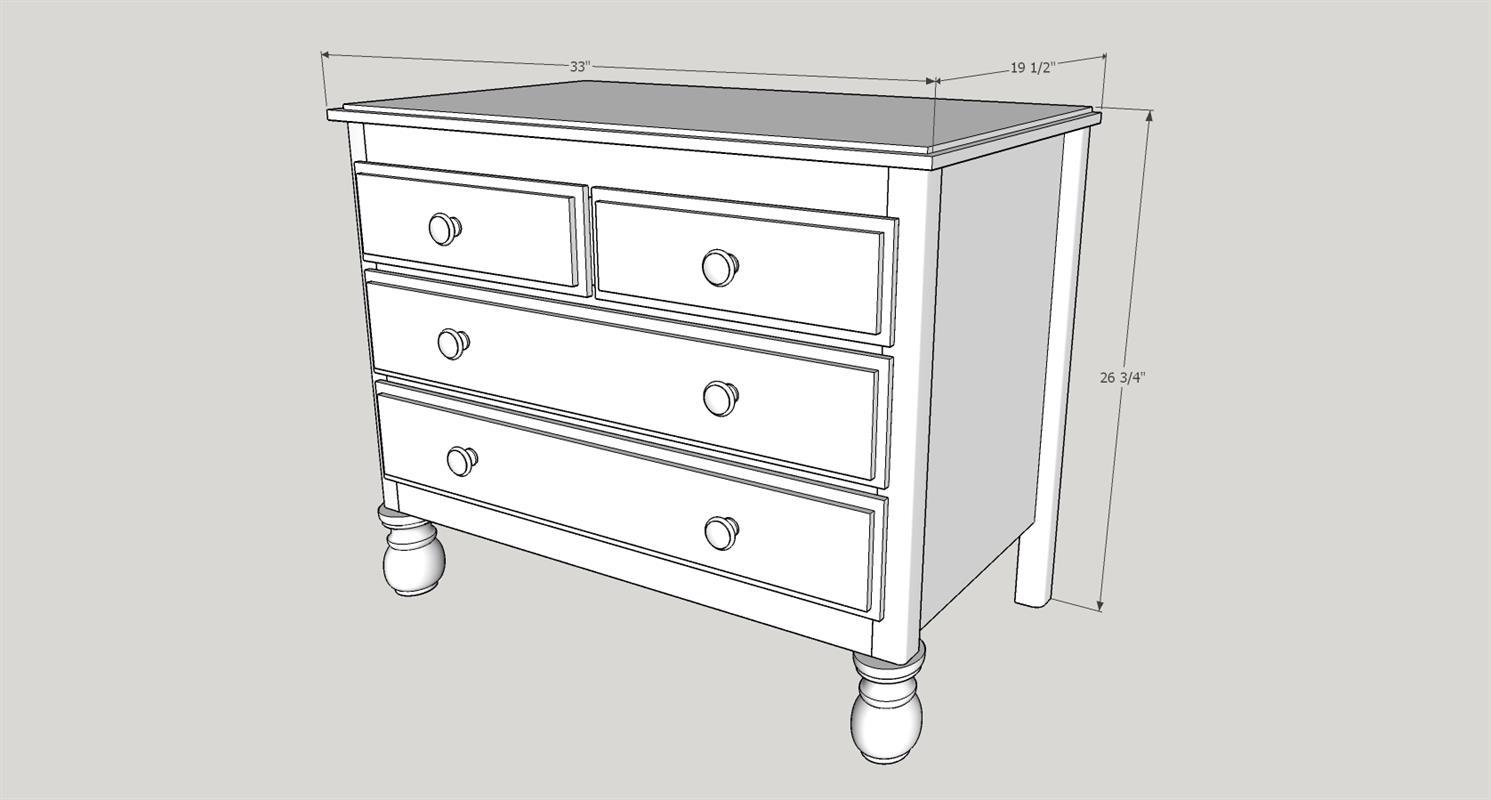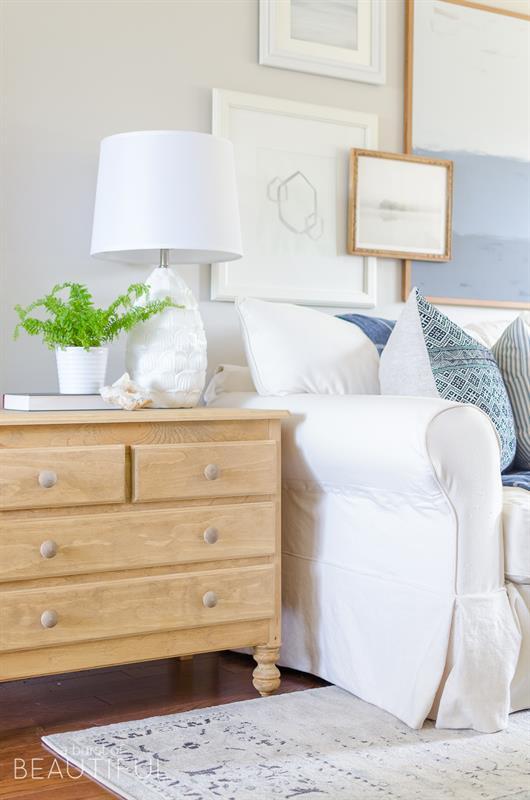
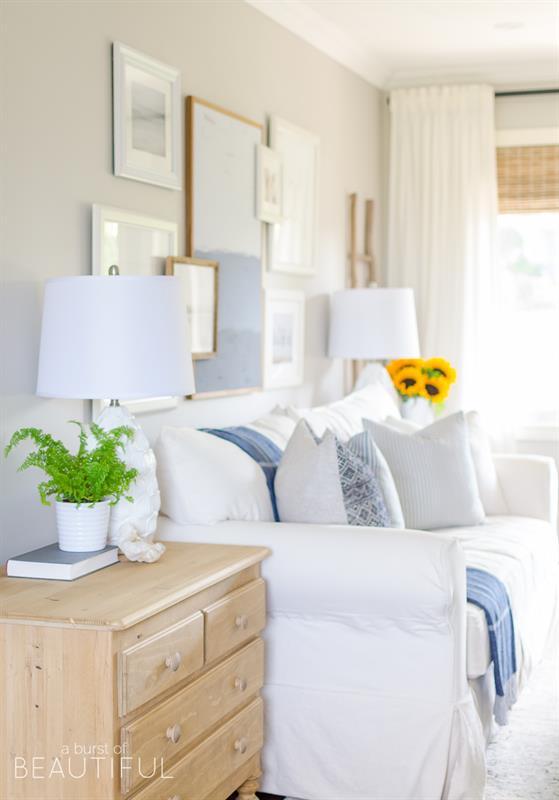


This vintage-inspired dresser is small enough in size to be a side table or entryway console. It has a classic, simple style that will fit into any decor.
Tools
Kreg Tools

Other Tools
-
Miter Saw

-
Table Saw
-
Tape Measure
-
Clamps
-
Drill (cordless)
-
Router
-
Shop Vacuum
Materials
Wood Products
- 1 Board , 2x2 , 96"
- 1 Board , 1x3 , 96"
- 1 Board , 1x2 , 96"
- 1 Board , 1x6 , 96"
- 1 Plywood , 3/4" Thick , Full Sheet
- 1 Laminated Pine Board , 3/4" Thick , 20" x 96"
- 1 Plywood , 1/4" Thick , Half Sheet
- 2 Pine , 5" , Bun/Turned Legs
Hardware & Supplies
- 92 1.25" Kreg Pocket Hole Screws
- 4 2.5" Kreg Pocket Hole Screws
- 1 Wood Glue
- 1 Stain
- 1 Flat Varnish / Satin Polyeurethane
- 4 Pairs of 14" bottom mount drawer slides
- 6 Drawer knobs
Directions
-
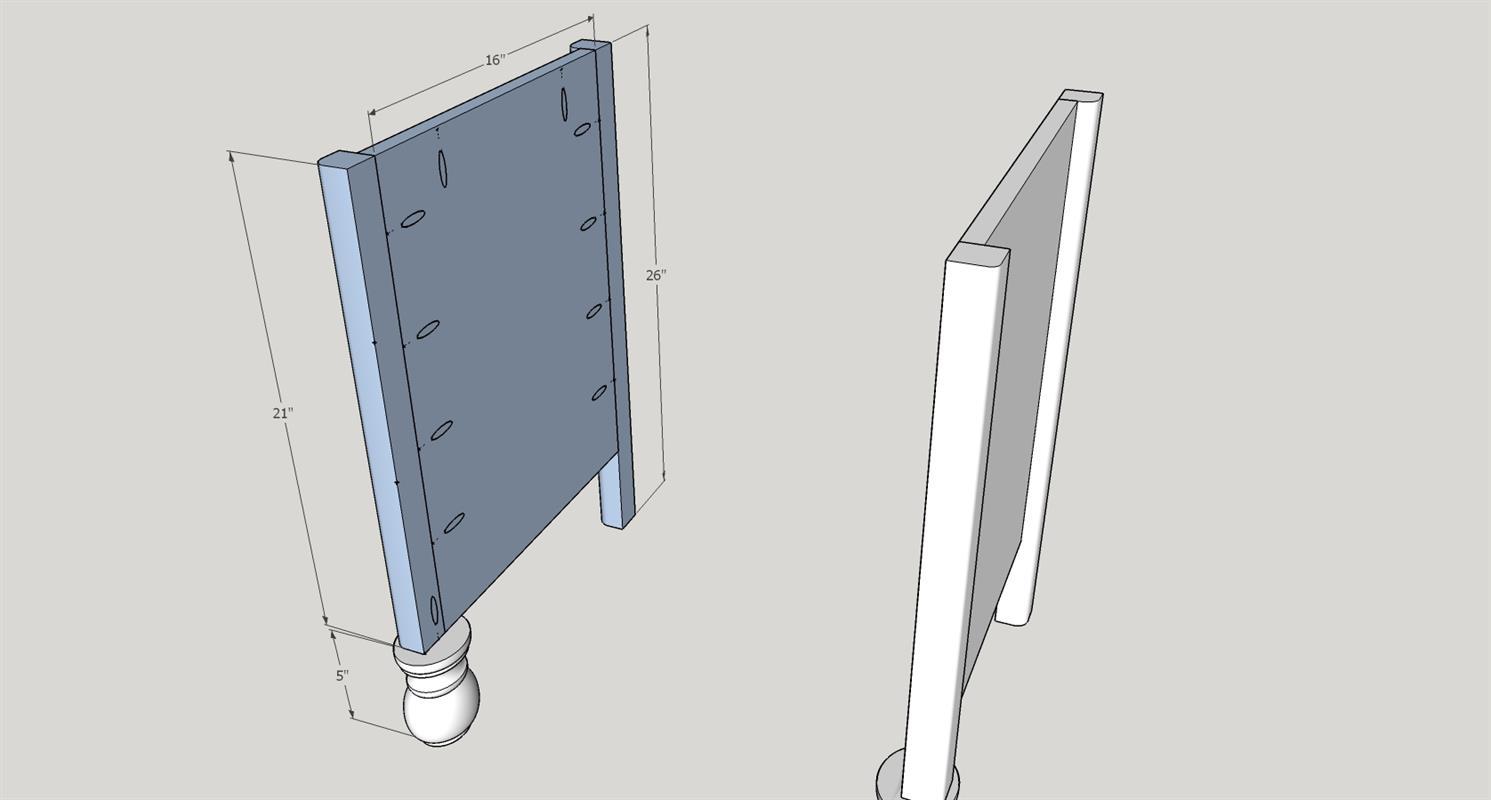
Sides
Drill pocket holes as shown in the diagram.
Create the first side by attaching the 1 1/2" x 1 1/2" x 21" to the bottom 5" bun leg (which you can find at a local hardware store or online) with wood glue and 2 1/2" pocket hole screw. If your chosen leg is shorter or longer than 5" you will have to compensate on the back leg by adding or subtracting the equal amount.
The back leg in this plan is 1 1/2" x 1 1/2" x 26". Attach the 21" + bun leg and 26" back leg to the 16" x 21" plywood panel using wood glue and 8 x 1 1/4" pocket hole screws, making sure the plywood is flush to the inside as shown in the diagram.
Repeat to create the opposite side.
-
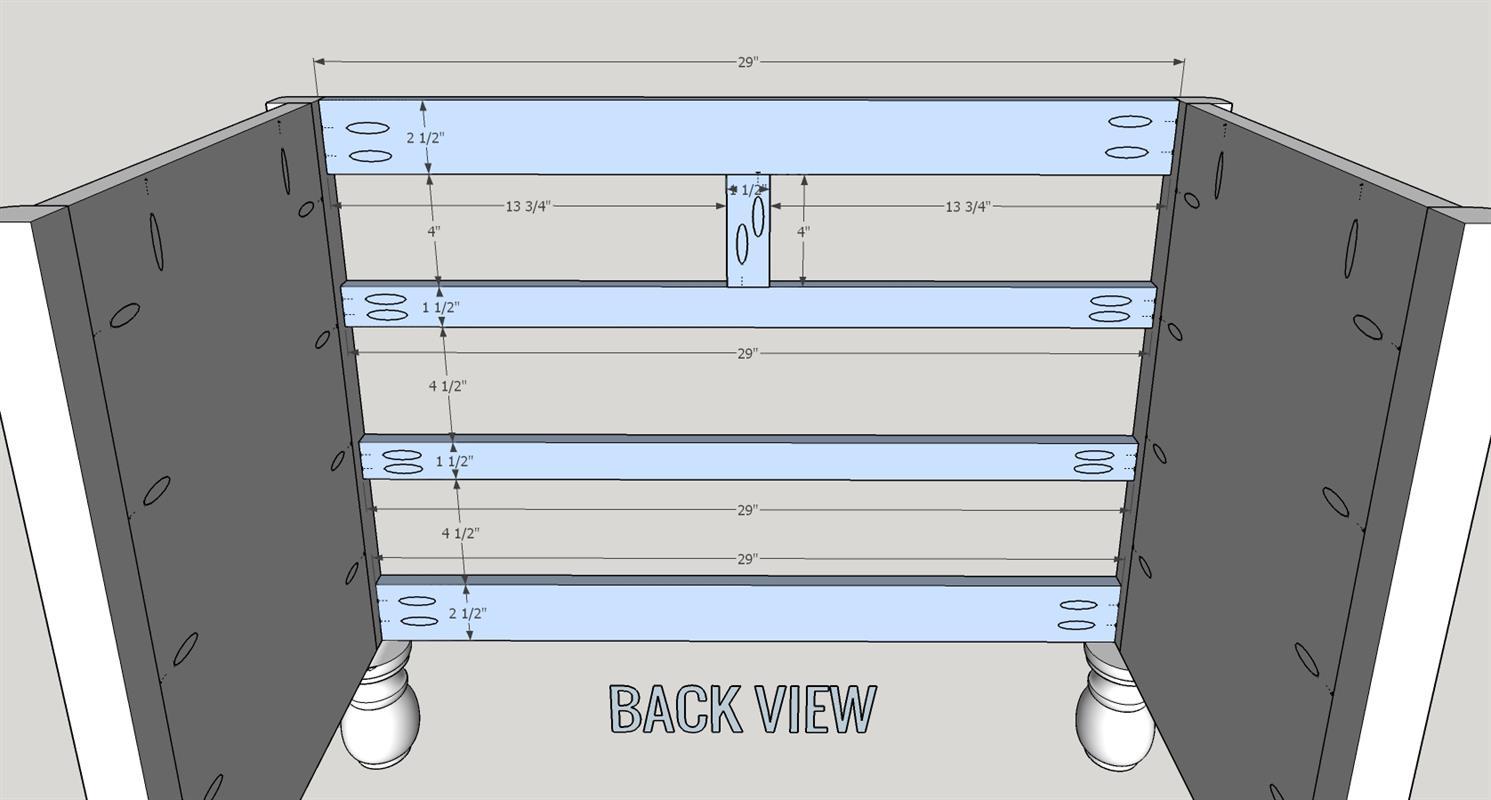
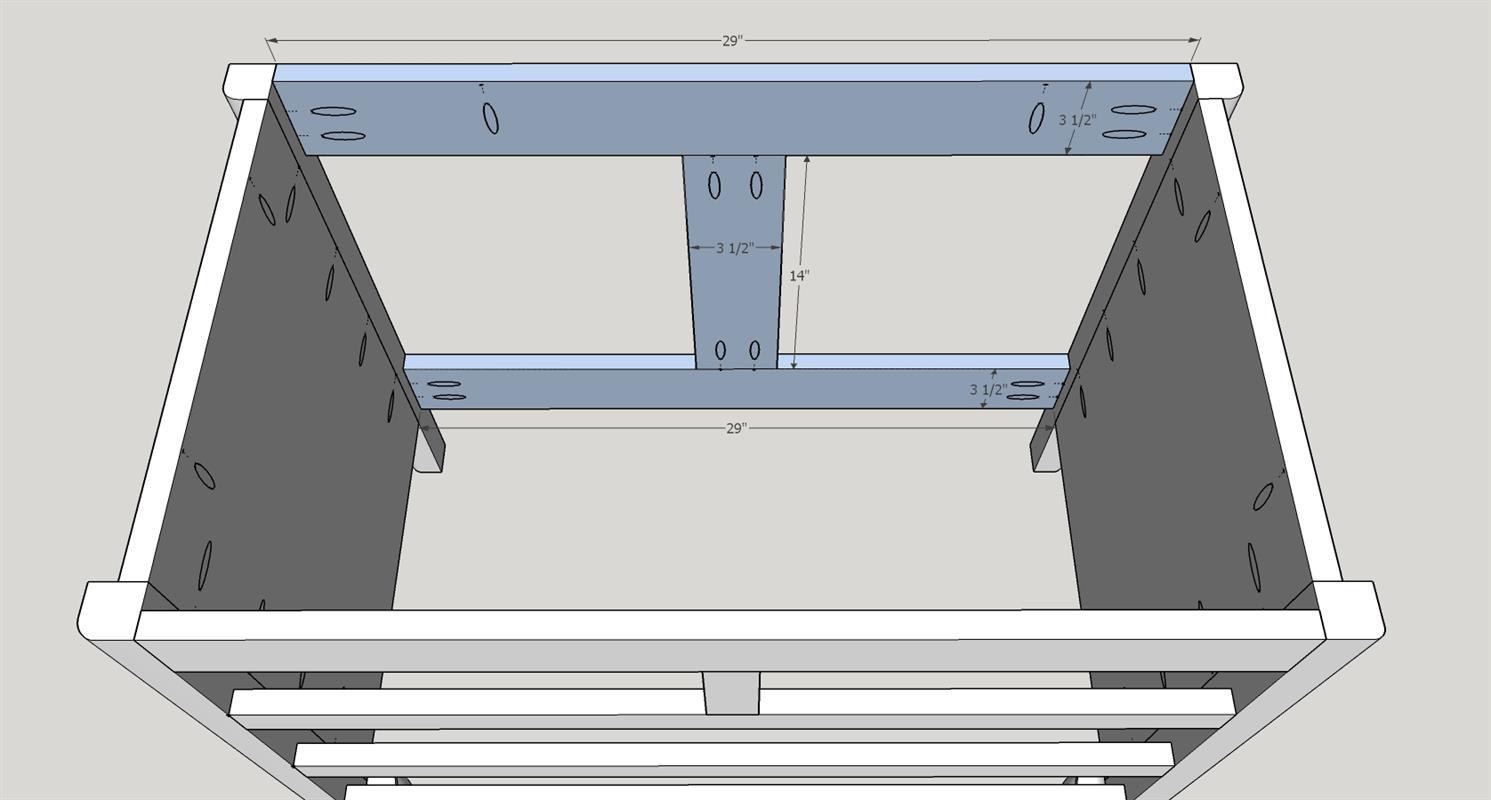
Front Spans
Drill pocket holes on the corresponding boards as shown in the diagram.
Attach the two 3/4" x 2 1/2" x 29" boards, one at the top and one at the bottom with wood glue and four 1 1/4" pocket hole screws on each.
Then attach one of the 3/4" x 1 1/2" x 29" boards 4 inches from the bottom of the top span you just installed with wood glue and four 1 1/4 pocket hole screws.
Then attach the second 3/4" x 1 1/2" x 29 board 4 1/2" from the top of the bottom span with wood glue and four 1 1/4 pocket hole screws, which should leave an equal space of 4 1/2" for the two bottom drawers.
Attach the 3/4" x 1 1/2" x 4" vertical piece in the exact center of the top opening with wood glue and two 1 1/4" pocket hole screws.
-
Back Spans
Drill pocket holes in the boards as shown in the diagram. Attach the two 3/4" x 3 1/2" x 29" boards, one at the top and one at the bottom (at the same mark that the side boards end at) with wood glue and two 1 1/4" pocket hole screws on each side.
Install the 3/4" x 3 1/2" x 14" board in the center of the back as shown in the diagram with wood glue and 1 1/4" pocket hole screws.
-
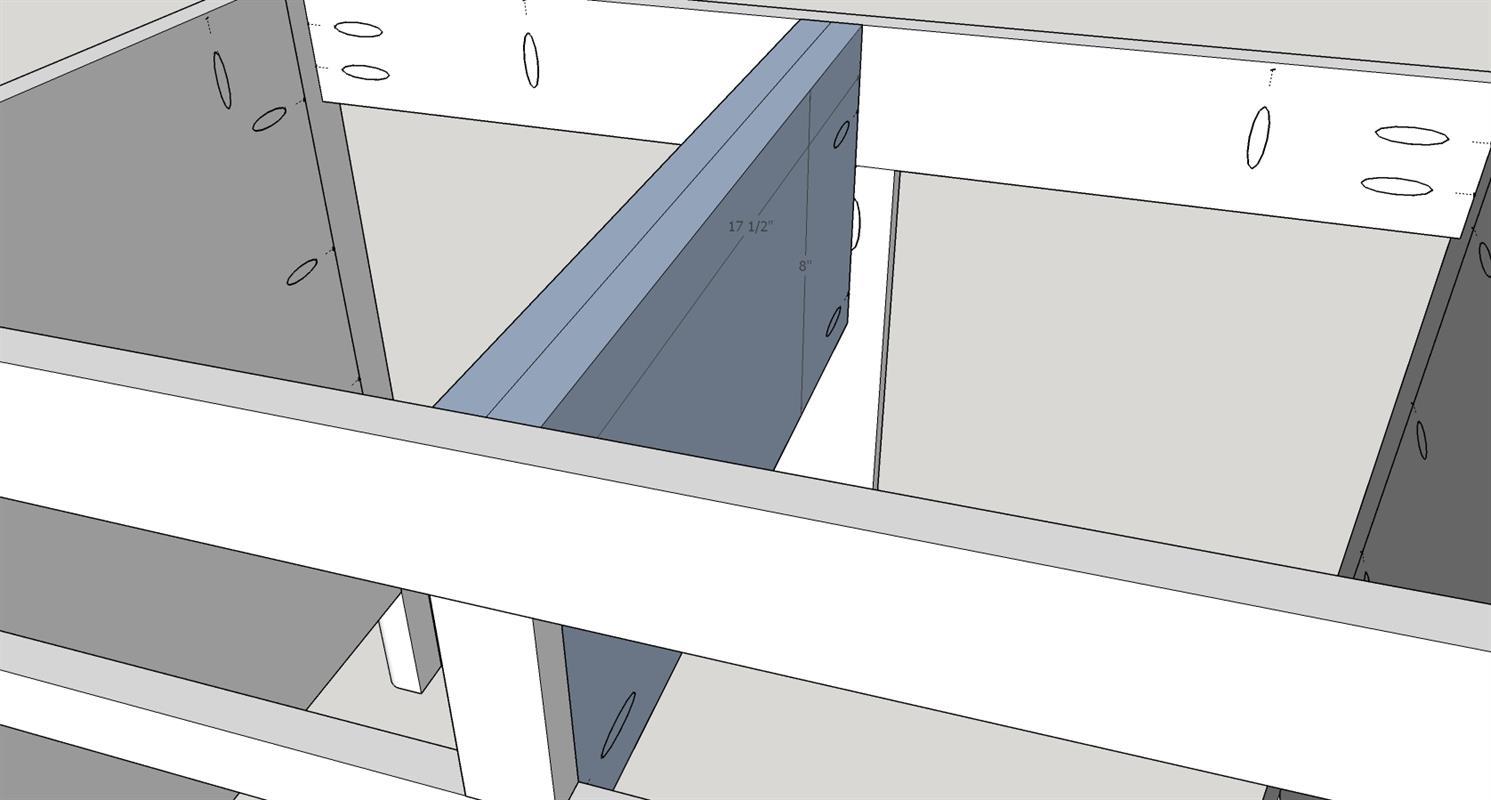
Center Support
Install the two 3/4" x 8" x 17 1/2" boards in the center to line up with the vertical piece between the top two drawer holes. Make sure they are centered on both the front and back as this is where your drawer tracks will be installed.
-
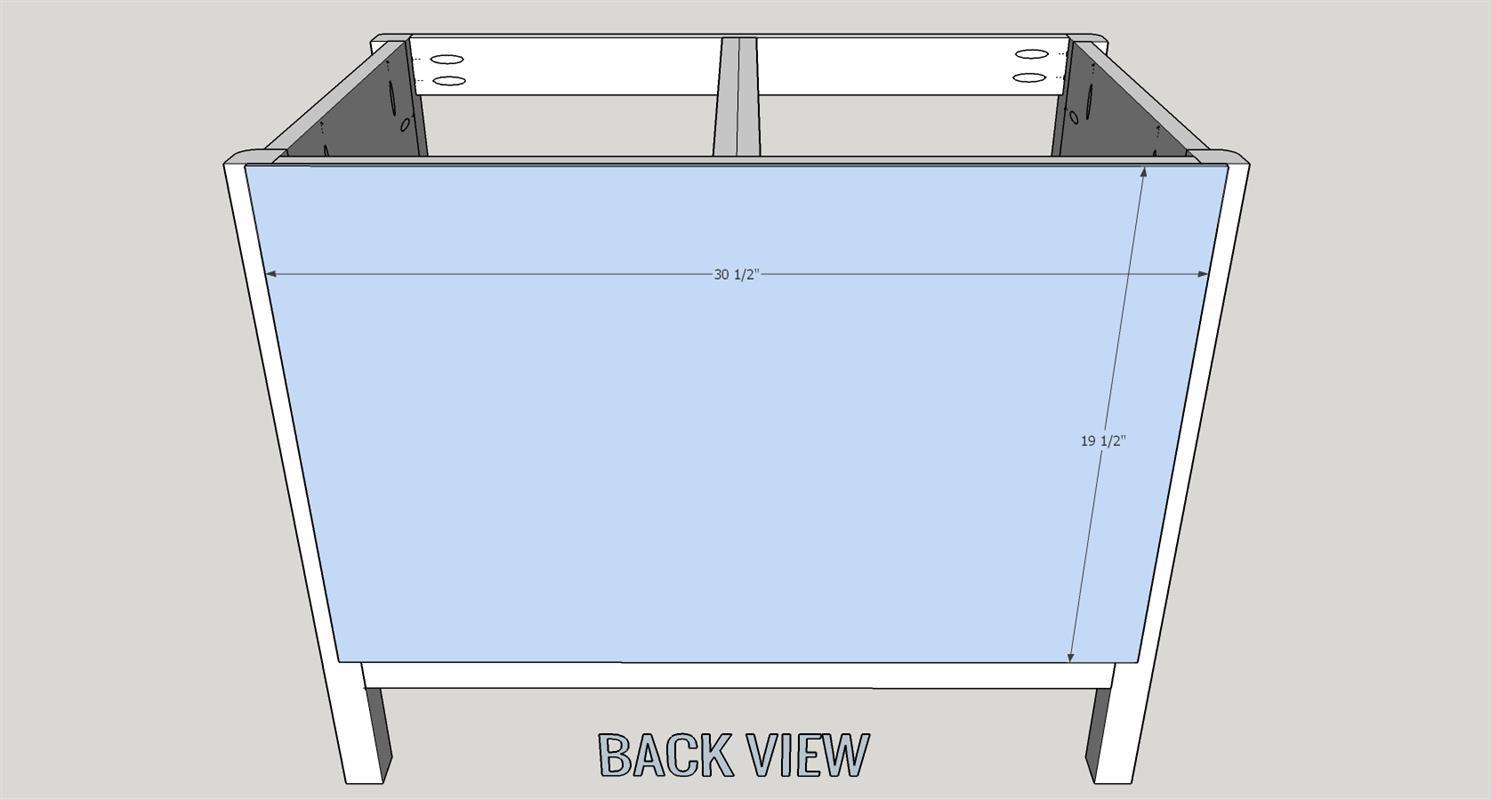
Back
Attach 1/4" x 19 1/2" x 30 1/2" back with finishing nails using a brad nailer or finishing nails and hammer.
-
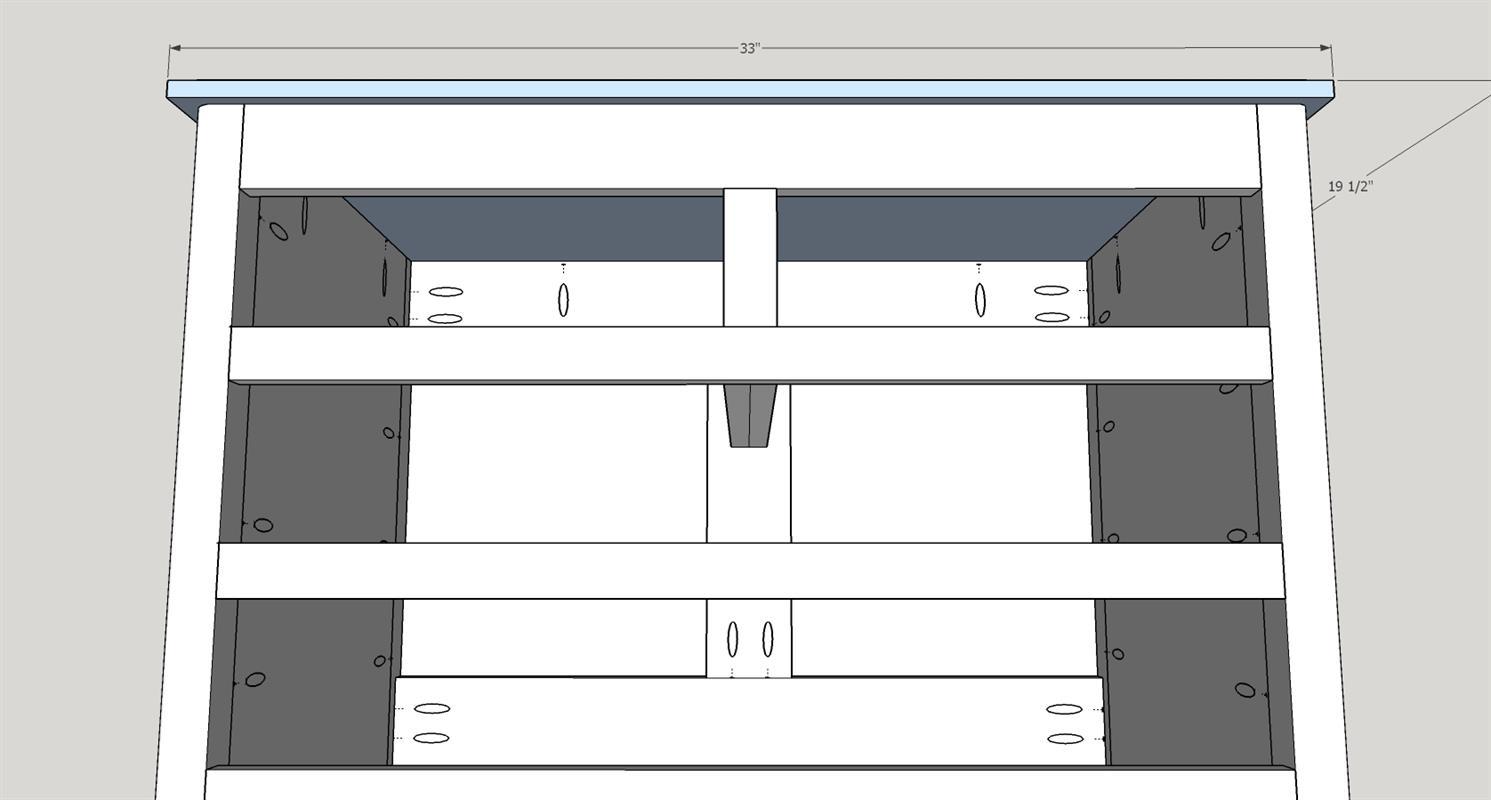
Top
If you'd like a routered edge, you can do so before or after installing the top. For this top, I used a Roman Ogee bit to give it a classic look.
The top is 33" x 19 1/2", centered and secured to with pocket 1 1/4" pocket hole screws from inside the base.
-
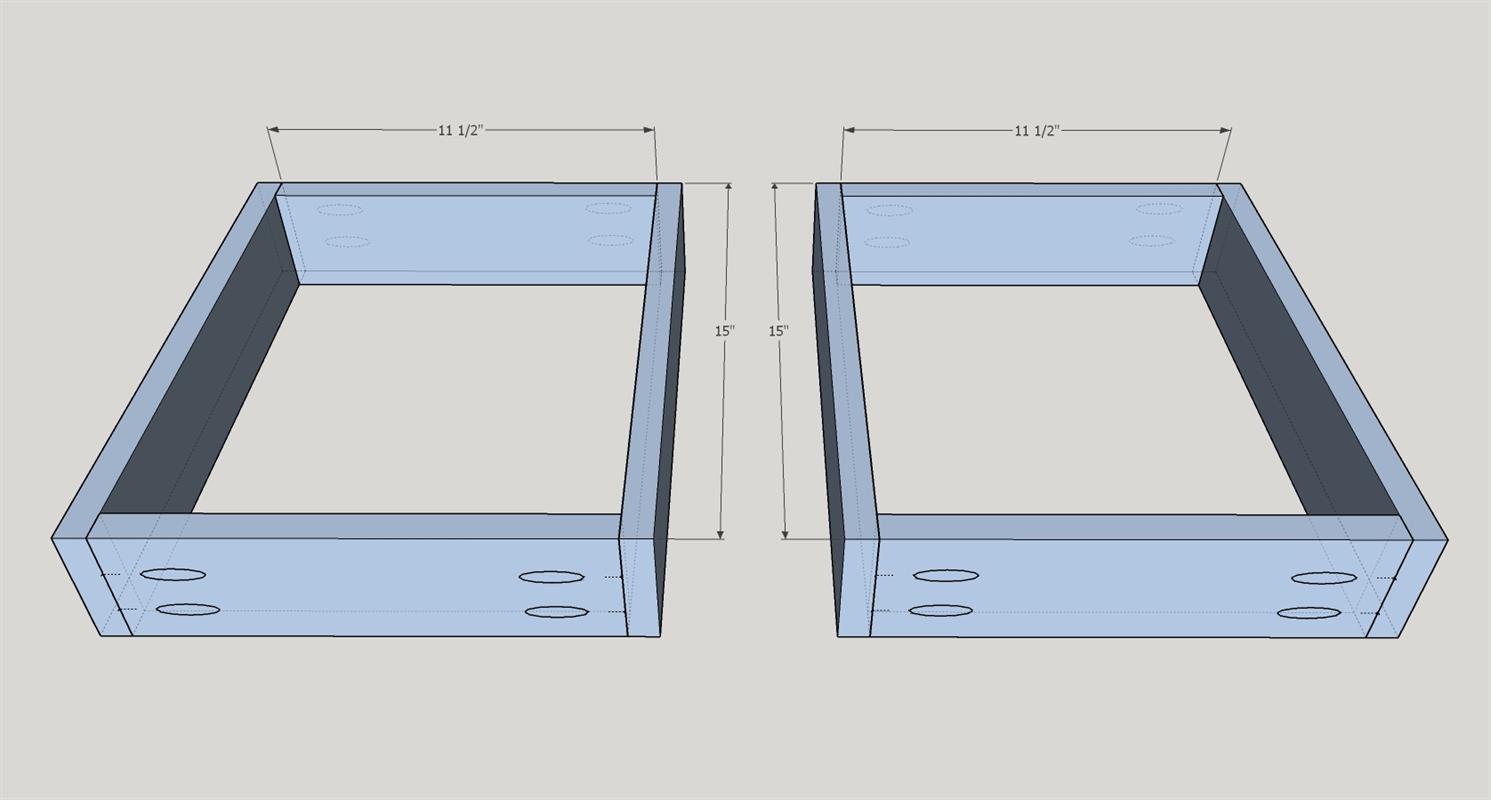
Top Small Drawer Frames
Drill pocket holes as shown in the diagram on the front and back pieces of the drawer frames. They should face out the front and back when assembled so you won't see them when the drawer is completed. Arrange as shown and attach with wood glue and 1 1/4" pocket hole screws.
-
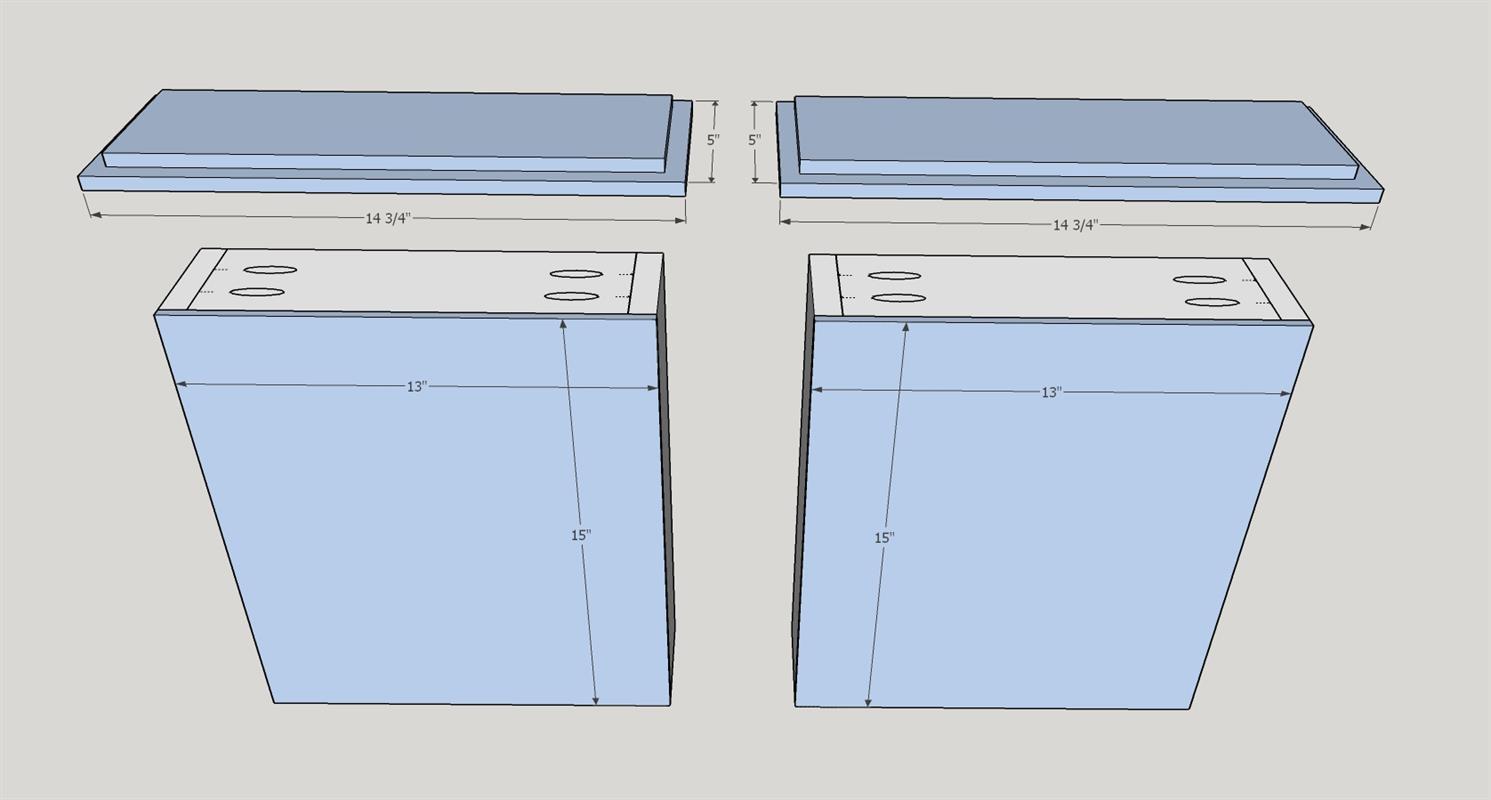
Top Small Drawer Bottom & Face
Attach 1/4" x 13" x 15" to the bottoms with wood glue and a brad nailer.
Cut the drawer faces to 14 3/4" x 5" and route the edges if you wish. Again, we used the same bit as the top - Royal Ogee. Do not attach to the drawer yet.
-
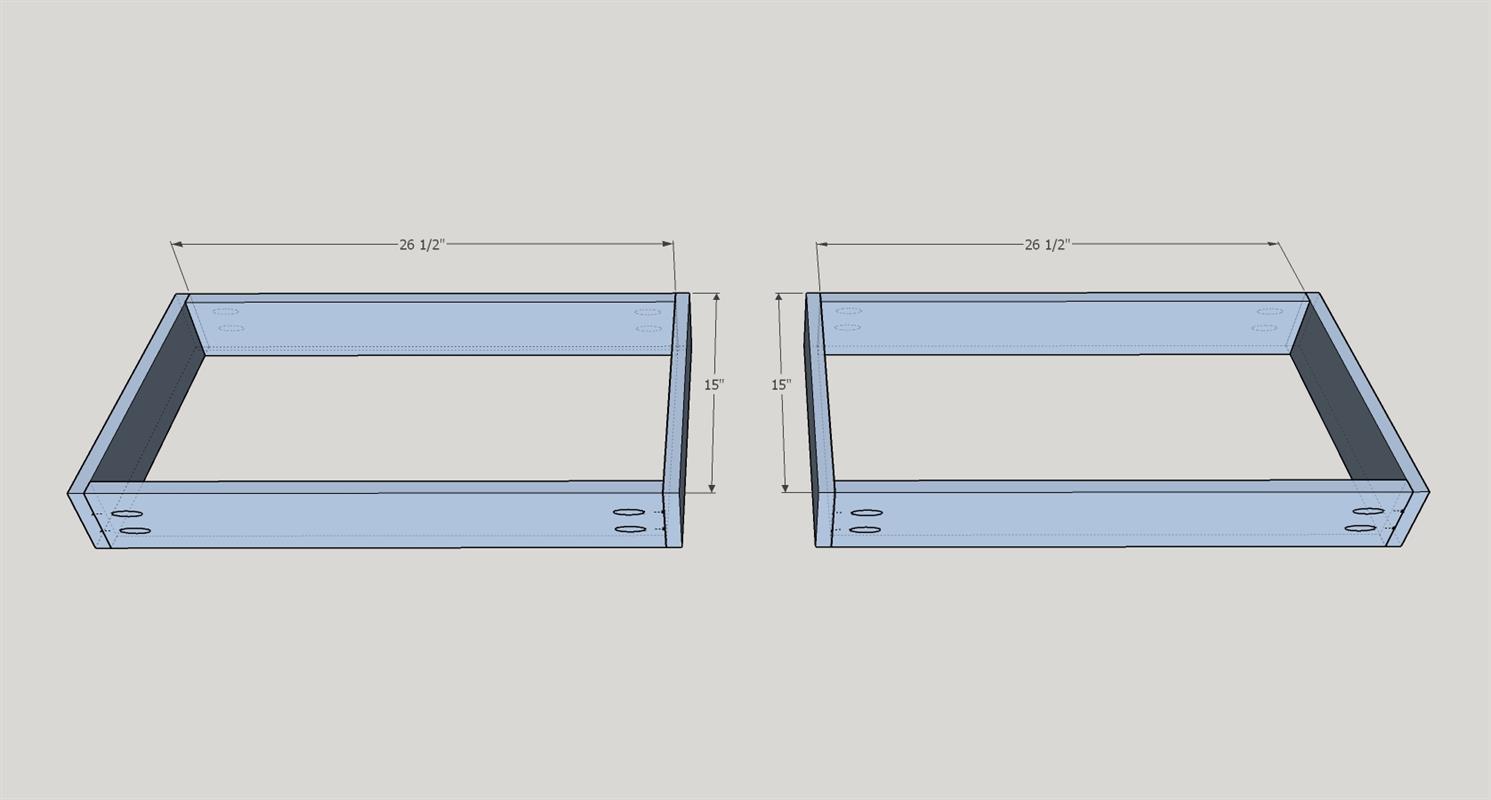
Large Drawer Frames
Drill pocket holes as shown in the diagram on the front and back pieces of the drawer frames. They should face out the front and back when assembled so you won't see them when the drawer is completed. Arrange as shown and attach with wood glue and 1 1/4" pocket hole screws.
-
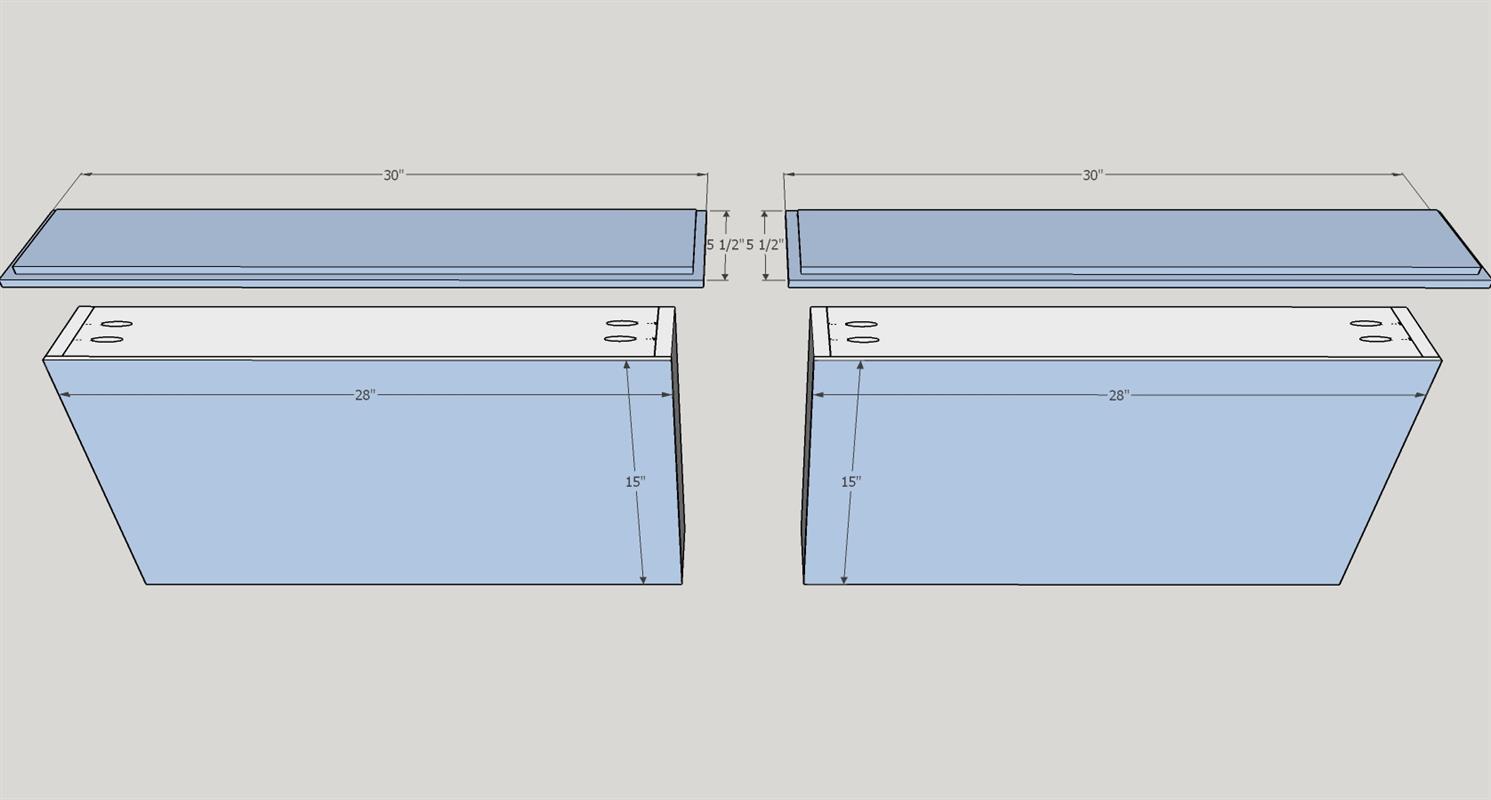
Large Drawer Bottoms & Faces
Attach 1/4" x 28" x 15" to the bottoms with wood glue and a brad nailer.
Cut the drawer faces to 30" x 5 1/2" and route the edges if you wish. Again, we used the same bit as the top - Royal Ogee. Do not attach to the drawer yet.
-
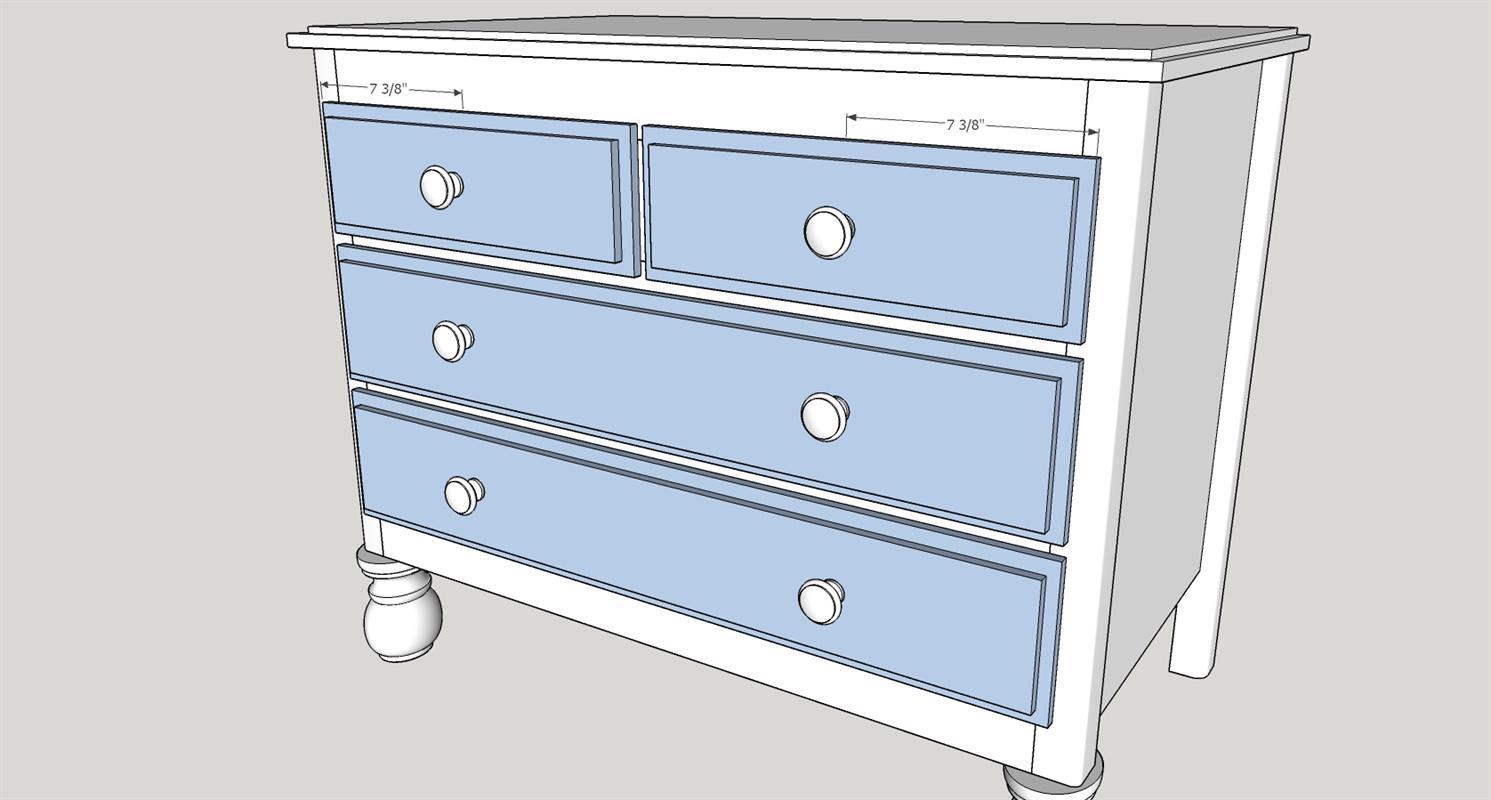
Attach drawers, faces and knobs
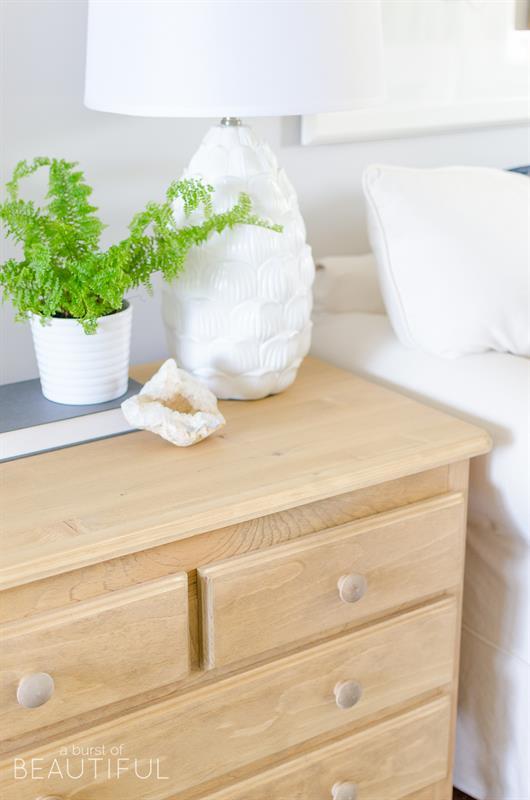
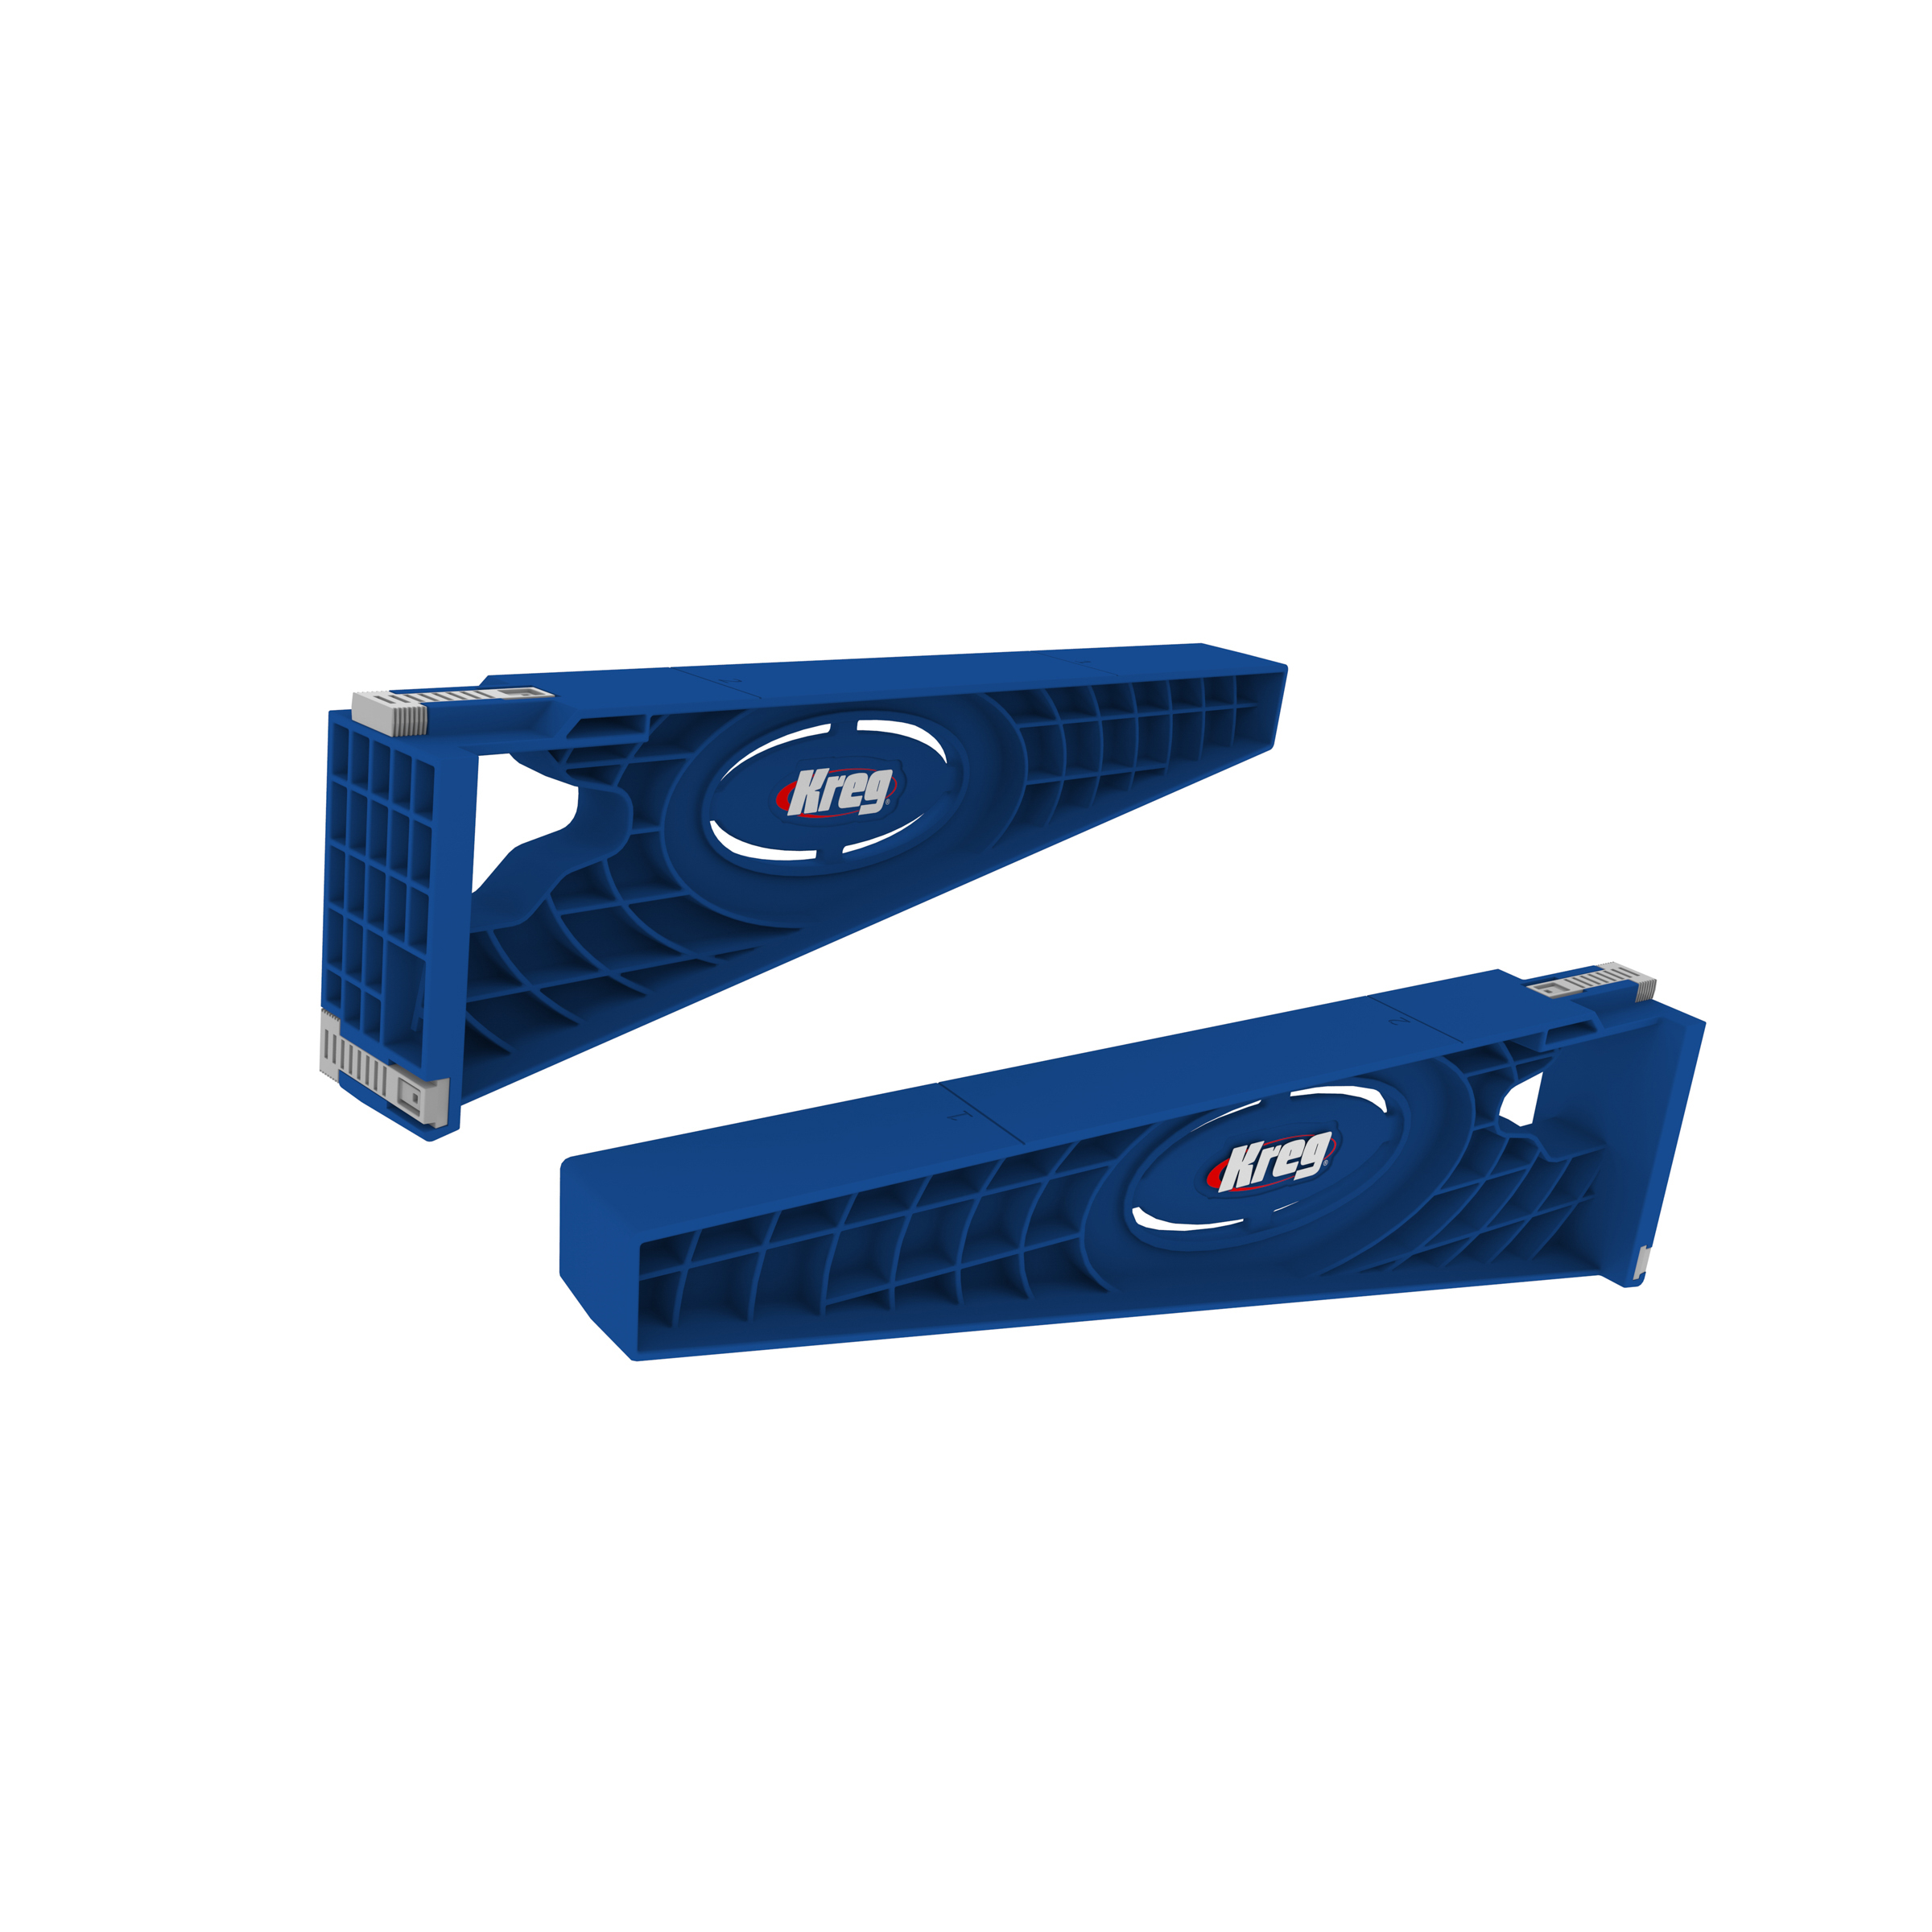
Before securing the faces to the drawers, attach bottom-mounted metal slides (or your choice of drawer slide) to the bottom of each drawer box and the corresponding side of each drawer opening. You can use a tool like the Kreg Drawer Slide Jig to help get them perfectly in place! Once you have the drawer boxes sliding well, predrill two holes in the front of each box. Center the faces and clamp in place while you screw from inside the drawer into the faces using 1 1/4" screws. Drill appropriate size holes in the faces 7 3/8" from the outside edge (1 on each top drawer, 2 on each of the larger drawers) and attach your knobs. We used some wooden knobs we found at a flea market, but similar ones can be found at your local hardware store.
-
Sand, Stain & Paint
Sand with 80, then 120, then 220 grit sandpaper. Stain or paint in your choice of color (we chose Golden Oak stain). And if you stained make sure to seal it with a satin, matte or dead flat varnish or polyurethane.