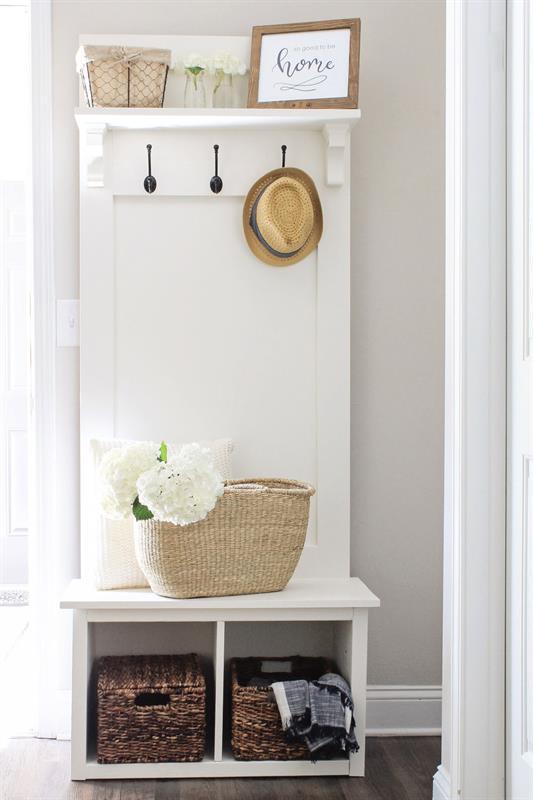
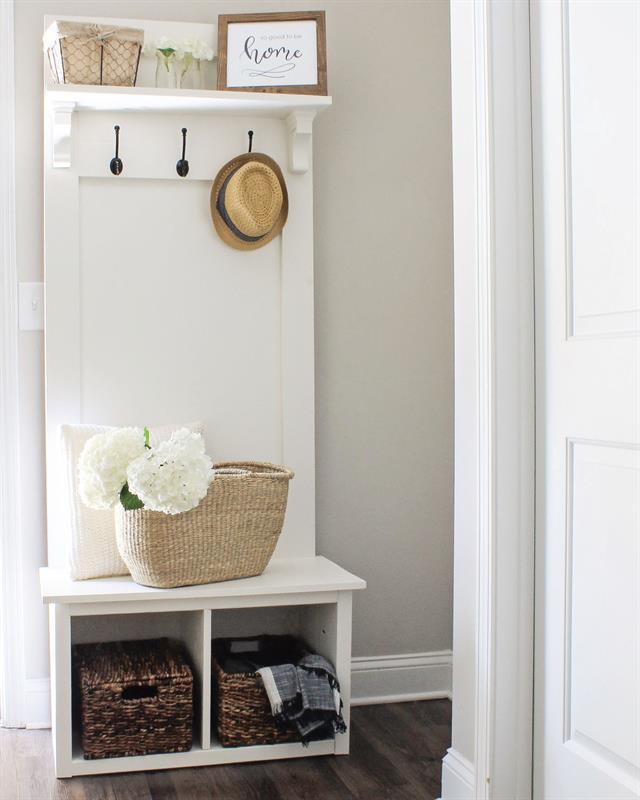


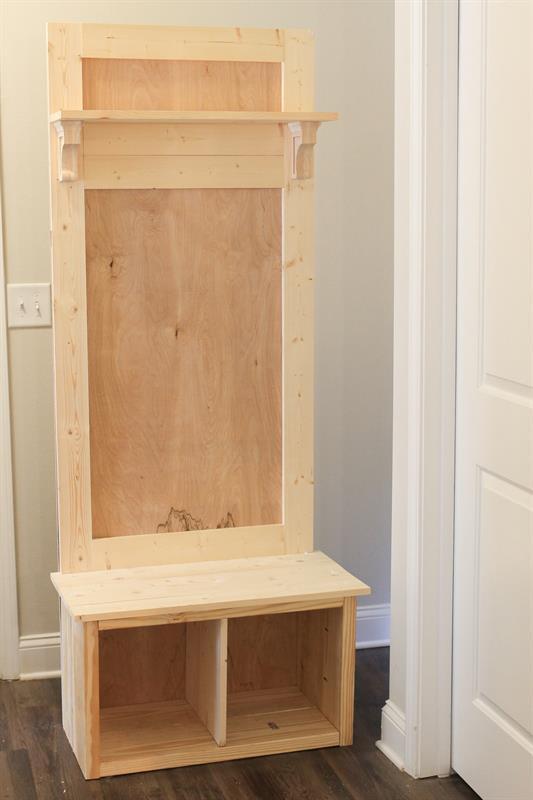
An entryway hall tree bench that is perfect for providing organization for small spaces! It works great in entryways, mudrooms, hallways, and more.
Tools
Kreg Tools

Other Tools
-
Circular Saw (corded)

-
Miter Saw
-
Tape Measure
-
Clamps
-
Drill (cordless)
-
Nail Gun
Materials
Wood Products
- 2 Board , 2x8 , 96"
- 1 Board , 1x8 , 72"
- 1 Board , 1x4 , 96"
- 1 Board , 1x4 , 120"
- 1 Laminated Panel Board , 1x16 , 48"
- 1 Plywood , 1/4" Thick , 4 ft x 8 ft
Hardware & Supplies
- 2 Wood Corbels - 2 1/2"W x 4"D x 6"H
- 3 Garment Hooks
- 2 2" Wood Screws
- 6 1 1/2" Wood Screws
- 4 3/4" Wood Screws
- 23 1 1/4" Pocket hole screws - Coarse thread
- 27 2 1/2" Pocket Hole Screws - Coarse Thread
- 30 3/4" Brad Nails
- 6 1" Brad Nails
- 1 Wood glue
Directions
-
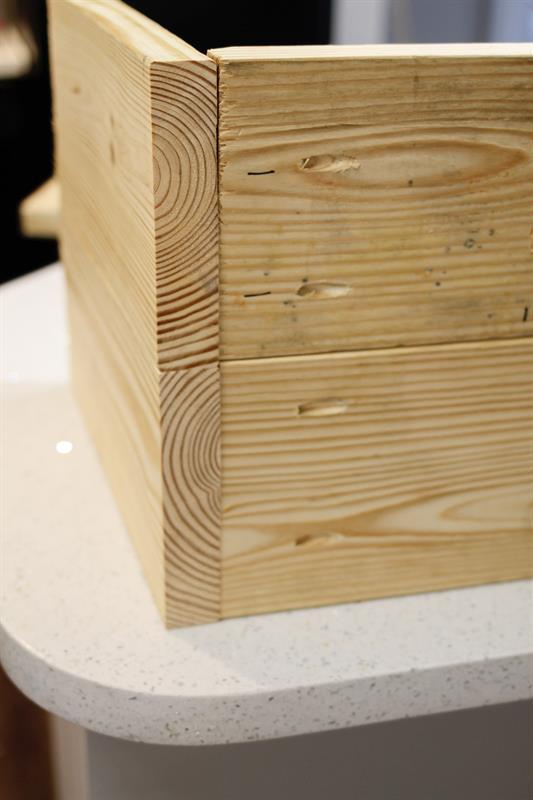
Make the sides of the bench
Use a miter saw and cut four 2x8 pieces @ 17" each.
Then, for two of the 17" pieces, add 2 pocket holes on one side. Using 2 1/2" pocket hole screws and wood glue, join one piece together that has pocket holes with a piece that has no pocket holes. Repeat these pocket hole steps for the other two 17" pieces. You now have the bench side pieces.
-
Attach bench sides to bench bottom
Join your bottom bench piece (pocket hole side facing down) into your two side pieces with 2 1/2" pocket hole screws and wood glue.
-
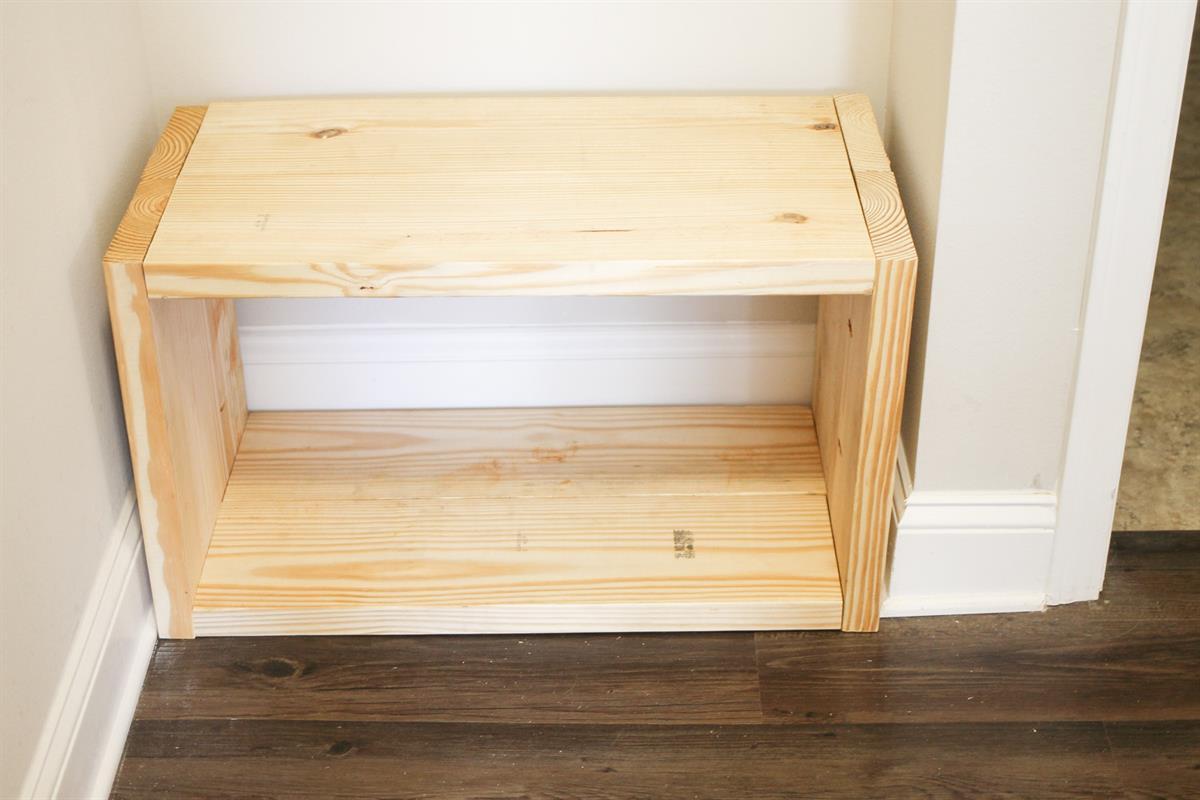
Attach top of bench to bench sides
Join your top bench piece into your two side pieces with 2 1/2" pocket hole screws and wood glue.
-
Cut the bench seat & cubby divider
Using a circular saw, cut a bench top seat 31" long from the 1x16x48" laminated board panel. Next, measure the exact height and width for a bench cubby divider. My cubby divider dimensions were about 14 1/2" x 14", but you will need to measure for exact measurements at this point for a perfect fit. Use the remaining piece leftover from the 1x16x48" board panel and cut it to the needed size for your bench cubby divider.
-
Attach the bench cubby divider
On your bench bottom and top piece, measure and mark 14 1/2" in from the edges (the center point for your divider). Line up your cubby divider at this center point. Then, use 2" wood screws and drill two screws through the top of the bench piece to secure the cubby divider into place (it is best to make pilot holes first to avoid wood splitting). Make sure to sink the wood screw head below the surface of the wood so it doesn't stick up. Repeat if needed from the bottom side of the bench.

-
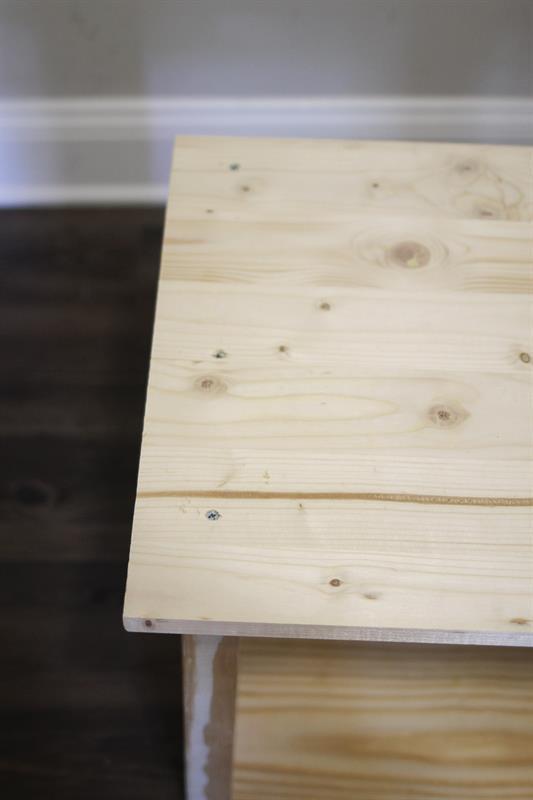
Attach bench top seat
Center your bench top seat piece that you cut to size in step 5 on top of your bench frame and make sure the back edge of the bench top seat is flush to the back edge of the bench frame. You don't want the bench top seat to hang off the back edge of the bench frame, you only want it to hang off the front edge. Clamp the bench top seat in place. Attach the seat to the bench frame using three 1 1/2" wood screws on each side of the bench top seat. Again make sure to create pilot holes first and make sure to sink the wood screw head below the surface of the wood so it doesn't stick up.
-
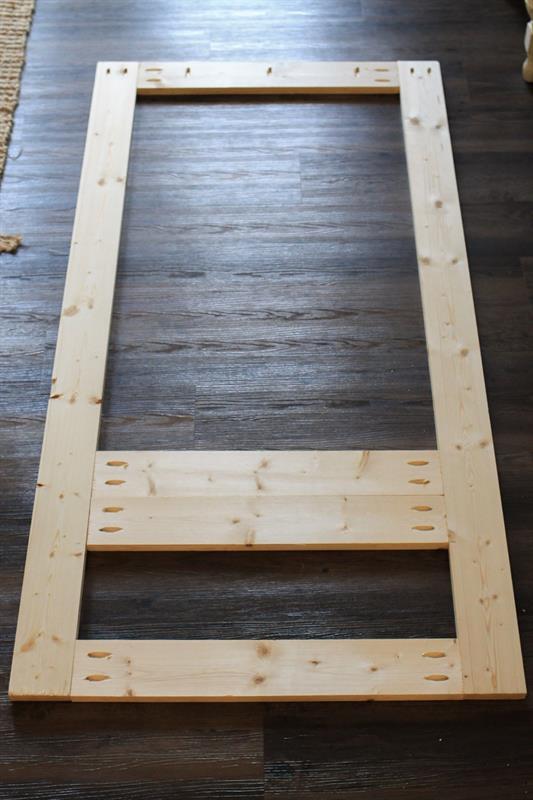
Prepare tree hall frame pieces
Using your 1x4x10ft piece and a miter saw, cut two 58 1/4" pieces. Then, add two pocket holes to just one end on each of the two pieces. Next, cut four 22" pieces from your 1x4x8ft piece. On all four pieces, add two pocket holes to each end. Then, on just one of the four 22" pieces, add three additional pocket holes along the middle on just one side (as shown in the photo).
-
Join tree hall frame pieces
Attach two of the 22" frame pieces to the two 58 1/4" frame pieces using 1 1/4" pocket screws and wood glue. Make sure you attach the 22' piece with the three extra pocket holes to the frame sides that have two pocket holes at the ends as shown in the photo as this will be the side that is attached to your bench.

-
Finish tree hall frame
Attach one 22" piece to the tree frame 10" down from the top edge using 1 1/4" pocket screws. Note the top edge of the frame is the part that does not have the 3 extra pocket holes along the bottom side. Then, add your last 22" piece directly below the previous one.
-
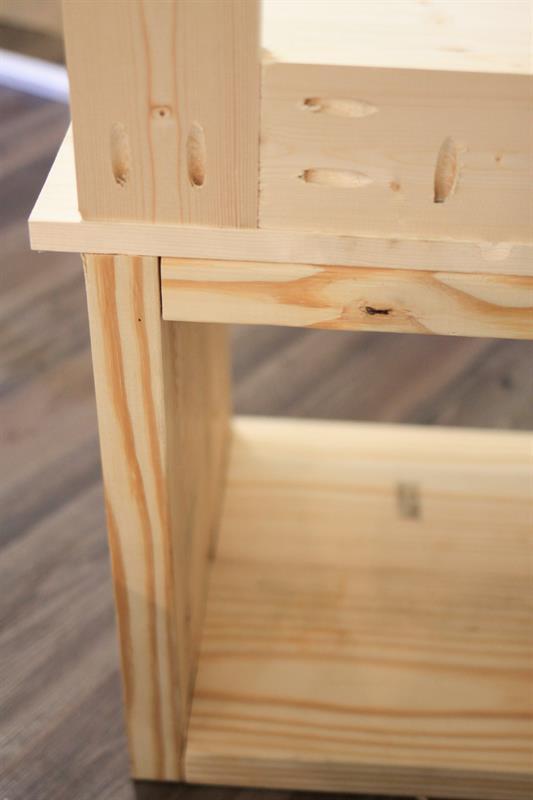
Attach tree hall frame to bench top
Line up your tree hall frame with your bench and attach it with 1 1/4" pocket hole screws and wood glue. It helps to use clamps for this step.
-
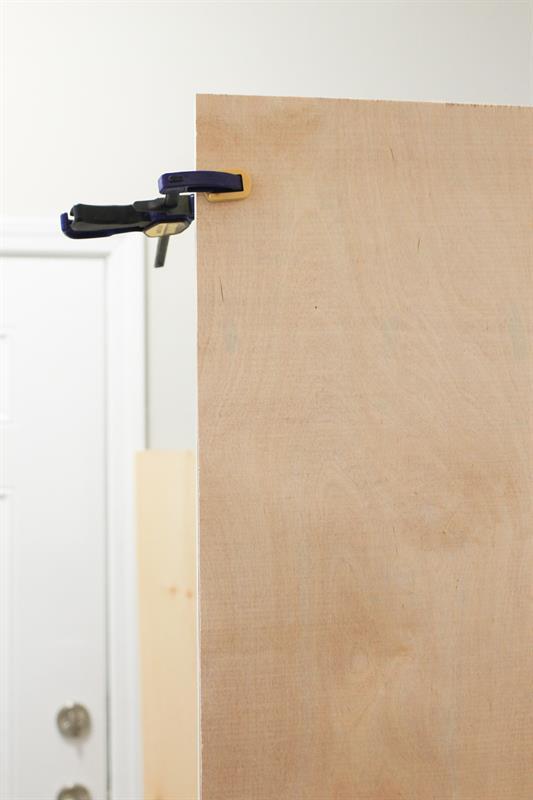
Add backing
Using a circular saw, cut your 1/4" thick 4ft x 8ft plywood to 29" x 76". Attach to the back of the tree hall bench with a brad nailer and 3/4" brad nails.
-
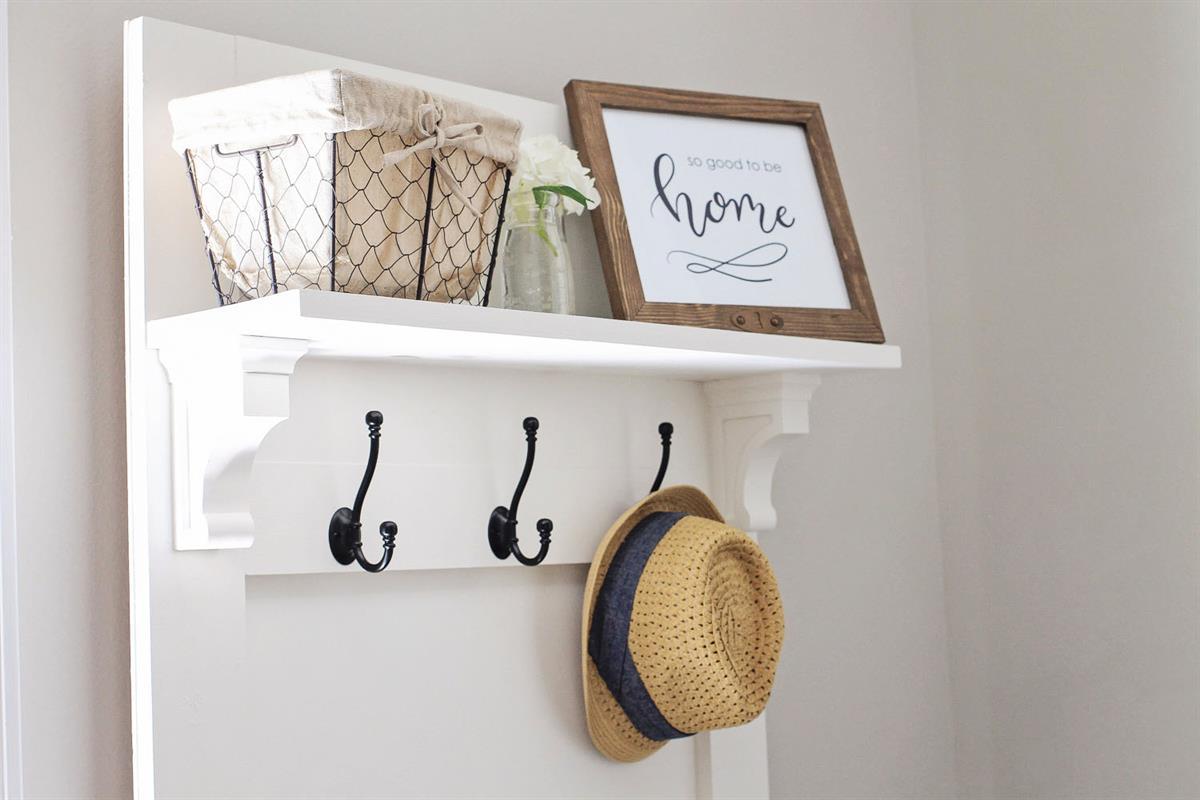
Add shelf and corbels to the front
Cut your 1x8x6ft to 29" long to create your shelf piece. Then, add the two wood corbels to the front of the frame making sure that the top edges are lined up with the top middle 1x4 piece. For attaching the wood corbels, follow the instructions that came with it. We used 3/4" wood screws for attaching ours. Finally, attach your shelf on top of the wood corbels using 1" brad nails and a brad nailer.
-
Finishing & add coat hooks
Your build is complete! Add wood filler over screws on bench top seat (if desired) and sand any necessary areas of the tree hall bench, then paint or stain. Lastly, add your three coat hooks under the shelf.
-
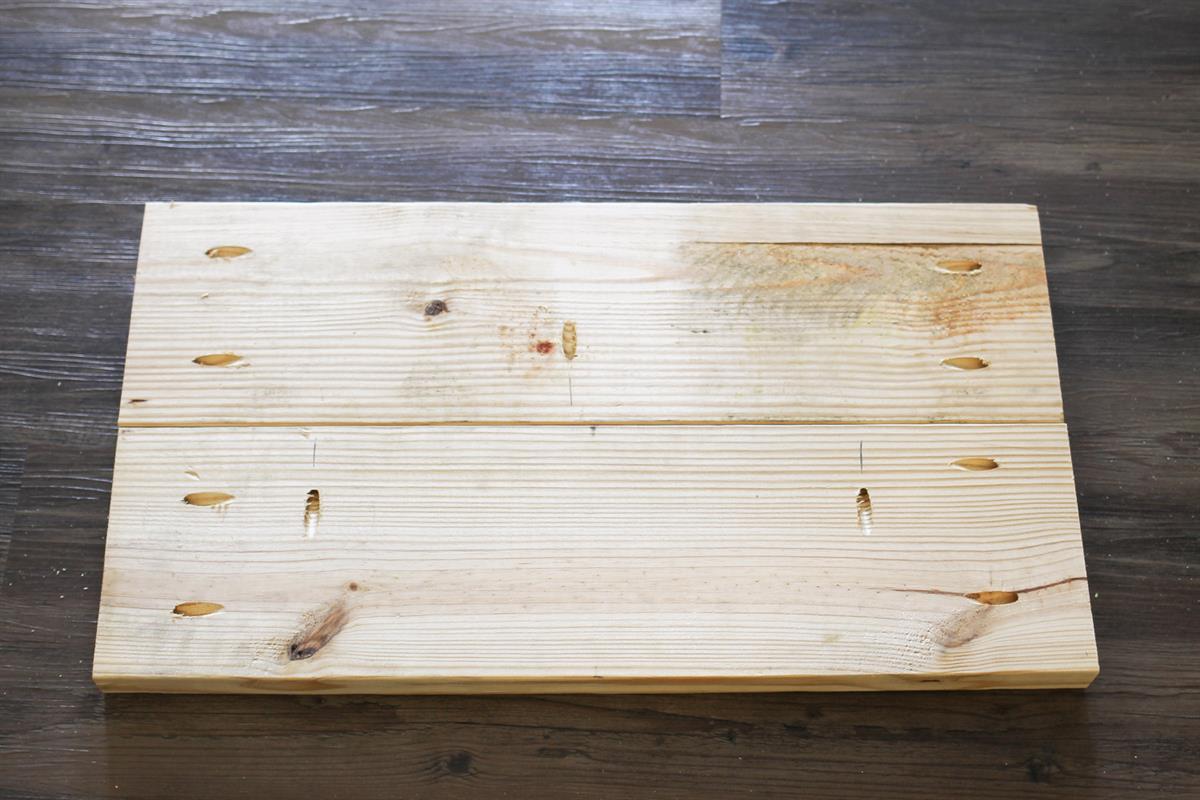
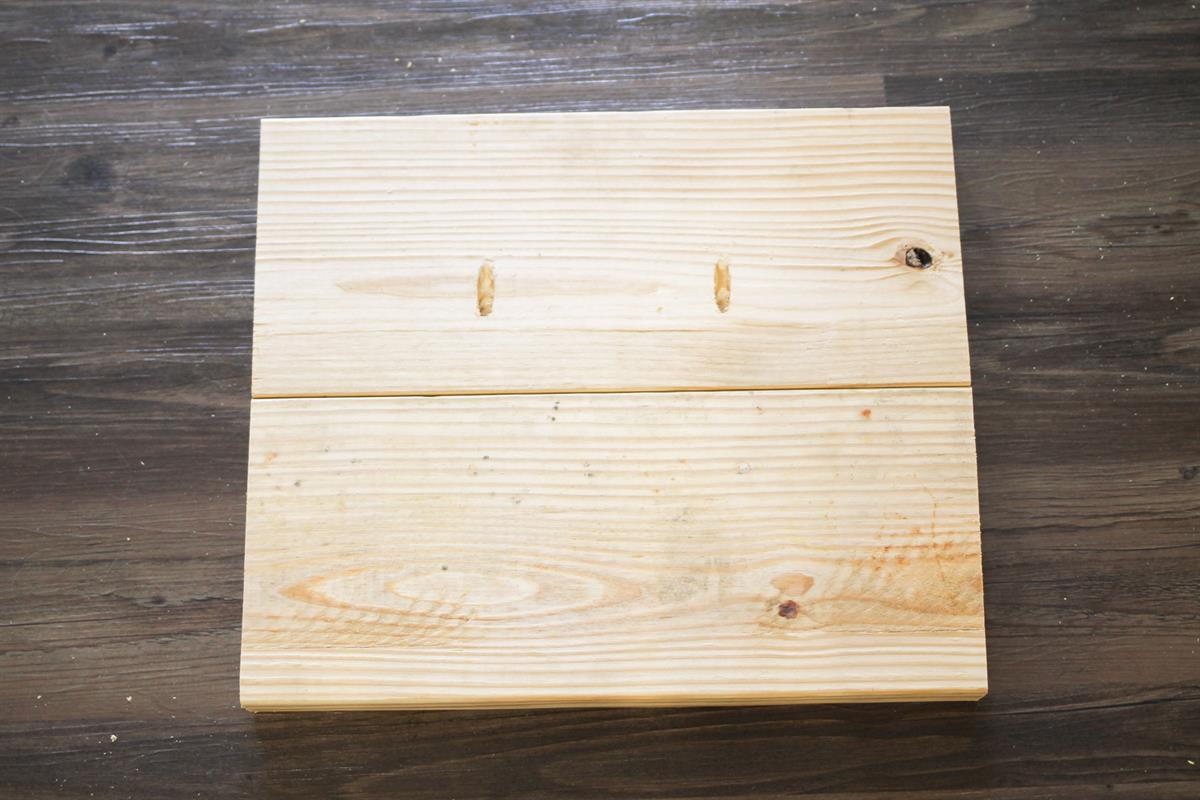
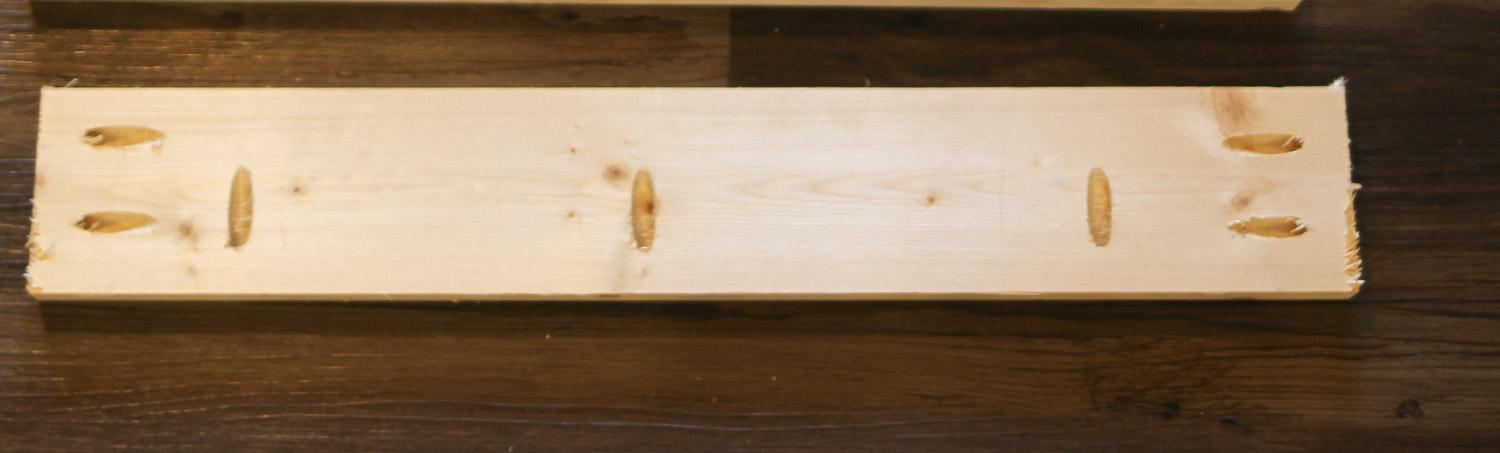
Make top & bottom bench pieces
Use a miter saw and cut four 2x8 pieces @ 26" each.
On two of the peices, add 2 pocket holes to all ends, then add three pocket holes down the middle of the boards as shown in the photo. Join the two boards together with the middle pocket holes using 2 1/2" pocket hole screws and wood glue.
Repeat these pocket hole steps for the other two 26" pieces. You now have the bench top and bottom pieces.