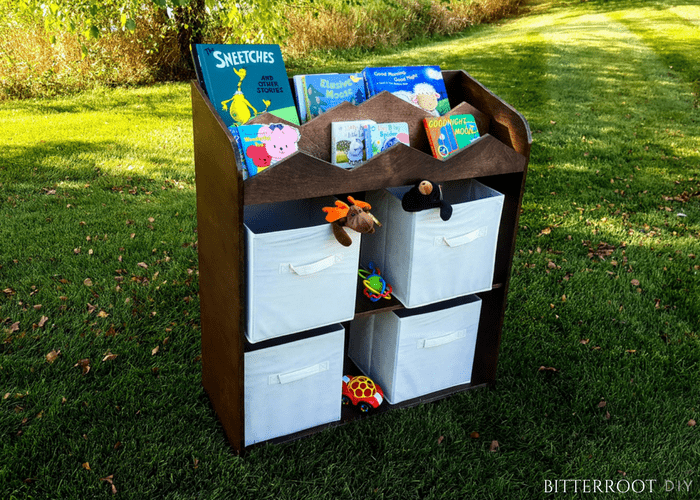


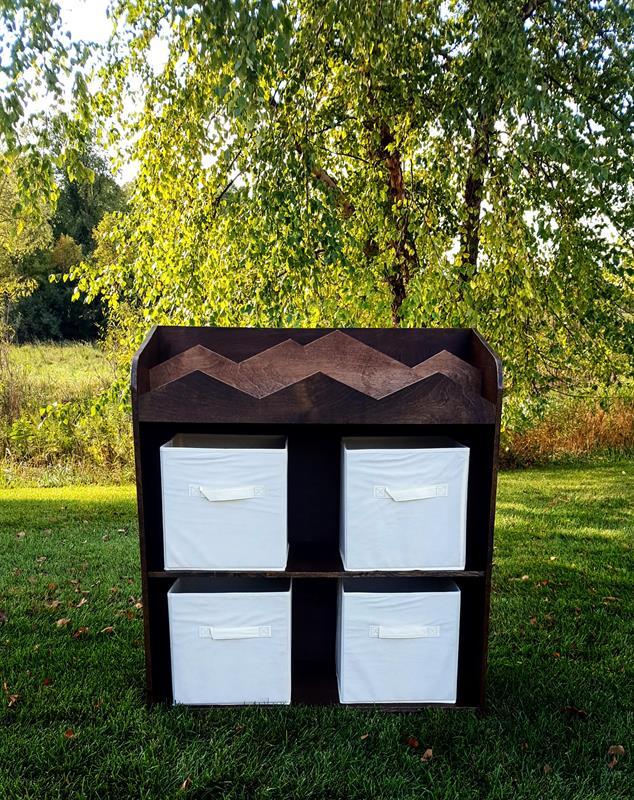
We’ve been in need of a place to put all of my son’s toys and books, which have been in stacks in his room since he was born, so I decided to make a custom bookshelf/toy storage unit! Books on top, toys on the bottom … business in the front, party in the back if ya know what I mean.
Tools
Kreg Tools


Other Tools
-
Circular Saw (cordless)

-
Jigsaw
-
Square
-
Tape Measure
-
Clamps
-
Drill (cordless)
Materials
Wood Products
- 1 Plywood , 1/2" Thick , Full Sheet
Hardware & Supplies
- 1 Minwax Special Walnut Stain
- 1 Minwax Jacobean Stain
- 1 Minwax Wipe-On Polyurethane
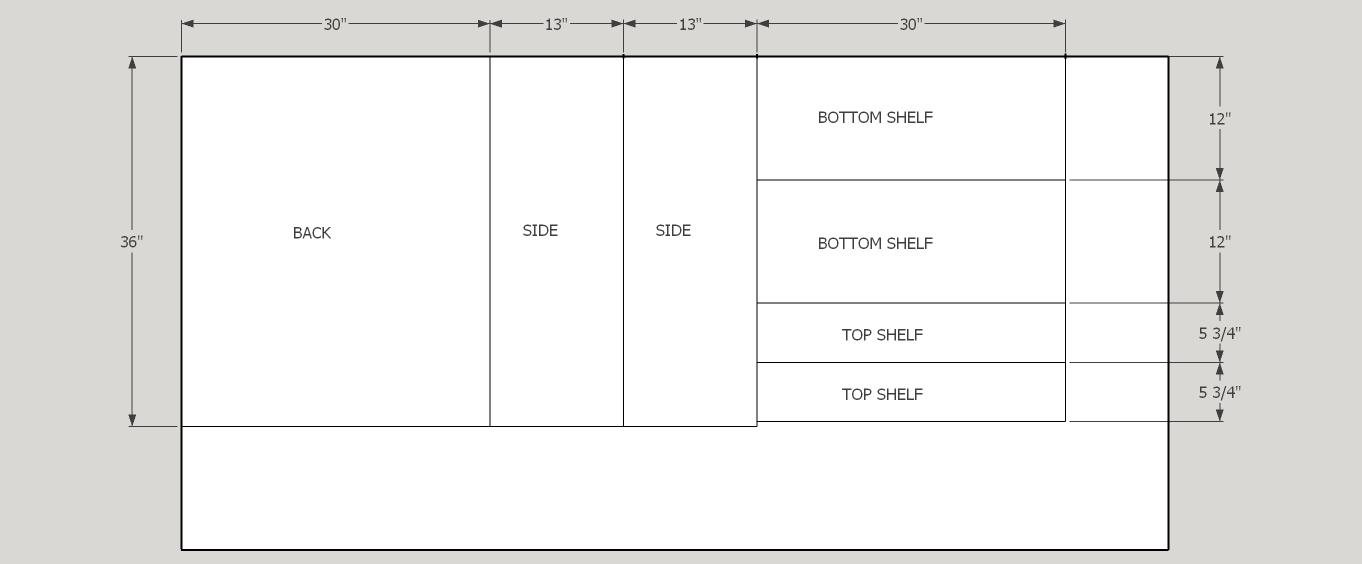
Cut List & Parts
- 1 Back , 1/2" x 30" x 36"
- 2 Sides , 1/2" x 13" x 36"
- 2 Bottom Shelves , 1/2" x 12" x 30"
- 2 Top Shelves , 1/2" x 5 3/4" x 30"
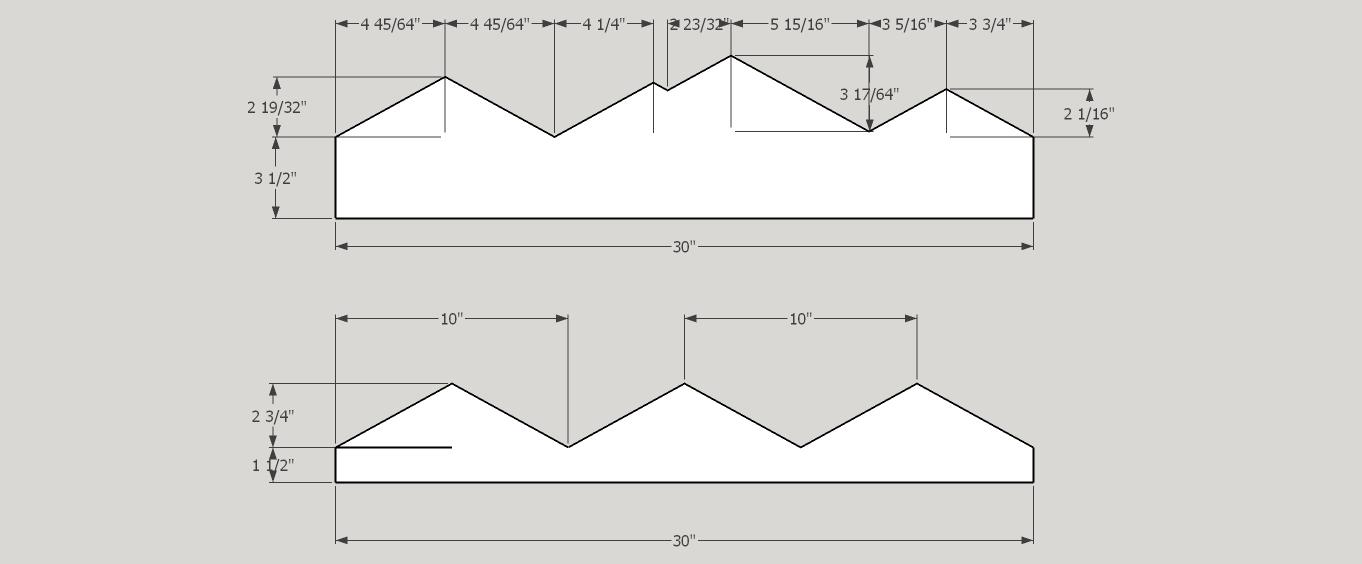
- 2 Mountain Ranges , See cut diagram
Directions
-
Step 1.
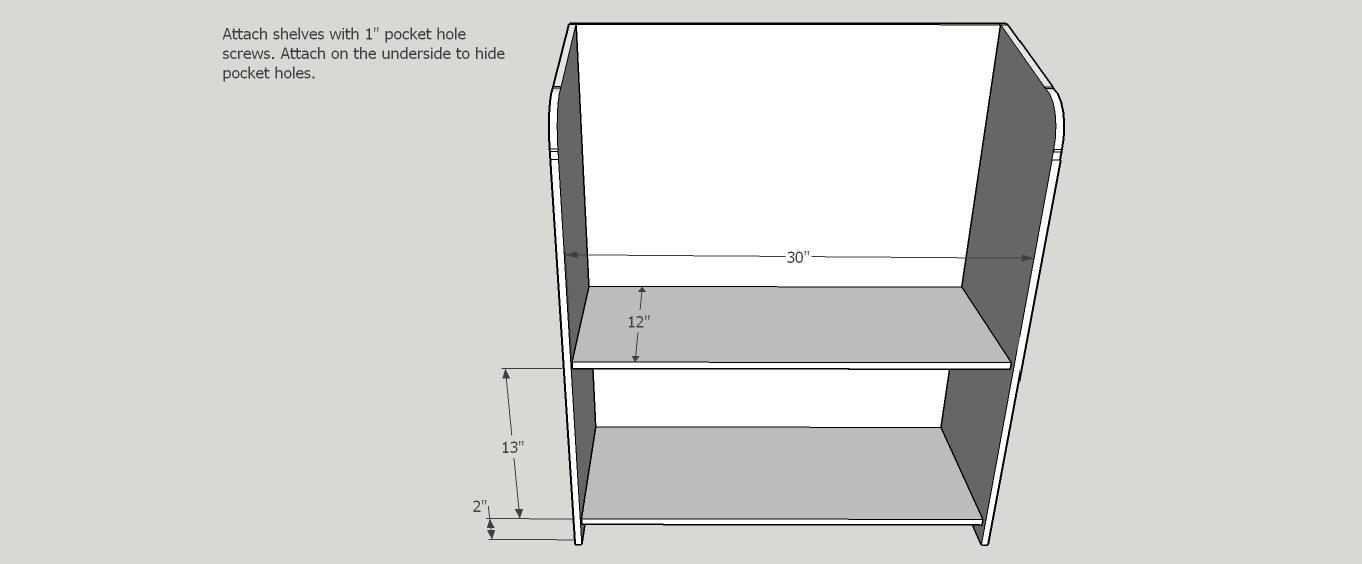
Start by attaching the sides to the back of the bookshelf. Line up the back so it is flush with the back edge of the side pieces.

-
Step 2.
Insert the bottom two shelves and attach with pocket holes and screws. Place the shelves so they are flush against the back of the bookshelf. They should sit 1/2" inset from the front edge.
-
Step 3.
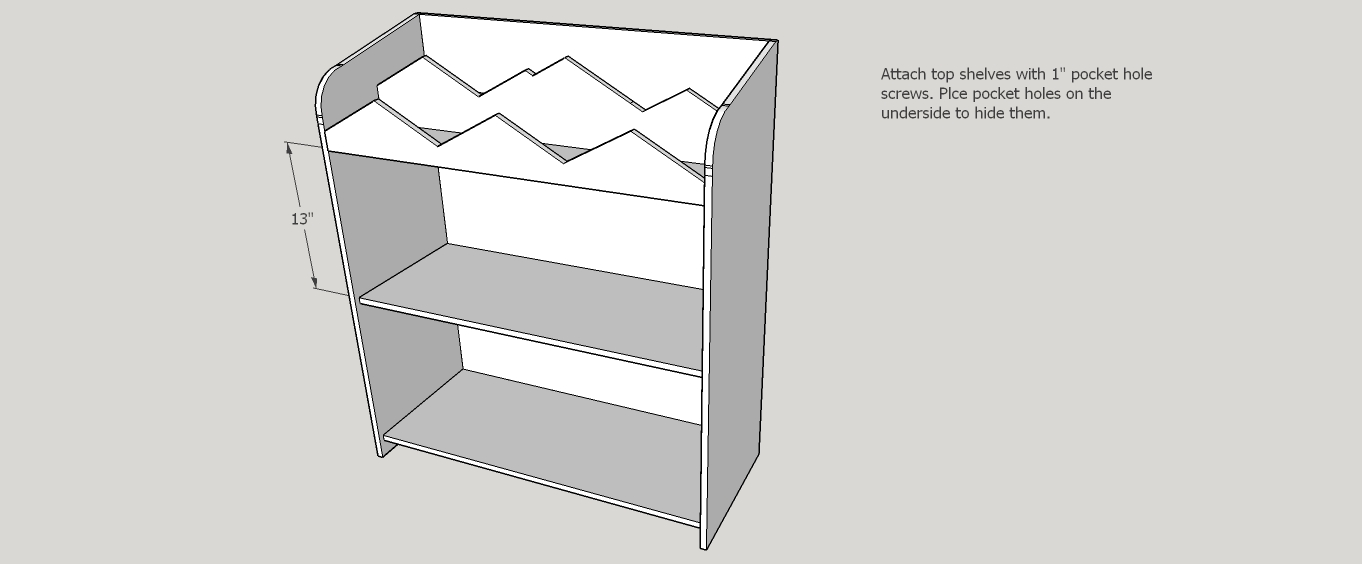
Build the upper shelving unit. Begin by attaching the small mountain range to the lower shelf. Next, attach the large mountain range to the back of the lower shelf. Finally, attach the upper shelf to the back of the large mountain range. It's not necessary to build the upper unit first, but I found it helpful. Do whatever works best in your situation!

-
Step 4.
Position the upper shelf unit and attach with pocket holes and screws. When the upper shelf unit is flush against the back of the bookshelf, the small mountain range should be flush with the front edge.
-
Step 5.
Finish as desired!
-
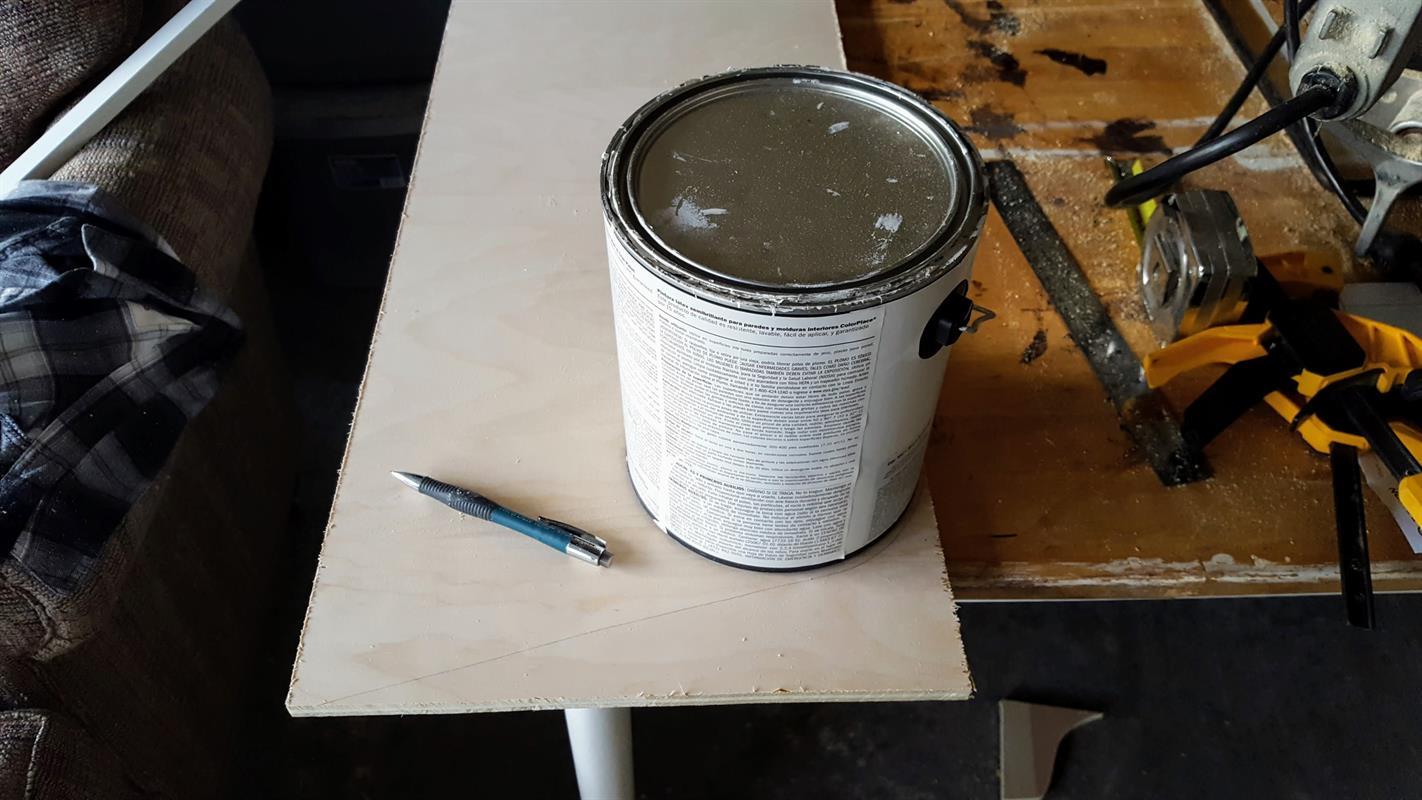
Round out the Side Pieces
Mark a point 1/2" from the top outside corner of the side piece (to account for the 1/2" thickness of the plywood back). Next, mark a point 3" down from the opposite side. Draw a diagonal line between those two points. Place a paint can (or anything with a decent circumference) with its sides tangent to the diagonal line and long edge of the side piece. Trace the curve and cut it out with a jigsaw.
Or if you have a better method, go for that!