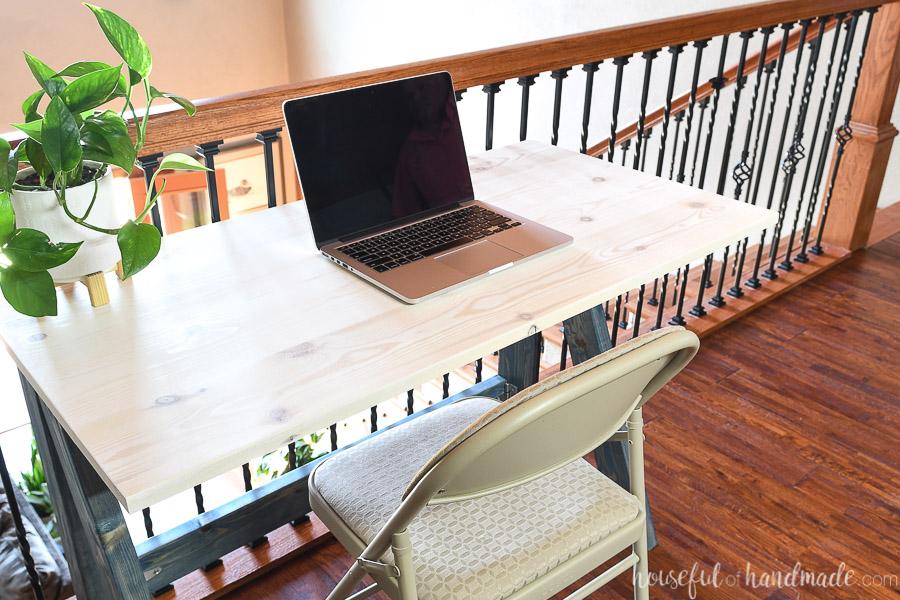
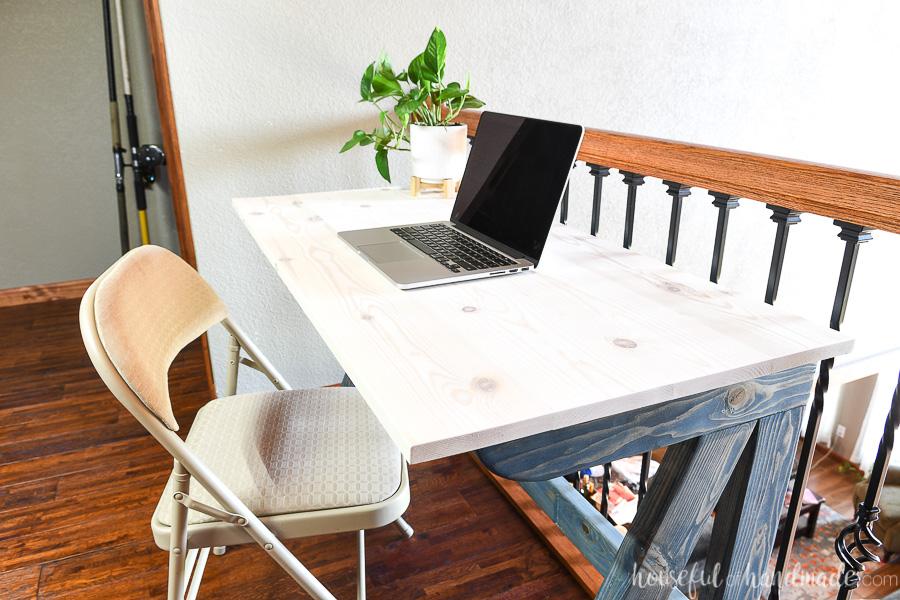


Add an extra desk to any space with this easy to build folding desk. Can be folded away into a closet or under a bed, then pulled out to make a work area. Perfect for working from home or for a temporary craft area.
Tools
Kreg Tools


Other Tools
-
Jigsaw

-
Miter Saw
-
Tape Measure
-
Drill (cordless)
-
Impact Driver
Materials
Wood Products
- 3 Board , 2x4 , 96"
- 2 Board , 1x6 , 96"
Hardware & Supplies
- 8 2 1/2" pocket hole screws
- 15 1 1/4" pocket hole screws
- 4 3" T-hinges
- 4 Gatehouse catch
- 1 Wood glue
- 24 #8 1" wood screws
Directions
-
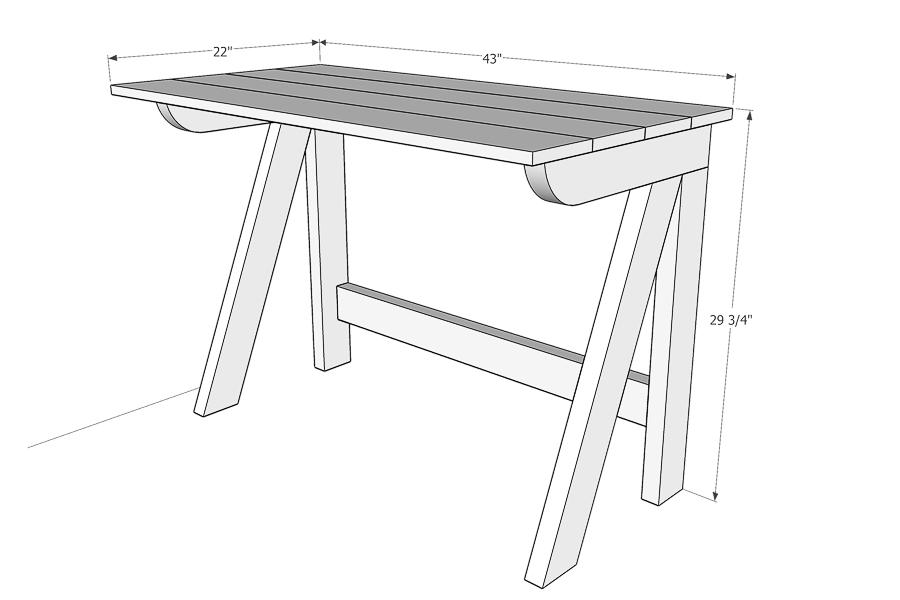
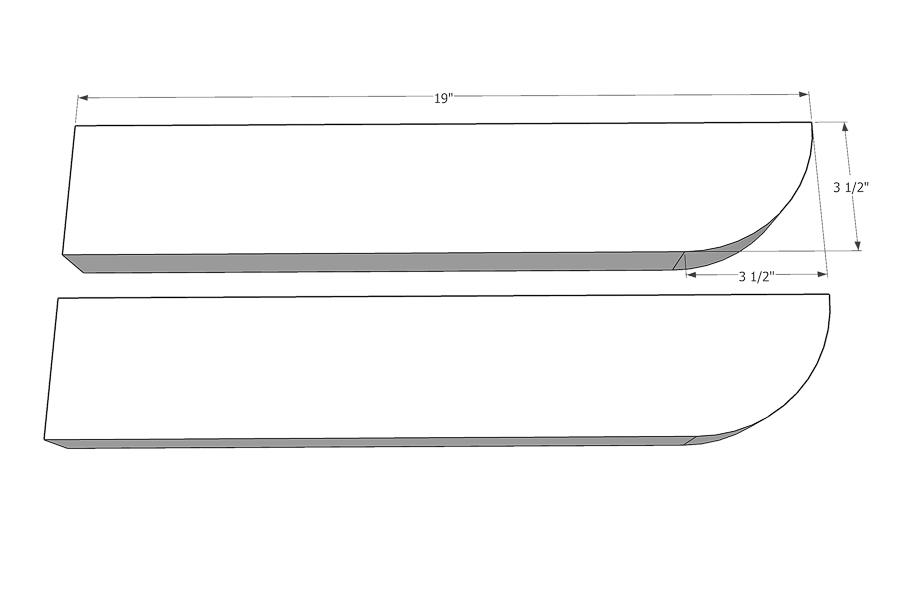
Cut leg tops
From the leg top boards, draw a round over on the front corner. Using a jig saw, cut the curve on the front of the leg tops.
-
Cut the angled legs
For the angled legs, cut the ends of the boards off at a 22 1/2 degree angle so the ends are parallel. With the ends cut off the boards should be 27 5/8" long from end to end.

-
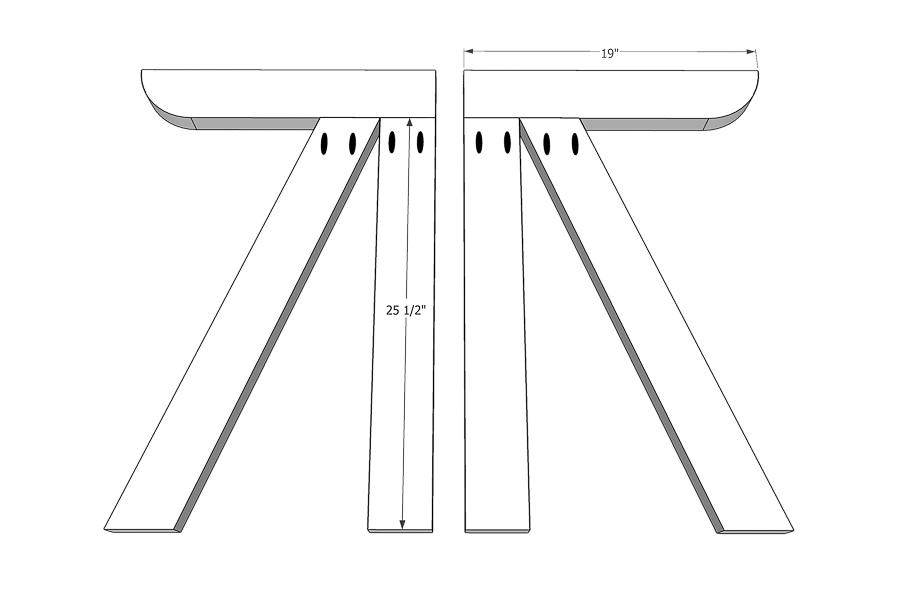
Assemble the legs
Set your Kreg pocket hole jig for 1 1/2" thick material. Add 2 pocket holes to the top of each back leg board and angled leg board. Make sure the pocket holes are on the inside of the legs pieces and the pieces are mirrored. Attach the back leg boards to the back of the leg top pieces so they are flush with the back. Then attach the angled leg boards to the leg tops so they are touching the top corner of the back leg boards. Secure with wood glue and 2 1/2" pocket hole screws.
-
Build the desk top
Set your Kreg pocket hole jig for 3/4" thick material. Drill 5 pocket holes along one long edge of 3 of the desk top boards. Secure the boards to each other along the long edge with 1 1/4" pocket hole screws and wood glue. Use the face clamps to keep the top joints flat.

-
Finish the pieces
Sand and stain/paint the finished pieces. Don't forget to also sand and stain/paint the desk back pieces that are not attached to anything yet.
-
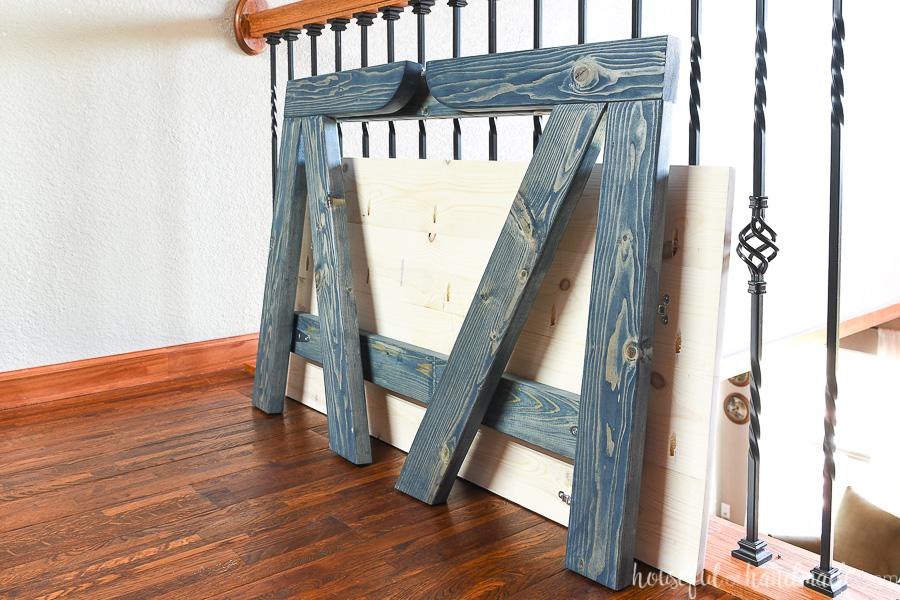
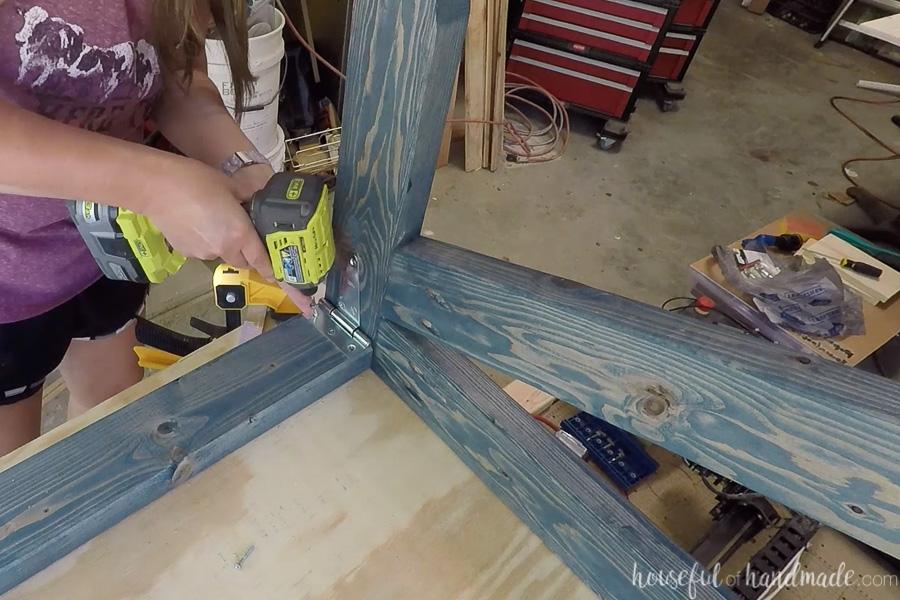
Assemble the folding desk frame
Using the t-hinges, attach one desk back piece to the top back of the leg pieces. Place the longer T of the hinge on the top leg piece. Then attach the second desk back piece so it is 5" up from the bottom of the assembled leg piece with another t-hinge. This time place the longer T of the hinge on the back piece so they are opposite. Secure with 1" long wood screws.
-
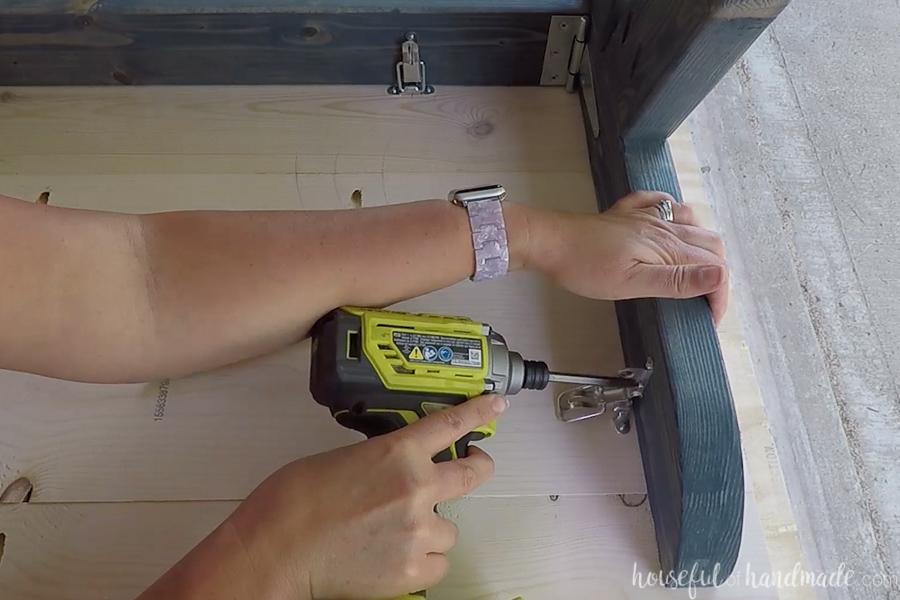
Attach catches
Use the 4 catches to secure the desk top to the top of the frame. To do this, place the top upside down on a work area and lay the legs on top of it. Center the legs so there is 1 1/2" overhang on each side and the top is flush at the back with the back of the legs. Place 2 catches on the top of the back legs about 6" in from the sides and one on the inside of the side legs about 5" in from the front. Attach the hook part to the bottom of the desk and the catch to the legs so they pull the desk top snug. Secure with included screws.
-
Set up your desk
To set up the desk, unclip the catches and fold the legs of the desk together. Move to where you want to set it up and open the legs fully. Center the desk top on the legs, lining up the catches. Secure the catches to secure the desk top!
-
Enjoy!
Enjoy your new work space. You can easily fold down your desk to store behind a sofa, in a closet, or under a bed until you need it. And make sure to visit me at Housefulofhandmade.com to for more things to to build!