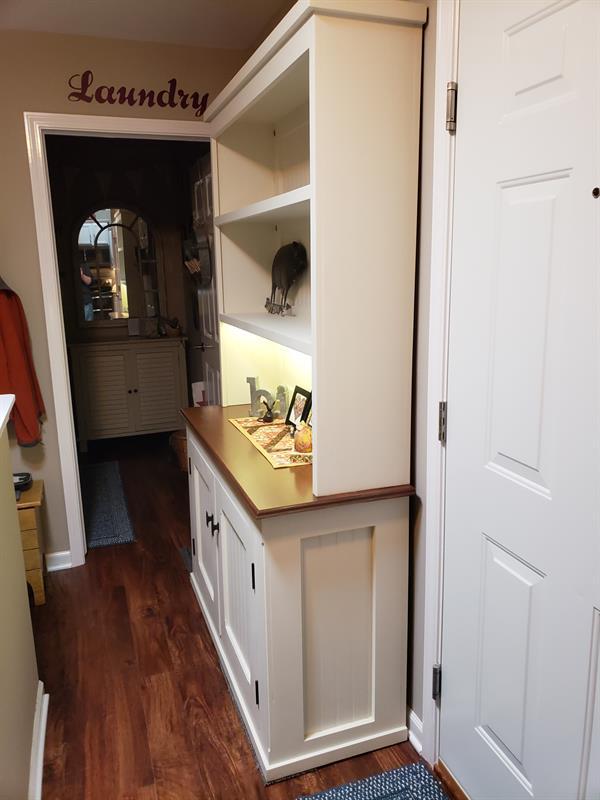
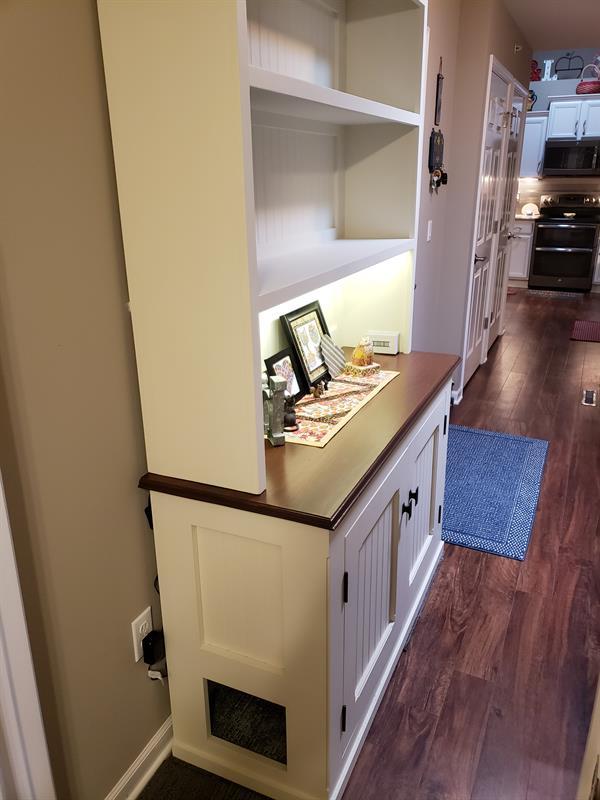


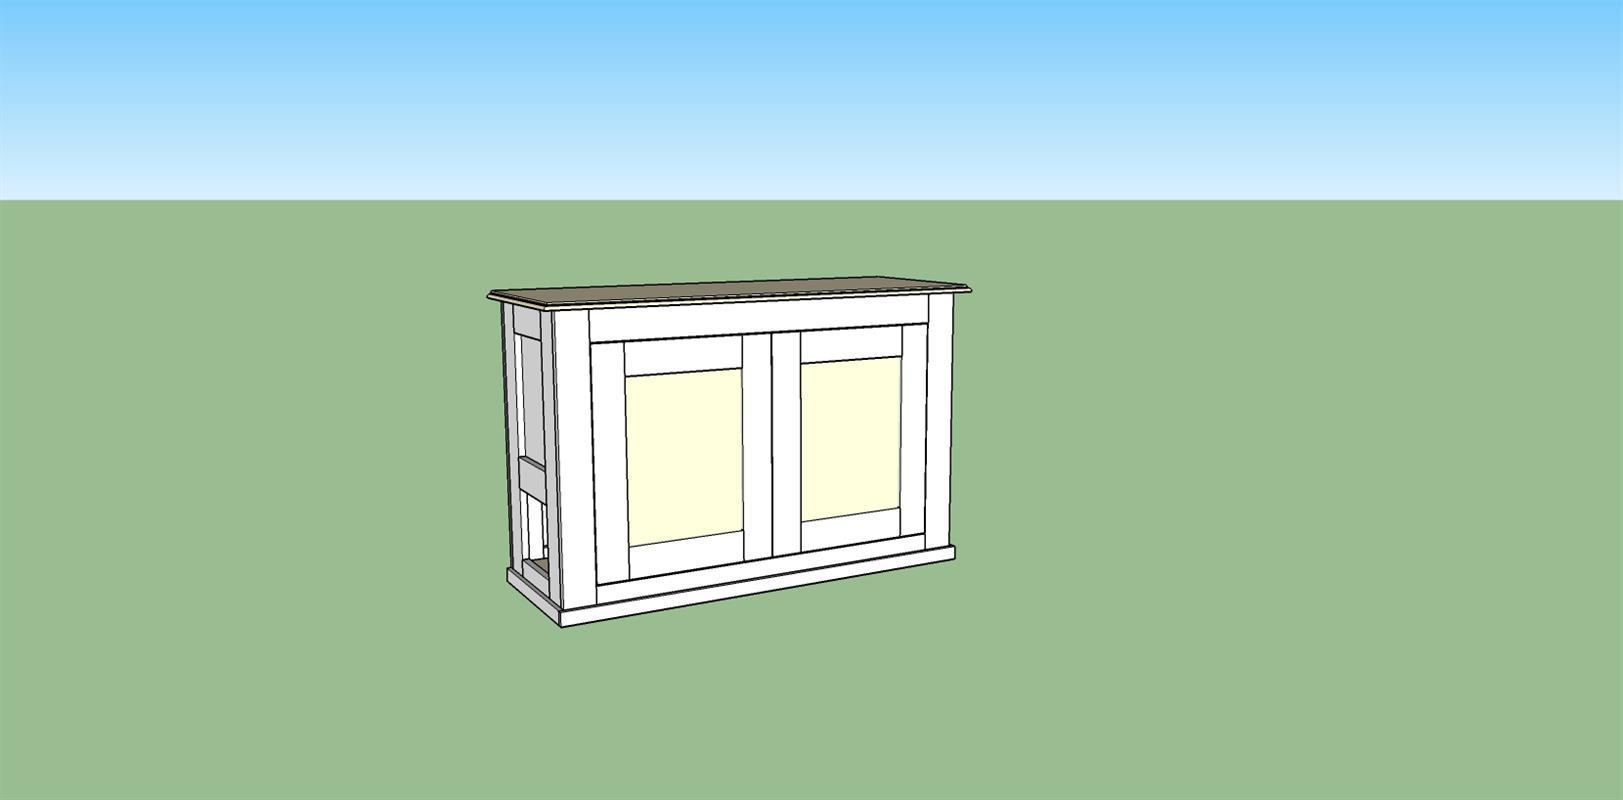
My wife needed a place to store her cookbooks so she could use them when we moved to a new home. Decided the best place was above the Cat Litter Box Cabinet that was constructed earlier this year.
Tools
Kreg Tools

Other Tools
-
Miter Saw

-
Table Saw
-
Tape Measure
-
Nail Gun
-
Router
-
Router Table
-
Sander
Materials
Wood Products
- 5 Board , 1x12 , 48"
- 7 Board , 1x4 , 48"
- 1 Board , 1x2 , 72"
- 1 Plywood , 1/4" Thick , 48"
Hardware & Supplies
- 50 Pocket hole screws
Directions
-
Construct the base
If you have not already constructed the CAT LITTER BOX CABINET..... see plan and construct the base
-
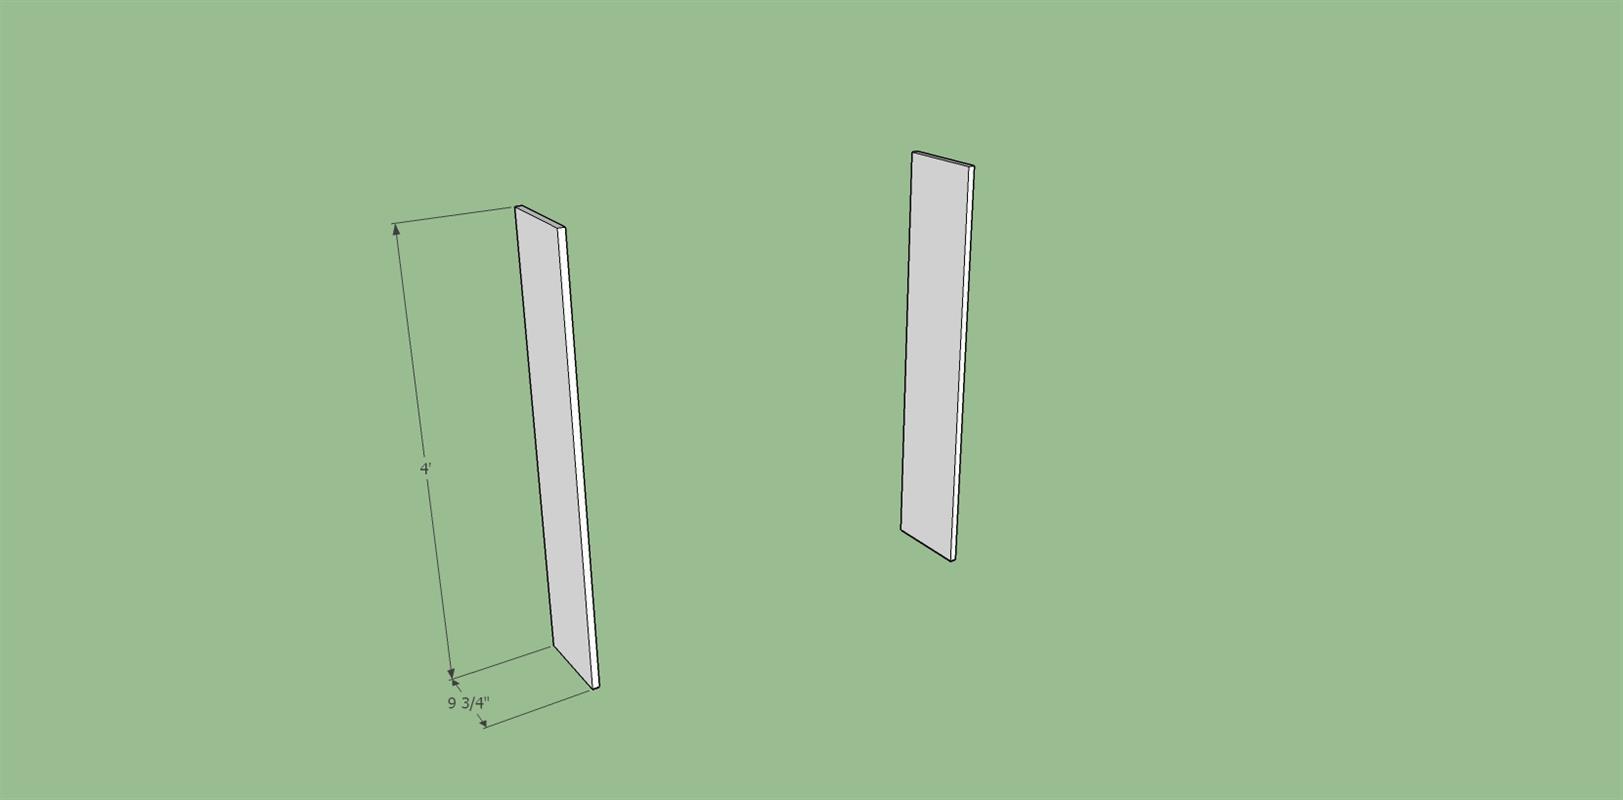
Cut the side panels
Cut (2) side panels to the dimensions shown out of 1x12 material cut down to 9 3/4"
-
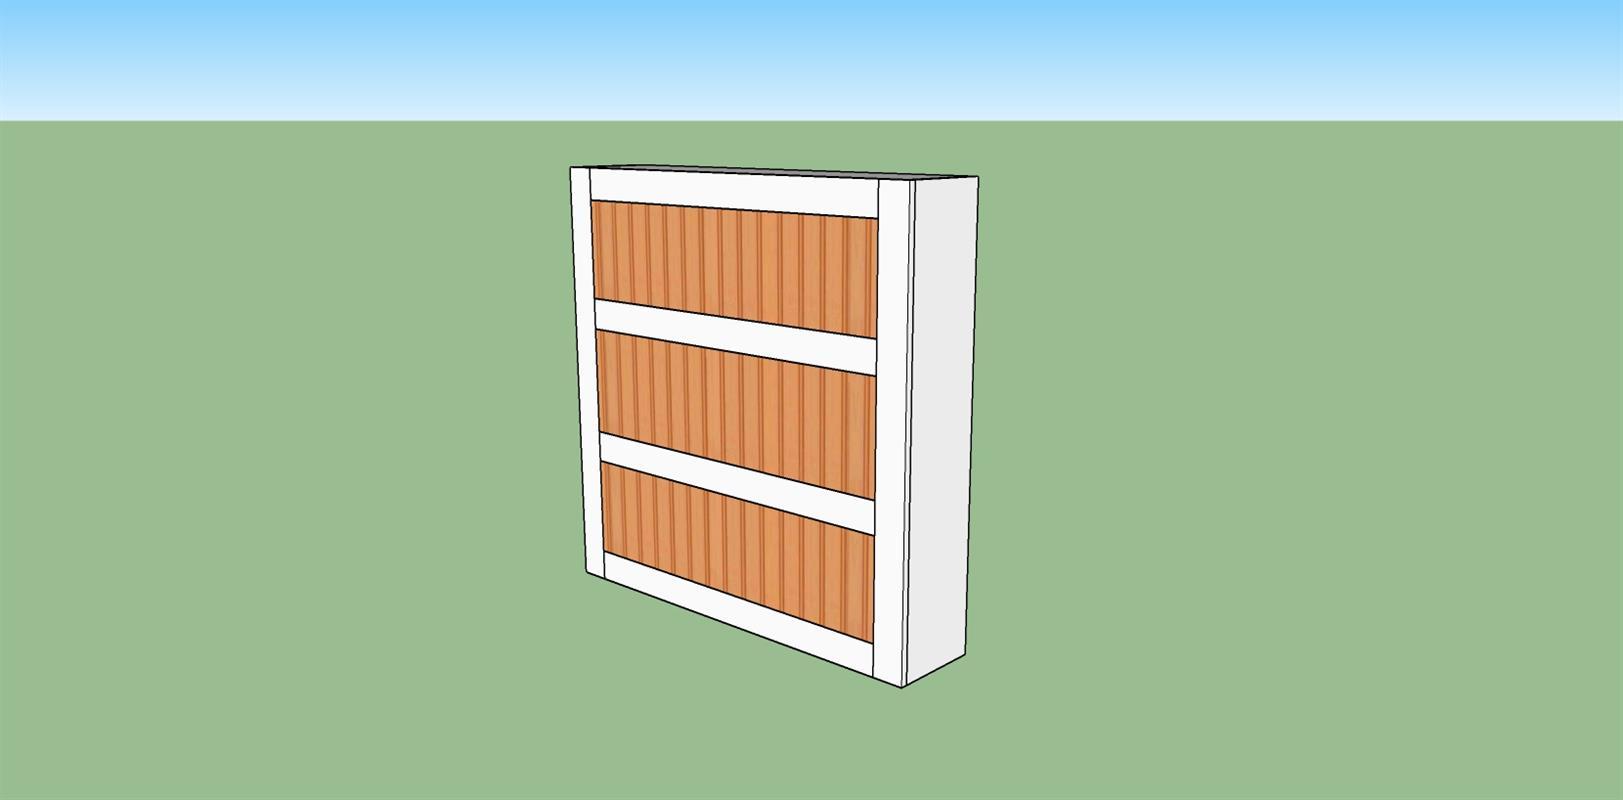
Cut the back panel pieces
Cut the back panel pieces from 1x4 material. Drill (2) pocket holes in each end of the horizontal pieces and join to the vertical pieces with
1 1/4" pocket hole screws. Also route a 1/4" rabbet along the inside edge of each piece to accept the plywood/beadboard in the next step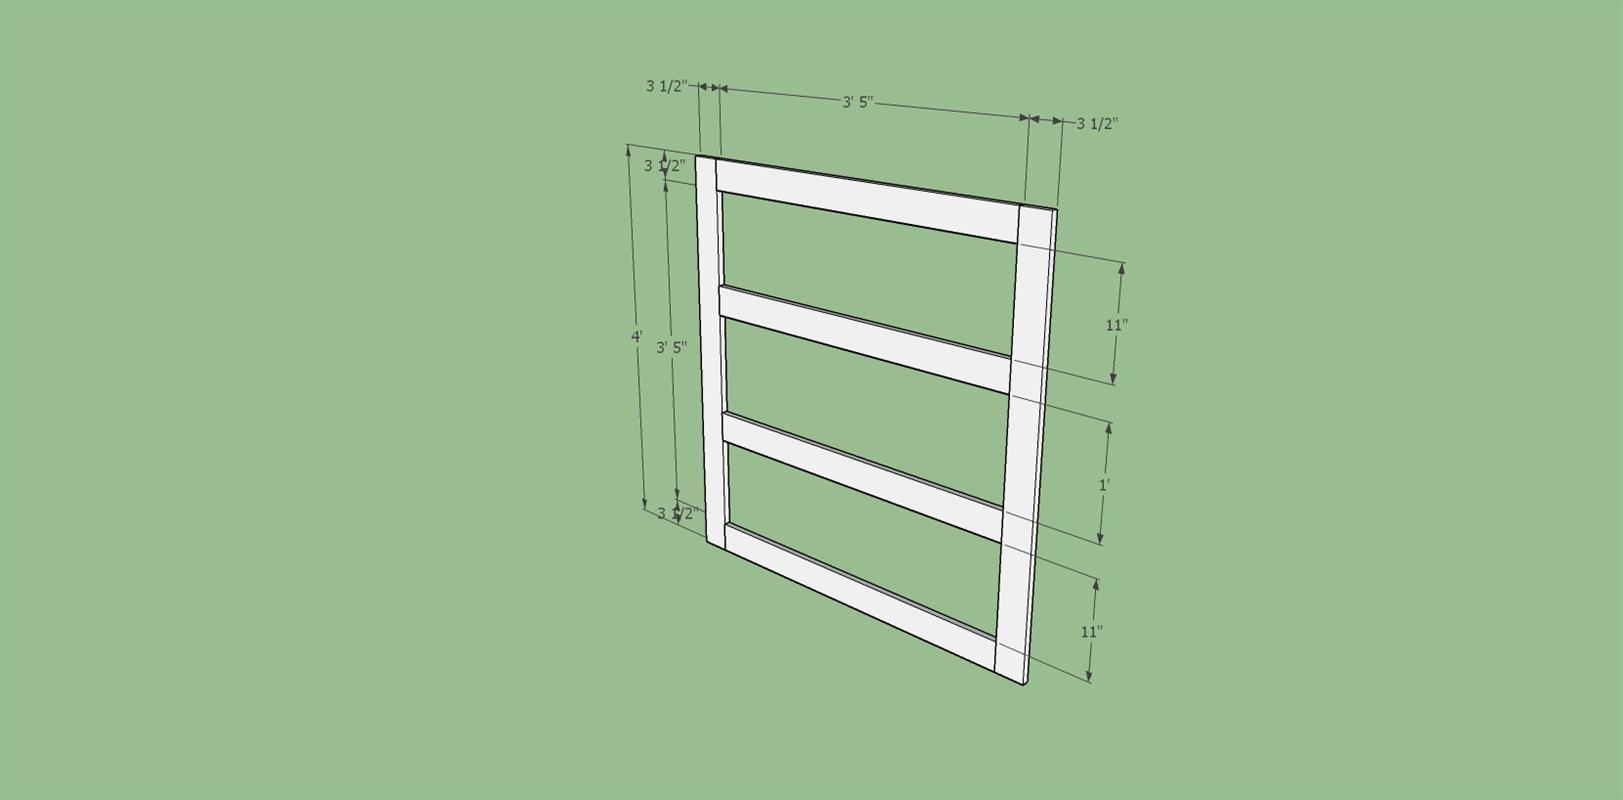
-
Cut the shelves
Cut (3) shelves to the dimensions shown out of 1x12 material cut down to
9 3/4". Also drill three pocket holes on the bottom in each end of each shelf and connect to the side panels with two 1 1/4" pocket hole screws.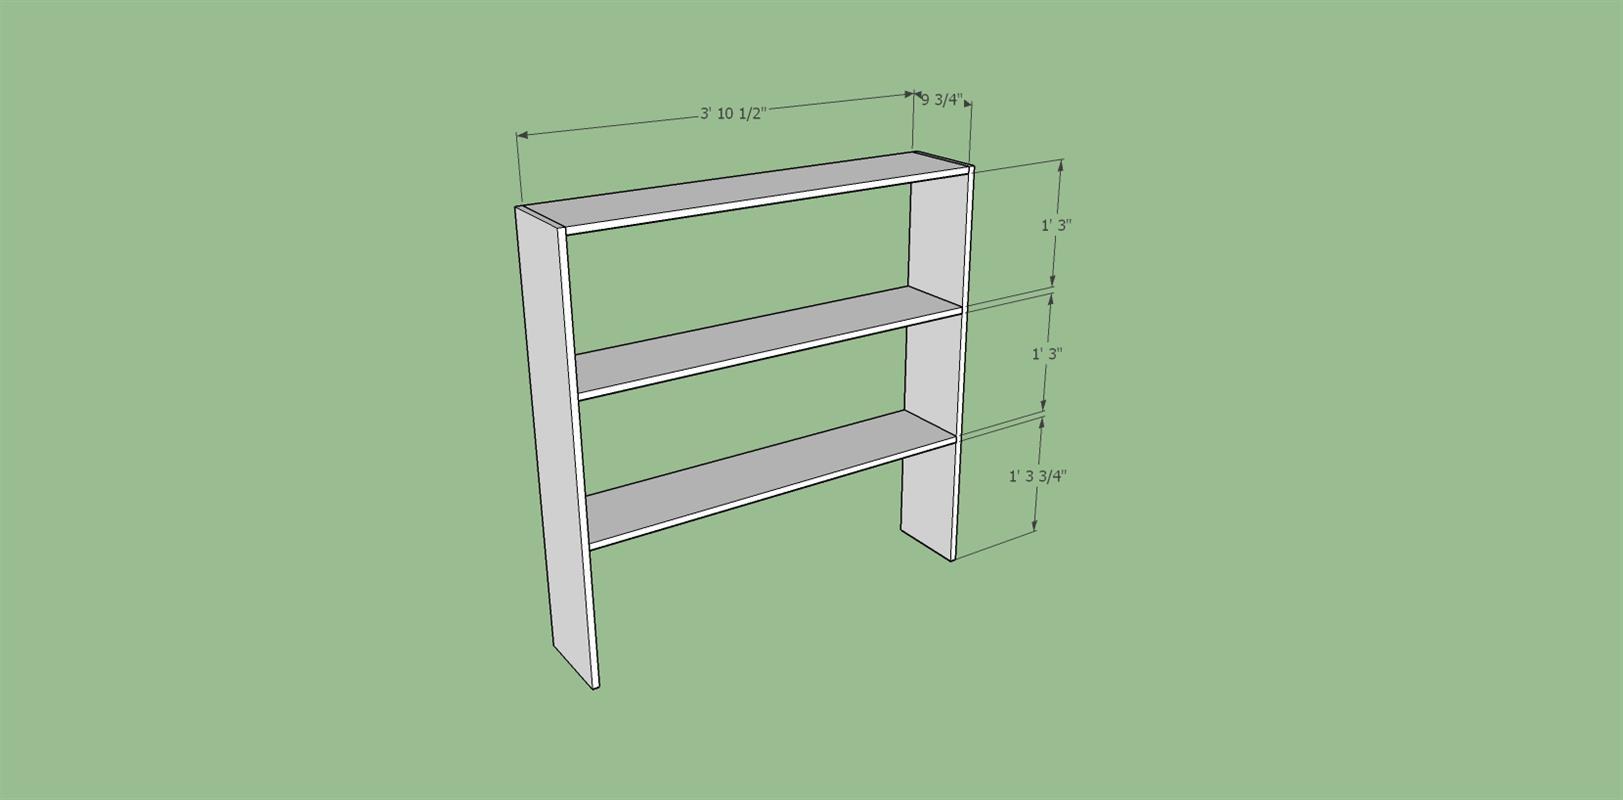
-
Attach the back panel
Attach the back panel to the shelves and side panels by gluing and nailing with your nail gun
-
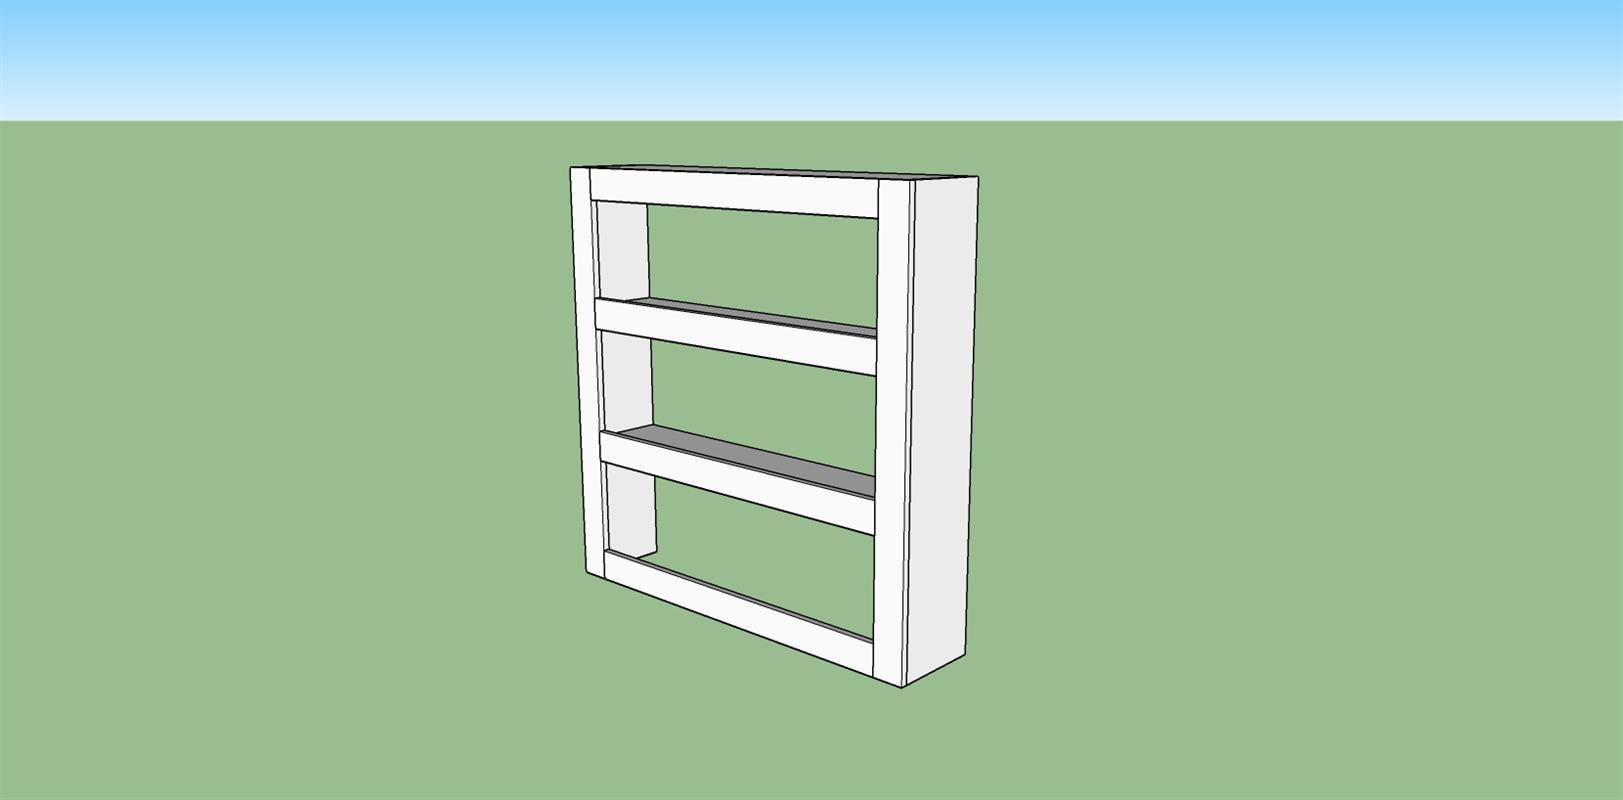
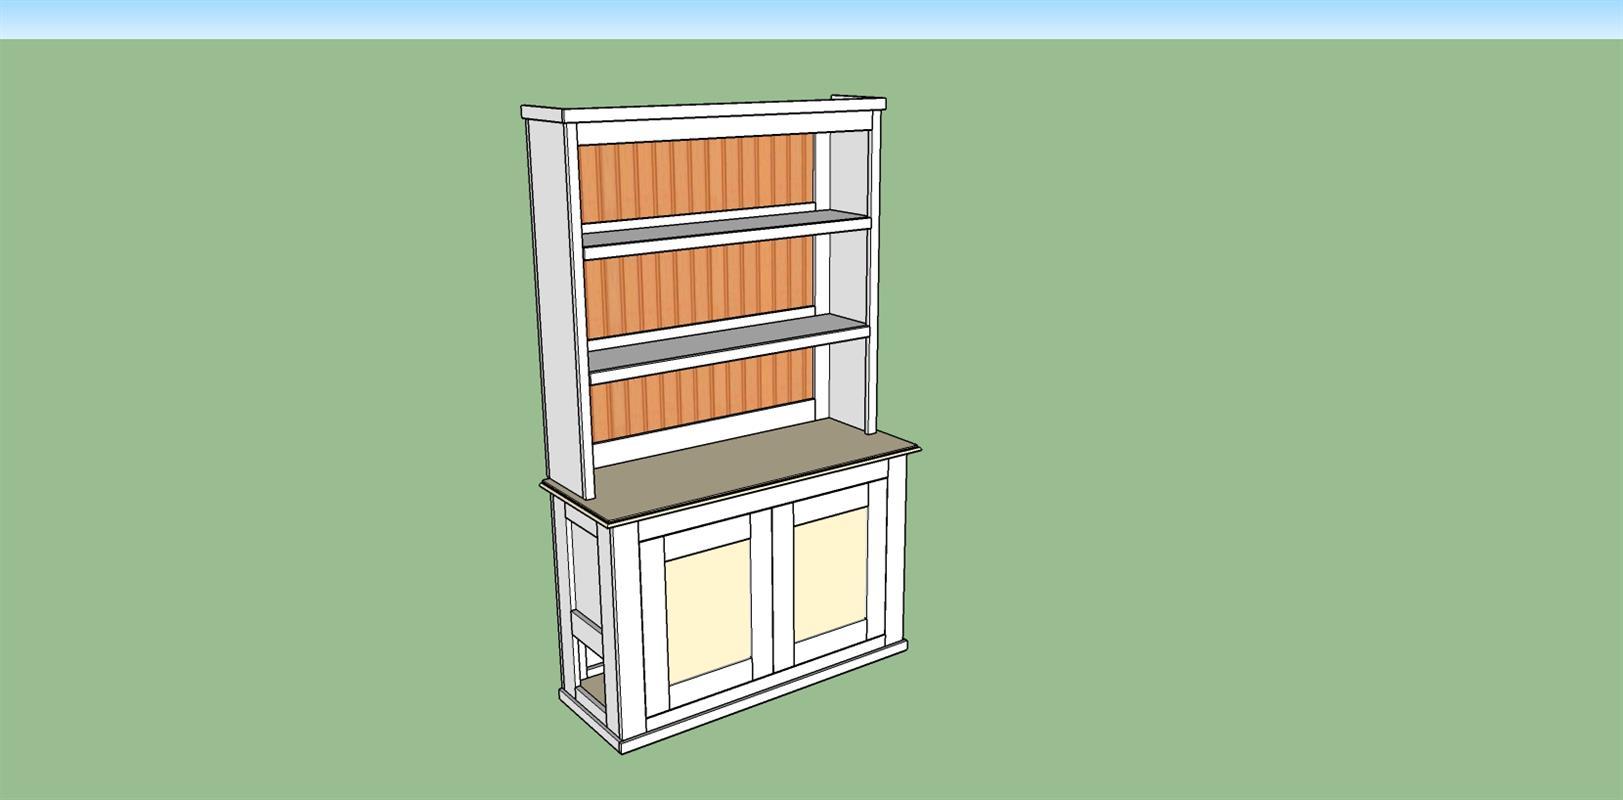
View of assembly from the front
View of the assembly from the front
-
Construct the face frame
Construct the face from following the dimensions shown using 1x2 material cut off of the 1x12's used for shelving and side panels. Join the parts by drilling pocket holes and using 1 1/4" pocket holes on the back side of the parts.
Install the face frame to the shelf box by gluing and using your nail gun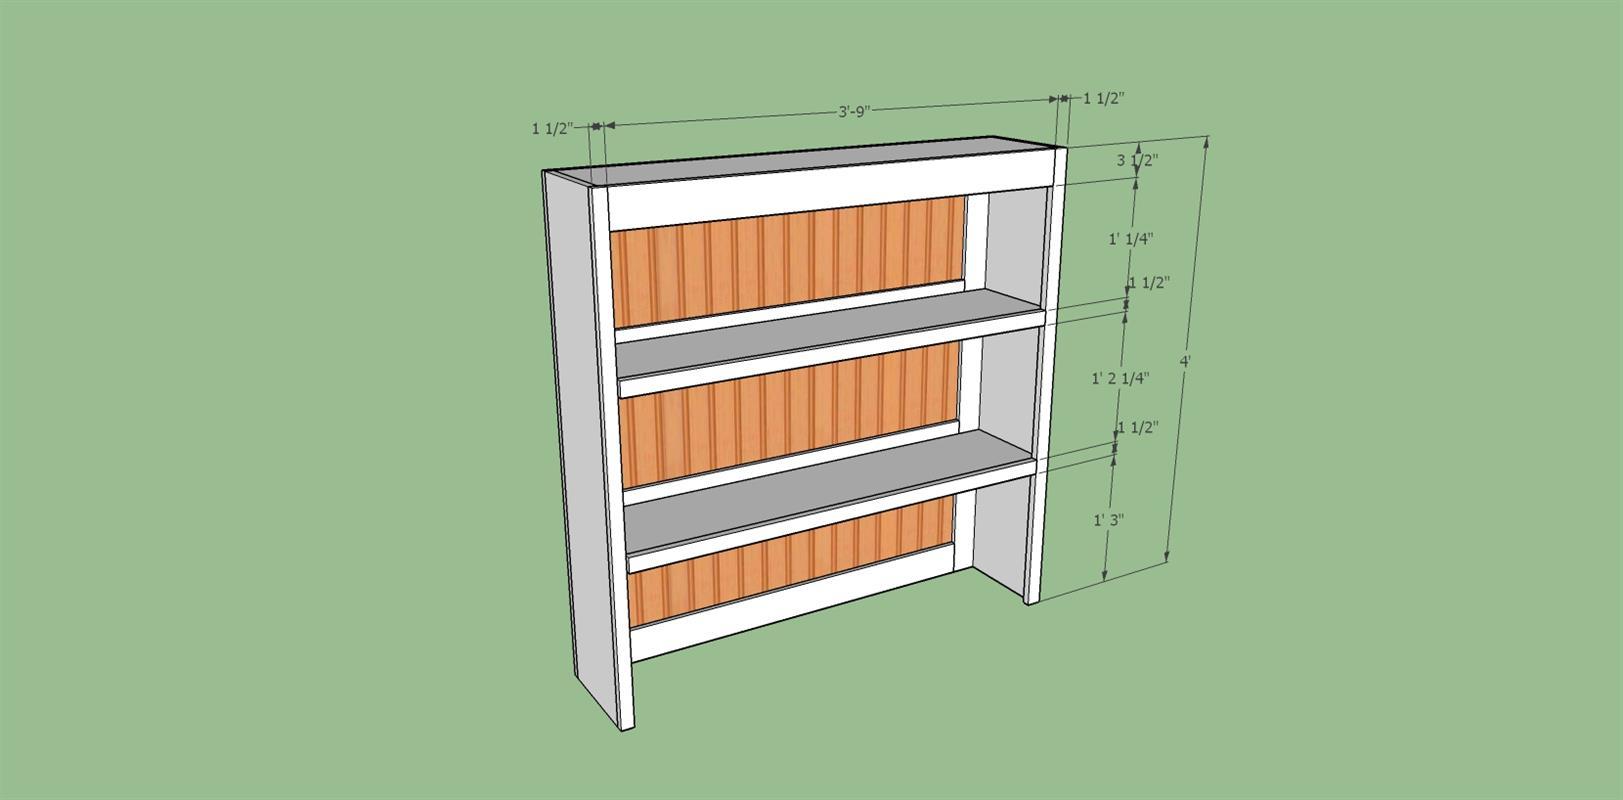
-
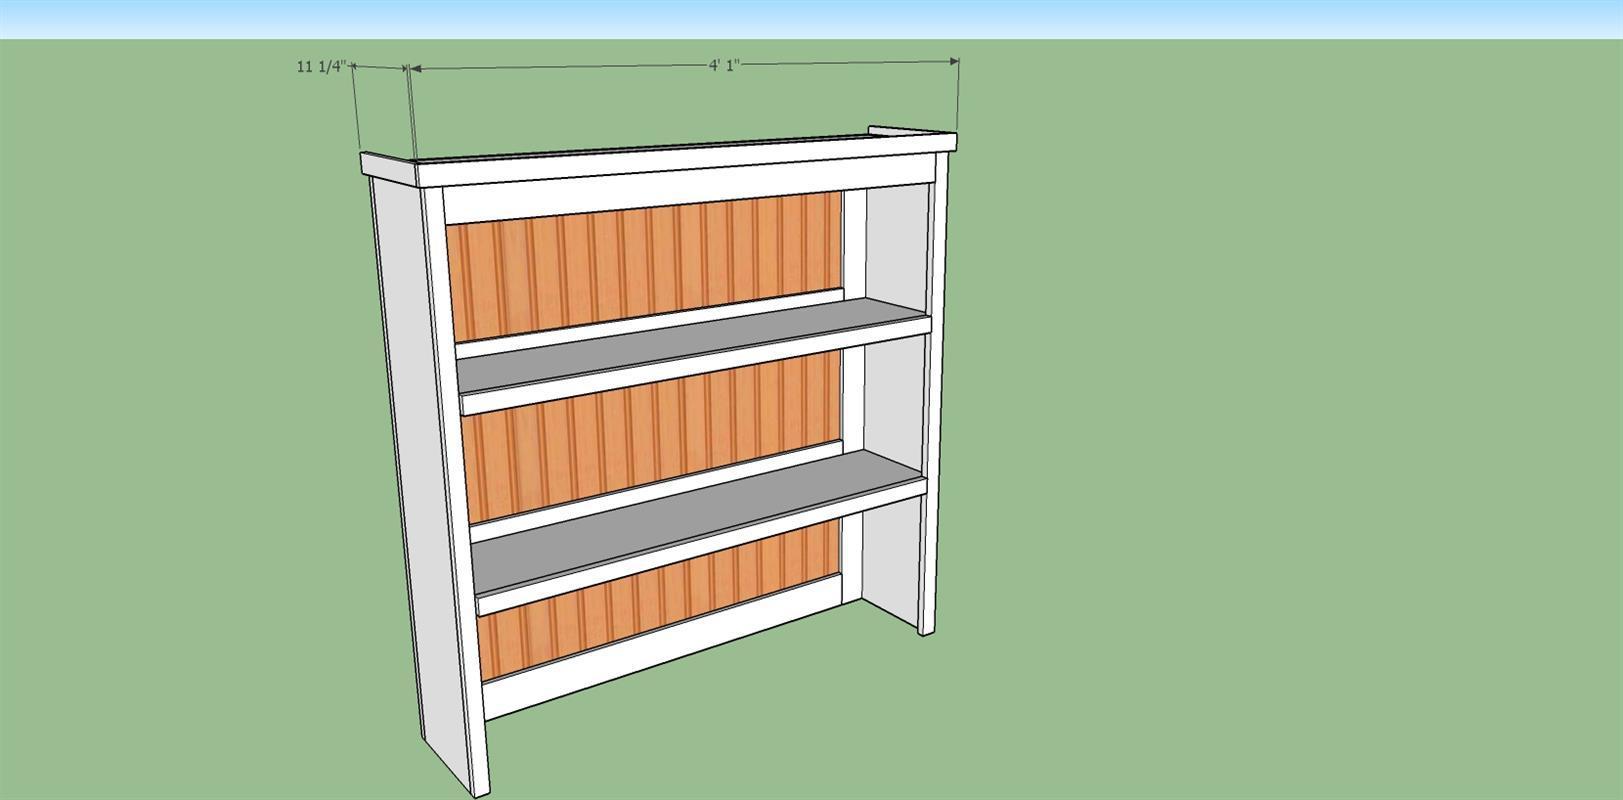
Attach the crown
Cut crown trim pieces per dimensions shown out of 1x2 material. Add crown trim to the assembly using your nail gun.
-
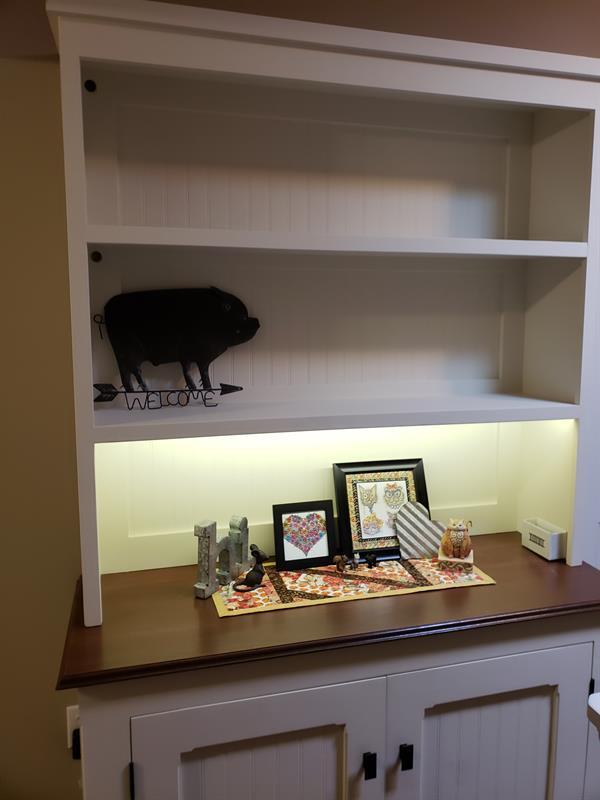
Finish
Finish the book shelf by painting or staining based on the materials you used.
-
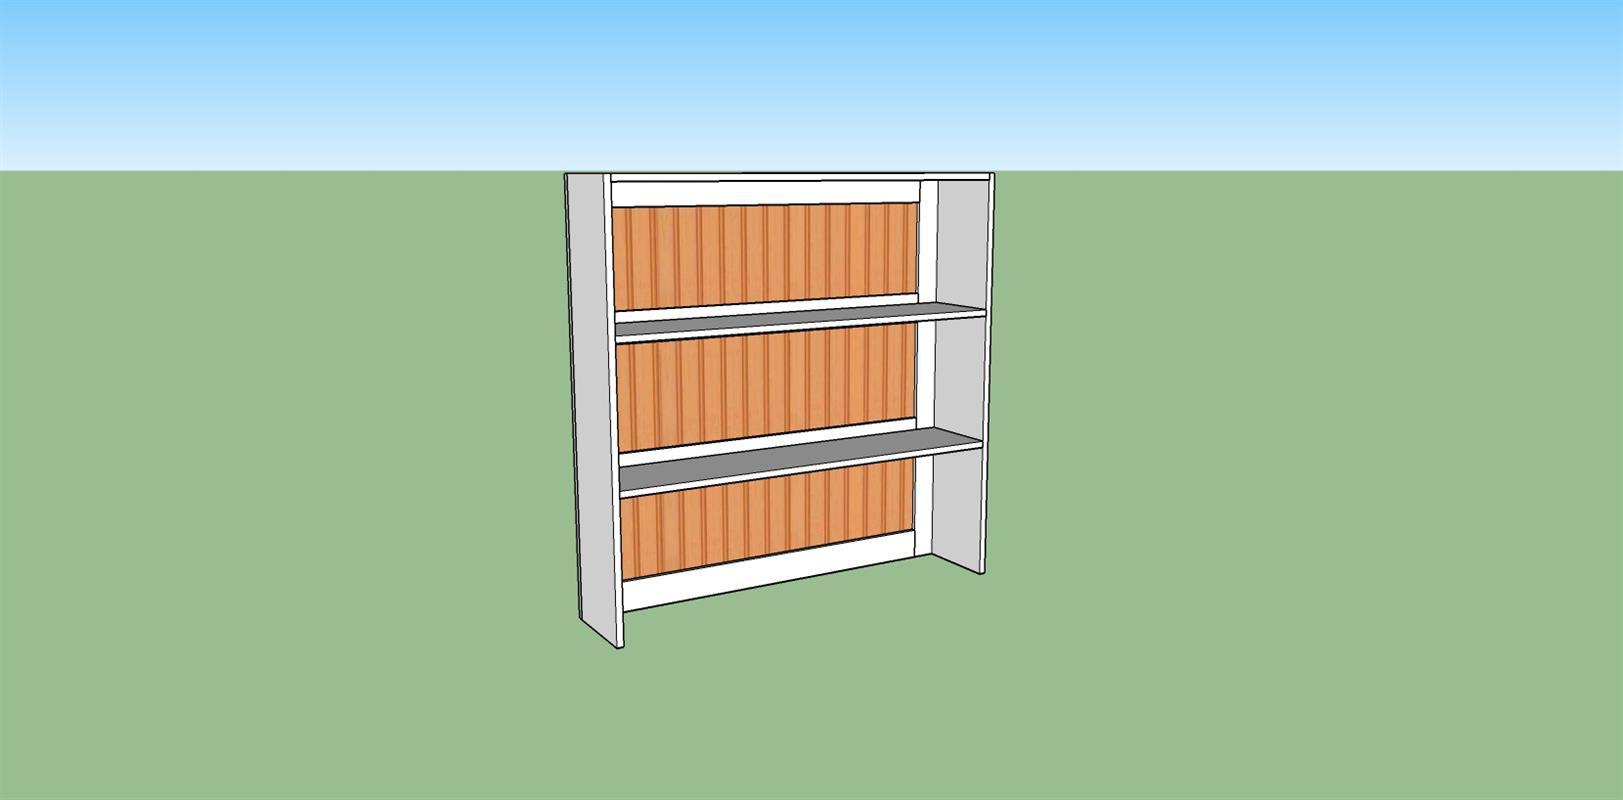
Install the beadboad/plywood
Install beadboard or plywood into the back panel assembly