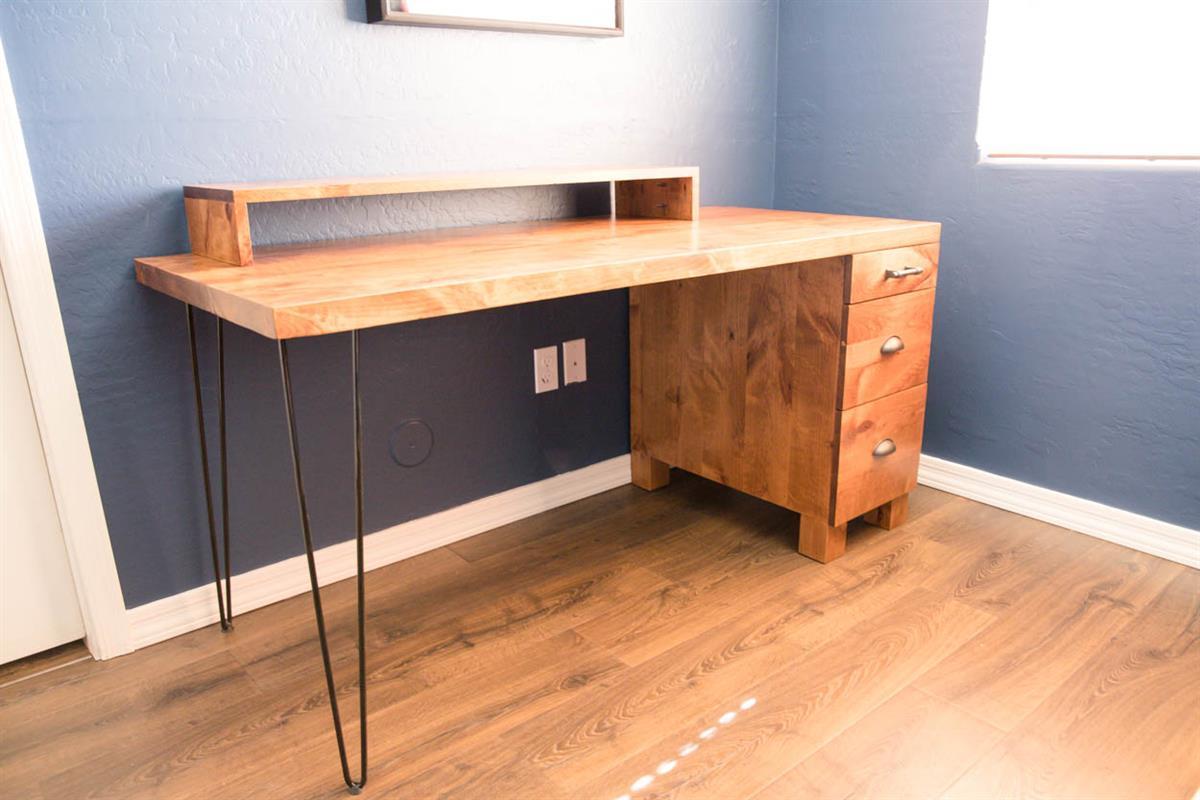
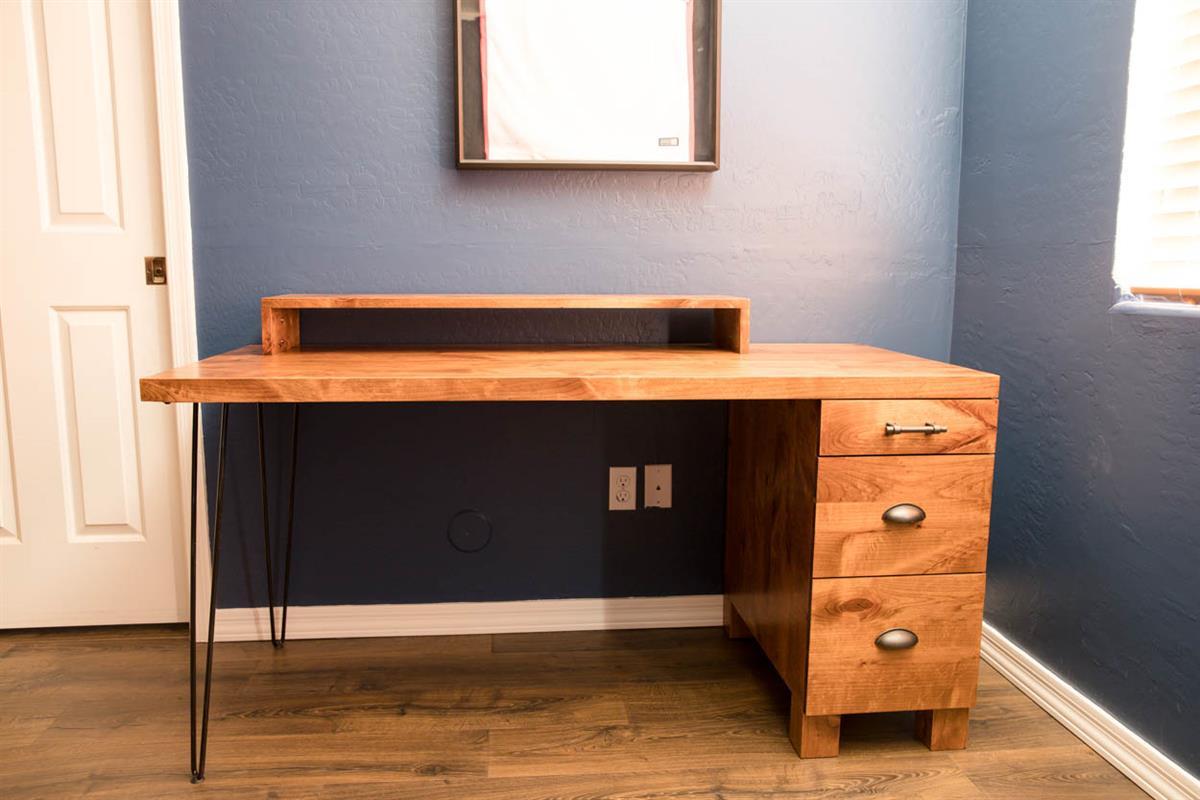
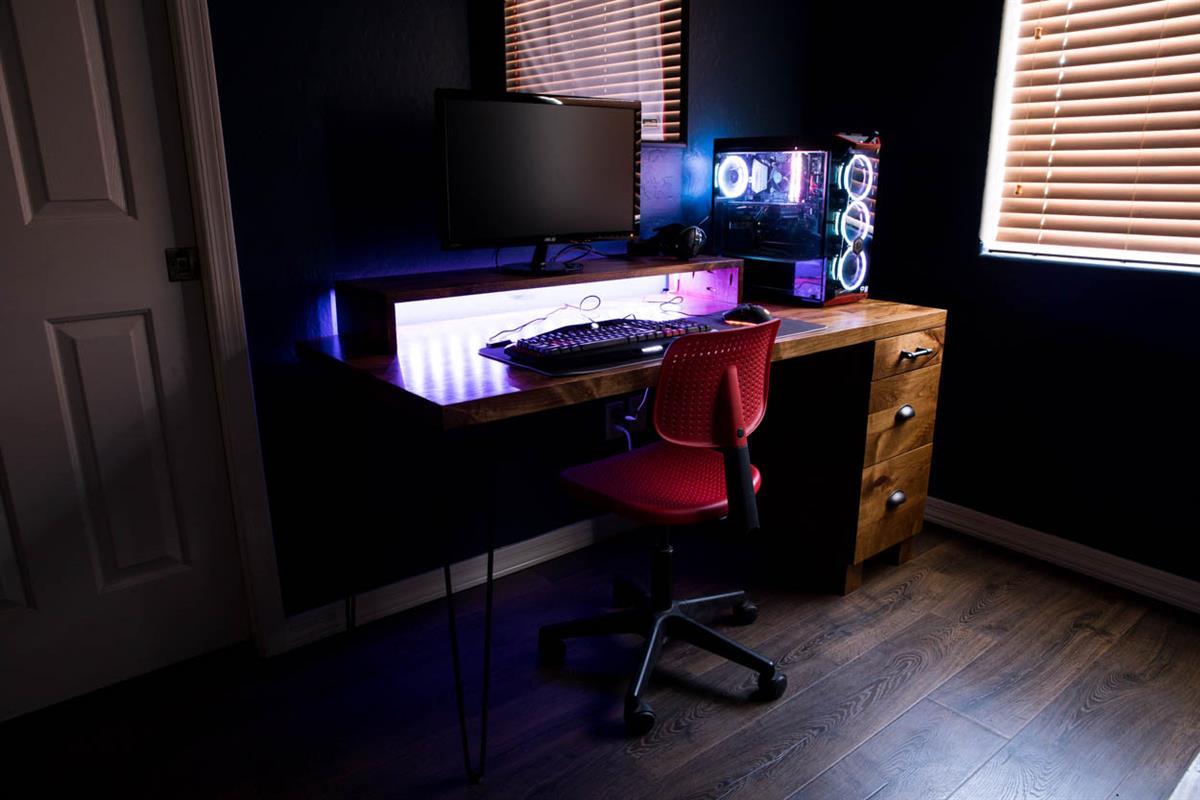
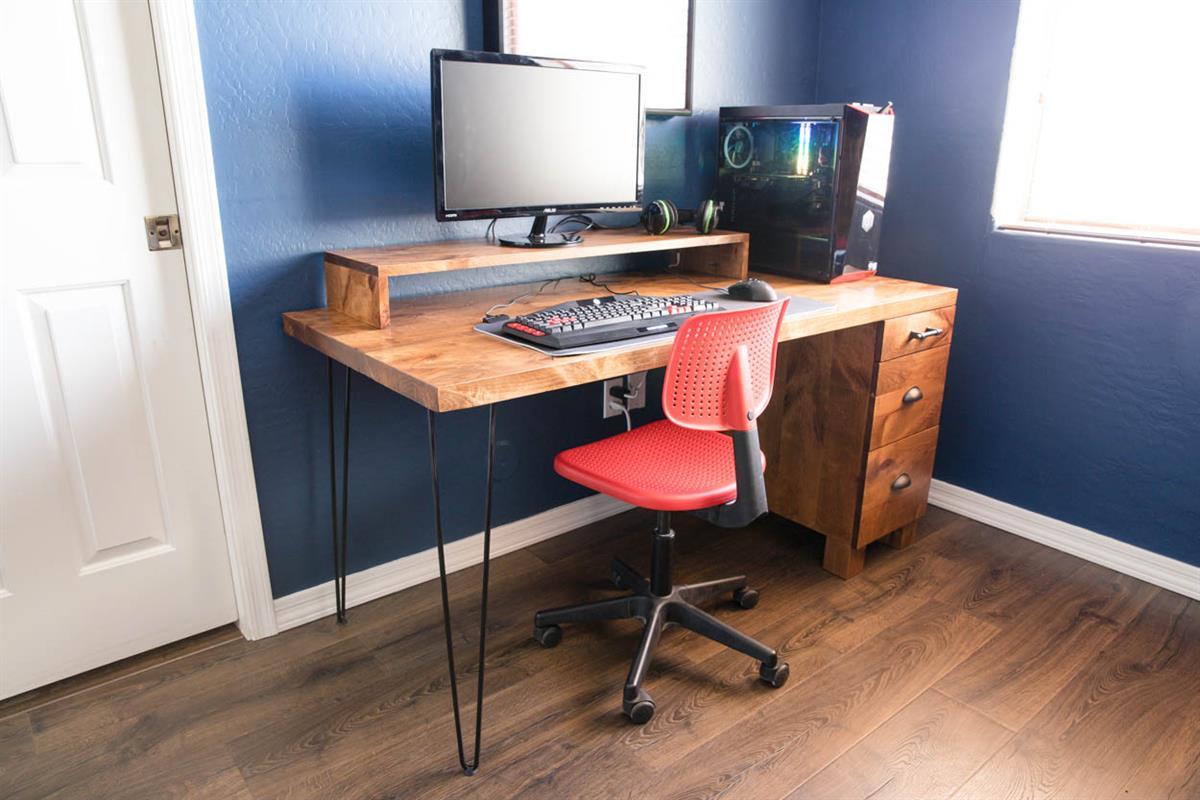
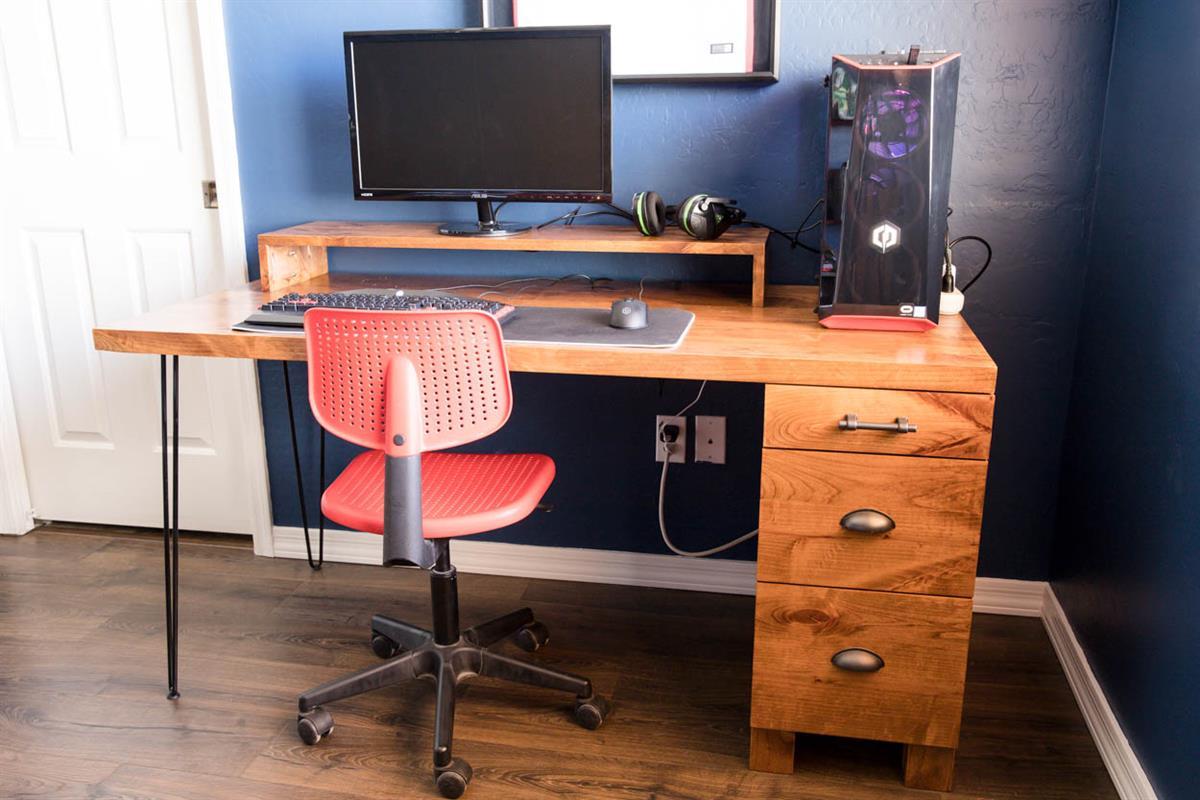


With the addition of hairpin legs, this gaming computer desk is a cross between modern and rustic. The extra long desk accommodates a larger mousepad and the addition of the LED lighting takes it to the next level. There’s also plenty of storage for headsets and office supplies.
Tools
Kreg Tools

Other Tools
-
Jointer

-
Miter Saw
-
Square
-
Table Saw
-
Tape Measure
-
Thickness Planer
-
Clamps
-
Drill (cordless)
-
Impact Driver
-
Router
-
Router Table
-
Sander
-
Air Compressor
-
Shop Vacuum
-
-
Tape Measure
Materials
Wood Products
- 5 Board , 2x6 , 96"
- 1 Plywood , 3/4" Thick , Full Sheet
- 1 Plywood , 1/4" Thick , Half Sheet
- 1 Board , 4x4 , 24"
- 1 Board , 1x4 , 24"
- 5 Board , 1x6 , 96"
Hardware & Supplies
- 3 18" side mount drawer slide sets
- 2 28" hairpin legs
- 3 Drawer pulls
- 1 Stain of choice (ex. provincial by Varathane)
- 1 Finish of choice (ex. wipe on polyurethane)
- 1 Orbital sandpaper discs (80, 120, 220 grit)
- 1 80 grit sanding belt for belt sander
- 1 220 grit sanding block
Directions
-
Build Desk Top
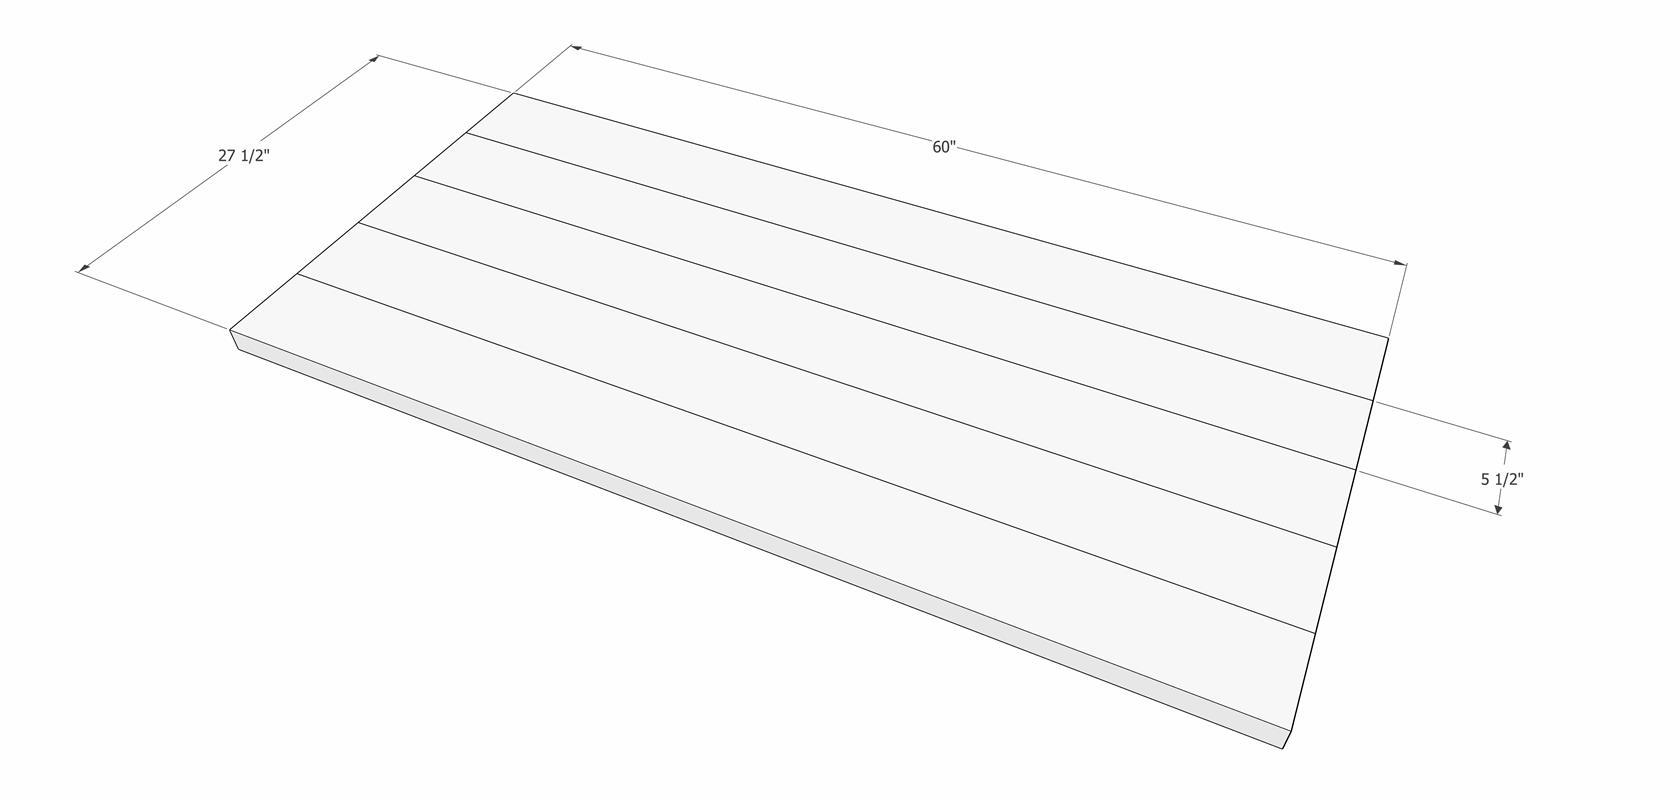
Glue up the 2x6 boards to make the desk top. This desktop was made of rough-cut knotty alder, which was milled to the nominal thickness and width of a 2x6 board. If using pine boards purchased from a home improvement store, pocket hole joinery for the desk top is highly recommended.
Apply wood glue to the entire edge of each of the boards. Clamp together and let cure for several hours or overnight. If using pocket joinery, drill 1 1/2" pocket holes into the sides of the boards and join together with 2 1/2" pocket screws, in addition to the wood glue.
-
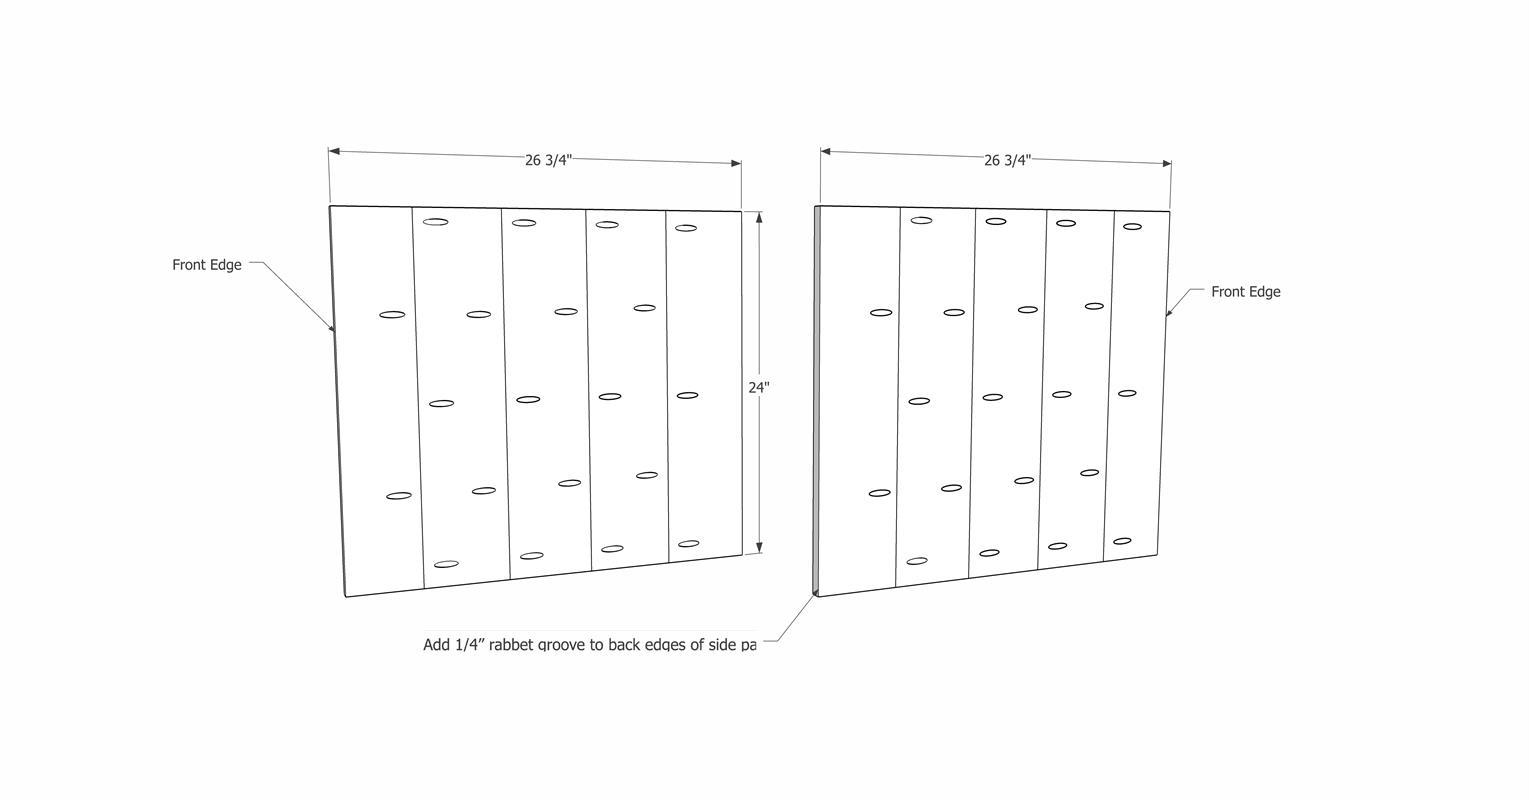
Build side panels
Assemble the side panels of the desk. Drill 3/4" pocket holes into each of the 24" x 1x6 boards. Attach the boards together with wood glue and 1 1/4" pocket screws.
Measure the width of the desk top. The side panels should be 3/4" narrower than the desk top and will need to be trimmed to size. (Ex. desk top is 27 1/2" wide, side panels should be trimmed to 26 3/4" wide). Trim the front edge of the side panels using a table saw, circular saw with fence, or Kreg Adaptive Cutting System.
On the back edge of the side panels, use a rabbeting bit to route a 1/4" deep x 1/2" wide groove to accommodate a 1/4" plywood backing.
Drill 3/4" pocket holes into the top edge of the side panels to attach the top. (NOT SHOWN IN DIAGRAM)
-
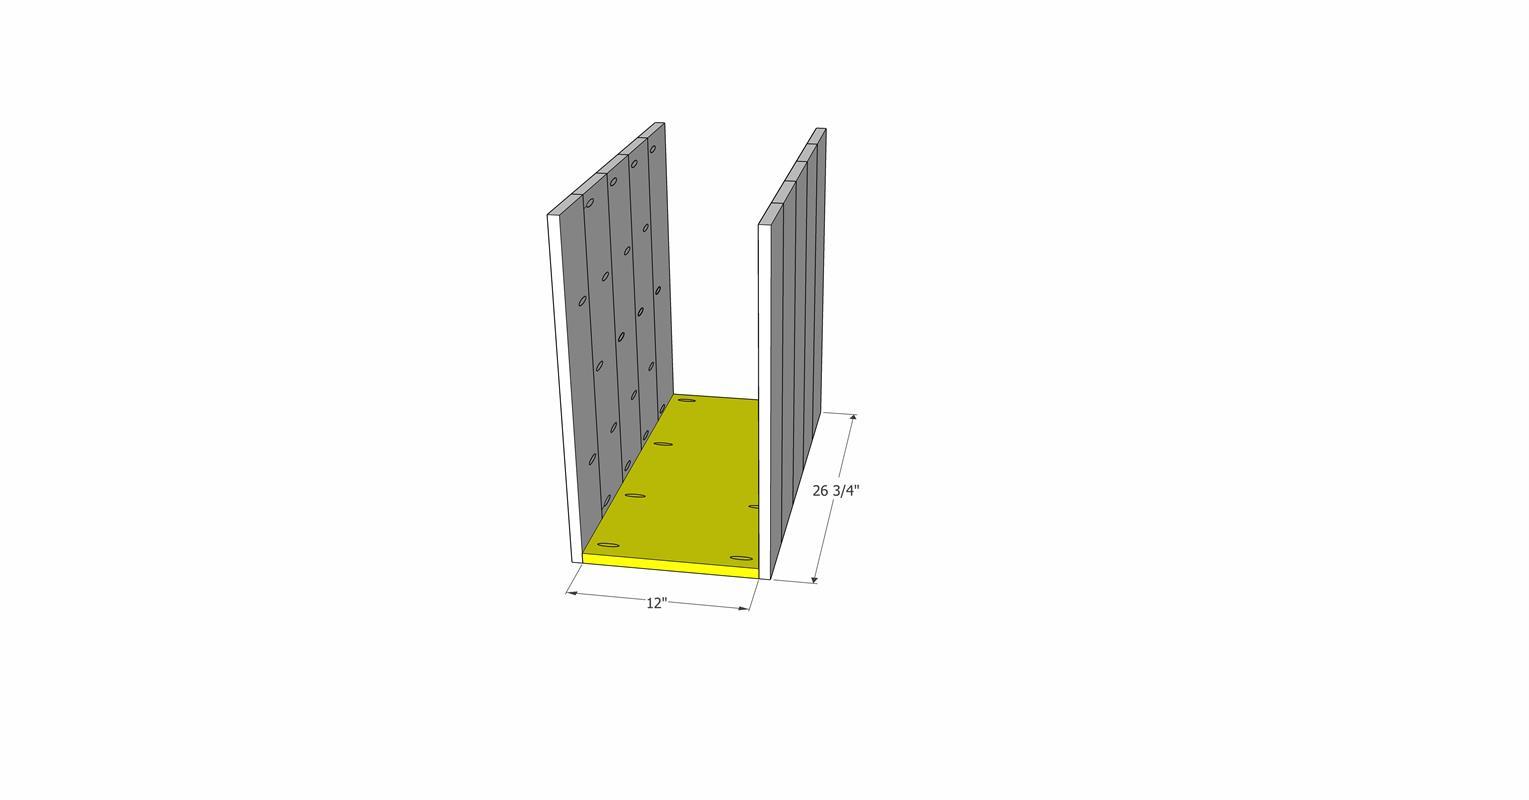
Attach cabinet bottom
Drill 3/4" pocket holes into each of the long sides of the 3/4" plywood that makes up the cabinet bottom. Using wood glue and 1 1/4" pocket screws, attach the plywood so it is flush with the bottom edge of the side panels.
-
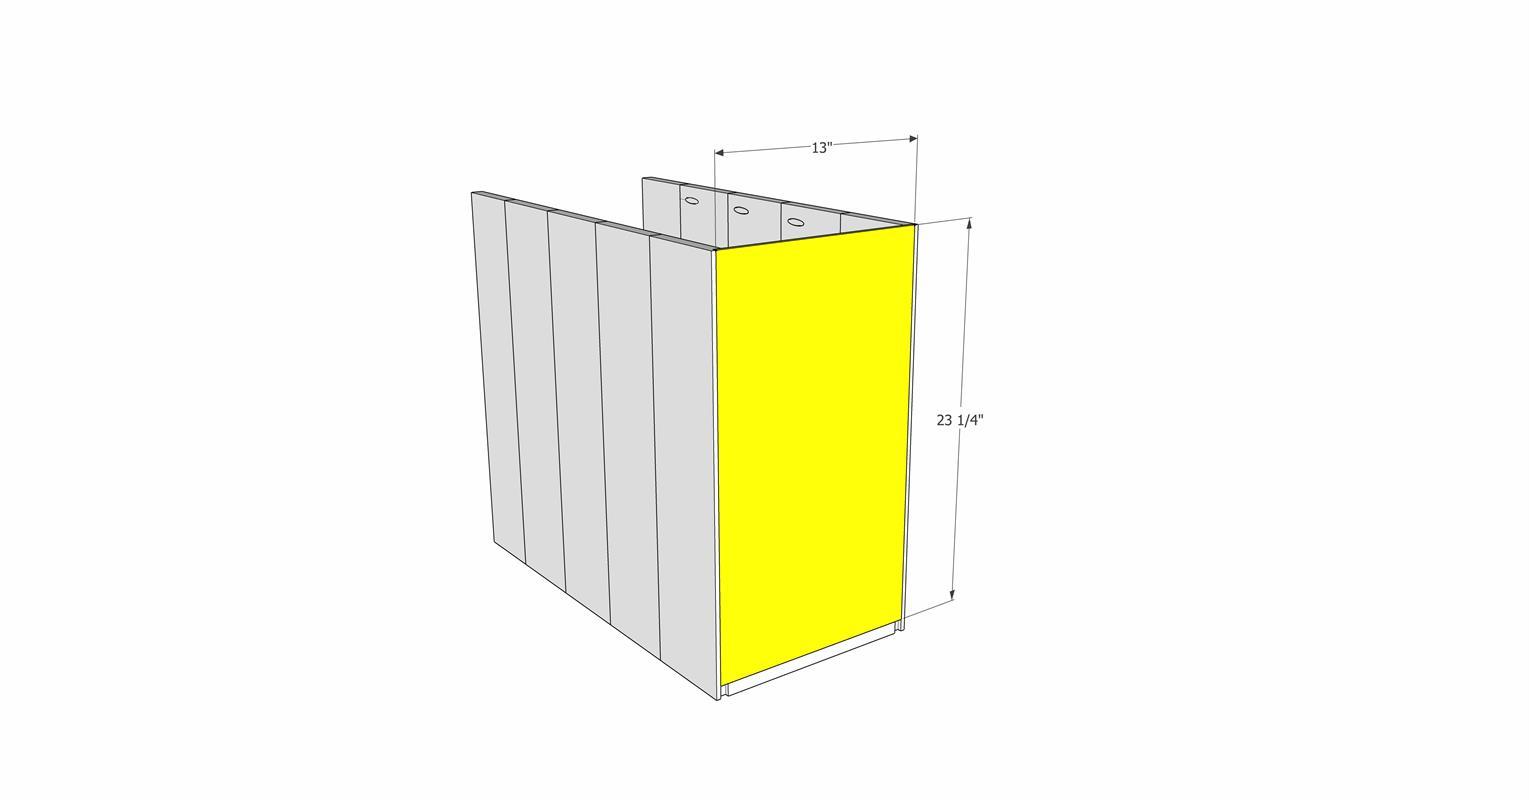
Attach cabinet back
Cut a 1/4" thick piece of plywood to 13" wide and 23 1/4" long. Apply a bead of wood glue to each of the rabbeted grooves on the side panels and attach the plywood backing with 3/4" brad nails or narrow crown staples.
-
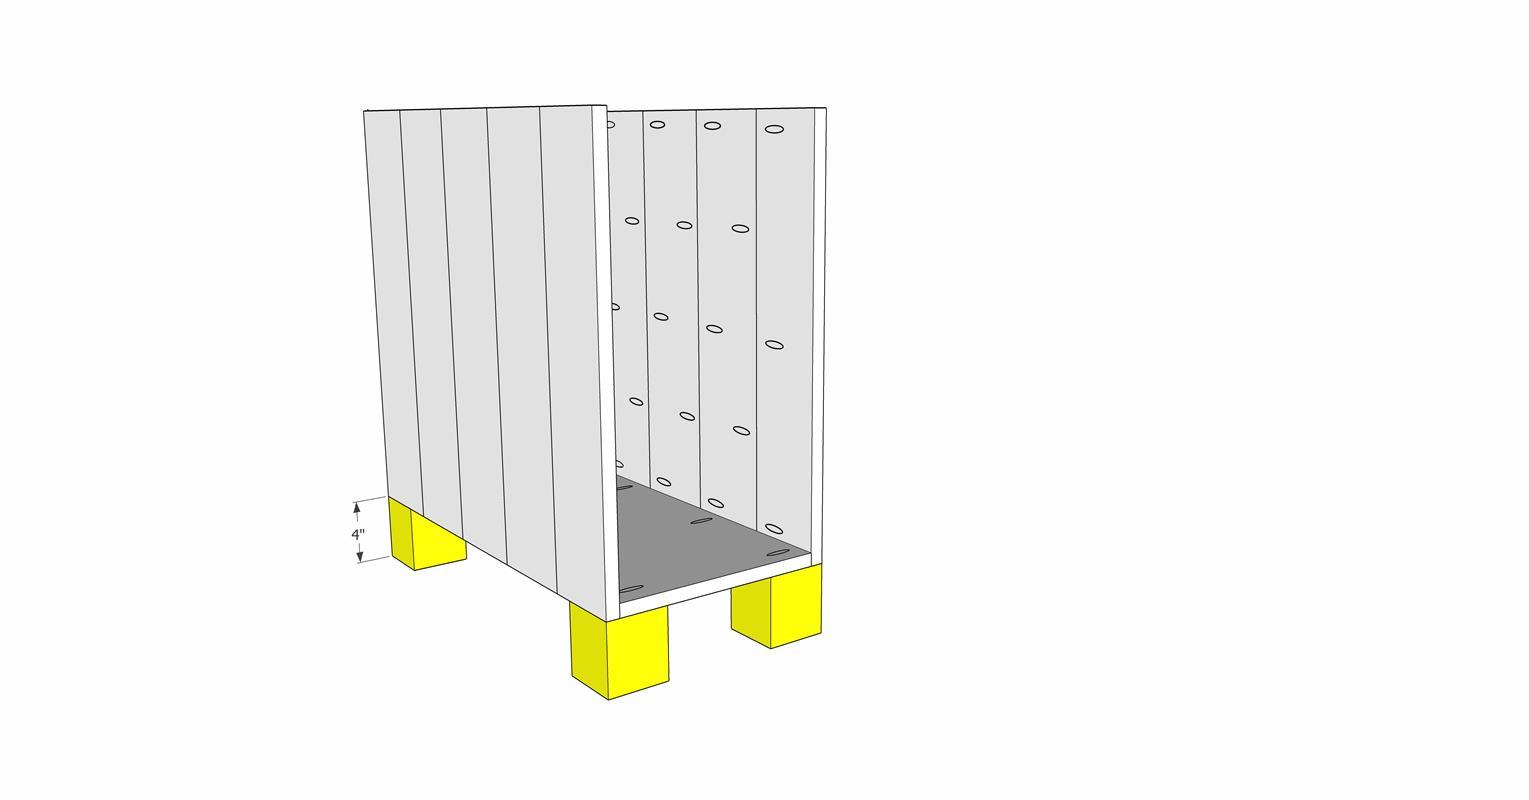
Attach legs to cabinet
Cut the 4x4 legs to be 4" long. Add wood glue to the tops of the legs and set the cabinet on top of the legs so that the edges are flush with each of the corners. Drill 1/16" pilot holes through the plywood bottom and into the legs. Attach the cabinet to the legs with 2 1/2" wood screws.
-
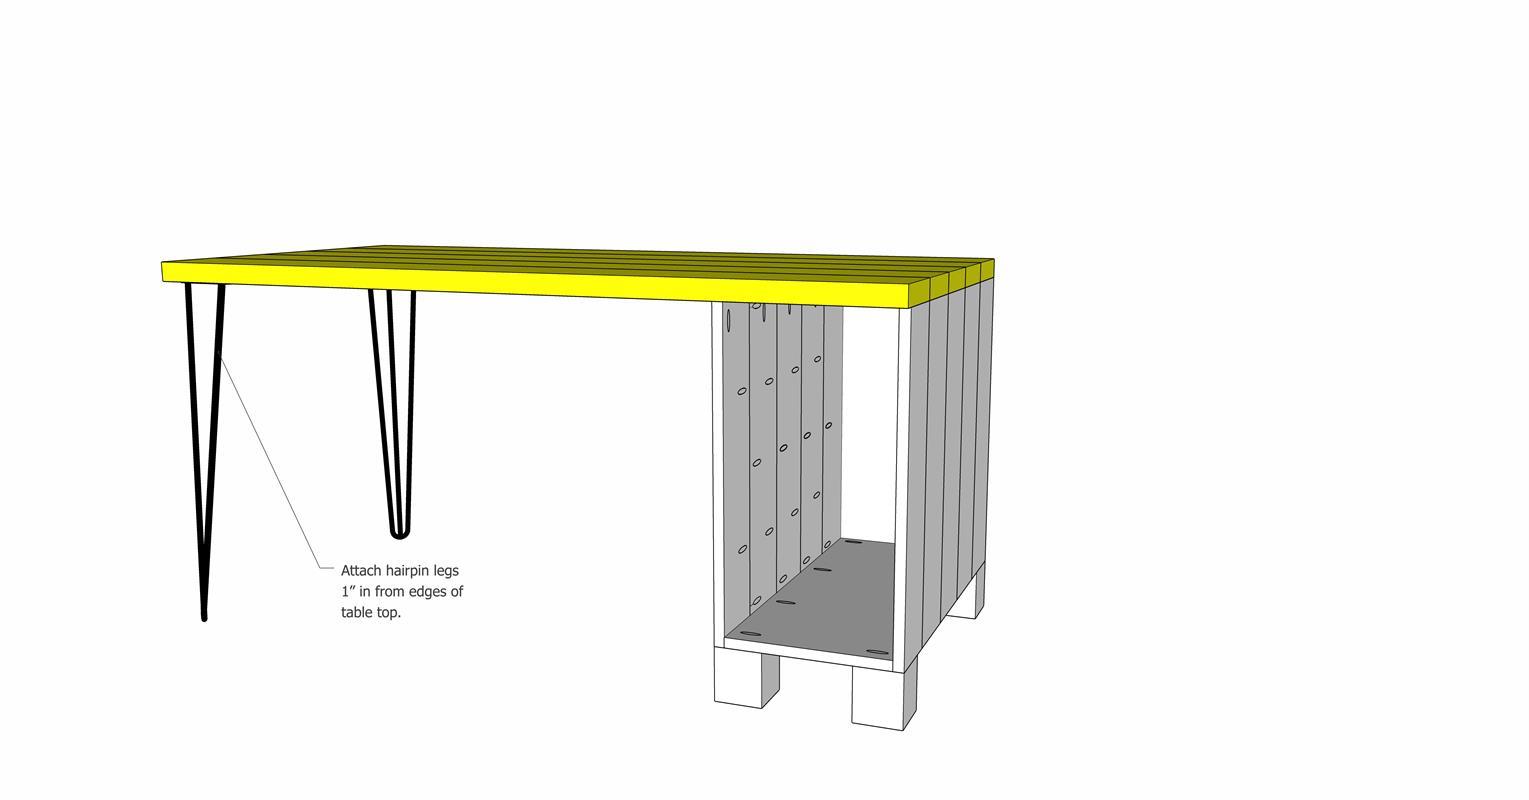
Attach hairpin legs and cabinet
Flip the desktop so that the bottom side is facing up. Attach the hairpin legs 1" inset from each edge of one end of the desktop. Flip the desktop over and install the cabinet on the opposite end, flush with the edge of the desktop. Clamp the desktop to the cabinet and attach with 1 1/4" pocket screws.
-
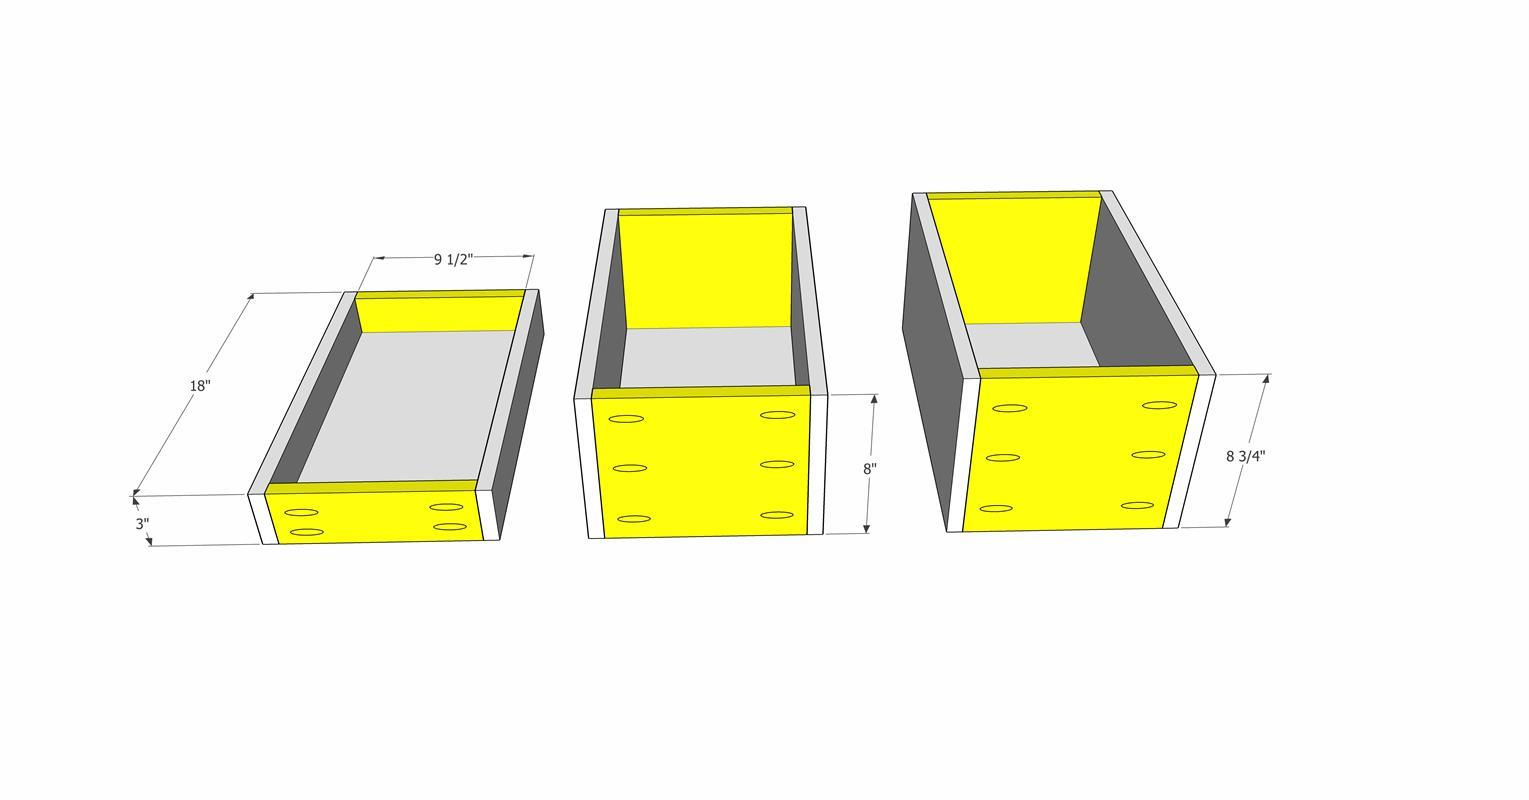
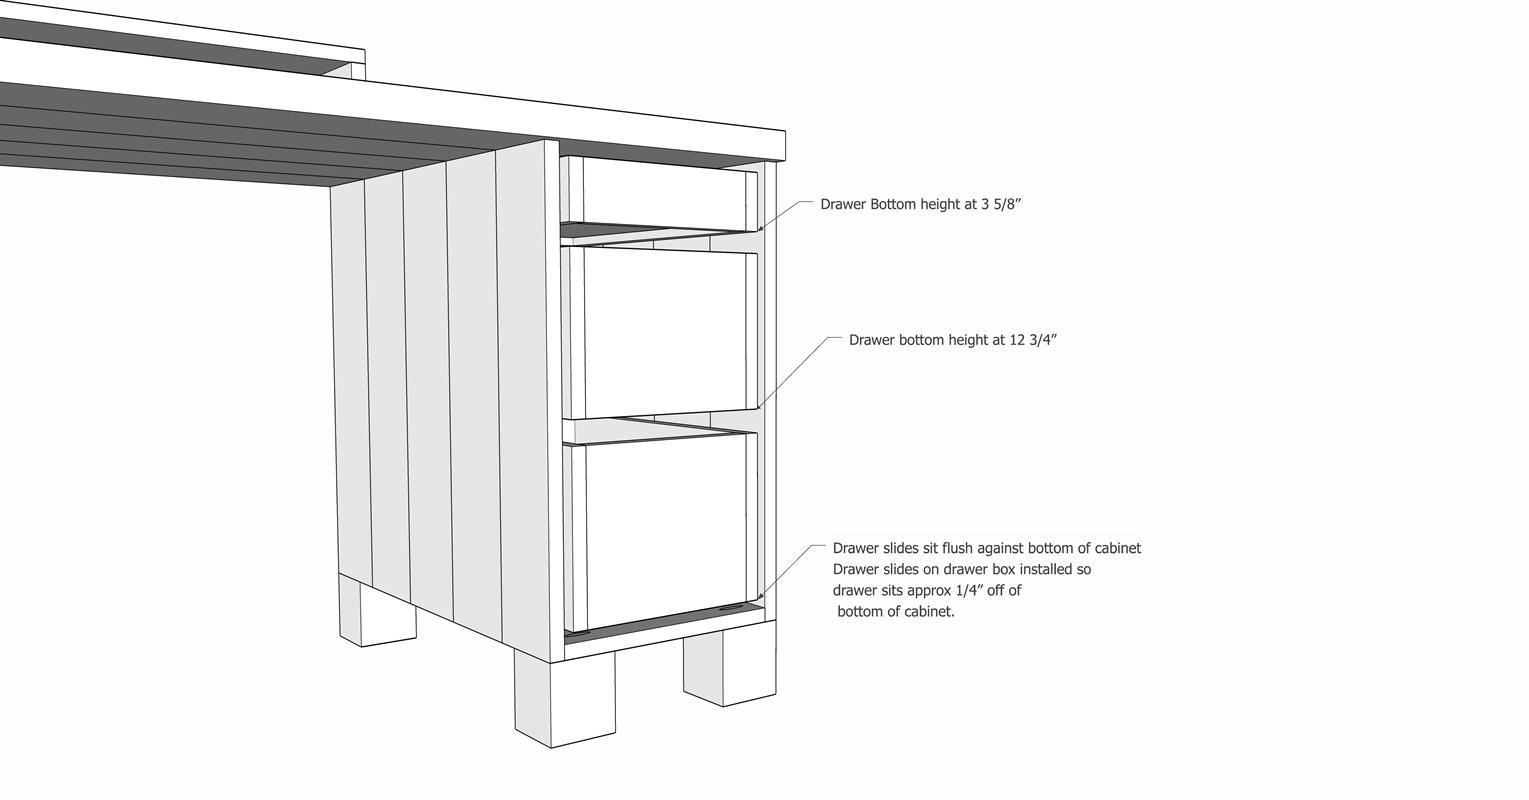
Build the drawers
Drill 3/4" pocket holes into the front and back pieces of the drawer boxes.
If using an inset drawer bottom, cut the 1/4" drawer bottom to be 17" x 10". Using a 1/4" router bit on your router table, route a dado groove 1/4" deep and 1/4" up from the bottom edge of each of the four drawer box pieces. Assemble the drawer boxes using wood glue and 1 1/4" pocket screws. The inset drawer bottom will fit inside the dado groove when the drawer box is being assembled. Ensure all pieces are flush and square.
If attaching the drawer bottom to the bottom edge of the drawer boxes, cut the drawer bottom to b e 18" x 11". Attach the drawer bottom with wood glue and 3/4" brad nails.
-
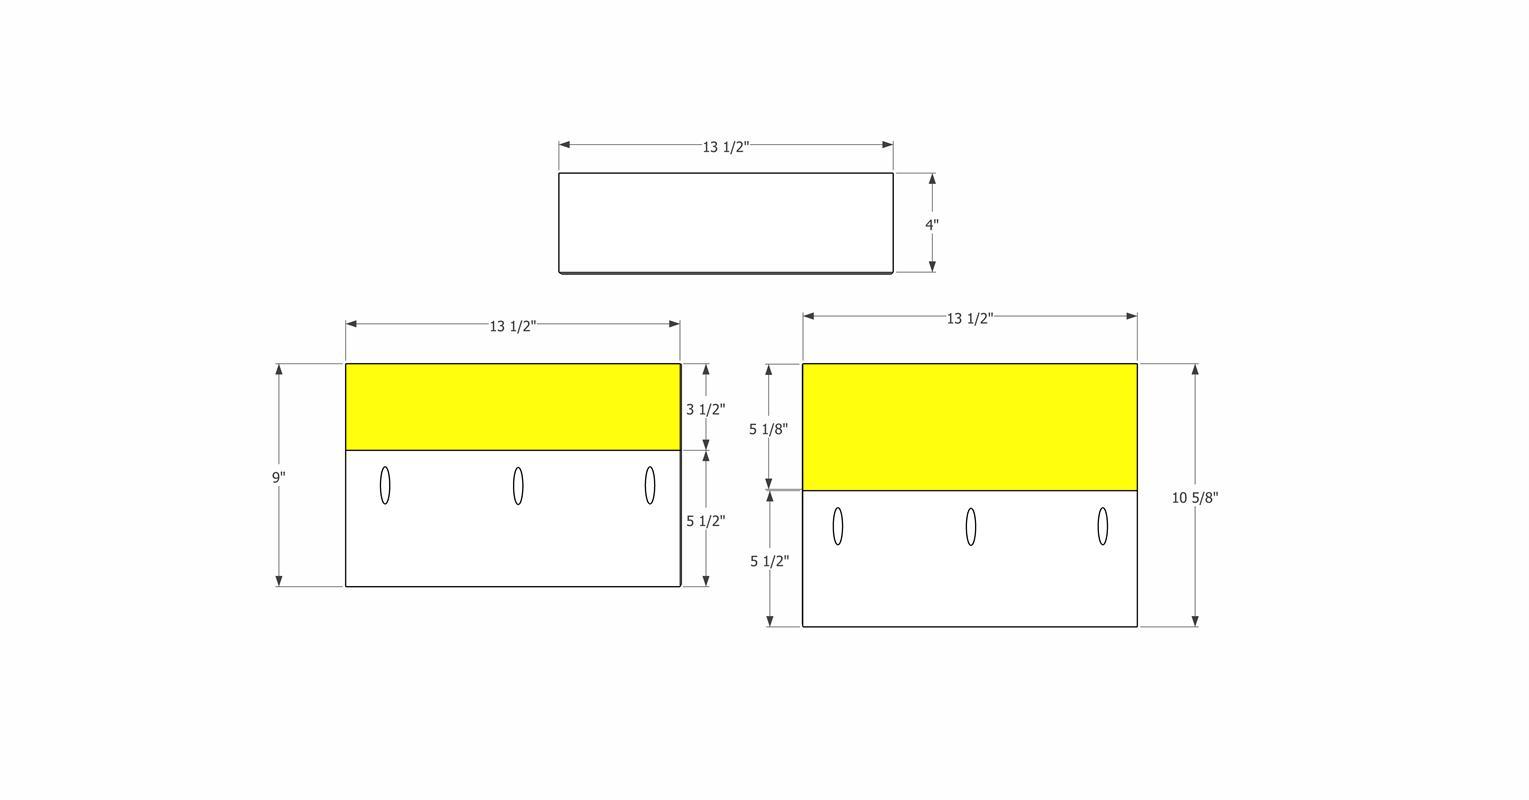
Build the drawer faces
Drill 3/4" pocket holes into the 5 1/2" pieces that make up the middle and top drawers. Glue and attach them to the second pieces of the drawer faces with 1 1/4" pocket screws.
-
Build the riser
Cut 1x6 boards down to size to build the riser. Drill 3/4" pocket holes into the boards to attach them together to make a 10" wide pieces. Attach them with wood glue and 1 1/4" pocket screws. Also drill 3/4" pocket holes into the one end of each of the 4" tall pieces to attach them to each end of the 41 1/2" long shelf. Attach the vertical pieces with wood glue and 1 1/4" pocket screws.
Attach the riser to the desk 4" in from the hairpin side of the desk and flush with the back edge. Clamp it in place and drill 3/32" pilot holes up through the bottom of the desktop and into the vertical pieces of the riser. Attach with 3" wood screws.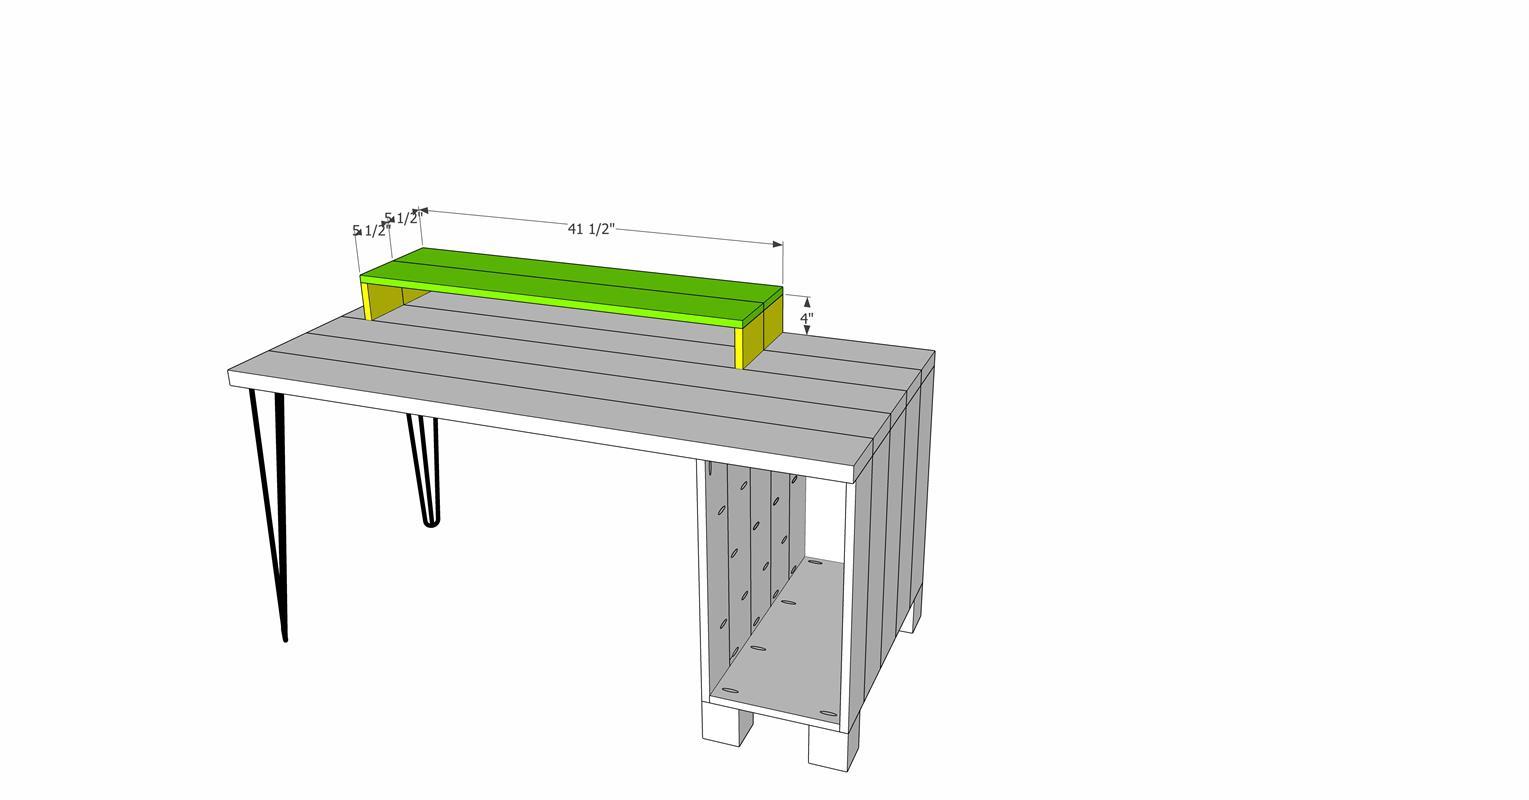
-
Finish as desired
Sand the entire desk smooth and finish as desired with paint or stain and a clear finish, such as polyurethane. This desk was finished with Varathane stain in Provincial and 4 coats of wipe on polyurethane (Minwax).
-
Install the drawers
Once the finish has dried, install the 18" side mount drawer slides using the Kreg drawer slide jigs.
-
Install drawer fronts and hardware
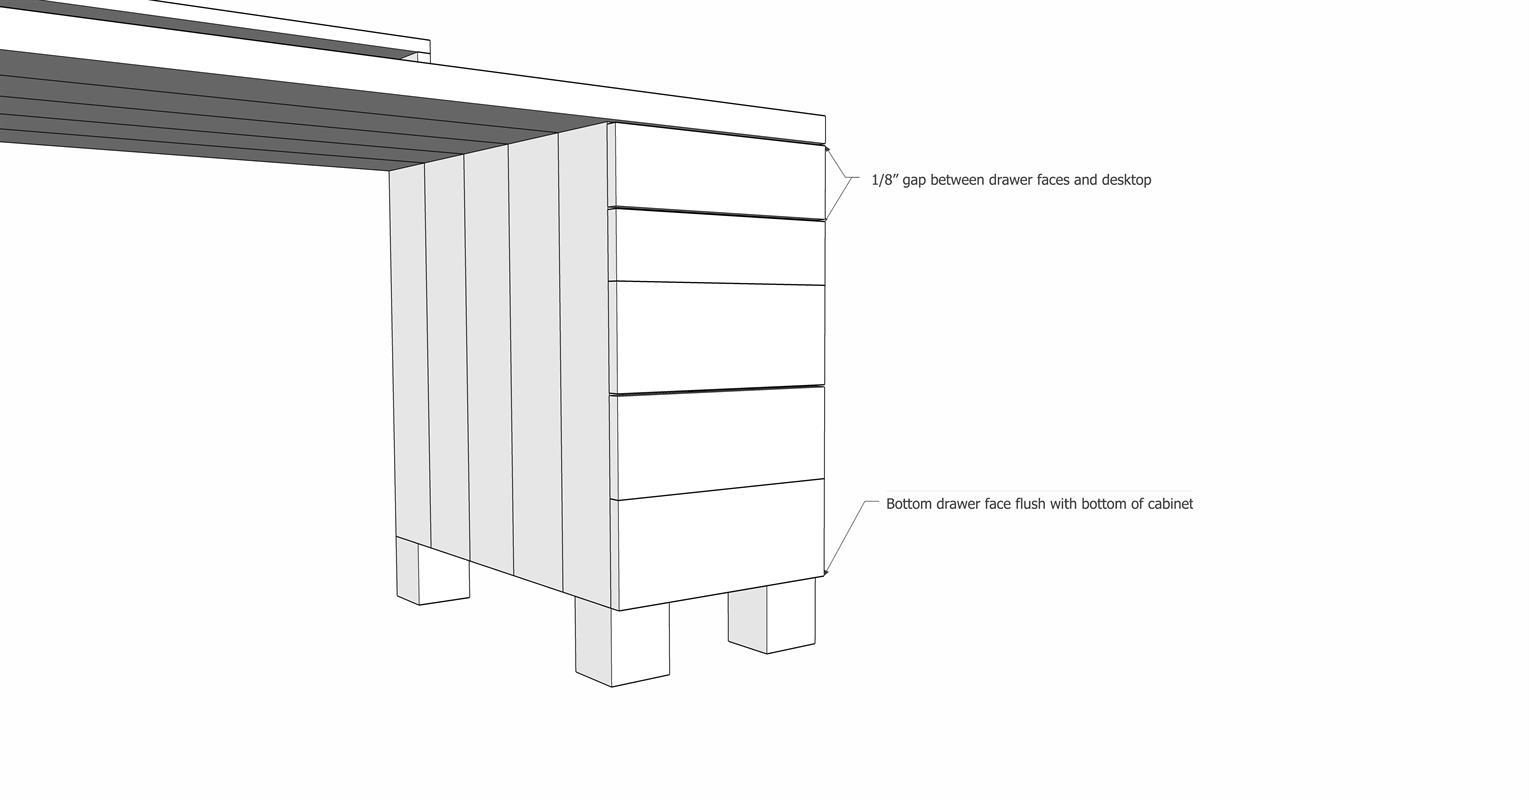
With the drawers installed, attach the drawer fronts to the drawer boxes. Use the Kreg cabinet hardware jig to drill holes into the front of the drawer faces. Line up the drawer faces to the drawers with 1/8" gap between the drawer faces and also a 1/8" gap from the top drawer to the desktop. The bottom drawer face will be flush with the cabinet bottom. Drive 1 1/4" wood screws through the predrilled holes and into the fronts of the drawer boxes to secure the faces in place. Pull the drawers out and attach them to the faces from the insides of the drawers using 1 1/4" wood screws. Finish drilling the holes through the drawers and install the hardware.