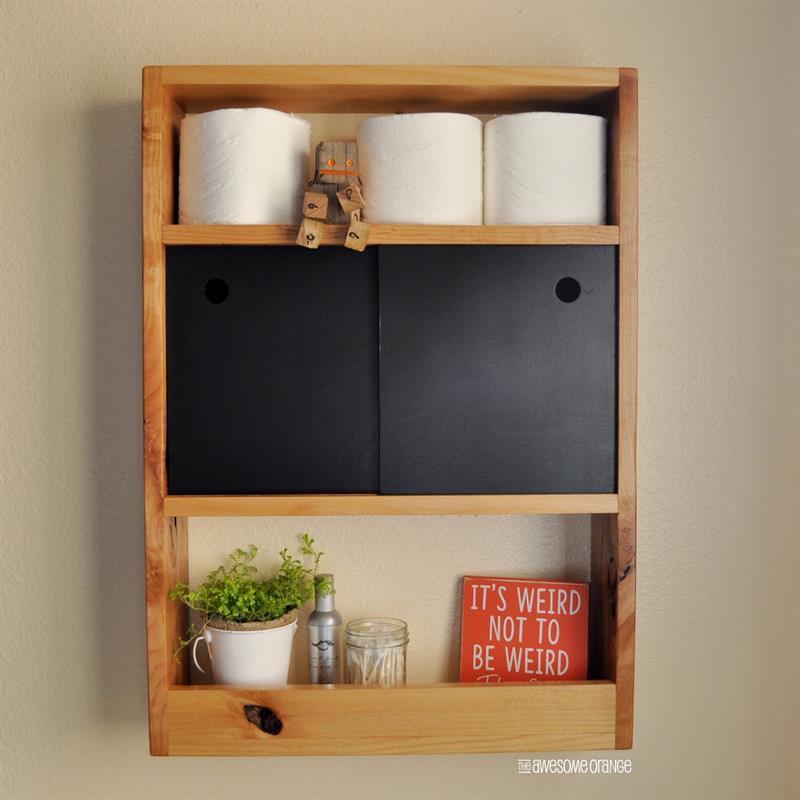

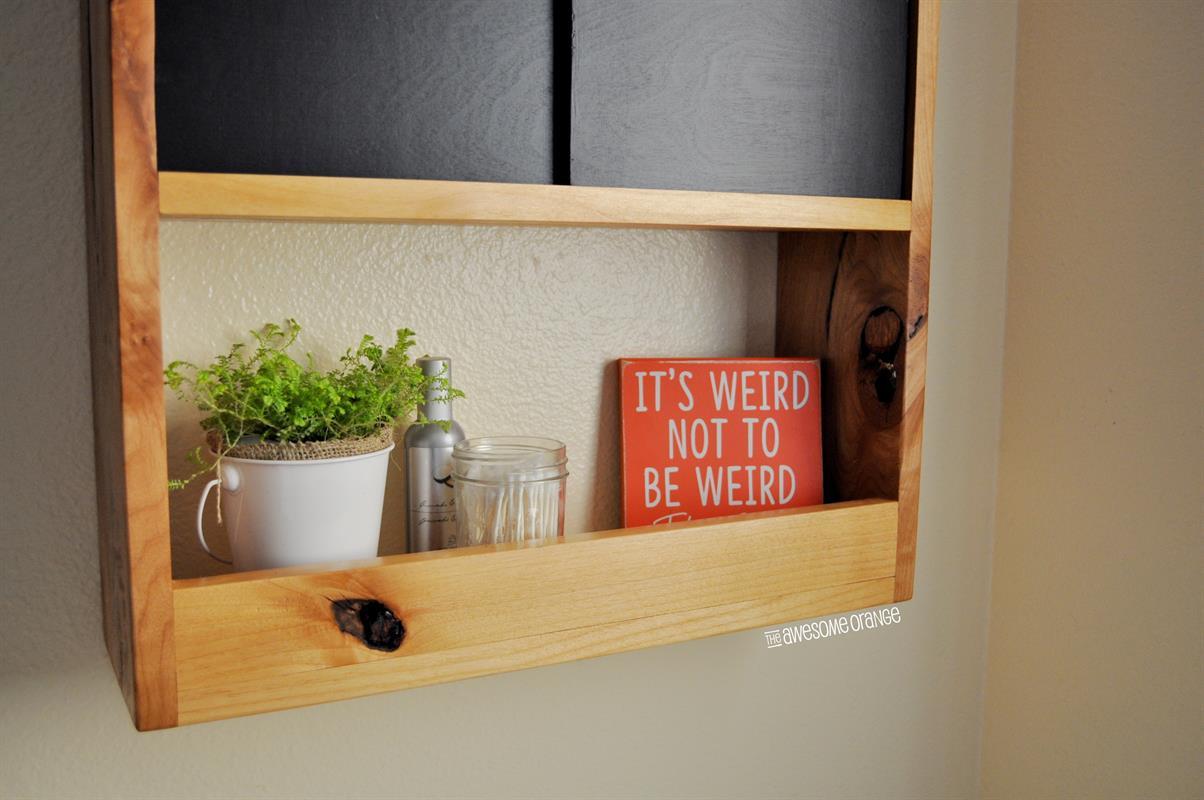
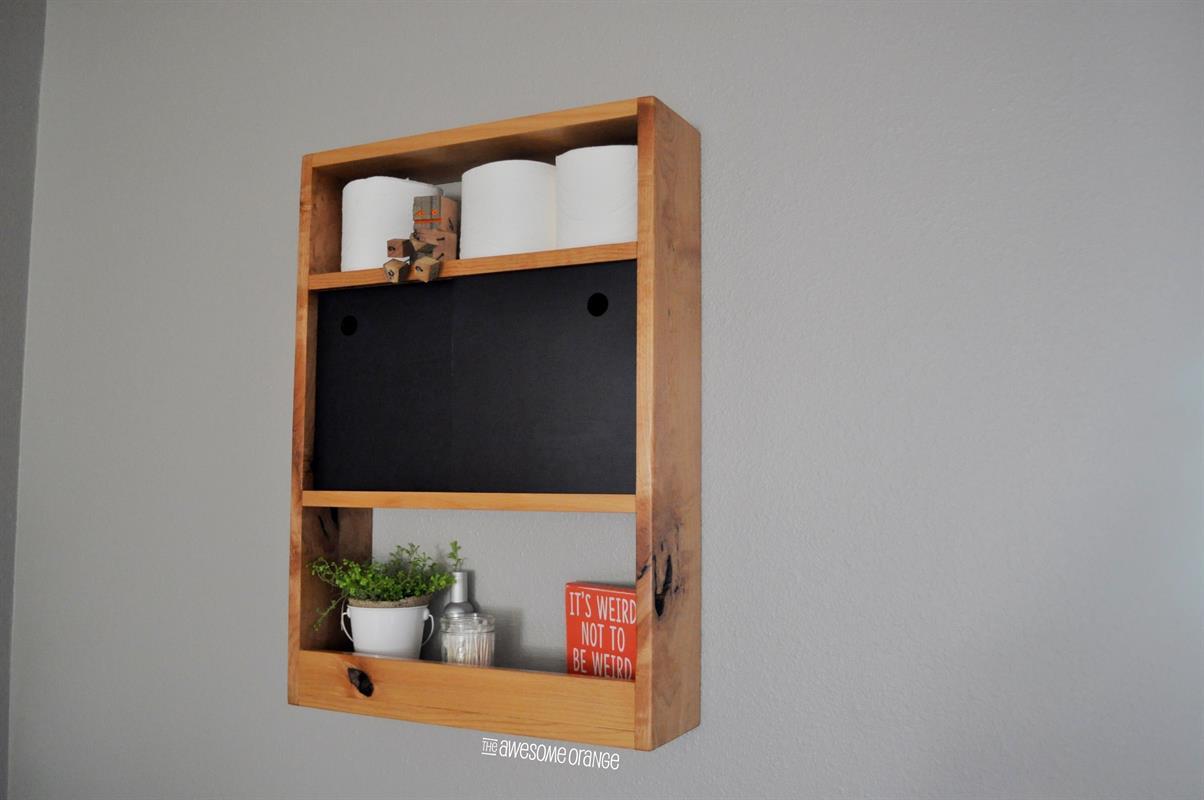


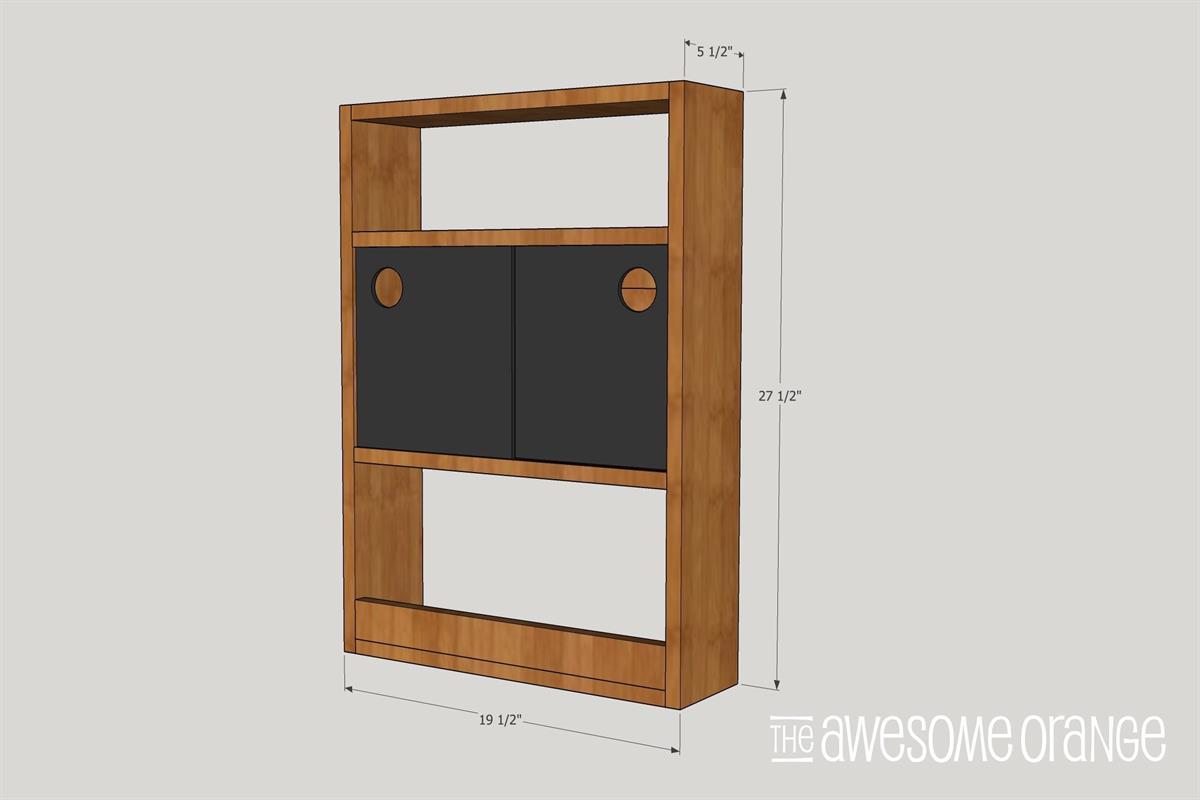
Have a small bathroom that is lacking storage? Well I have the perfect DIY Over-The-Toliet Shelf project to help you out! Display the pretty stuff and hide the not so pretty necessities behind the doors!
Tools
Kreg Tools


Other Tools
-
Miter Saw

-
Square
-
Table Saw
-
Tape Measure
-
Drill (cordless)
-
Sander
Materials
Wood Products
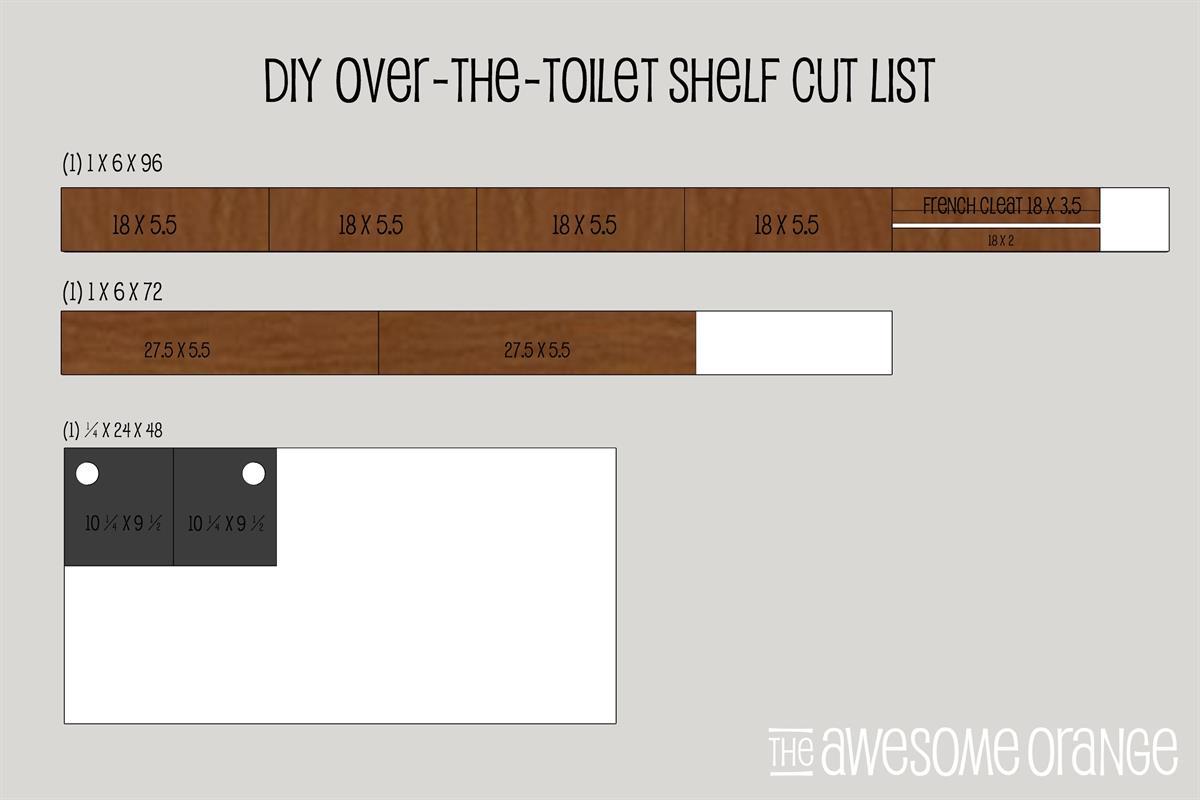
- 1 Board , 1x6 , 96"
- 1 Board , 1x6 , 72"
- 1 Plywood , 1/4" Thick , Half Sheet
Hardware & Supplies
- 28 1 1/4" Pocket Holes Screws
- 3 1 1/4" Wood Screws (for french cleat)
- 1 Wood Glue
- 1 Sandpaper
- 1 Stain/Finish
Cut List & Parts
- 4 Shelves , 18" x 5.5" x 3/4"
- 2 Sides , 27.5" x 5.5" x 3/4"
- 1 Bottom Shelf Trim , 18" x 2" x 3/4"
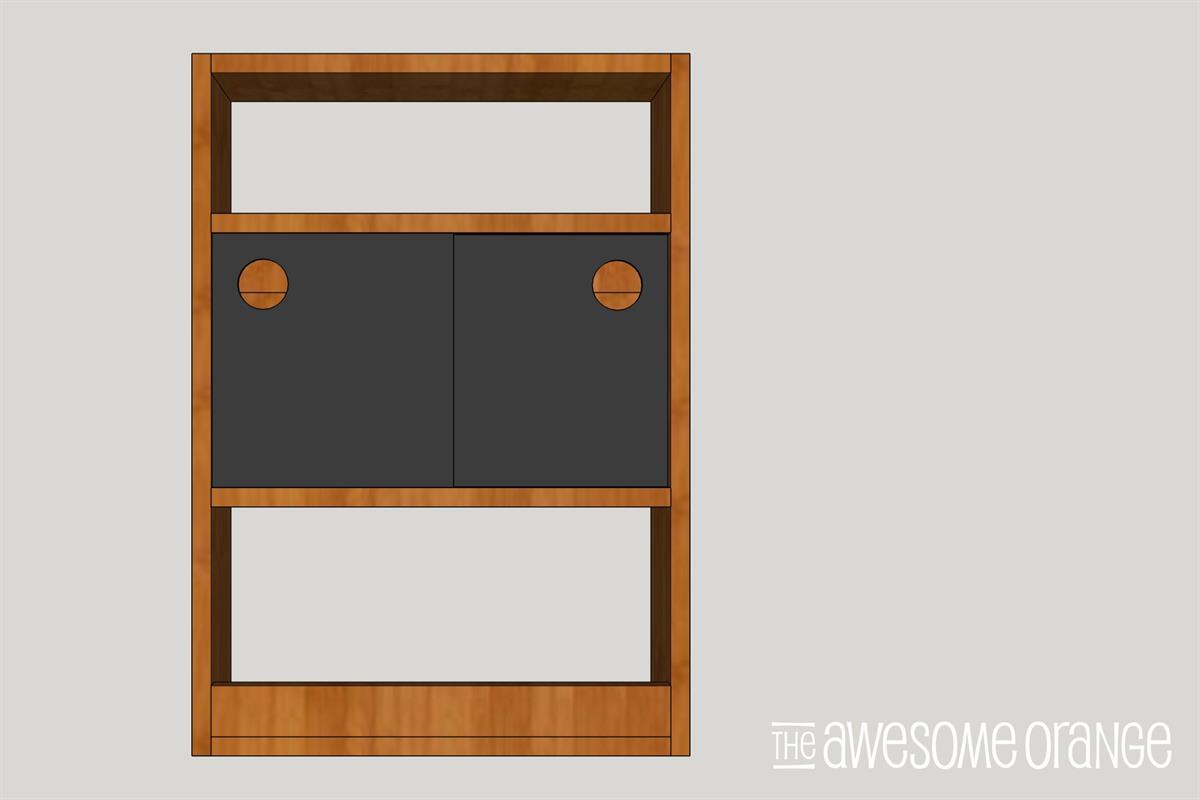
- 2 Doors , 10 1/4" x 9 1/2" x 1/4"
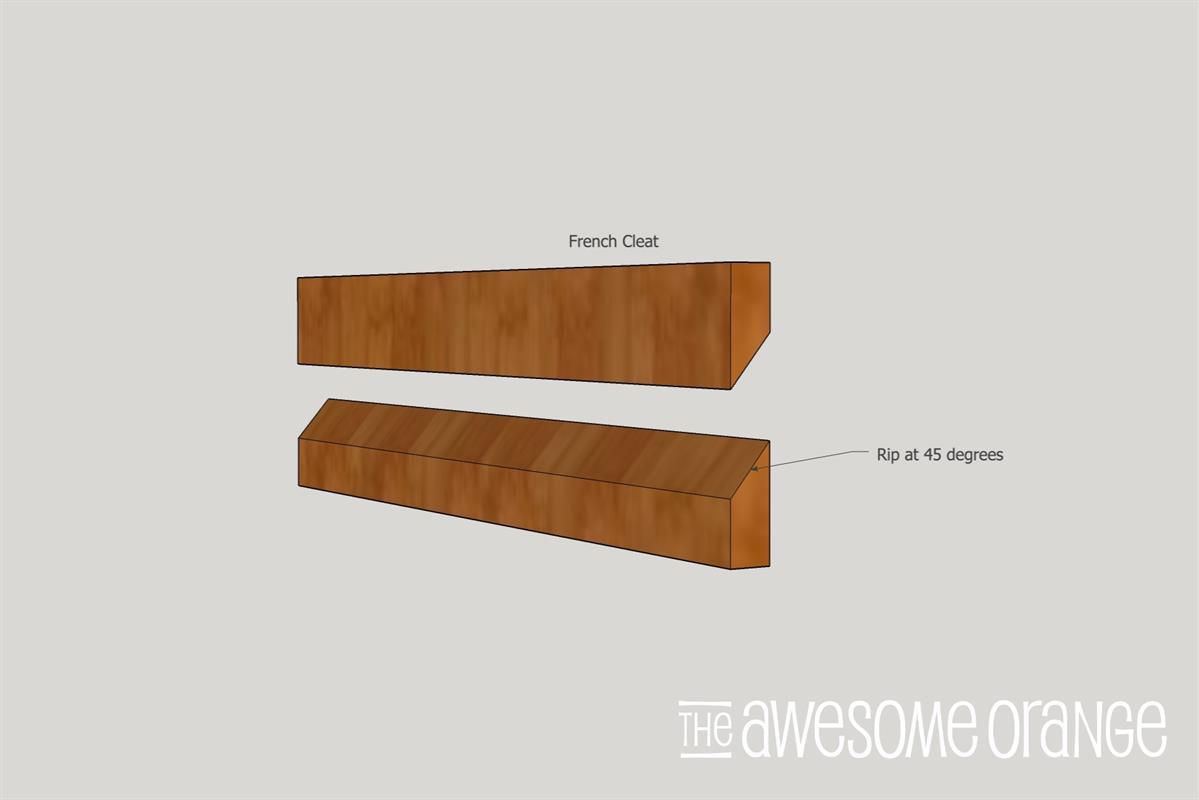
- 1 French Cleat , 18" x 3.5" x 3/4"
Directions
-
Check Dimensions & Cut List
Prior to starting this project, check the dimensions and cut list.
-
Rip Dados
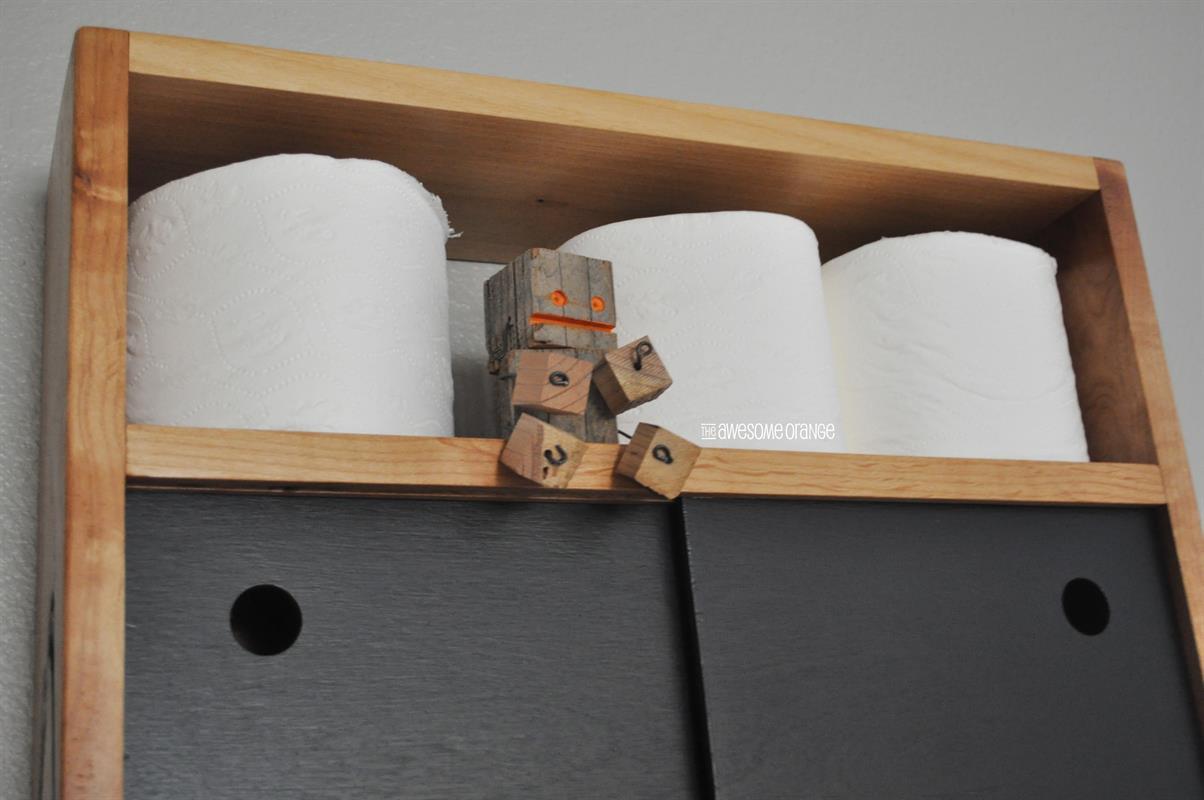
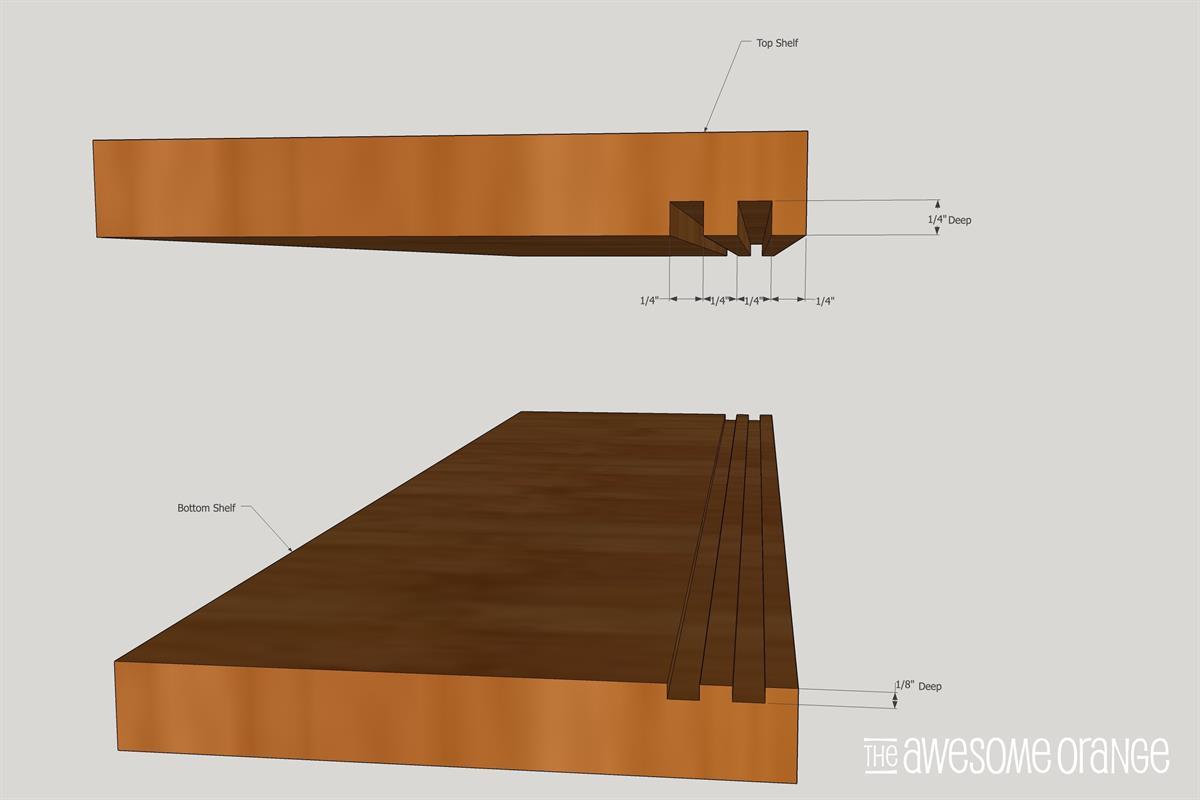
Using the table saw rip dados in two shelf pieces to create the tracks that the doors will slide in. You can also use a router, if preferred. On the top shelf the dados with be 1/4" deep and bottom shelf need to be 1/8" deep. This will allow proper installation of the doors.
-
French Cleat
Rip the french cleat at a 45 degree angle on the table saw.
-
Start Assembly
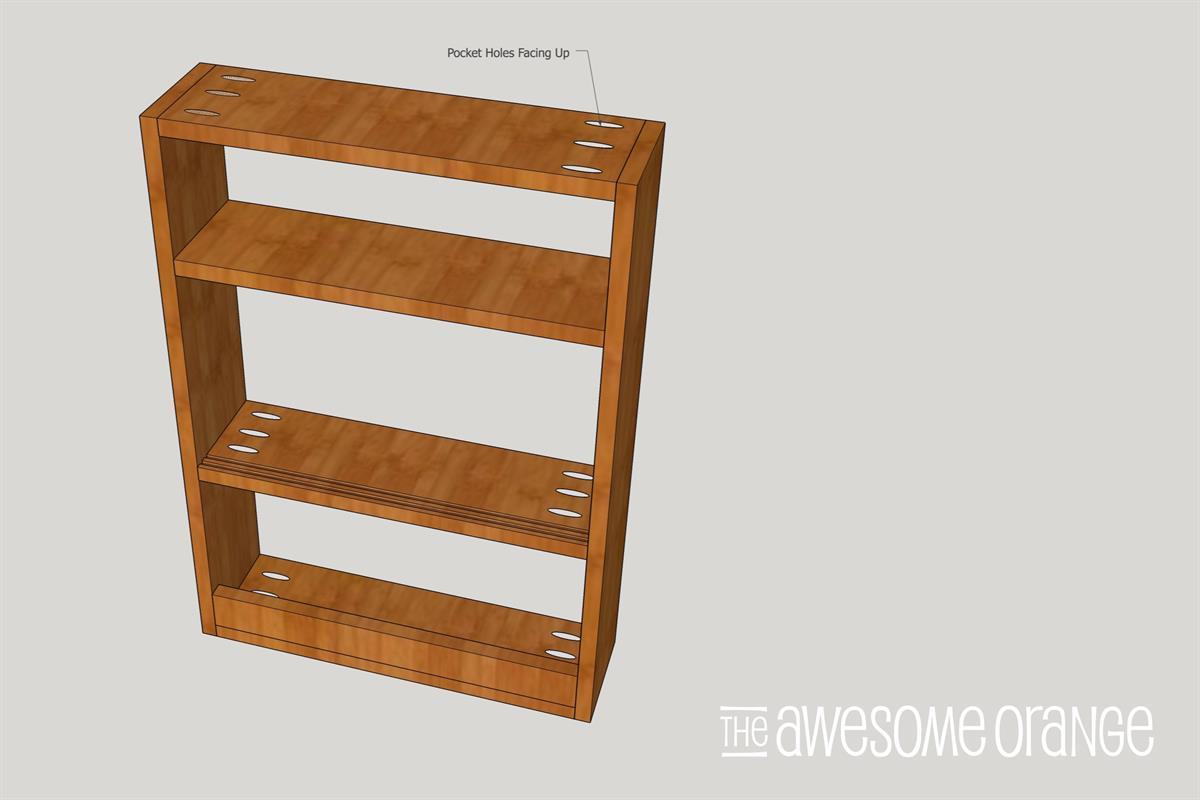
Drill 3/4" pocket holes and assemble using wood glue and 1 1/4" pocket holes screws. Start assembling with the two sides, bottom shelf and trim, then working your way up the shelves. Pay close attention to orientation of bottom and top shelf with dados. If they aren't oriented correctly doors won't work. (See picture for best pocket hole orientation.)

-
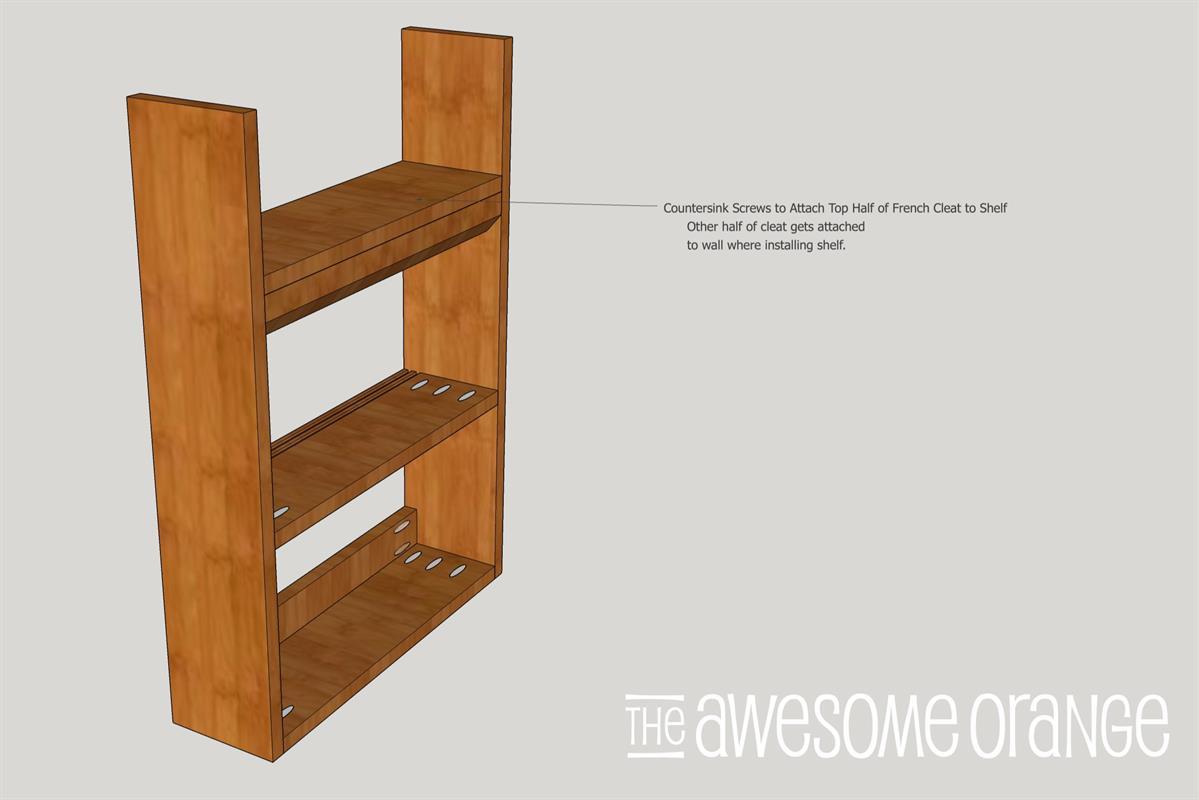
Install French Cleat
Install top of french cleat with countersunk 1 1/4" wood screws.
-
Attach Top
Using 1 1/4" pocket hole screws and wood glue attach top.
-
Finger Pulls
Drill 1" finger holes pulls 2" from top and 2" from side.

-
Finish It!
Sand and then finish it in your choice of stain, paint, or sealer! And then lastly install doors. Place back door in back dado at the top and it will fall into bottom dado. Repeat with front door. Waxing the dado track with help with opening and closing the doors.
-
Visit www.theAwesomeOrange.com
Visit www.theAwesomeOrange.com for more photos of this build!