Bailey Chair For Dogs
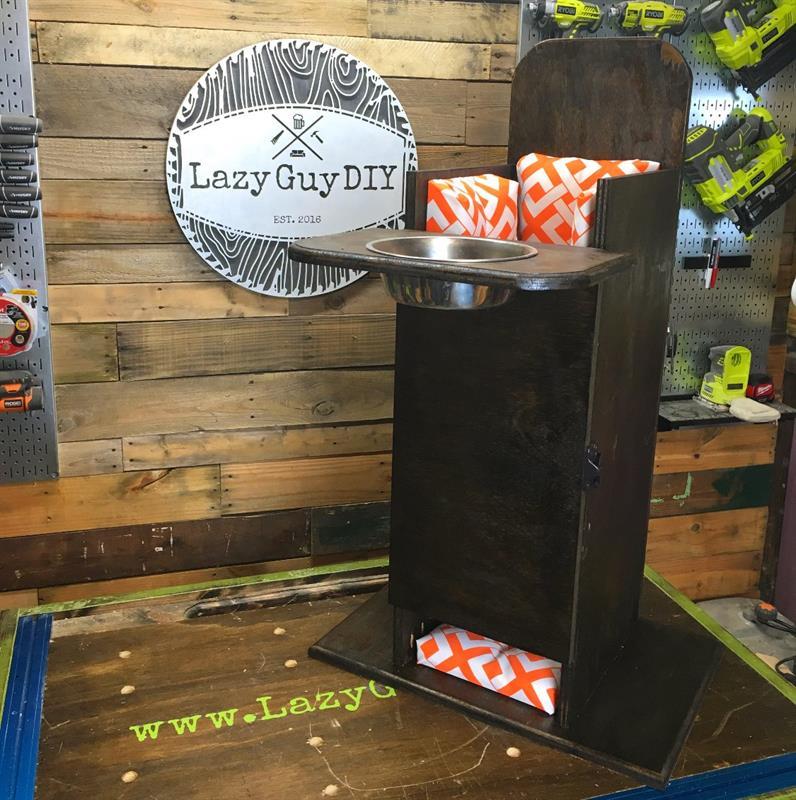
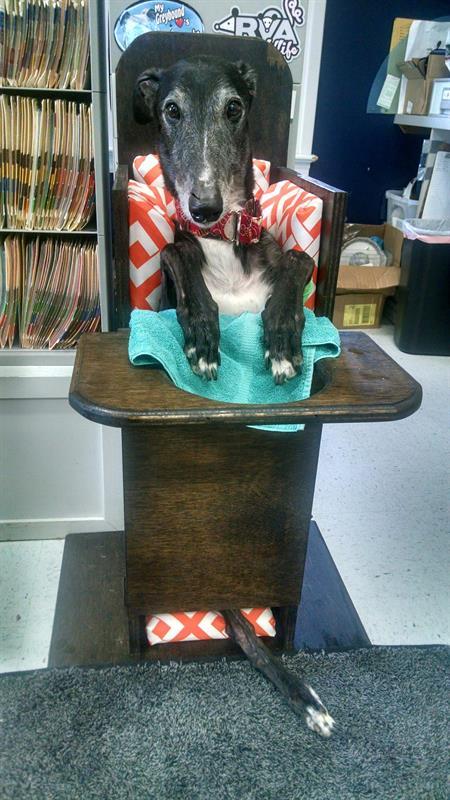
By Lazy Guy DIYBailey Chairs are lifesavers for dogs with a condition called Canine Mega Esophagus. The dogs are unable to eat in a normal position and have to sit upright in order to digest their food. This build is a simple project that has a lasting impression on the life of your furry friend!
Directions
-
Pre-Build Note
*Please note, like a tailored suit, these chairs are custom built to fit each dog, so the measurements we used for Norbet (a giant Greyhound) won’t work for your Yorkie Poo. Use the images as a guide for assembly, but use the measurement guide to custom fit each dog for the build.
-
Measure The Dog
You need three measurements to get started:
Measurement A – Shoulder Blade to Shoulder Blade.Measurement B – Shoulder to Tush. You want to get the length of your dog of how high their shoulders will be when they are sitting in an upright position.
Measurement C - Shoulder to Front of Chest – Measure too small and you crush your dog, too big and your dog slides out the bottom…
-
Back Support
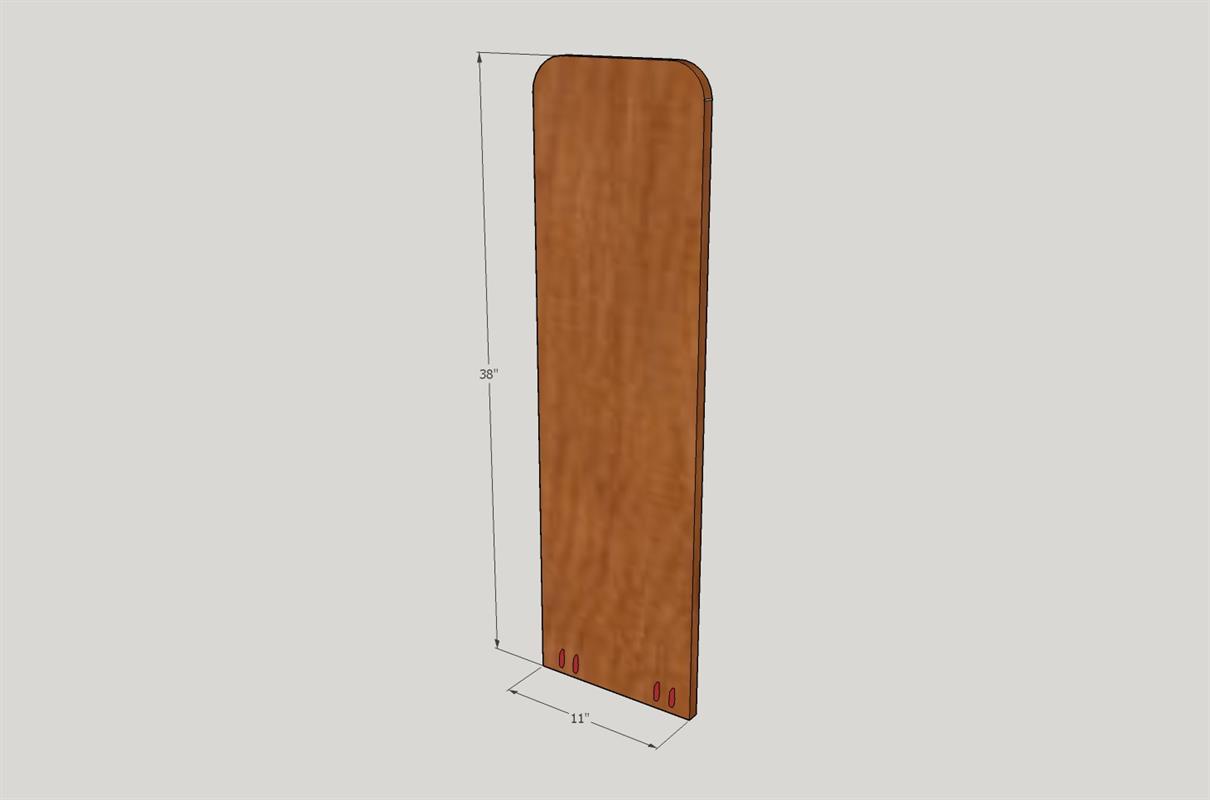
Take Measurement A (shoulder to shoulder) and add 3”- 4” (depending on if you add a cushion) and Measurement B (shoulder to bottom) and add 4”- 6”. In our case, Norbet is 7 ½” (A) by 32” (B), so I ripped a piece of plywood down to 11” x 38”. On the bottom of one end (inside facing) we pre-drilled a pair of ¾” pocket holes.
On the top, we traced a round edge and used a jig saw to create the decorative rounded headboard.
-
Side Supports
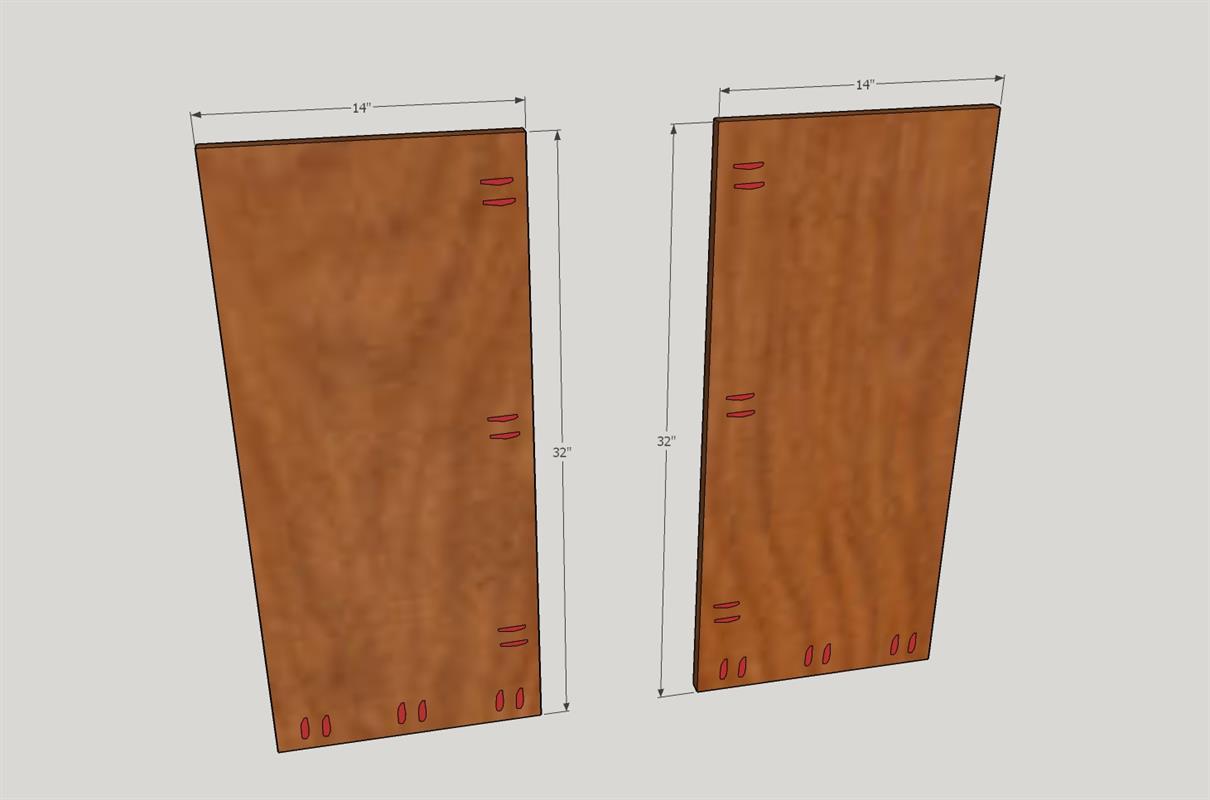
Using Measurement C (Shoulder to Chest) +2”- 3” (depending on if you add a cushion) and Measurement B (Shoulder to bottom) I cut (2) pieces of plywood for the side panels. For Norbet, he’s 32” (B) by 11 ½” (C) so we cut both of our panels to 14” x 32”. Using your pocket hole jig, pre-drill a set of ¾” holes on the bottom edge and inside facing edge of both panels.
-
Assemble The Frame
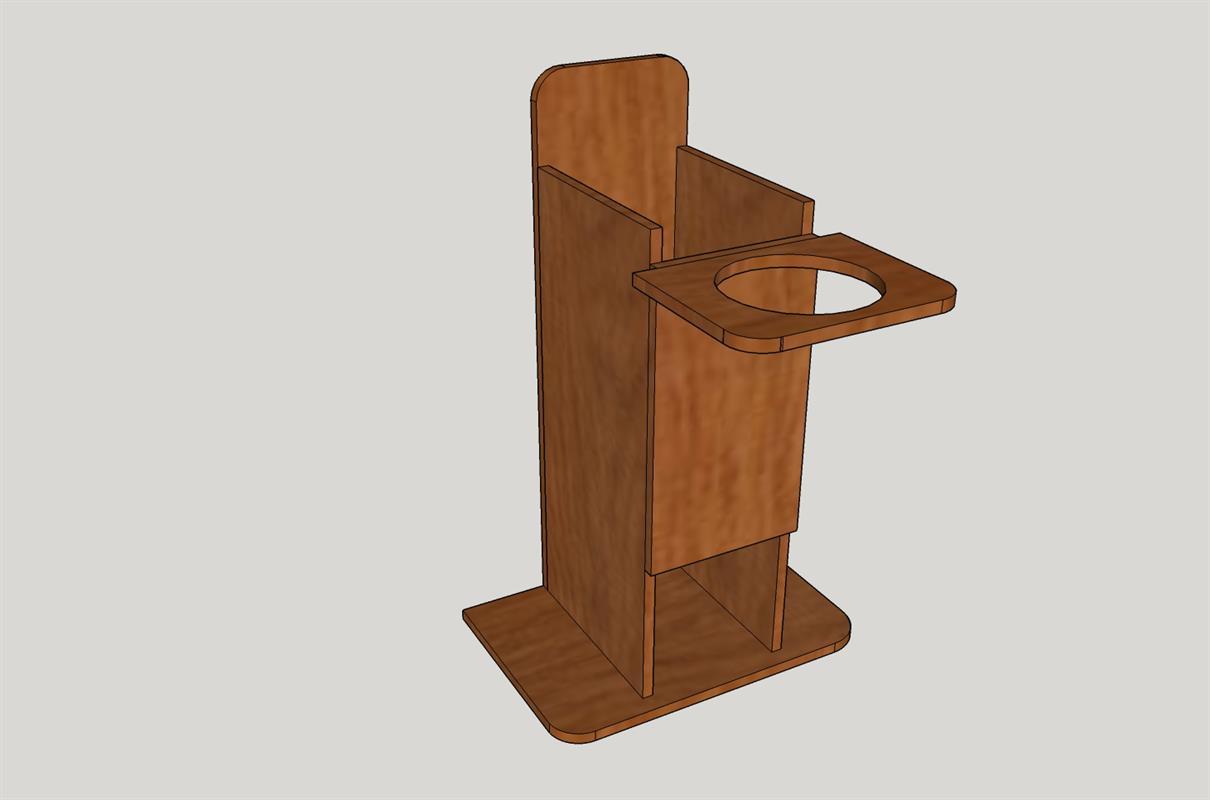
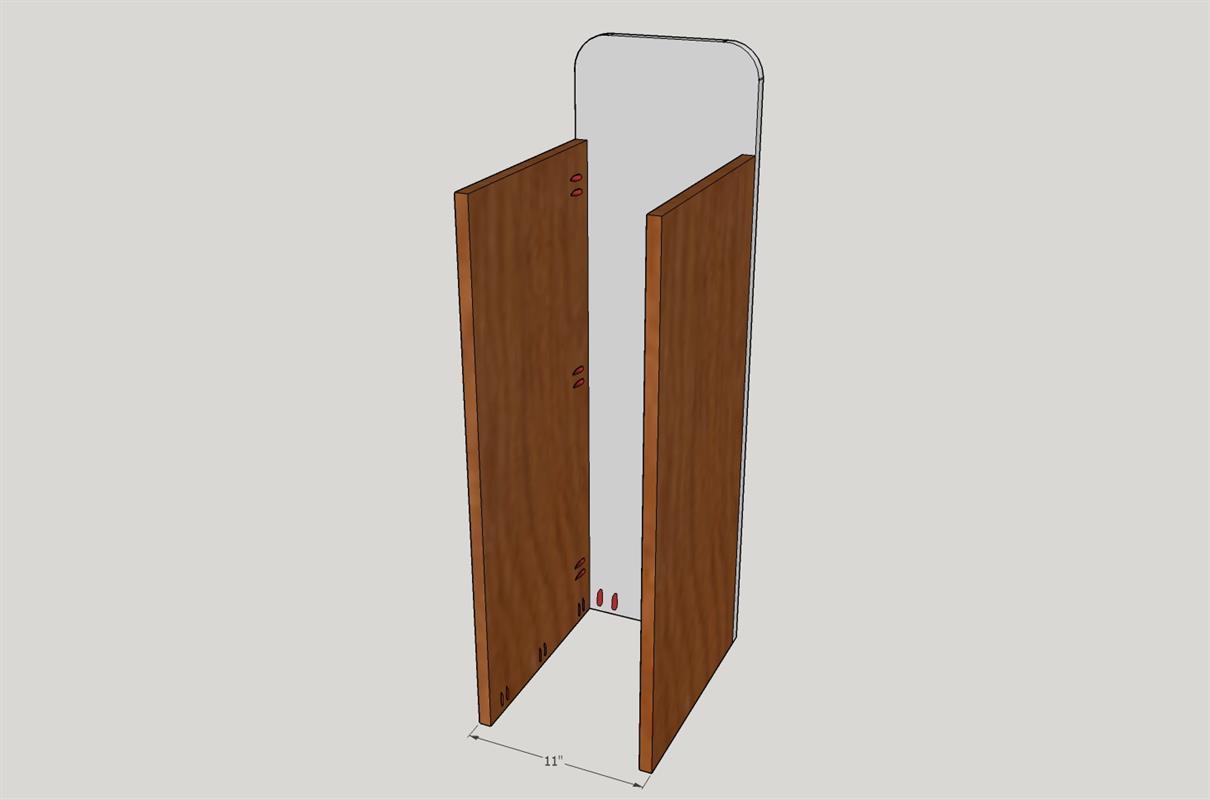
Using wood glue on the joint and 1-1/4” pocket screws, attach each side panel to the back panel. It’s personal preference as to whether you want the pocket holes outward or inward facing. We choose inward knowing the cushions would cover them up. Make sure your edges are flush when attaching. Don’t worry about square-ness yet because the pocket screws will naturally tilt the material inward until we attach it in the next step.
-
Add The Base
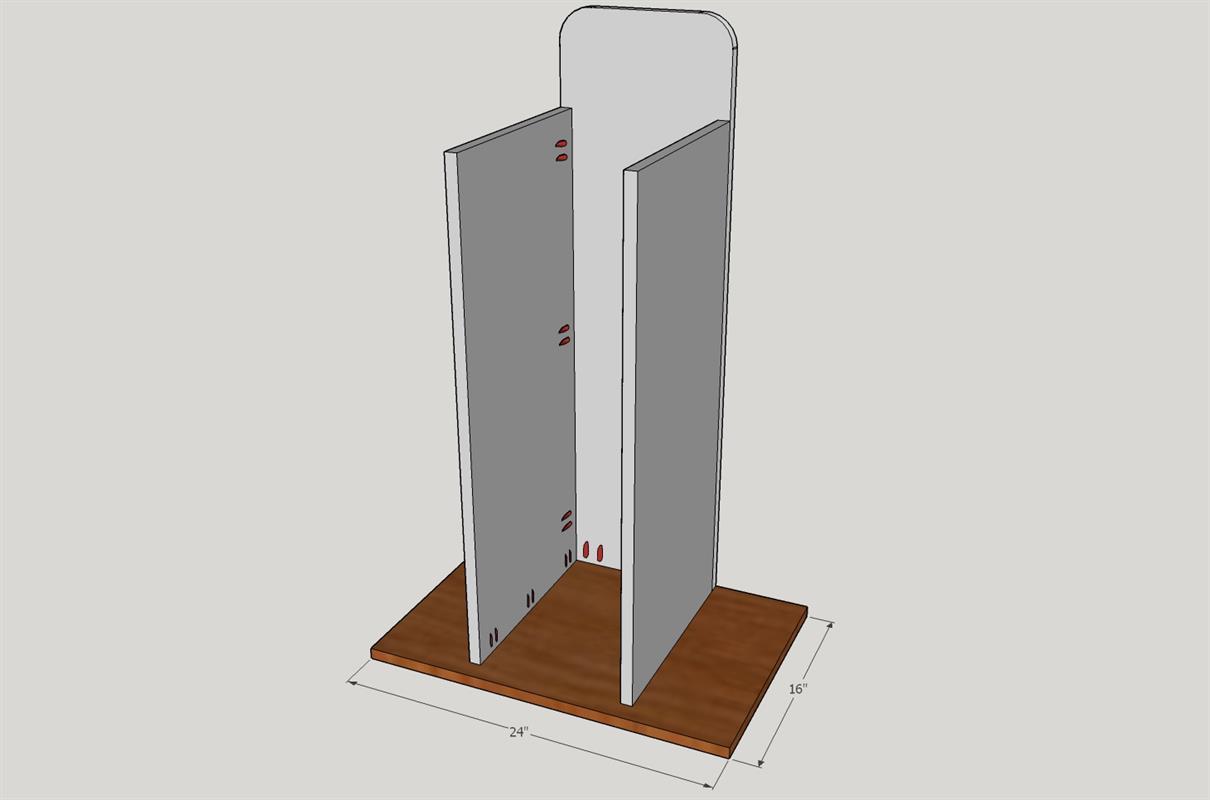
The bigger the dog, the bigger the base you’re going to need. So because of the size, we cut a panel of plywood to 16” by 24” adding about 4”- 6” to each side and about 1” of overhang in the front. To fancy it up, we took a palm router with a rounder over bit and ran it over the edge of three sides. It’s completely cosmetic. We attached the back panel of the frame first to the base (flush with the back) using the pre-drilled ¾” pocket holes from earlier with wood glue and 1-1/4” pocket screws. Then with a speed square to check square-ness, we attached the side panels to the base as well. If you’re going to patch the pocket holes now is a good time.
-
Add The Door
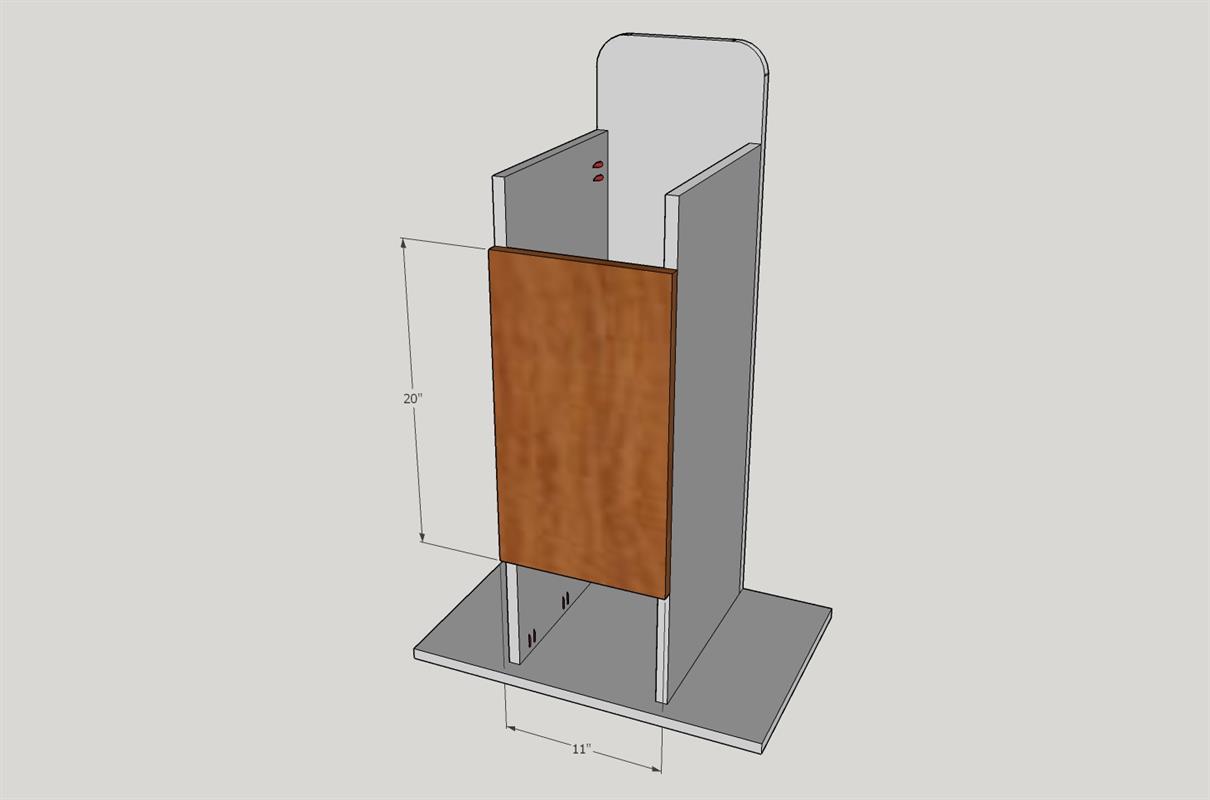
Measuring the width from side panel to side panel (in our case it was 11”) we cut a panel for the door. This is where it really depends on the shape and size of your dog. For bigger dogs, you need to leave a few inches below the door for their feet to hang out for little dogs you can just close it off completely. As far as height, it all depends on the shape of your dog’s face. Since Norbet has a long pointy nose, we had to allow for him to sit upright and still have enough clearance to eat. Our panel ended up being 11” x 20”.
-
Add The Tray
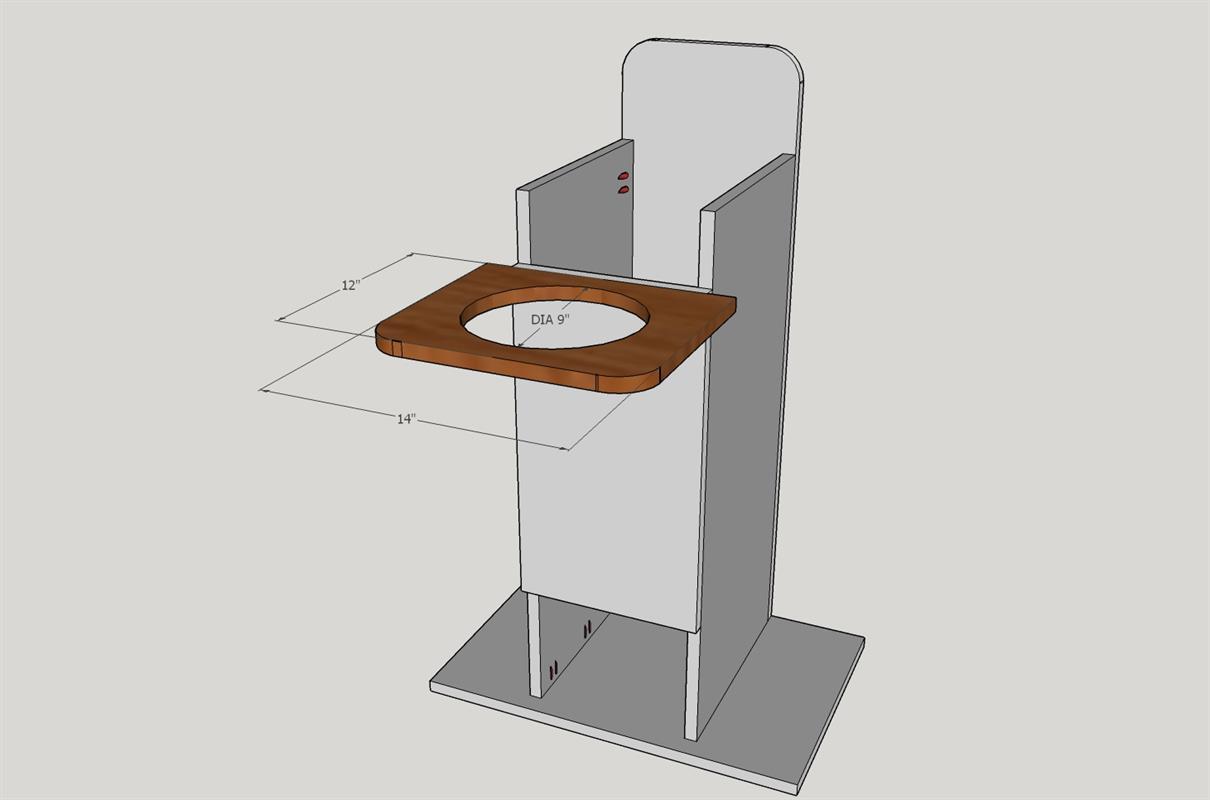
Using the bowl as a guide, we cut a piece of plywood to 14” (3” wider than the frame) by 12” to accommodate Norbet’s bowl. We used the jig saw to cut rounded edges for the front and then used the router with a round over bit. For the bowl insert we traced the outline of the bowl we would use (make sure it’s got a lip) and then drew another circle ¼” skinnier on the inside. Using a drill bit for a pilot hole, we then used the jig saw to cut out the circle. We also used the round over bit and the router to soften the edge of the cut out. With the hole all cut out, we pre-drilled a set of ¾” pocket holes on the underside of the tray then attached the tray directly to the door with wood glue and 1-1/4” pocket screws.
-
Cushioning (Optional)
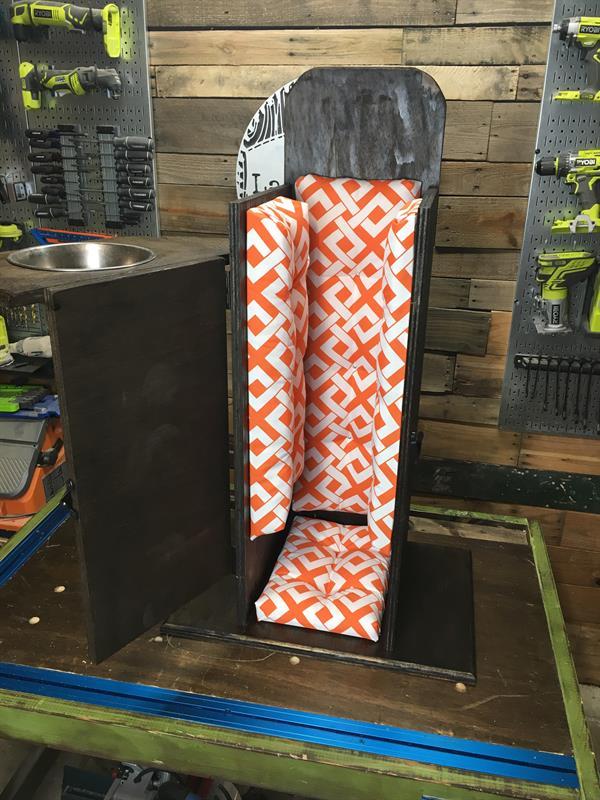
Because of how skinny Norbet had gotten, we added cushions. Using underlayment (thin plywood) we cut out panels to fit inside of each side of the chair. We then bought patio cushions, cut up the stuffing to the size of each panel and attached with spray adhesive. We then wrapped each piece with outdoor fabric and attached with staples. Each cushion panel was then attached to the chair with 3/4" wood screws.


