
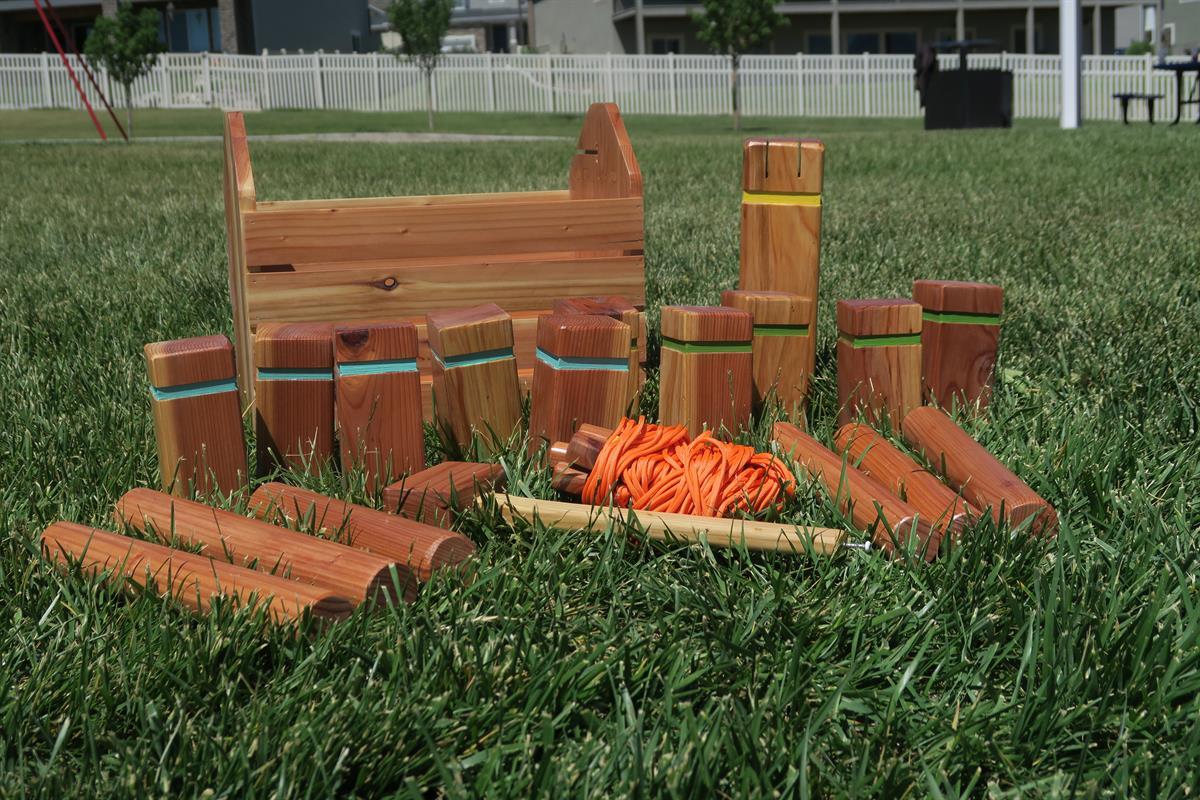


Kubb (pronounced "koob") is a lawn game where the object is to knock over wooden blocks, known as 'kubbs', by throwing wooden batons at them.
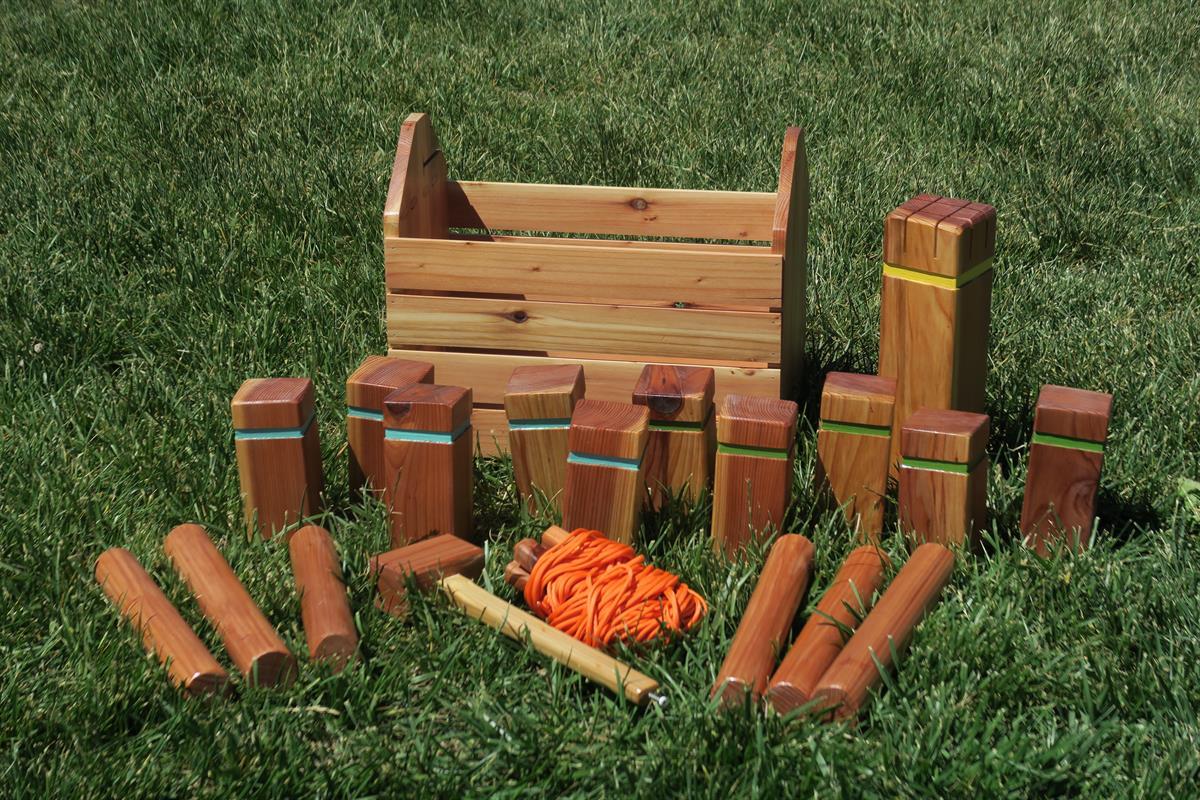
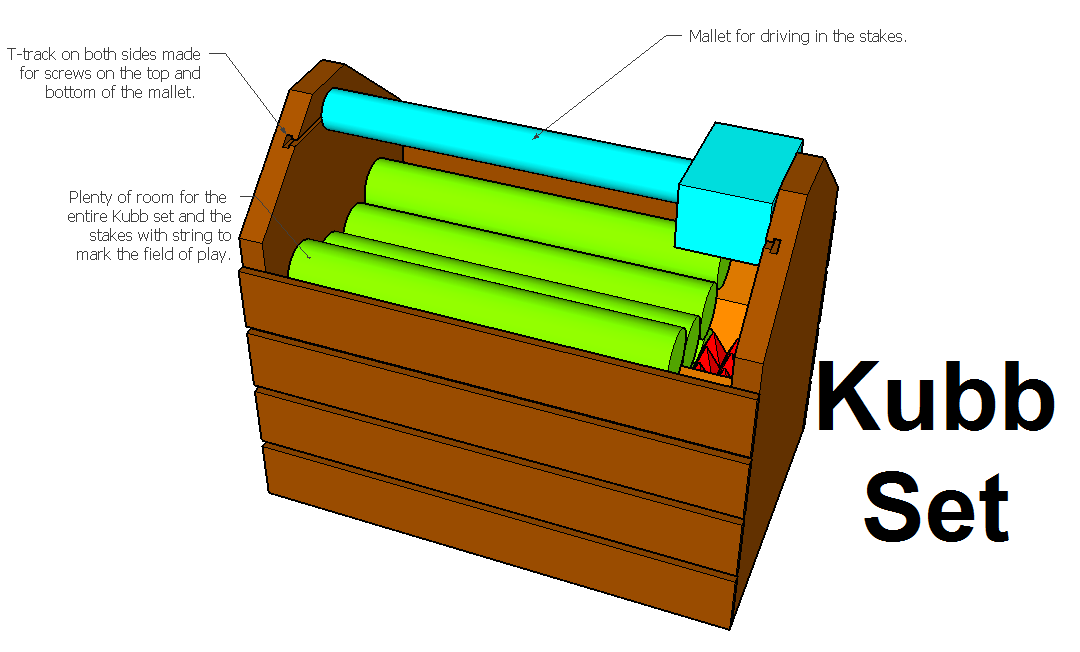
This DIY set includes "regulation sized" Kubbs, Batons, a King, stakes on a pre-measured line for marking the field and a case with an integrated mallet.
Tools
Kreg Tools

Other Tools
-
Miter Saw

-
Table Saw
-
Tape Measure
-
Clamps
-
Drill (cordless)
-
Drill Press
-
Impact Driver
-
Router
-
Sander
-
Shop Vacuum
-
Workbench
Materials
Wood Products
- 1 Board , 4x4 , 120"
- 1 Closet Rod/Dowel , 1 3/4 round , 72"
- 1 Plywood , 3/4" Thick , Quarter Sheet
- 1 Dowel , 1 1/4" round , 16"
Hardware & Supplies
- 6 Pocket Hole Screws
- 1 Paint of your choice
- 75 Feet of rope or string
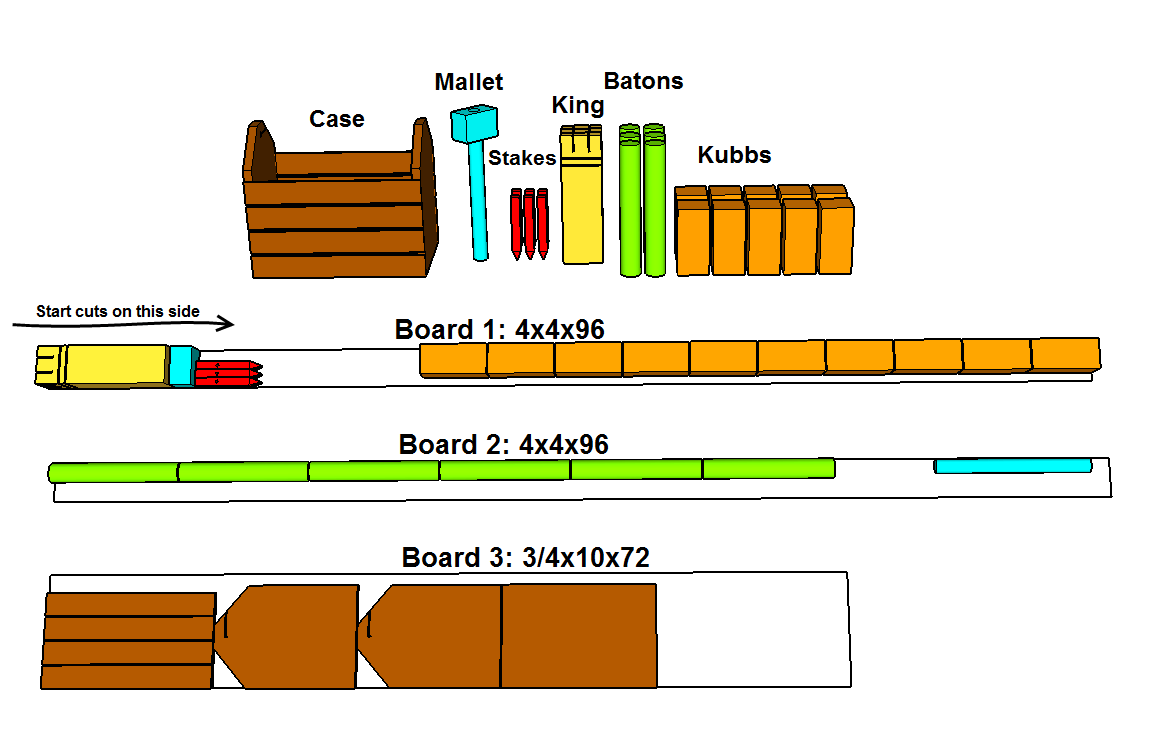
Cut List & Parts
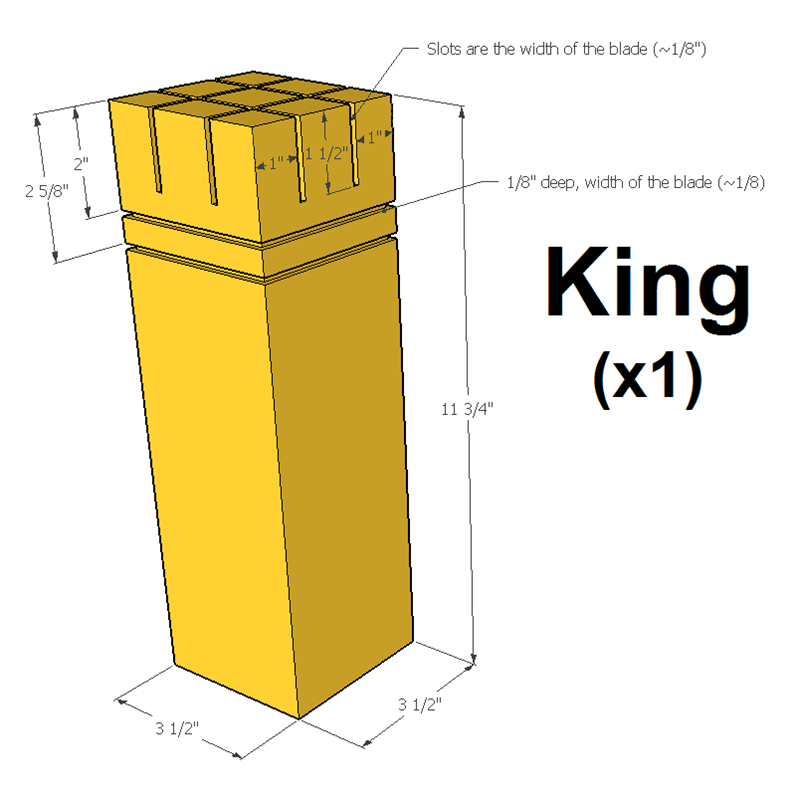
- 1 King , 3 1/2" x 3 1/2" x 11 3/4"
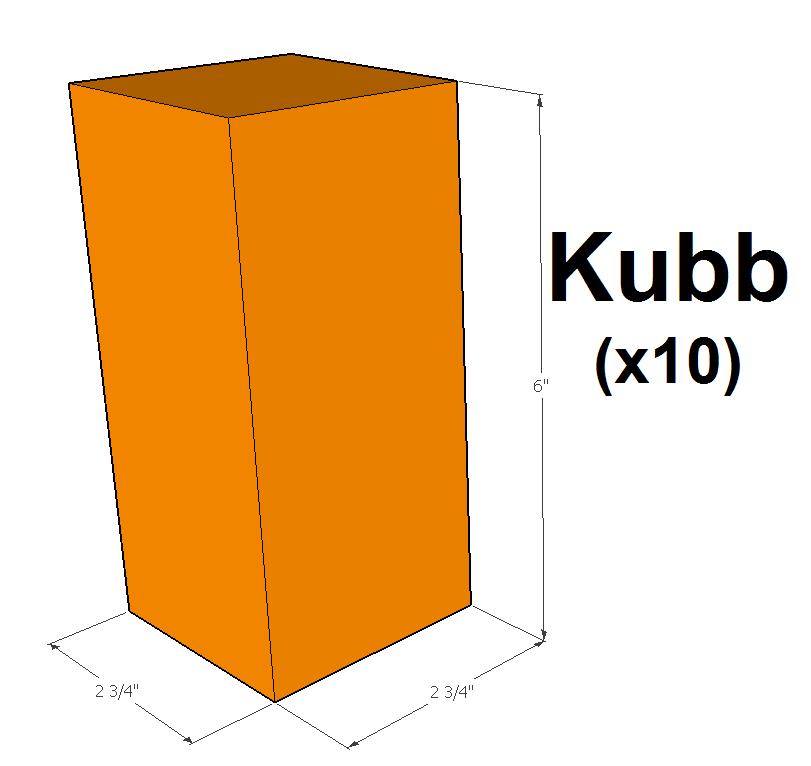
- 10 Kubb , 2 3/4" x 2 3/4" x 6"
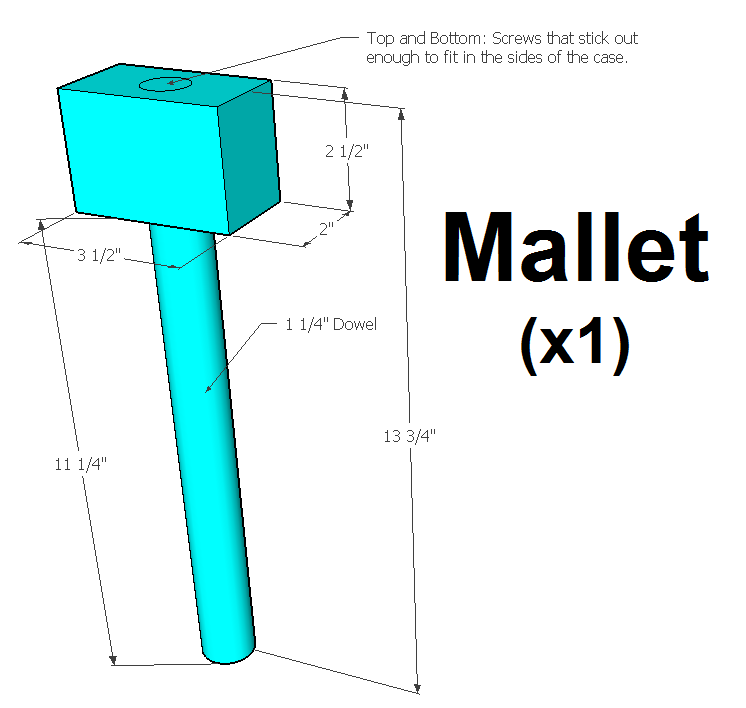
- 1 Mallet Head , 3 1/2" x 2" x 2 1/2"
- 1 Mallet Handle , 13 3/4" x 1 1/4" dowel
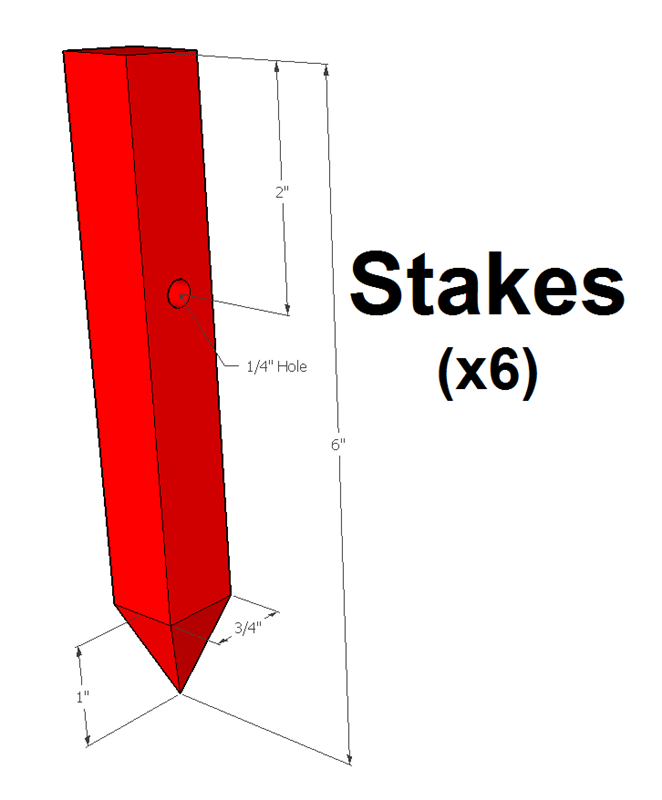
- 6 Stakes , 6" x 3/4" x 3/4"
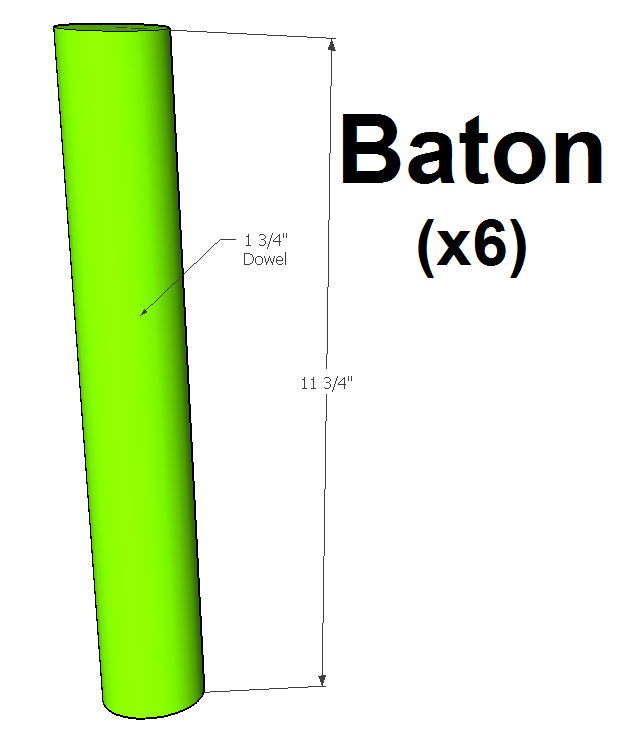
- 6 Batons , 11 3/4" x 1 3/4" dowel
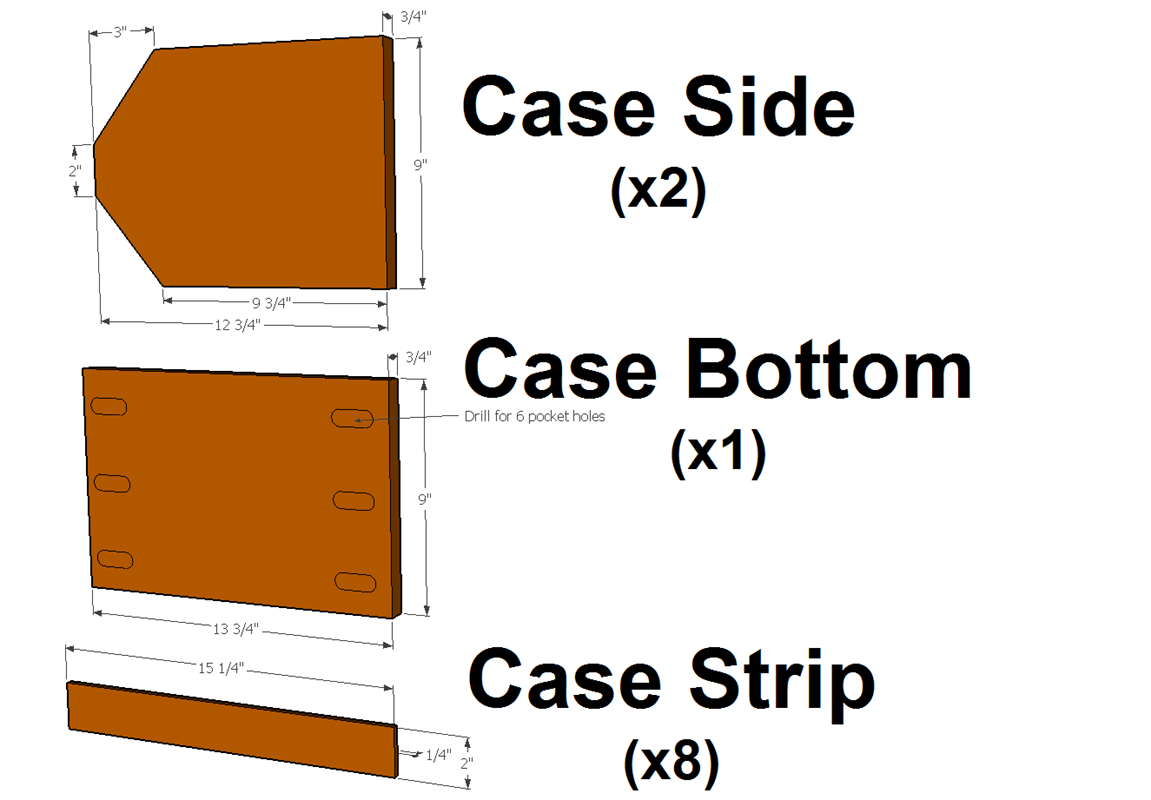
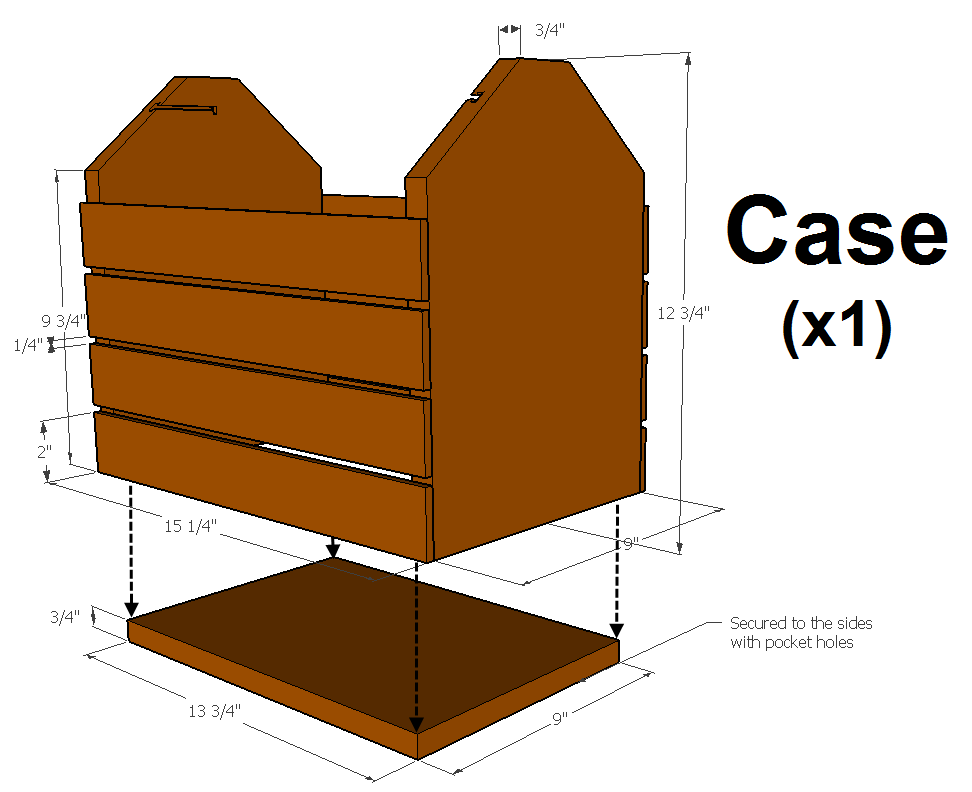
- 2 Case Side , 9" x 12 3/4" x 3/4"
- 1 Case Bottom , 9" x 13 3/4" x 3/4"
- 8 Case Strip , 15 1/4" x 2" x 1/4"
Directions
-
What is Kubb?
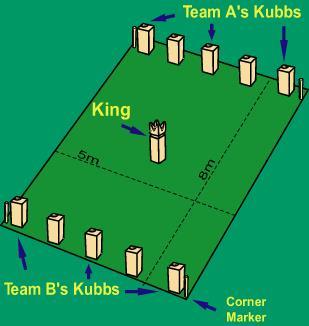
Play takes place on a small rectangular playing field, known as a 'pitch'. 'Kubbs' are placed at both ends of the pitch, and the 'king', a larger wooden block, is placed in the middle of the pitch.
Some rules vary from country to country and from region to region, but the ultimate object of the game is to knock over the 'kubbs' on the opposing side of the pitch, and then to knock over the 'king', before the opponent does.
Games can last from five minutes to well over an hour. The game can be played on a variety of surfaces such as grass, sand, concrete, snow, or even ice. Rules and instructional videos are in linked in the "Extras" section.
-
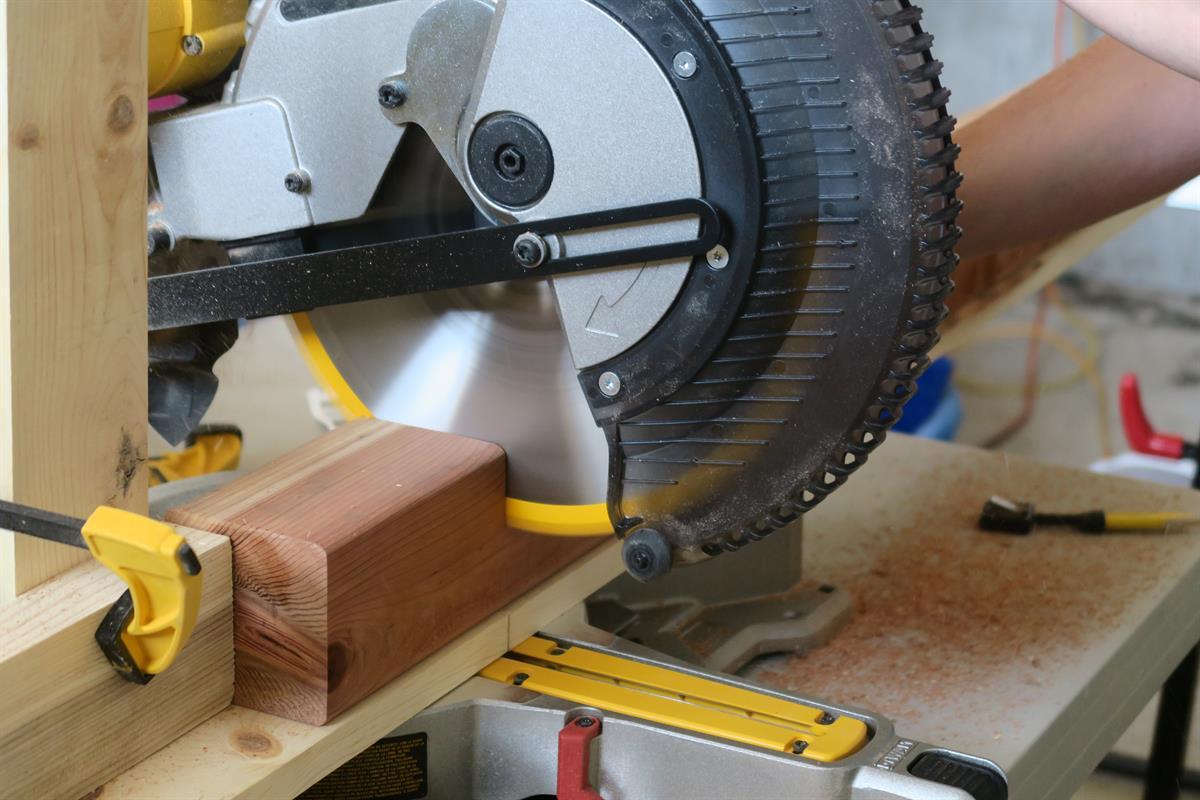
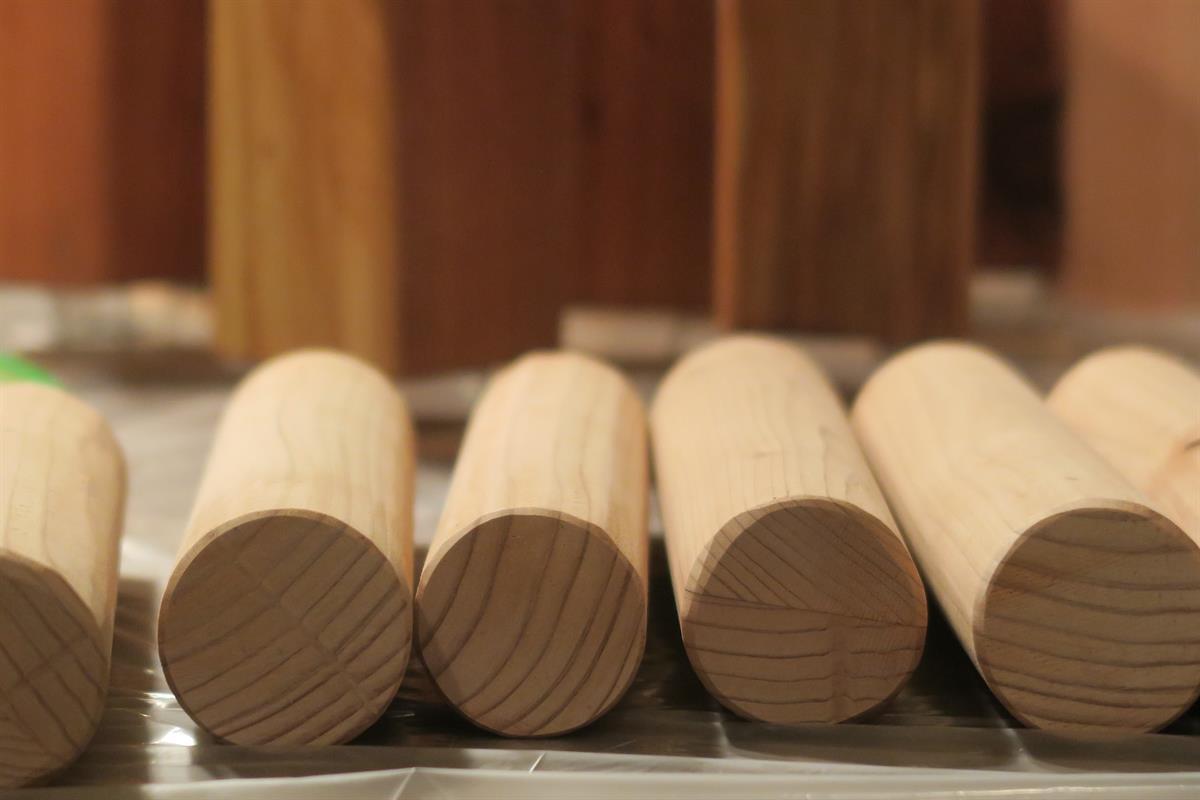
Cut the basic shapes
From a 4x4, cut the Kings, mallet handle/head, stakes and the Kubbs to their rough size. I set up a stop block on my saw to cut the 10 Kubbs to equal size.
-
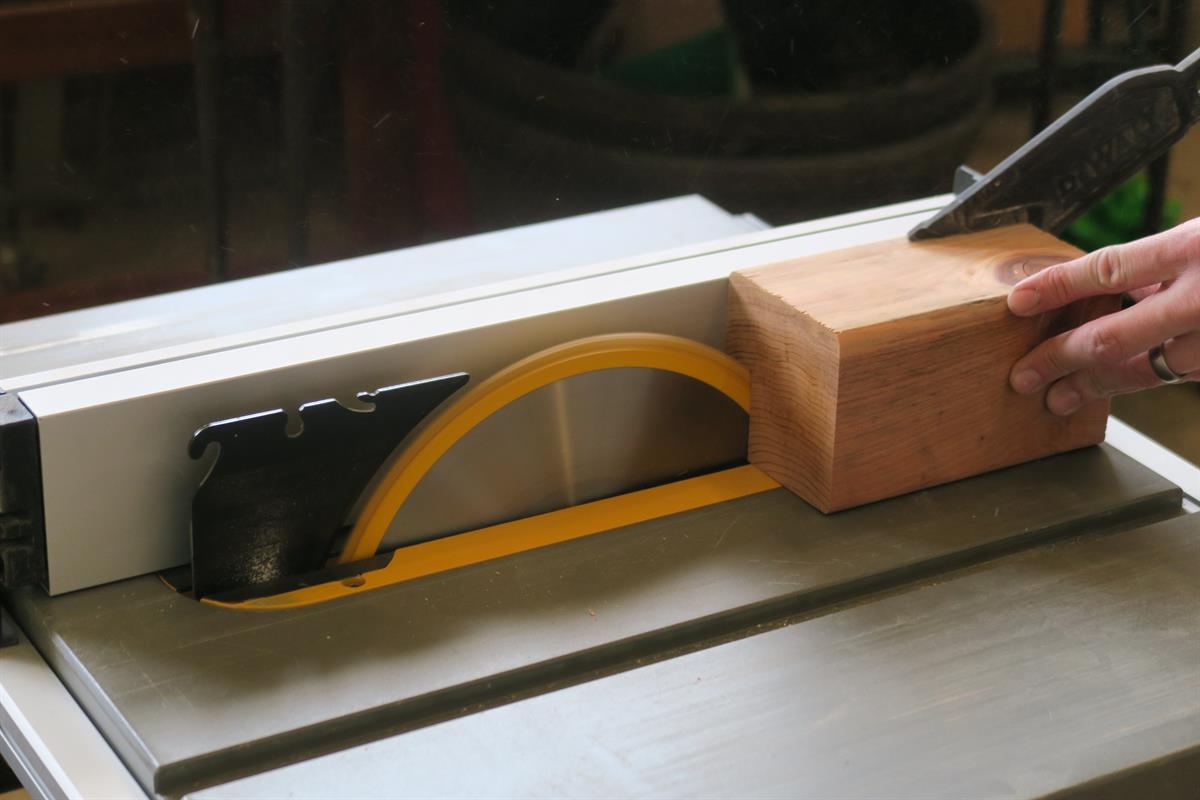
Cut Kubbs to final size
Trim off the sides of all of the Kubbs to their final size. This would have been easier to do before they were all cut to a rough size. Learn from my time-wasting mistake!
-
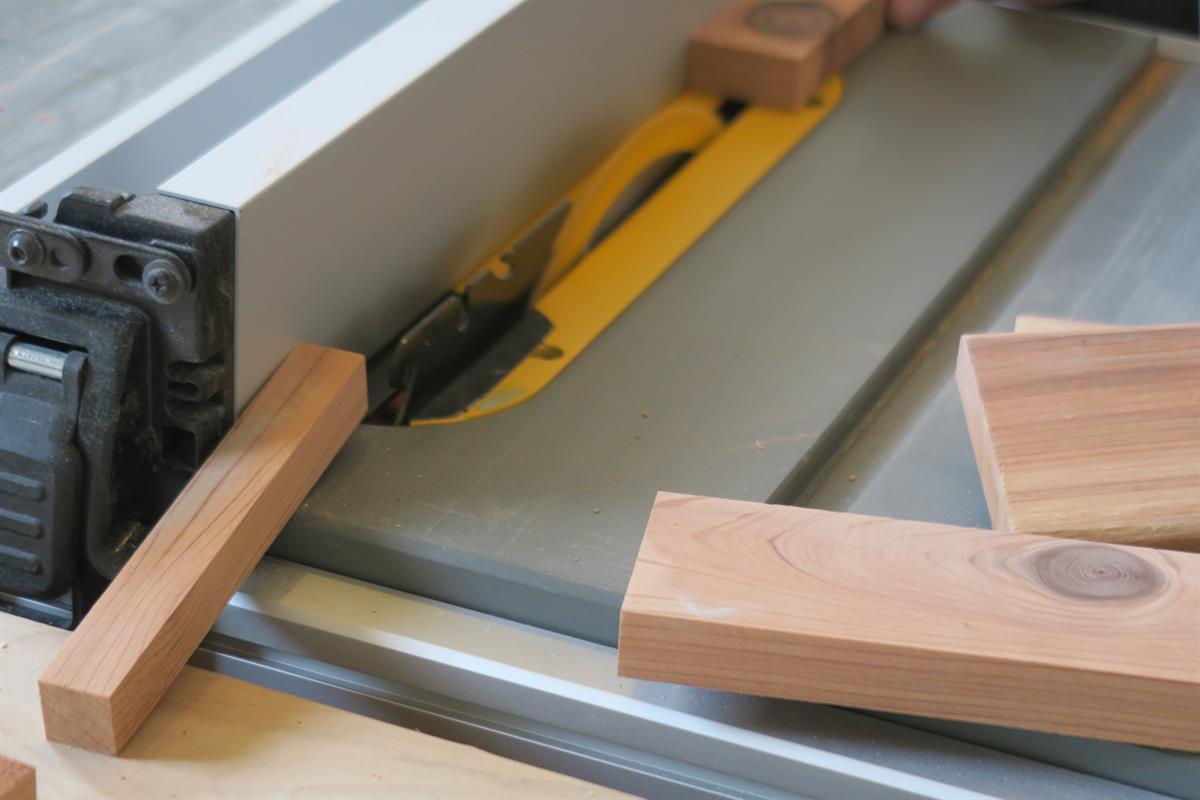
Cut down the stakes
I decided to use wood for the stakes, though wire stakes will probably work better in the real world. This is a prettier option in my opinion.
-
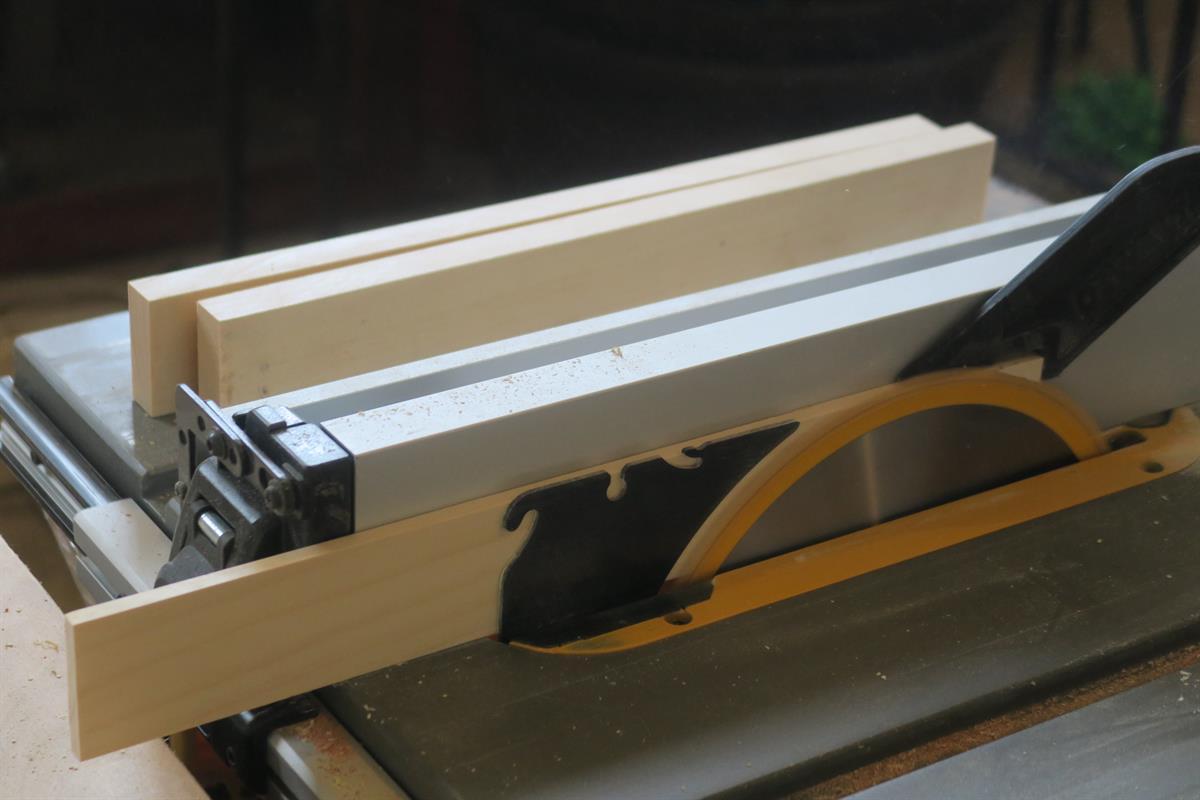
Cut the case
Using the 1x6 board, cut the case's sides, bottom and slats. I ended up changing my mind and going with an "all redwood" theme, it's your call.
-
Cut the dowels
In my quest for an "all redwood" project, I made the dowels from 4x4's and a router jig. This is obviously optional and you could get a closet rod and cut it to size.
-
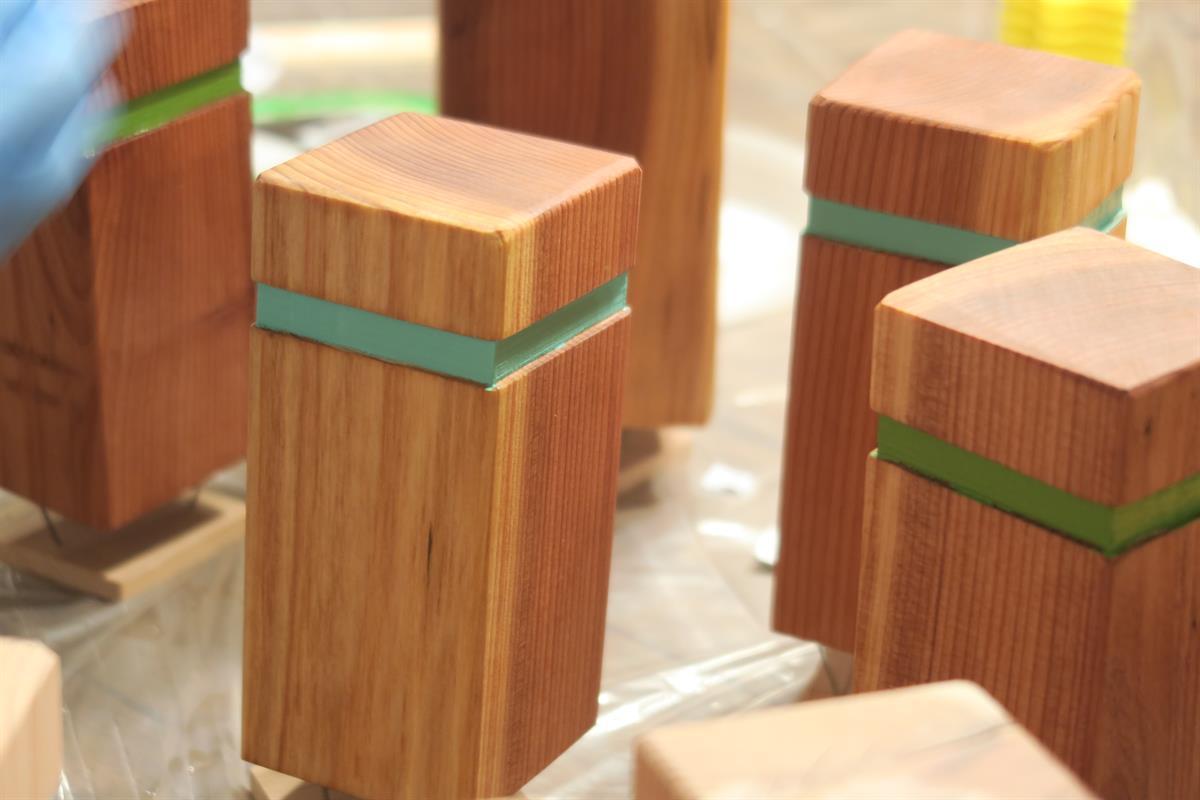
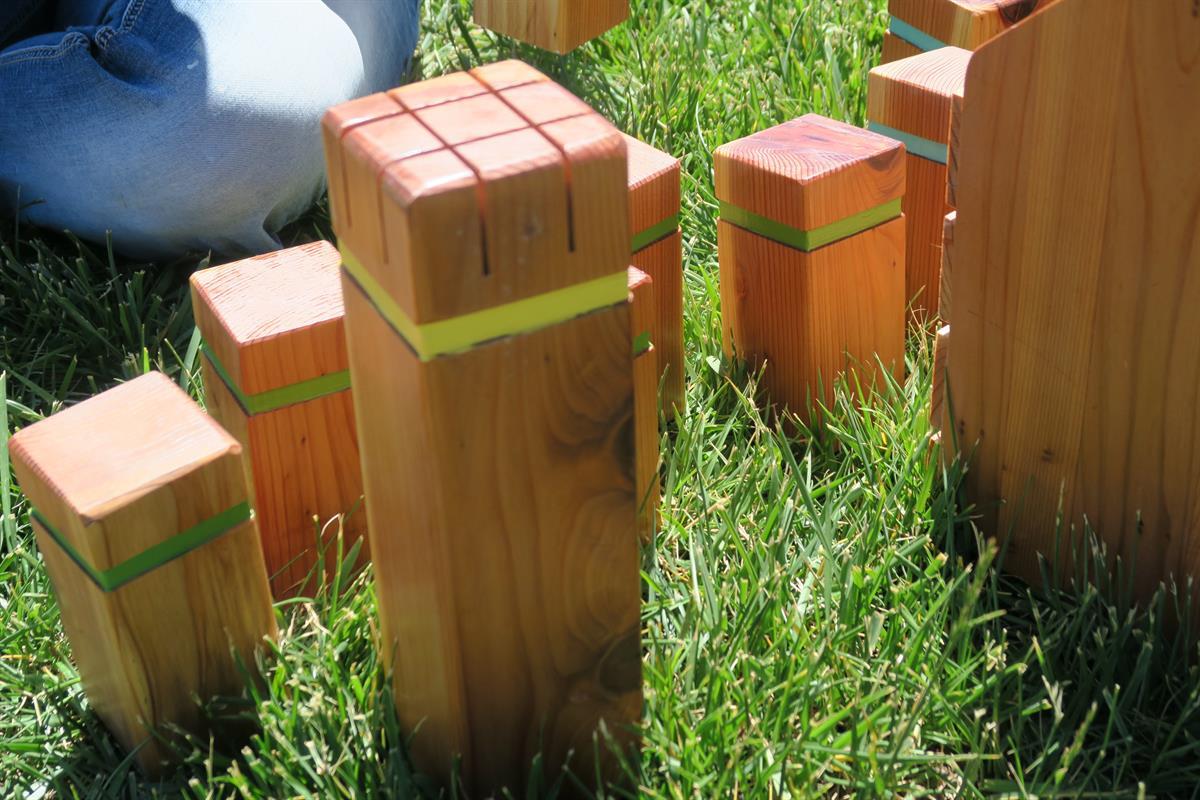
Optional Decoration/Team Colors
I chose to cut a band about 1/8" deep on the Kubbs, Stakes and King. I also painted them to show different teams and the stakes are colored so you can easily set up the playing field. In my case, there is a blue team, a green team and the king is yellow.
-
Cut the King
The king is cut to length from the 4x4, I added the decorative band and the cuts on the top for the "crown".
-
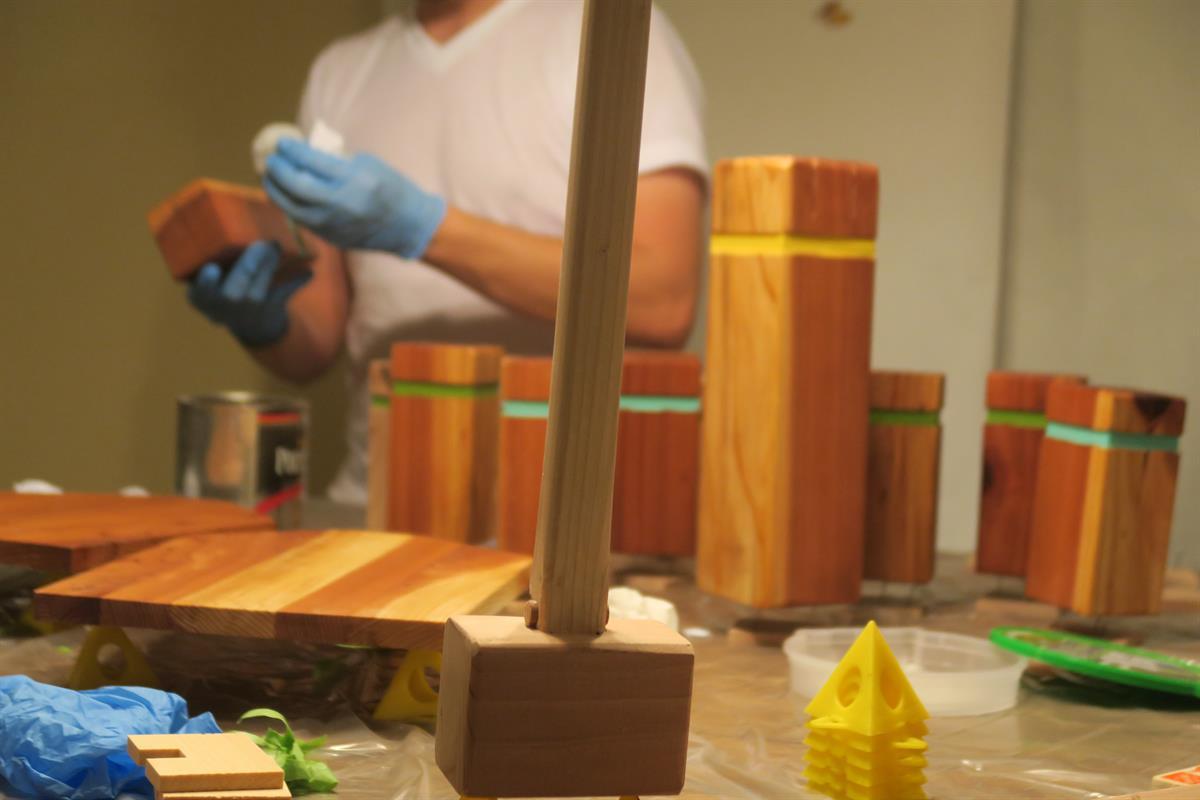
Finishing
I used a wipe-on poly after letting the paint dry. I purposely did this before final assembly of the case and taped off where I would need to glue.
-
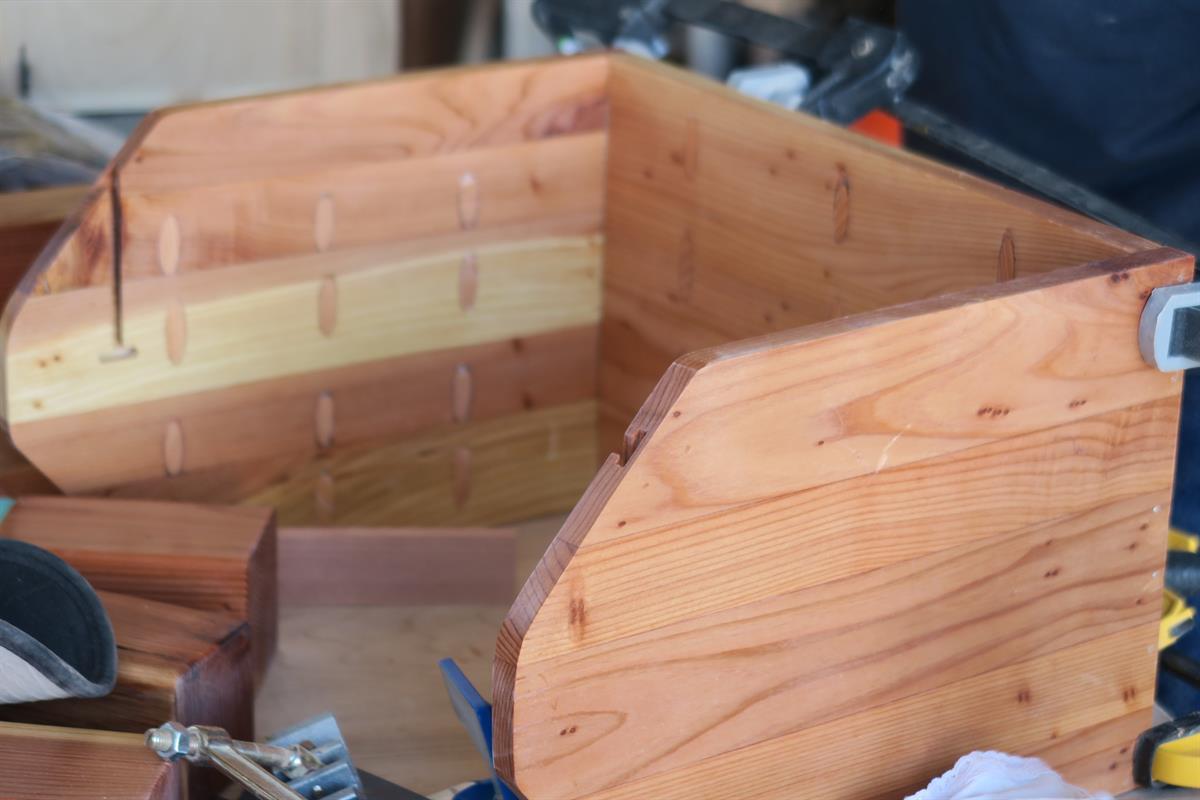
Rough assembly of the case
I cut strips of wood about 2.5" wide and joined them with pocket holes while the glue dried. As you can see in the picture, I filled them with wooden plugs and sanded smooth.
-
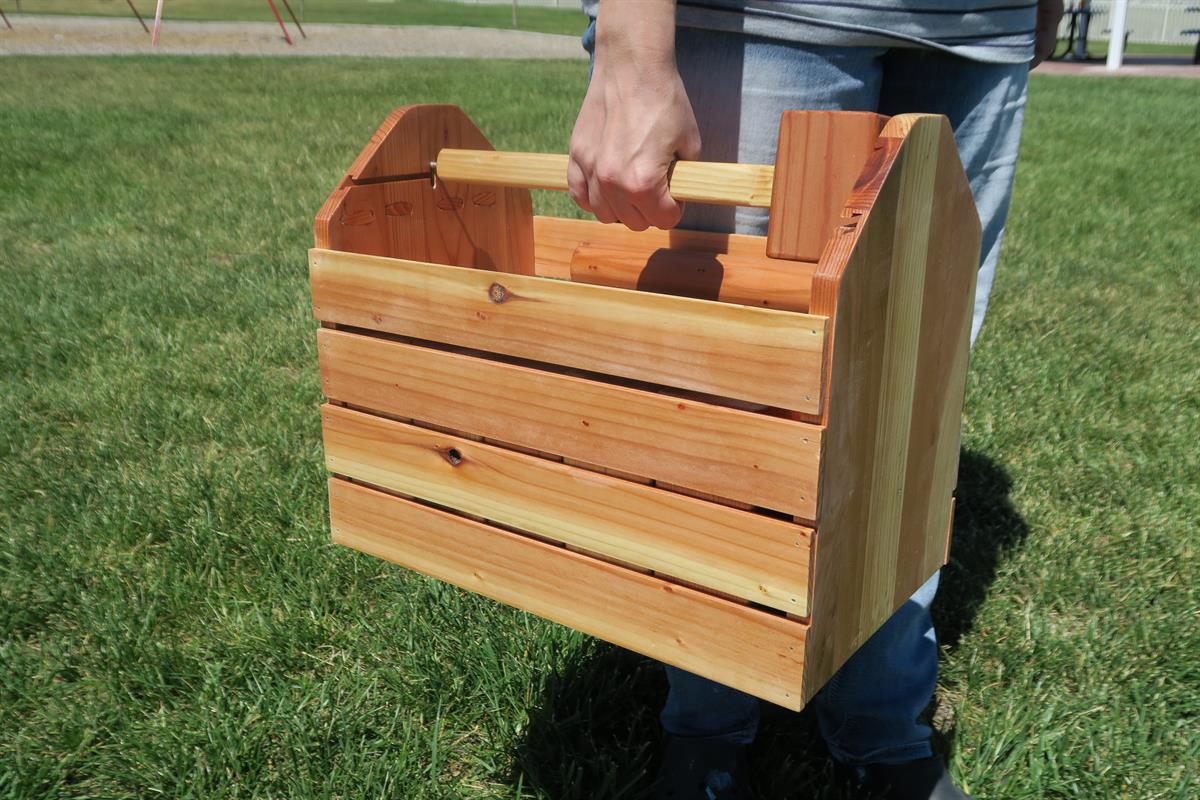
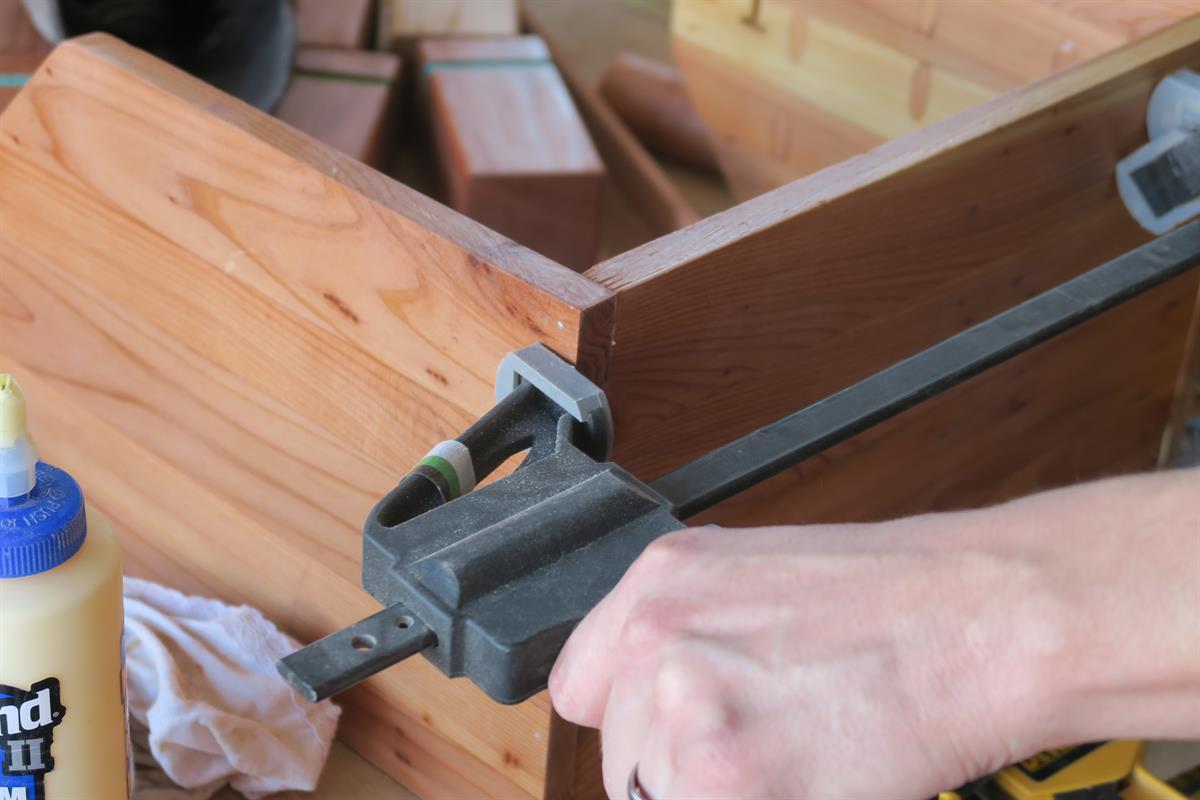
Final assembly of the case
With the finish dry, I glued the case together with pocket holes attaching the bottom to each side. Then I nailed the slats in place with small nails.
-
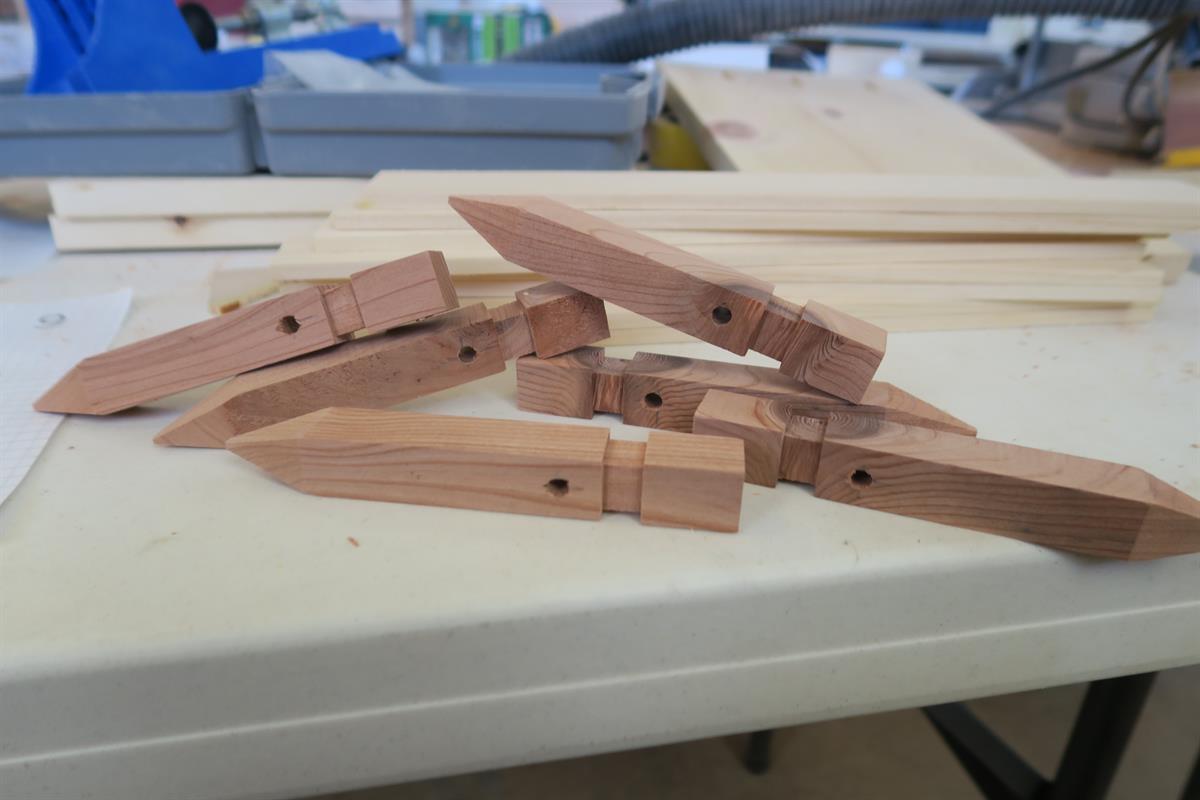
Finishing the stakes
Drill the holes in the stakes and cut/sand them to a point. Decorative band is optional.
-
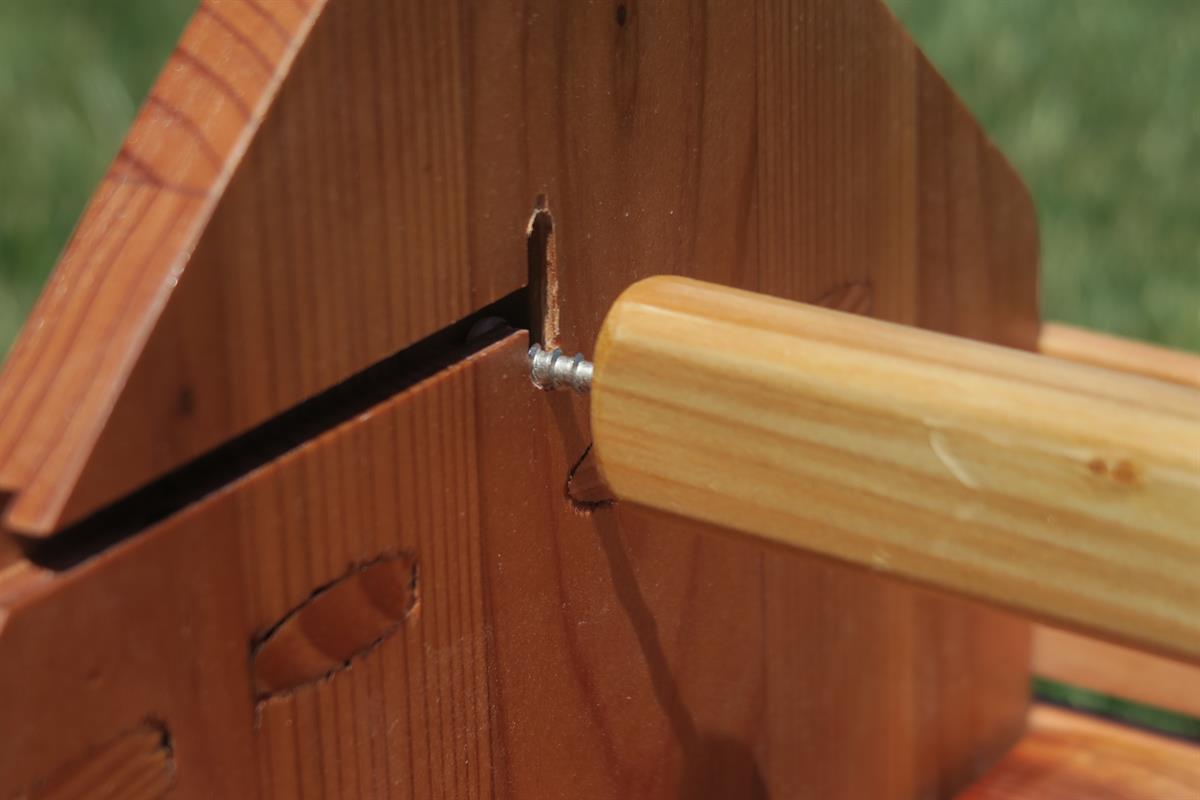
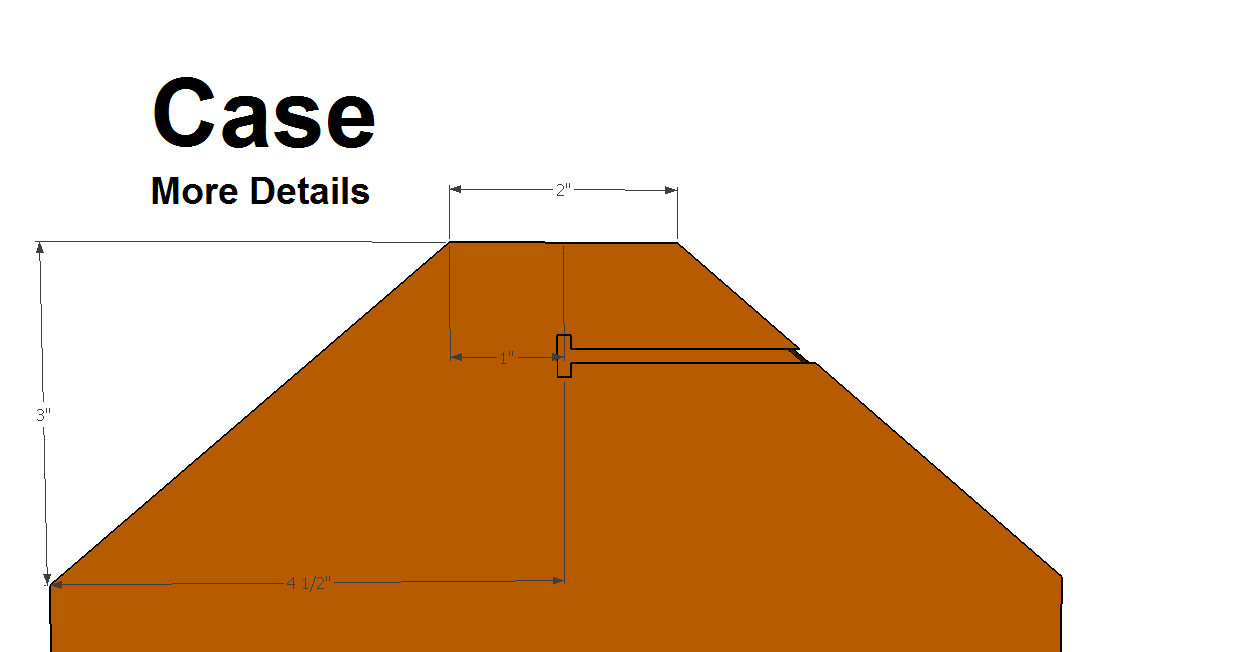
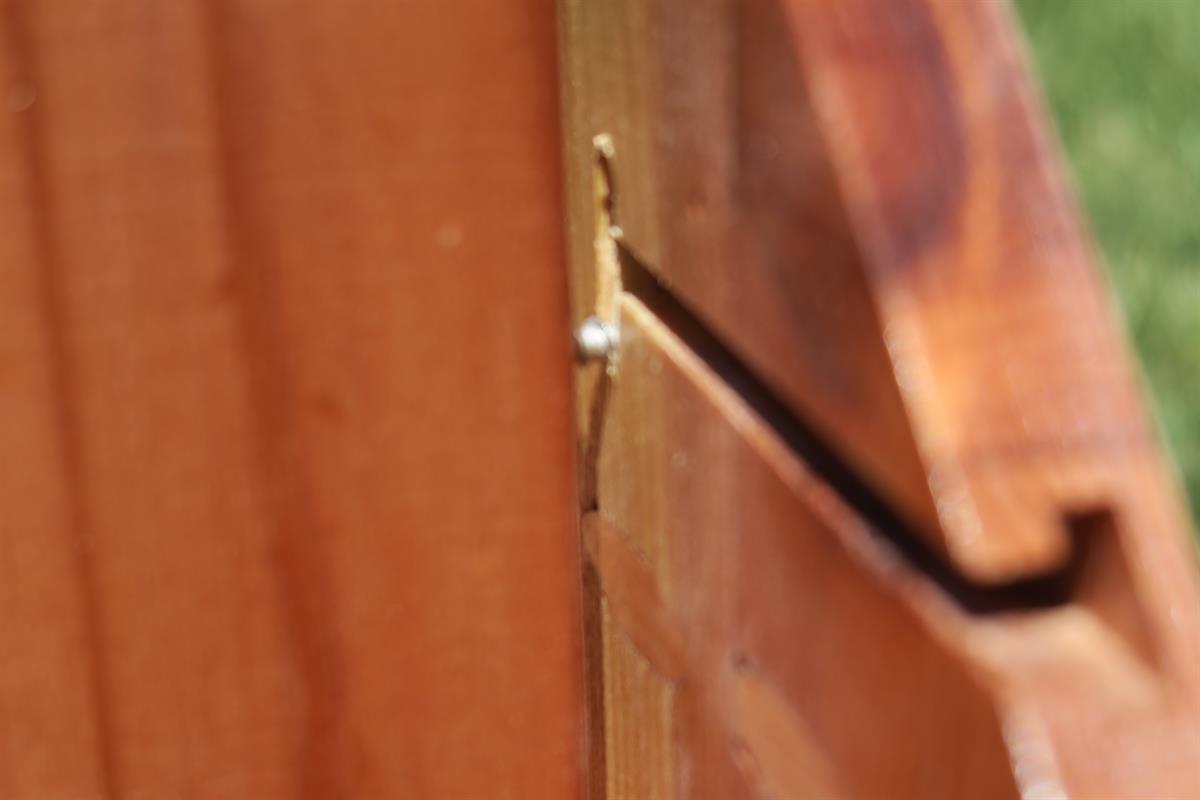
Cut the track for the mallet
I used a key hole bit on my router to do this. I laid both sides down and started in between them to end with a mirrored result. I used a straight edge around all sides and had a 1/4 spacer that I removed to route the "T" shape in the center of the case. A plunge router is not necessary, because you don't want the bit coming back up.
-
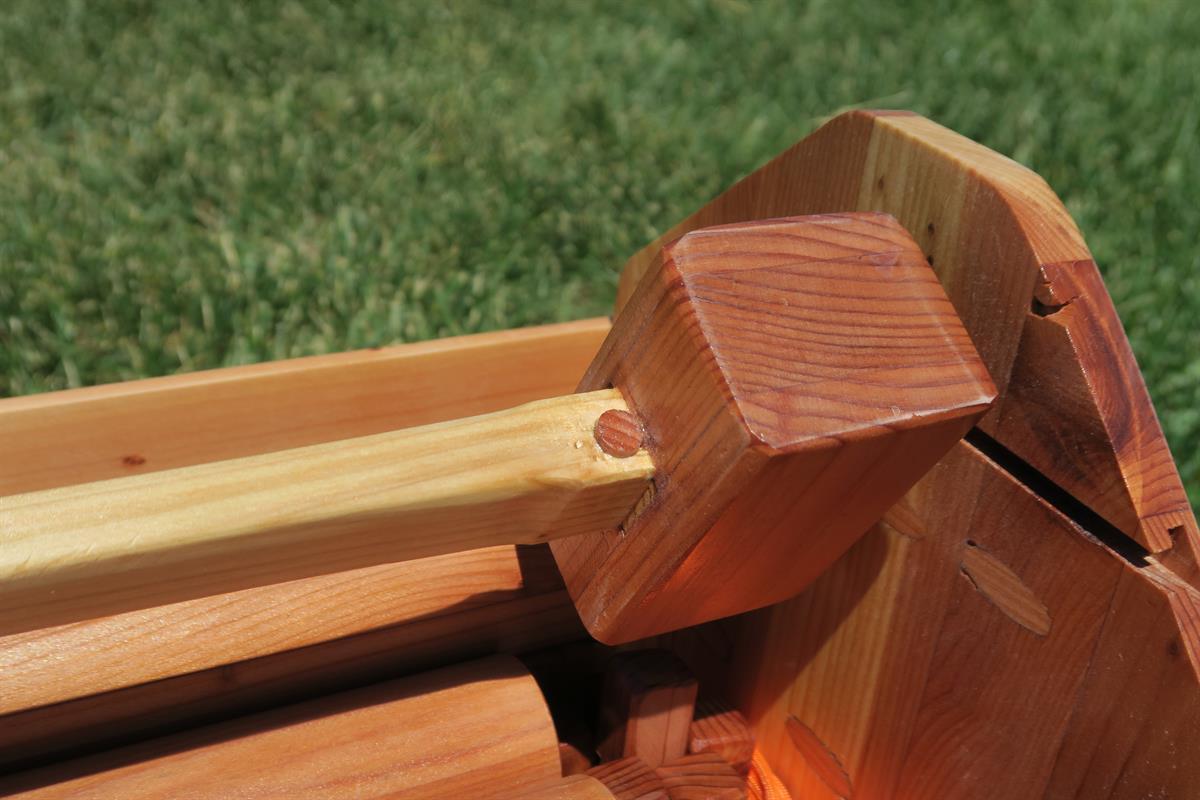
Cut the mallet
I watched several how-to videos online and decided on Steve Ramsey's design. My plans call for a dowel to be cut for the handle, but I found that using a non-round handle was more comfortable. I also filled the head with BBs for extra weight.
-
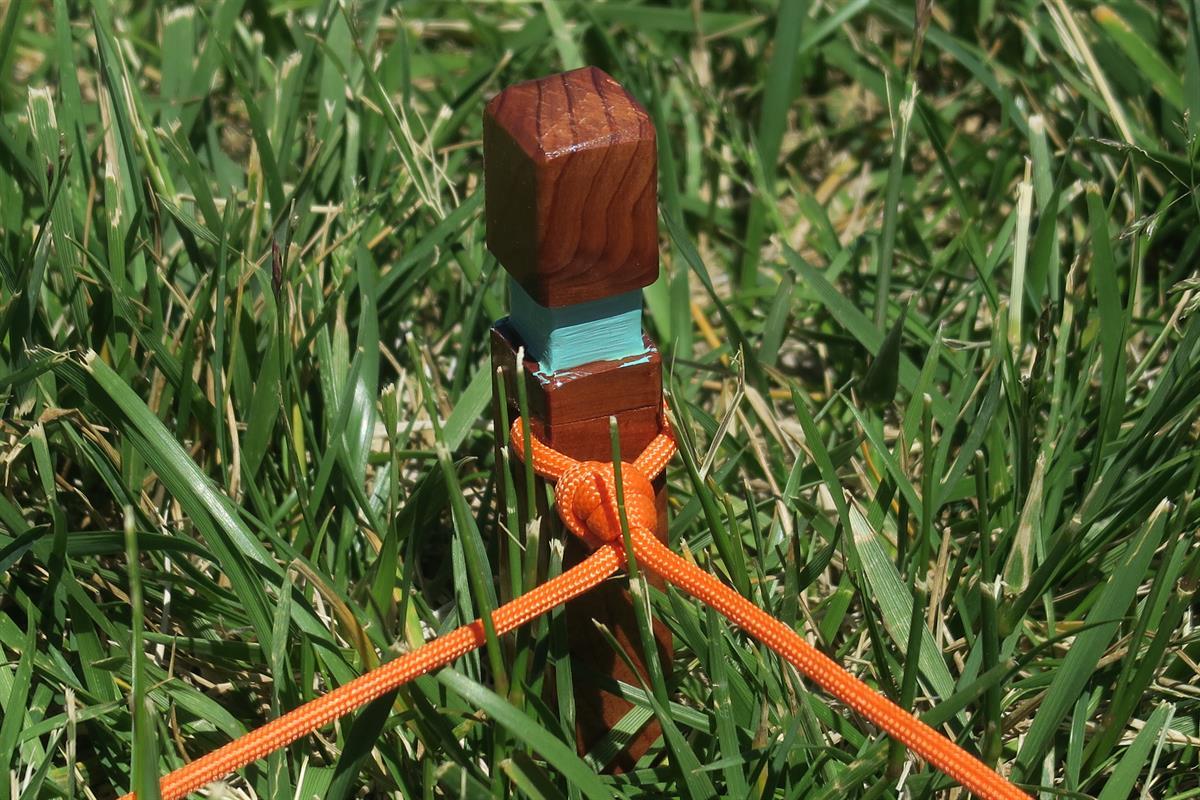
Cut the rope, attach to stakes
I found this bright orange paracord and thought it would mark the field of play nicely. I ran the rope through each stake and tied knots so I don't have to measure the field every time I play.