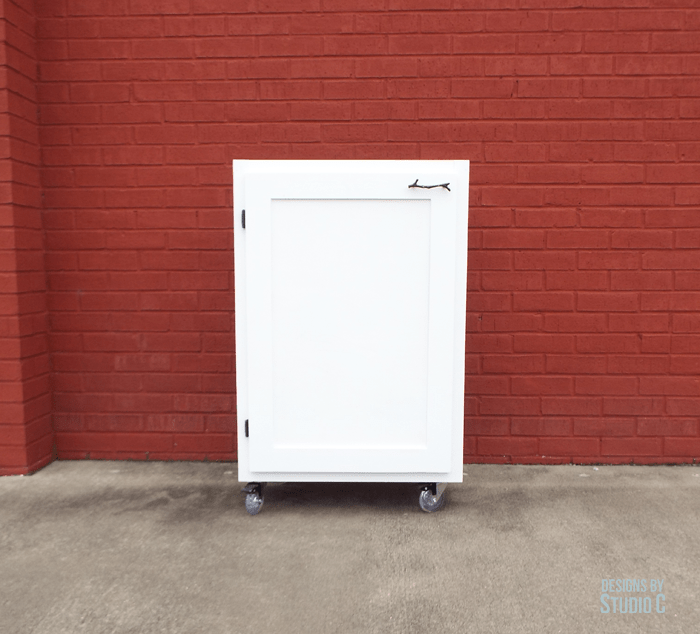
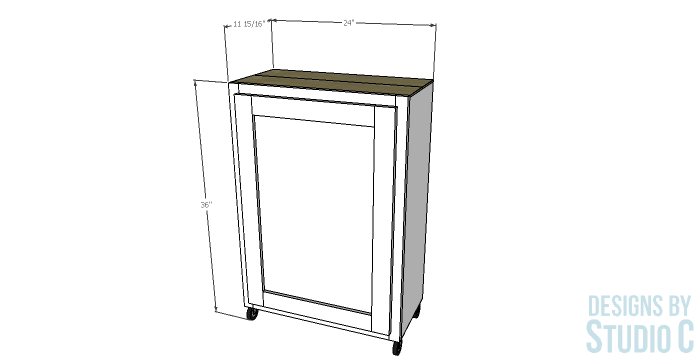


An easy to build cabinet on casters with a tile top, and a shelf behind the door. The cabinet is counter height and the perfect addition to a small space.
Tools
Kreg Tools

Other Tools
-
Miter Saw

-
Table Saw
-
Tape Measure
-
Nail Gun
-
Sander
Materials
Wood Products
- 2 Board , 1x2 , 96"
- 1 Board , 1x3 , 96"
- 2 Plywood , 1/4" Thick , Quarter Sheet
- 1 Plywood , 3/4" Thick , Half Sheet
Hardware & Supplies
- 1 Box of 1-1/4" Pocket Hole Screws
- 1 Box of 1/2" Brad Nails
- 1 Box of 1-1/2" Brad Nails
- 2 1/4" Overlay Hinges
- 4 3" Casters with 3/4" screws
- 1 Wood Glue
- 1 Sandpaper (80, 120, 220 Grits)
- 2 Rectangular Wood Grain Ceramic Tiles
Directions
-
Step One
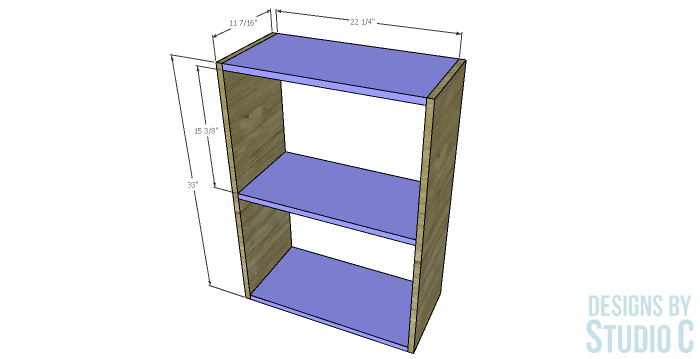
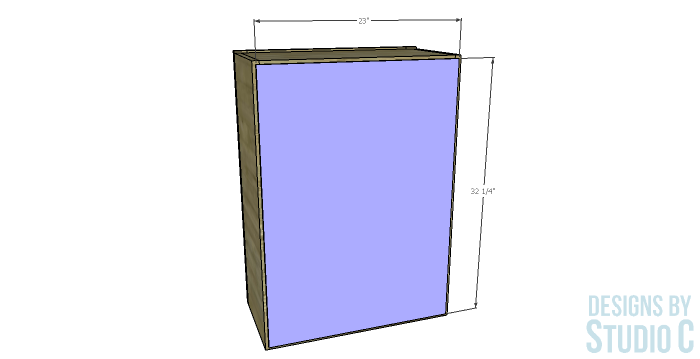
Cut the pieces for the sides, top and shelf. With the pocket hole jig set for 3/4" material, drill pocket holes in each end of the top, bottom and shelf. Assemble the case using glue and 1-1/4" pocket hole screws.
-
Step Two
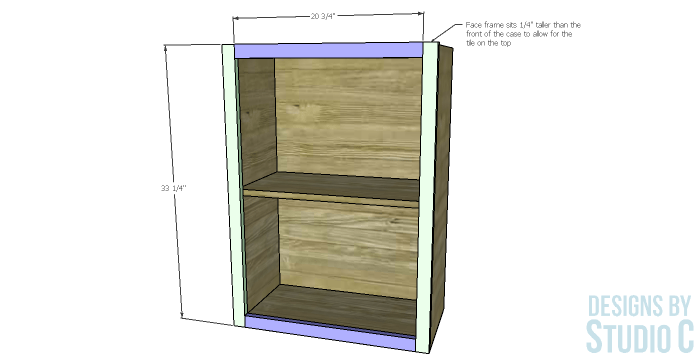
Cut the piece for the back. Secure the back to the case using 1-1/2" brad nails.
-
Step Three
Cut the pieces for the face frame. Drill pocket holes in each end of the shorter pieces. Assemble the frame using glue and 1-1/4" pocket hole screws.
Position the face frame on the case with the sides and bottom flush. (Remember: the top of the face frame will sit 1/4" higher than the case to accommodate the tile.) Secure in place using glue and 1-1/2" brad nails.
-
Step Four
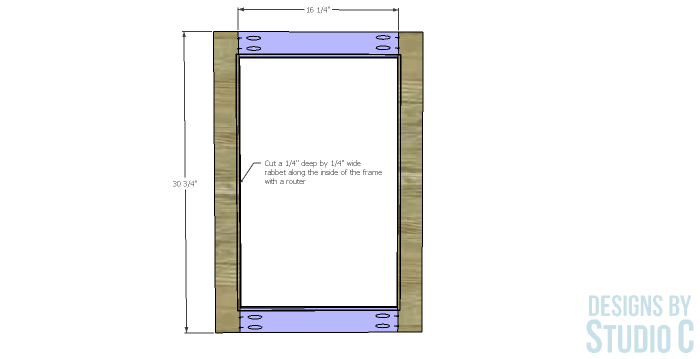
Cut the pieces for the door frame and drill pocket holes in each end of the shorter pieces. Assemble the frame using glue and 1-1/4" pocket hole screws.
Using a router and a 1/4" rabbeting bit, cut a 1/4" deep rabbet along the inside back of the frame to accommodate the panel. Use a chisel to square the corners so the frame will fit (the corners of the panel can also be rounded.)
-
Step Five
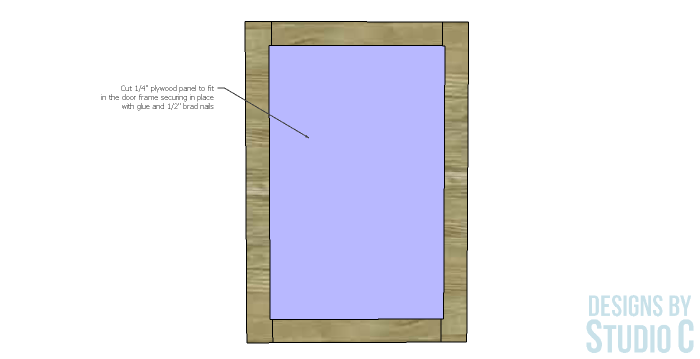
Cut the 1/4" panel to fit, then secure to the door frame using glue and 1/2" brad nails.
-
Step Six
Finish the cabinet as desired, then install the door following the manufacturer's installation instructions for the hinges. The door will overlap the opening by 1/4" on all sides.

-
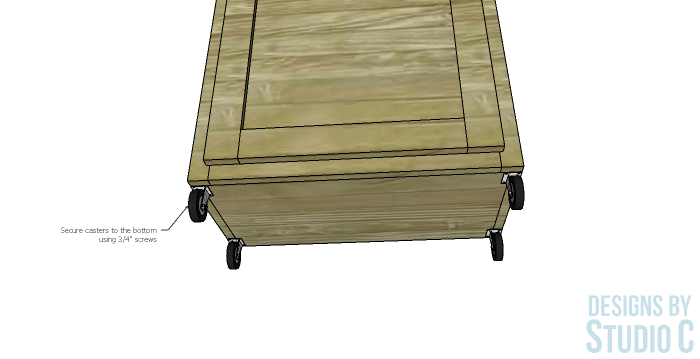
Step Seven
The casters will be secured to the bottom of the case using 3/4" screws.