

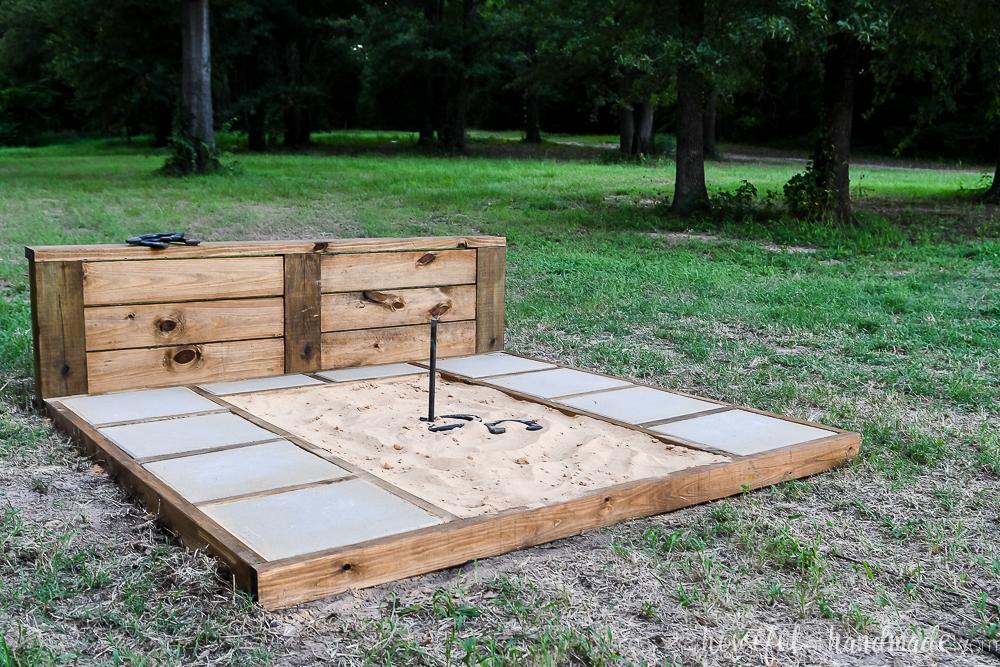
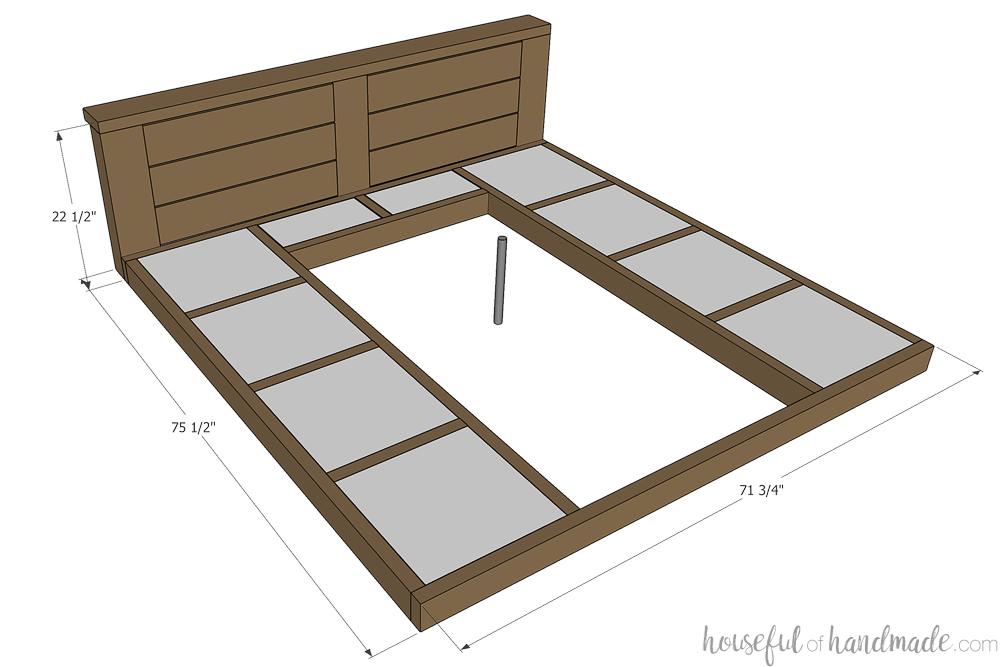


Enjoy some games outside with your own horseshoe pit. This horseshoe pit frame has a throwing platform with the front at the foul line, large sandpit, and sturdy backstop that can handle a few stray horseshoes. The hardest part of this build is lifting the sturdy frames into place.
Tools
Kreg Tools


Other Tools
-
Miter Saw

-
Square
-
Tape Measure
-
Drill (cordless)
-
Impact Driver
-
Level
Materials
Wood Products
- 13 Board , 2x4 , 96"
- 6 Board , 2x6 , 96"
- 2 Board , 4x6 , 72"
Hardware & Supplies
- 180 2 1/2" blue-kote pocket hole screws
- 12 3" lag bolts
- 16 16x16 pavers
- 4 8x16 pavers
- 1 Wood glue
- 1 Sand
Directions
-
Build sides of frame
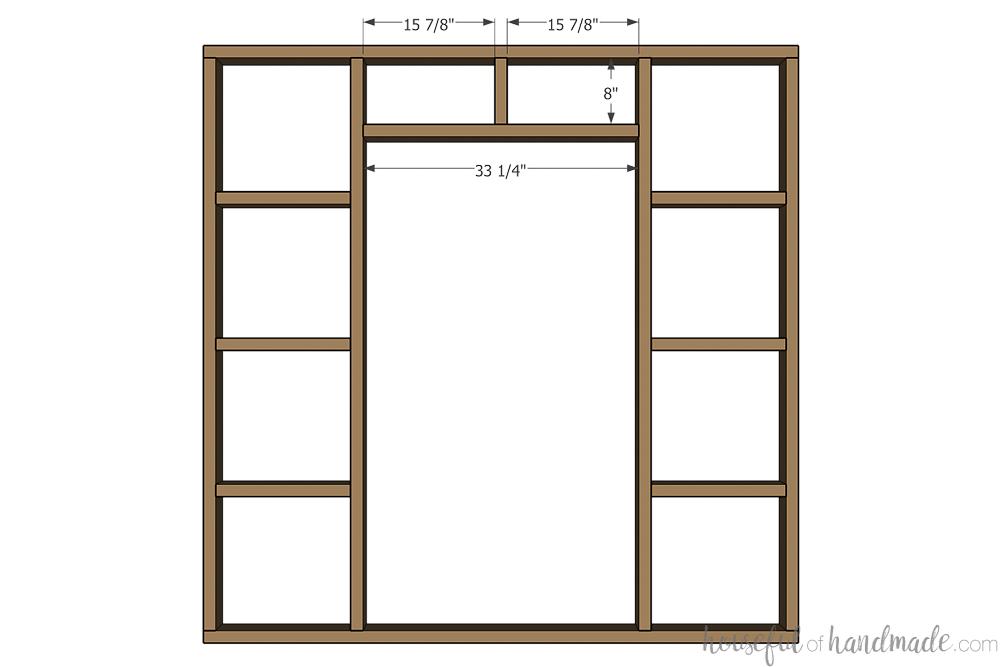
Cut all the frame boards. Set your pocket hole jig for 1 1/2" thick material and drill 2 pocket holes in each end of all the frame boards except the Frame front/back boards. Secure the frame side slats in between two frame sides as shown in the picture. There should be a 6 1/8" gap between all the slats. Secure with 2 1/2" pocket hole screws and wood glue.
-
Add frame front/back
Attach two assembled sides between two frame front/back boards with the pocket holes already drilled in each ends of the frame side boards. Secure them with 2 1/2" pocket hole screws and wood glue so the outside side board is flush with the edge of the frame front/back boards.

-
Assemble back of frame
Attach the frame back slat to the frame back board in the center. Secure with 2 1/2" pocket hole screws and wood glue. Attach the frame pit back between the assembled sides and flush with the bottom of the frame back board. Secure with 2 1/2" pocket hole screws and wood glue.
-
Build a second frame
Repeat to build a second frame.
-
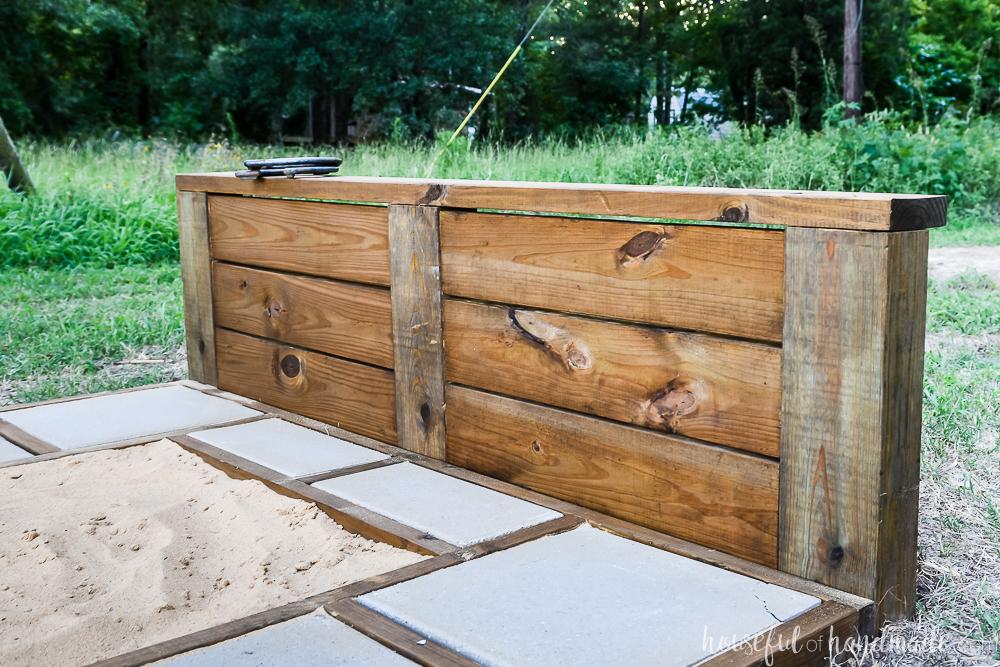
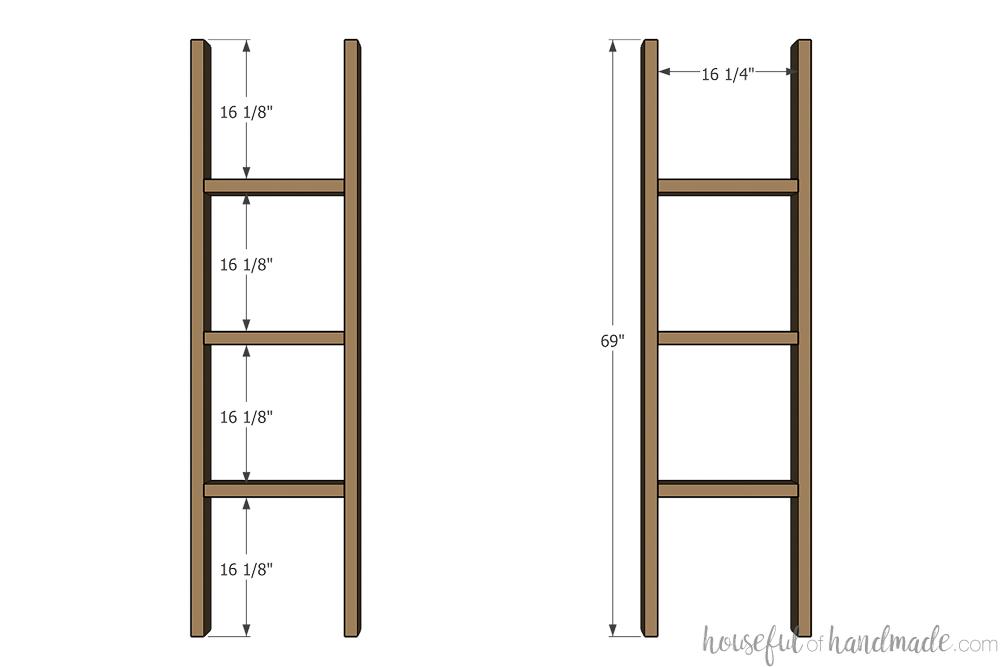
Assemble backstop
Cut the backstop boards. With the pocket hole jig still set for 1 1/2" thick material, drill 3 pocket holes in each end of all the backstop slat boards. Attach the backstop slats between the 3 backstop legs so they are flush with the front or set slightly back (1/4"). Also set the top slat 1/4" below the top of the leg and leave a 1/4" gap between the slats. Secure to the legs with 2 1/2" pocket hole screws and wood glue.
-
Add the backstop top
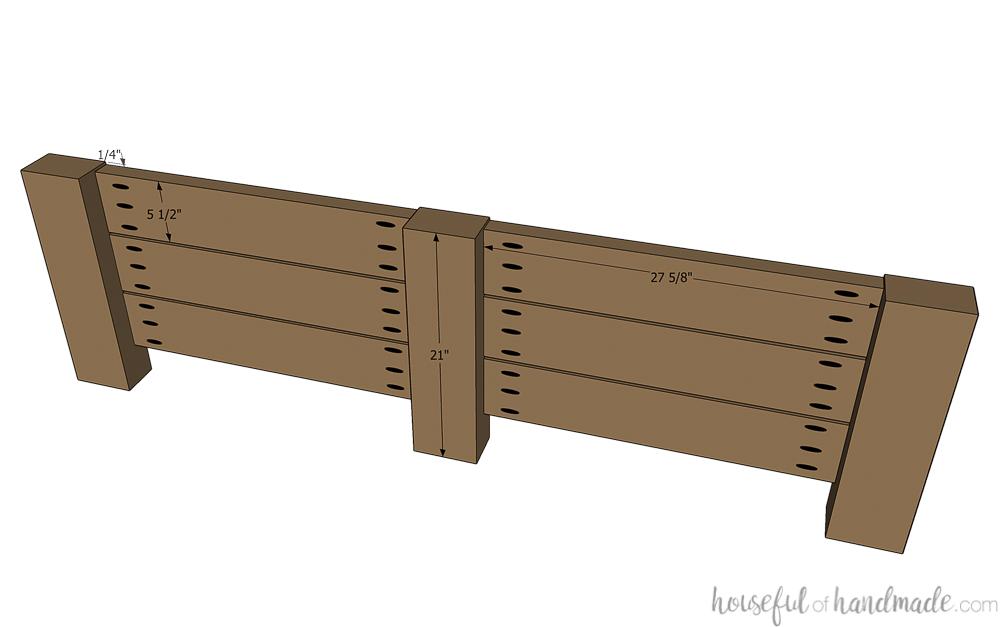
Drill 2 pocket holes set for 1 1/2" thick material in the back on the top of each of the backstop legs. Since the 4x6 board will not fit in the jig, you will have to use the 300 series or remove the top part of the jig with spacers. Clamp it to the leg to drill holes. Add wood glue to the top of the legs and secure the backstop top with 2 1/2" pocket hole screws so the front is flush with the front of the legs and the back overhangs.

-
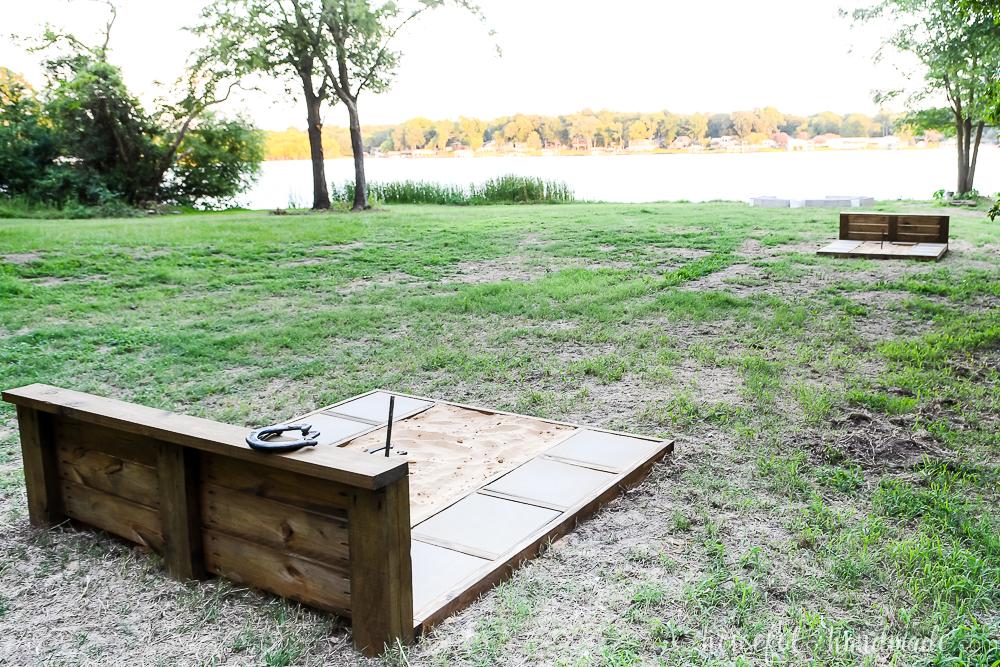
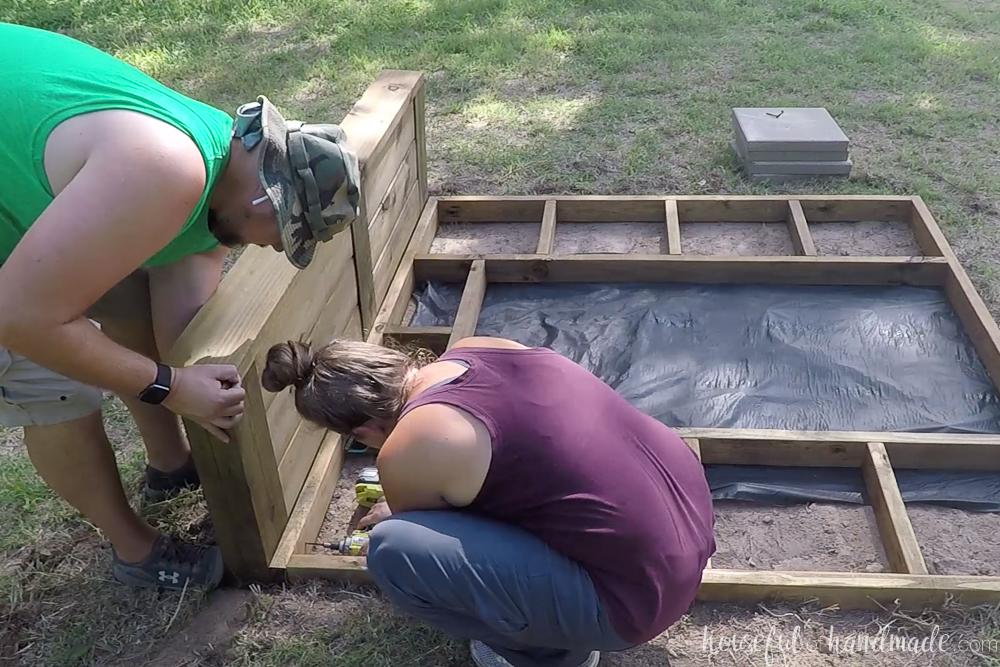
Install the frame
Pick your spot for your horseshoe pits. The stakes should be set back from the front of the frame 36" and the stakes need to be 40' apart, so space the assembled frames 34' apart. Remove any grass and level the area for the pits. Place the frame in the area. You can use weed barrier below the pit if you want. Then place the backstop up against the back (they are very heavy if you attach them before moving into place). Attach the back to the frame by driving 2 lag bolts into each leg through the back of the frame. There should be a 1/4" gap between the top of the frame and the bottom slat to allow sand to fall through as needed.
-
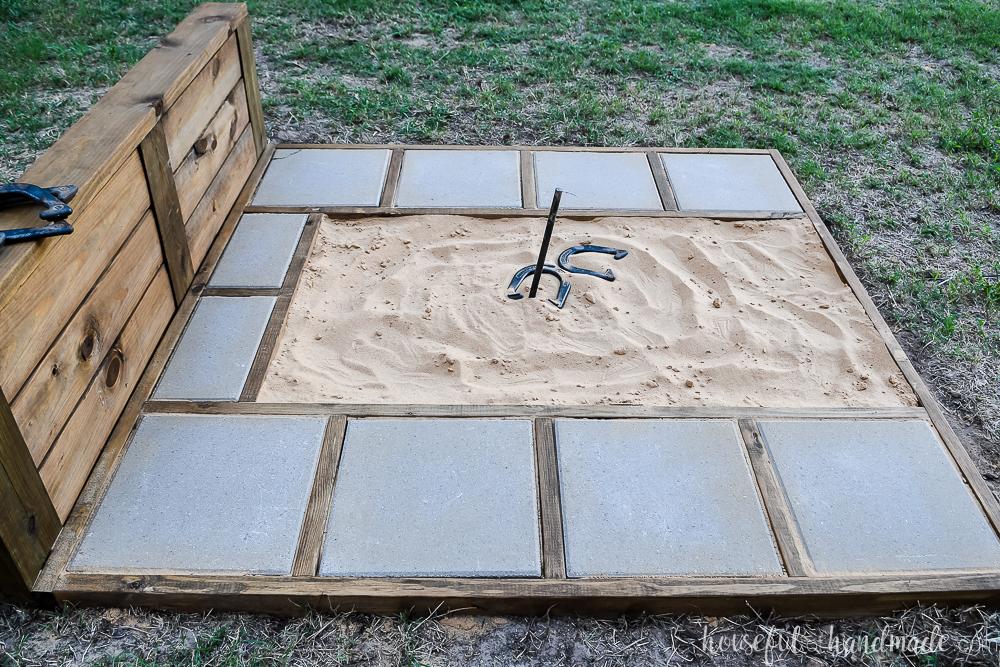
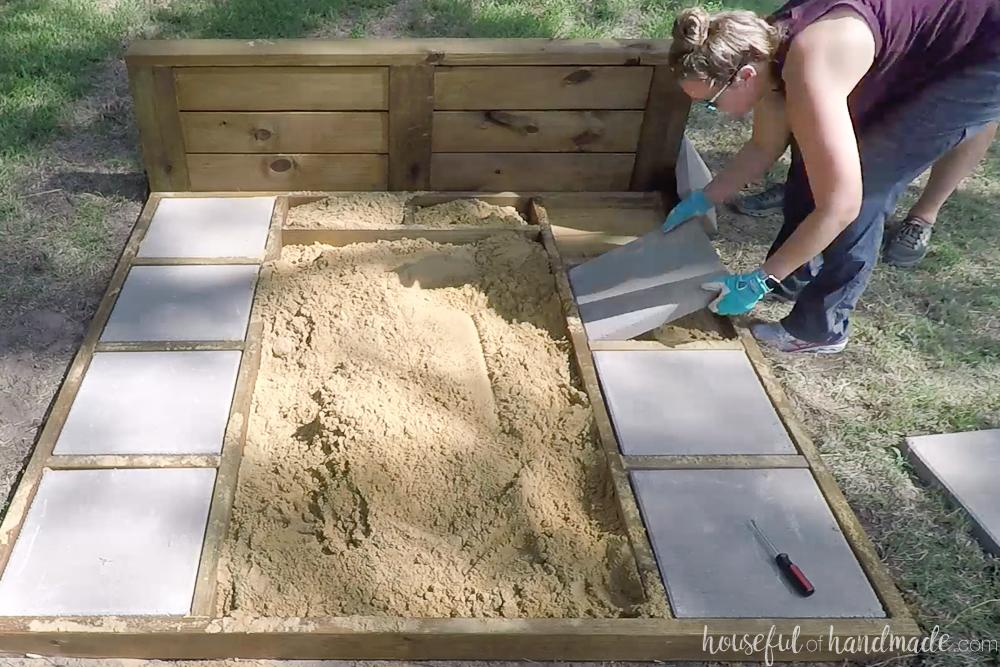
Install the throwing platform
Fill the throwing platform squares with sand, leaving room for the pavers on the top. You will need to stop down the sand as you measure for the paver height. Since the pavers fit so snug, it is hard to remove them once placed, we found using one of the smaller pavers to stomp down the sand and measure much easier. Once all the pavers are placed, fill the small gap around them with sand and fill the pit with sand.
-
Enjoy!
Now all that is left is to install your horseshoe pit stakes and enjoy a fun summer game! And make sure to visit me at Houseful of Handmade to say hi and find more things to build.

-
Build a second backstop
Repeat to build a second backstop.