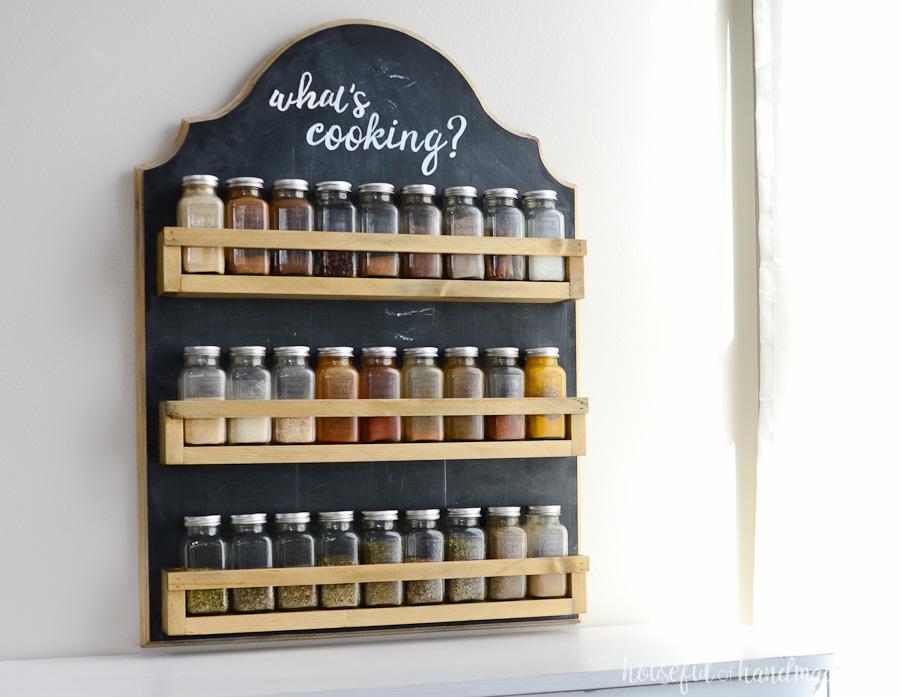
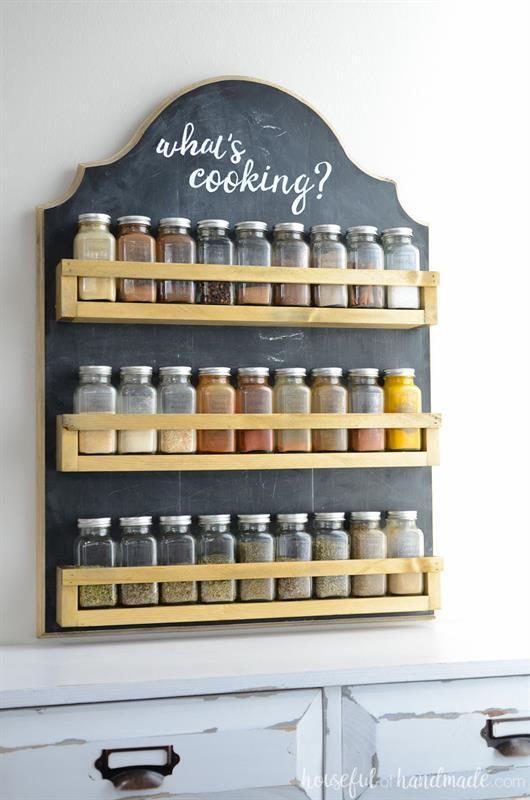


Free up counter space and cabinet space by displaying your spice collection on the wall of your kitchen. This quick project will help you organize your kitchen, and acts as beautiful wall decor too.
Tools
Kreg Tools


Other Tools
-
Circular Saw (corded)

-
Jigsaw
-
Tape Measure
-
Drill (cordless)
-
Impact Driver
-
Nail Gun
-
Router
-
Sander
Materials
Wood Products
- 1 Board , 1x8 , 96"
- 1 Board , 1x3 , 96"
Hardware & Supplies
- 25 1 1/4" pocket hole screws
- 15 1 1/4" wood screws
- 1 Wood glue
- 1 Chalkboard paint
- 1 Wood stain
- 1 Wood sealer
Directions
-
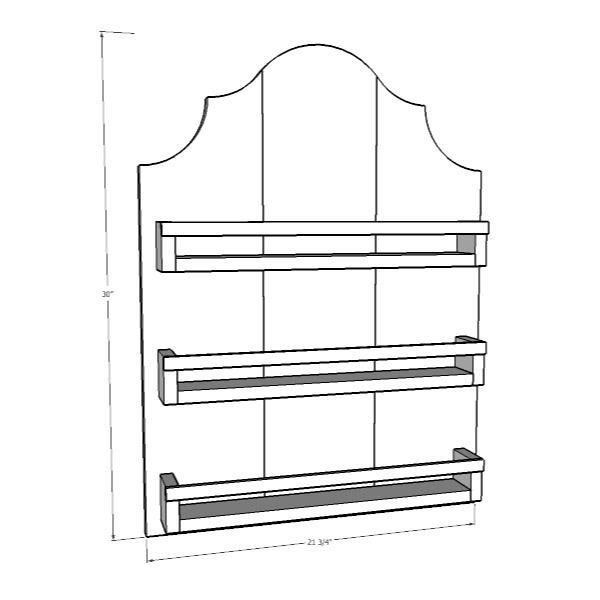
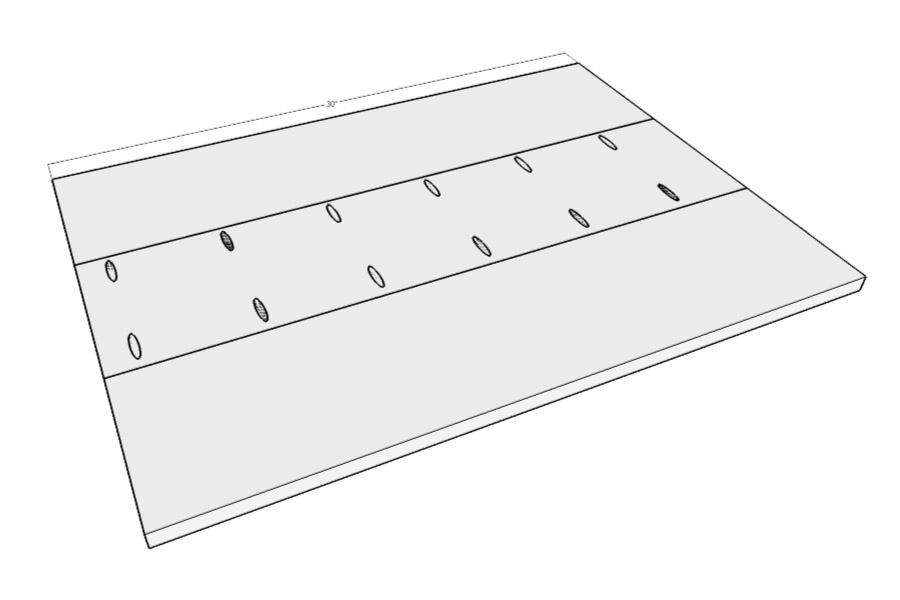
Build back of spice rack
Cut 1x8 into 3 30" pieces. Join the boards along the edges by drilling pocket holes in the sides of the center board about 5-6" apart. Make sure the pocket hole on the top of the boards is low enough that it will not be cut through when you add the decorative top. Apply wood glue to the edges of the boards, clap them together and secure with 1 1/4" pocket hole screws.
-
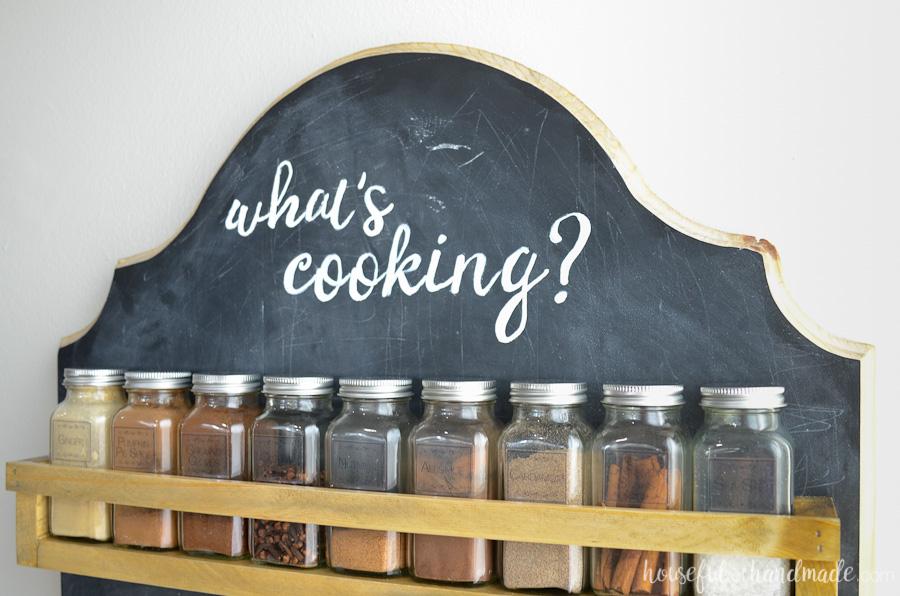
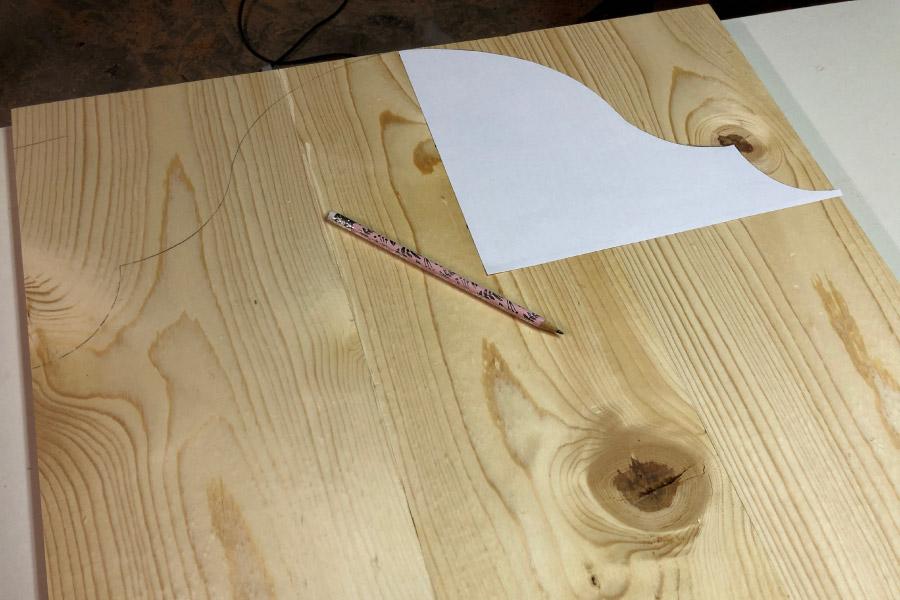
Cut decorative top
Sketch out the decorative top you want on your spice rack or download the one I used in the extras tab. Cut out the template and trace it on one half of the top of your connected boards. Then flip and trace the other side. Cut along the lines with a jig saw.
-
Add optional router edge
To add a farmhouse look to my spice rack, I used my router to apply a decorative edge to the front edges of the spice rack back.
-
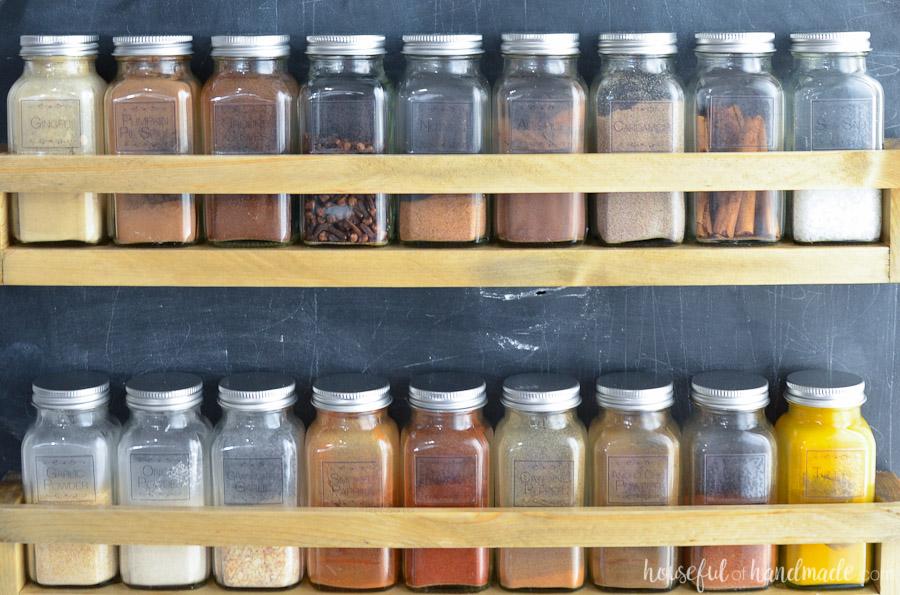
Cut boards for the spice shelves
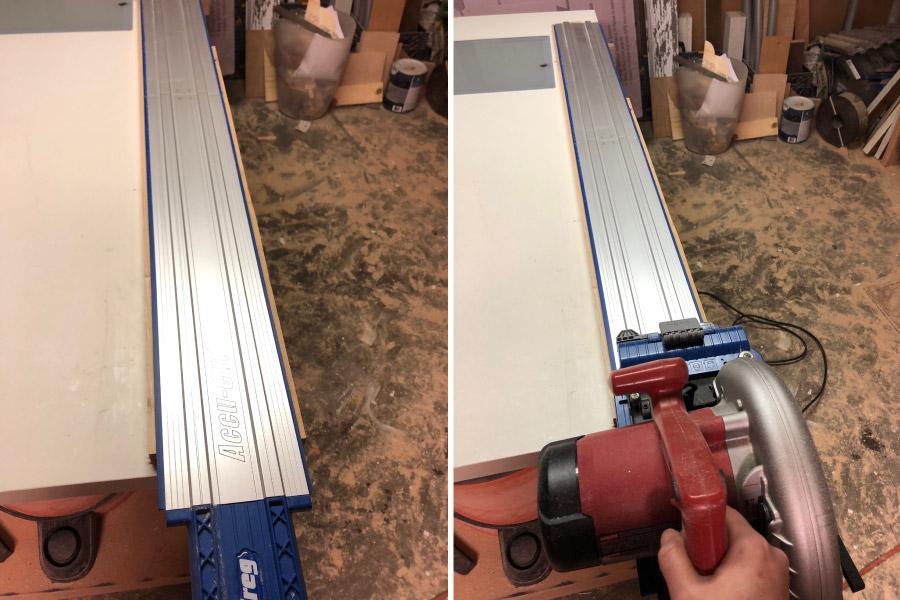
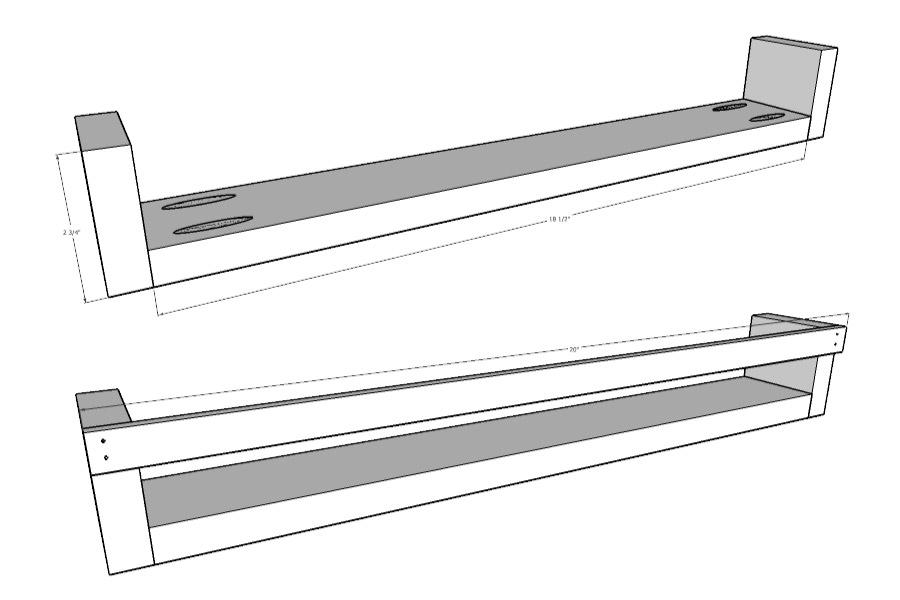
My spice shelves were built to hold spice jars that are 2 1/16" x 2 1/16". Measure your spice jars and adjust as necessary. Cut the 1x3 board into (3) 25" pieces and then rip those pieces into 2 1/4" wide boards. Do not discard the ~1/4" wide piece that is remaining. If you do not have a table saw, you can easily rip boards with the Kreg AccuCut and a circular saw by using a second piece of wood to balance the AccuCut. Or feel free to leave the boards 2 1/2" wide and purchase 1/4" x 1/2" trim for the front of the shelves. Cut each of the 2 1/4" wide boards into (1) 18 1/2" piece and (2) 2 3/4" pieces.
-
Build the spice shelves
Drill pocket holes into both ends the top of the 18 1/2" pieces. Line the 2 3/4" pieces up on the edges to create a U and secure with wood glue and pocket hole screws. Cut the ~1/4" piece to 20" and attach to the top front of the spice shelves with wood glue and finishing nails.
-
Sand and finish back & shelves
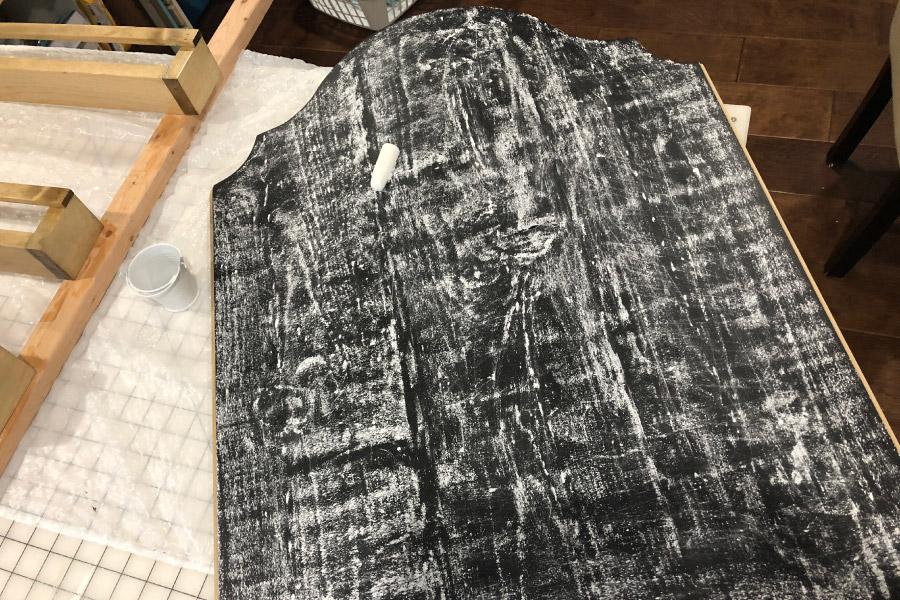
If you want to add a chalkboard back like I did. Sand, stain or paint, and seal all the spice shelves and the back piece before attaching the shelves. For the chalkboard back, apply 3 coats of chalkboard paint. Then prime the chalkboard by rubbing the side of a piece of chalk over the entire surface then wiping it off with a cloth or eraser before attaching the spice shelves.
-
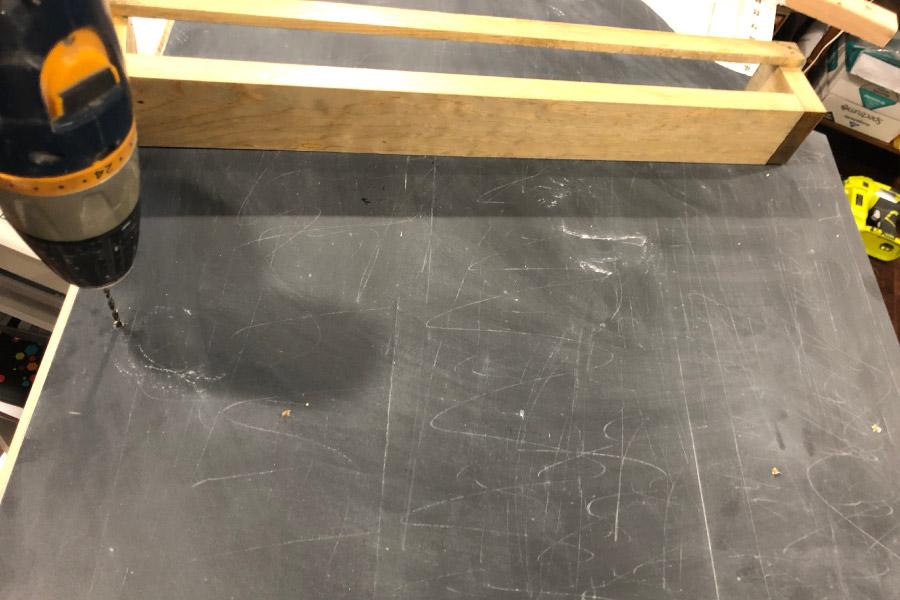
Attach the spice shelves
Measure and mark where you want to attach your spice shelves. Make sure you have enough room between shelves to easily remove your spice jars. My jars are 4 1/2" tall so I spaced my shelves 4 3/4" apart. Drill holes through the back of the spice rack where you will attach the shelves. Then attach the shelves with wood glue and 1 1/4" wood screws from the back of the spice rack.