

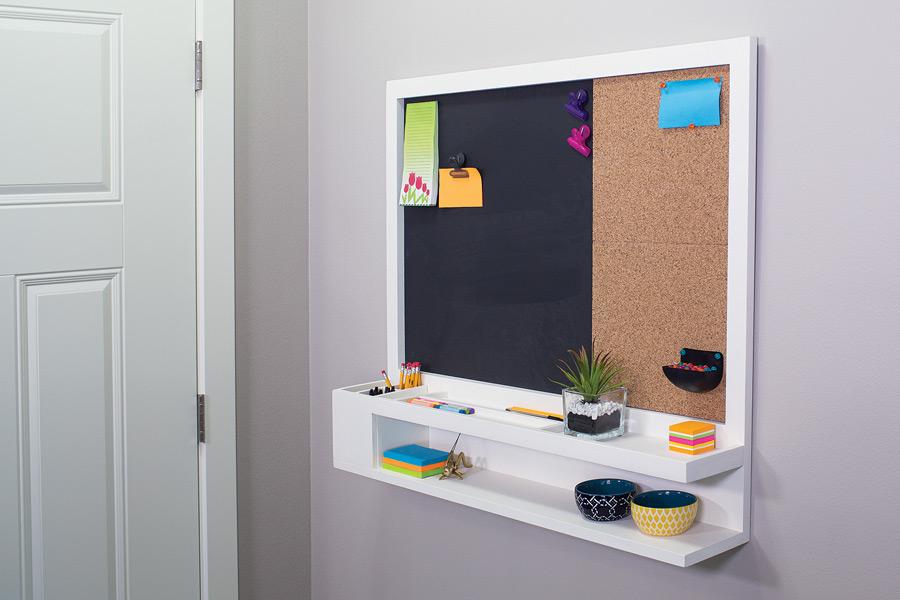
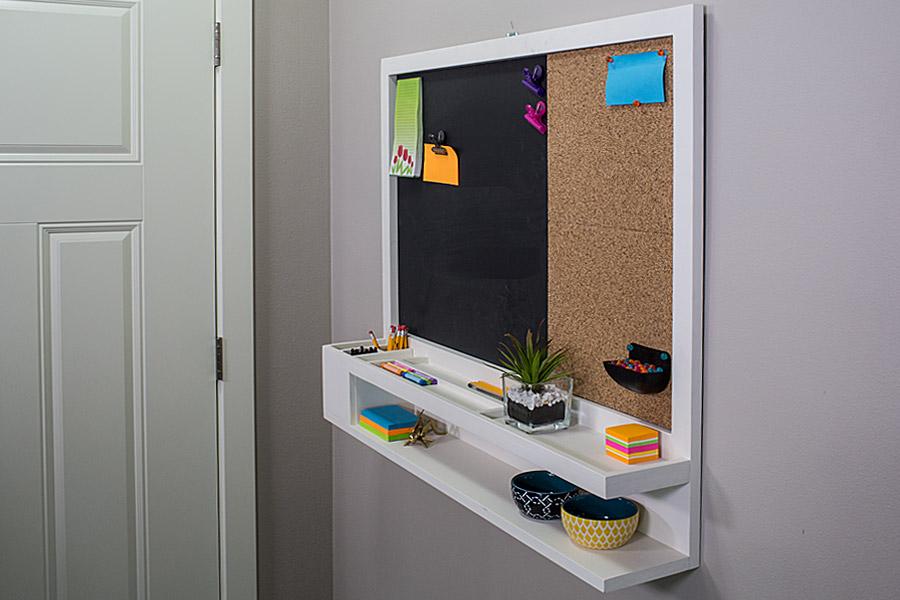
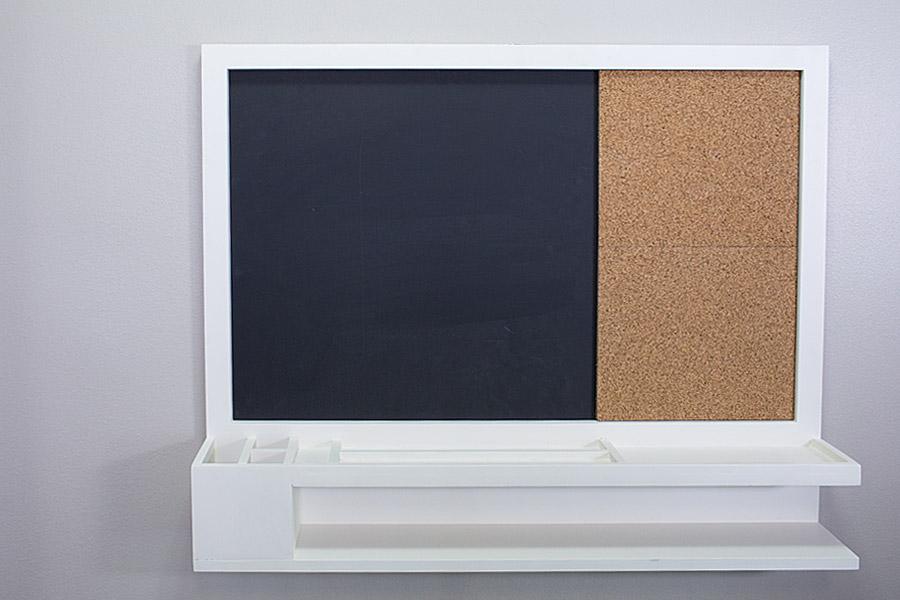
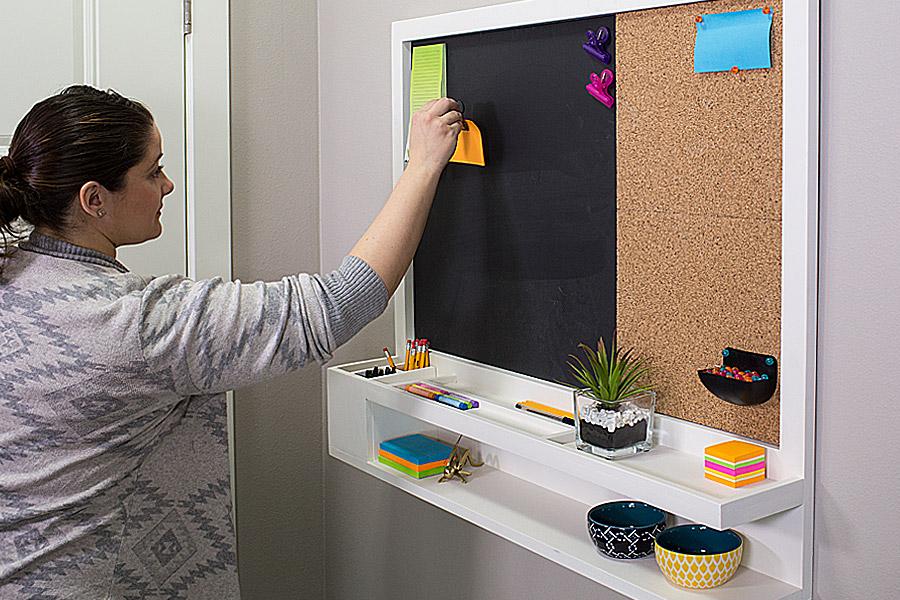


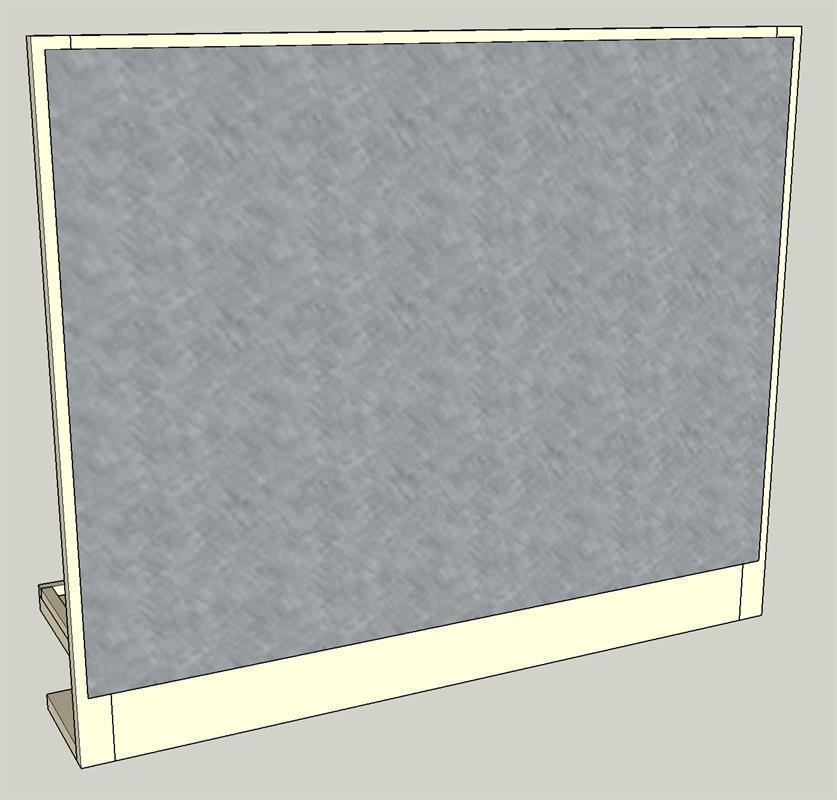
Make use of a blank wall in your entryway or kitchen with a message center that will keep the whole family organized and informed. It features storage, a magnetic chalkboard, and a cork board for pinning up notes.
Tools
Kreg Tools


Other Tools
-
Circular Saw (cordless)

-
Drill (cordless)
Materials
Wood Products
- 1 Board , 1x2 , 96"
- 1 Board , 1x6 , 96"
- 1 Board , 1x8 , 48"
- 1 Board , 1/2" x 6" , 48"
- 2 Dowel , 1/2" Square Dowel , 36"
Hardware & Supplies
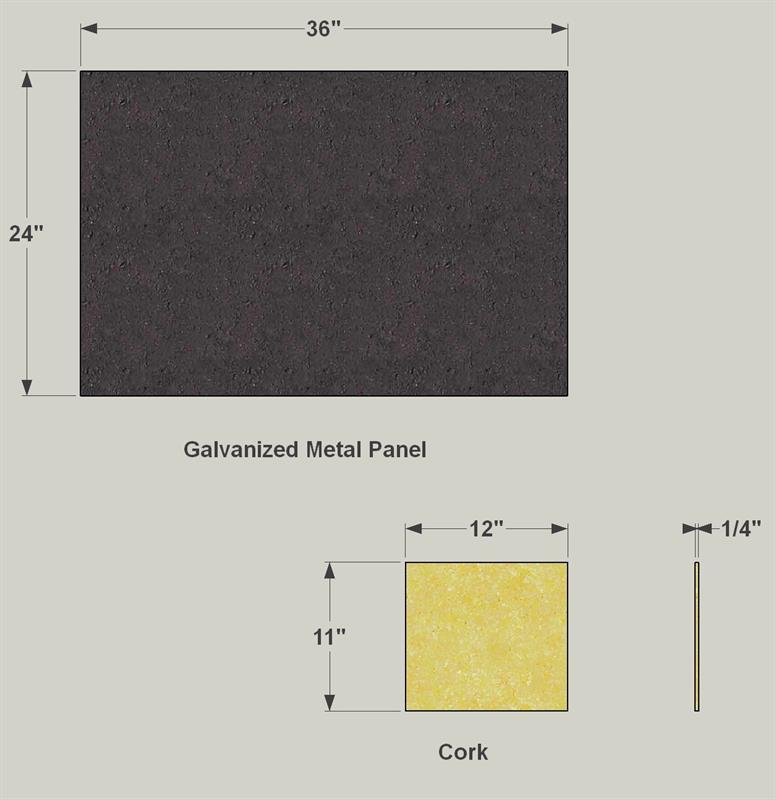
- 1 Galvanized sheet metal, 24" x 36"
- 1 4-pack 12" x 12" cork boards
- 17 1 1/4" coarse-thread pocket-hole screws
- 20 5/8" panhead screws
- 2 Large D-ring picture hangers
- 1 Quart chalkboard paint
- 1 Quart white paint
- 1 Wood glue
- 1 Spray adhesive
Cut List & Parts
- 2 Frame Stiles , 3/4" x 1 1/2" x 34"
- 1 Frame Top Rail , 3/4" x 1 1/2" x 30 3/4"
- 1 Frame Bottom Rail , 3/4" x 7 1/4" x 34"
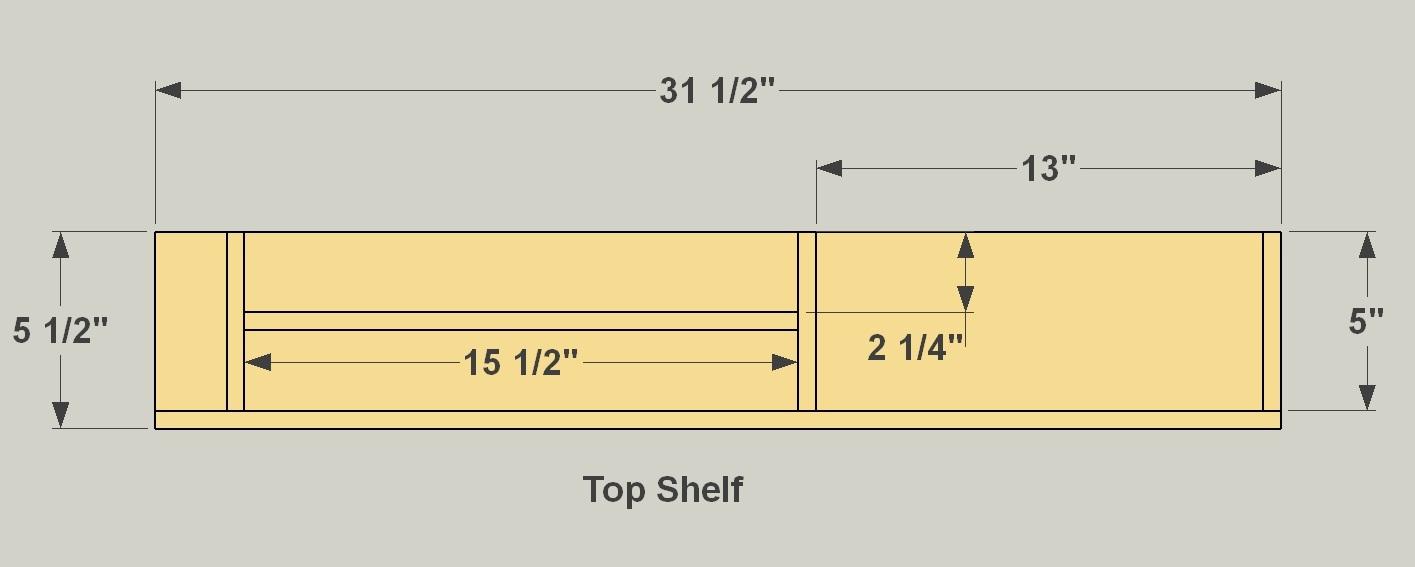
- 1 Top Shelf , 3/4" x 5 1/2" x 31-1/2"
- 1 Bottom Shelf , 3/4" x 5 1/2" x 37”
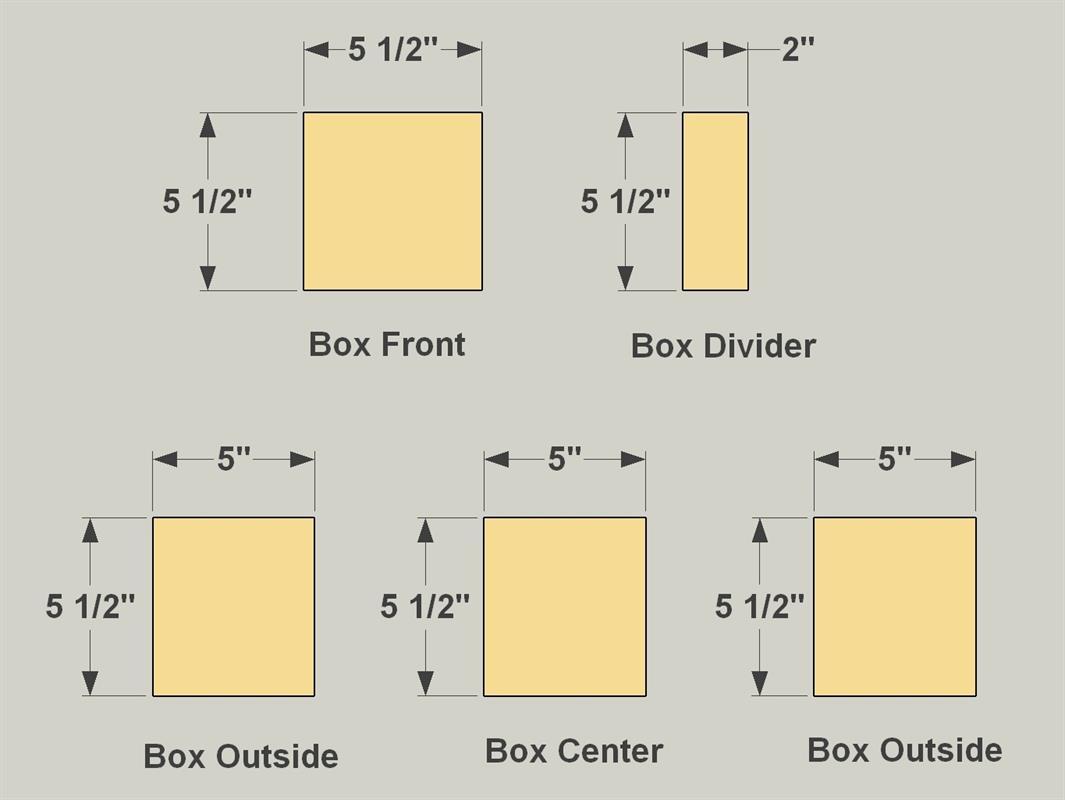
- 1 Pencil Box Front , 1/2" x 5 1/2" x 5 1/2"
- 2 Pencil Box Sides , 1/2" x 5" x 5 1/2"
- 1 Pencil Box Center , 1/2" x 5" x 5 1/2"
- 1 Pencil Box Divider , 1/2" x 2” x 5 1/2"
- 1 Shelf Edge , 1/2" x 1/2" x 31 1/2"
- 3 Shelf Short Dividers , 1/2" x 1/2" x 5”
- 1 Shelf Long Divider , 1/2" x 1/2" x 15 1/2"
Directions
-
Cut the Frame Parts
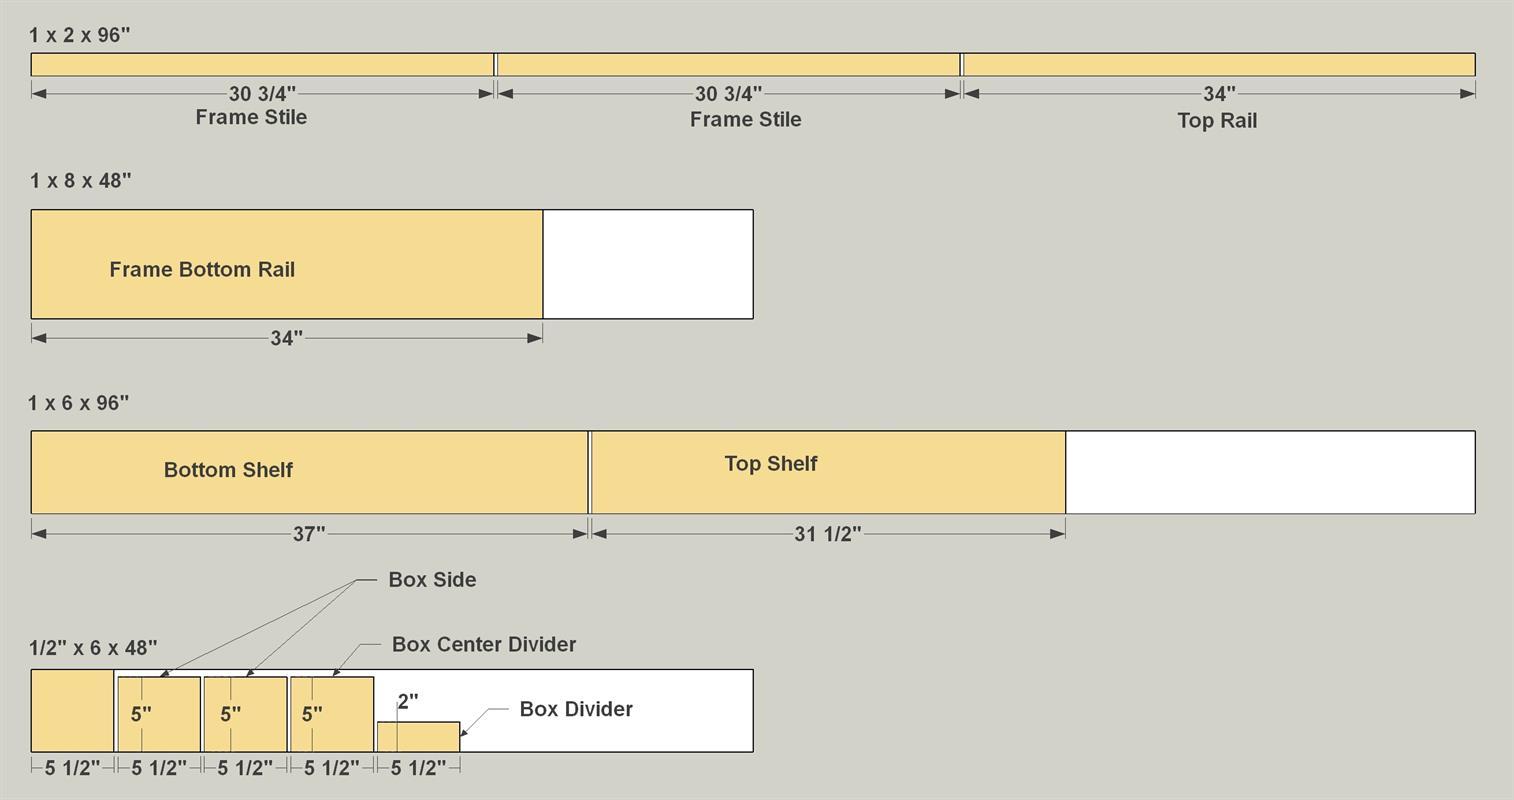
Using Cutting Diagram 1 as a guide, cut one Frame Top Rail and two Frame Stiles to length from a 1x2 board. Also cut one Frame Bottom Rail to length from a 1x8 board.
-
Drill Pocket Holes in Frame Rails
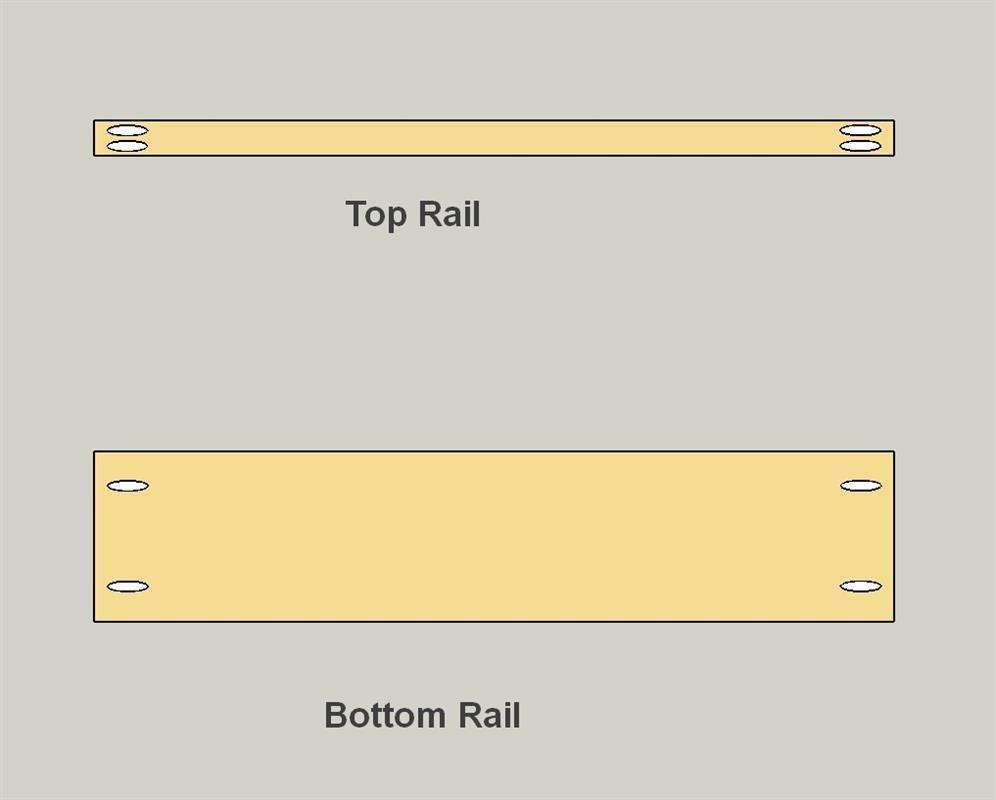
Set your pocket-hole jig and drill bit for 3/4"-thick materials. Drill pocket holes in the end of the Top Rail and Bottom Rail, as shown.
-
Assemble the Frame
After sanding the Frame Rails and Stiles, assemble the frame using 1 1/4" pocket-hole screws.

-
Create the Shelves
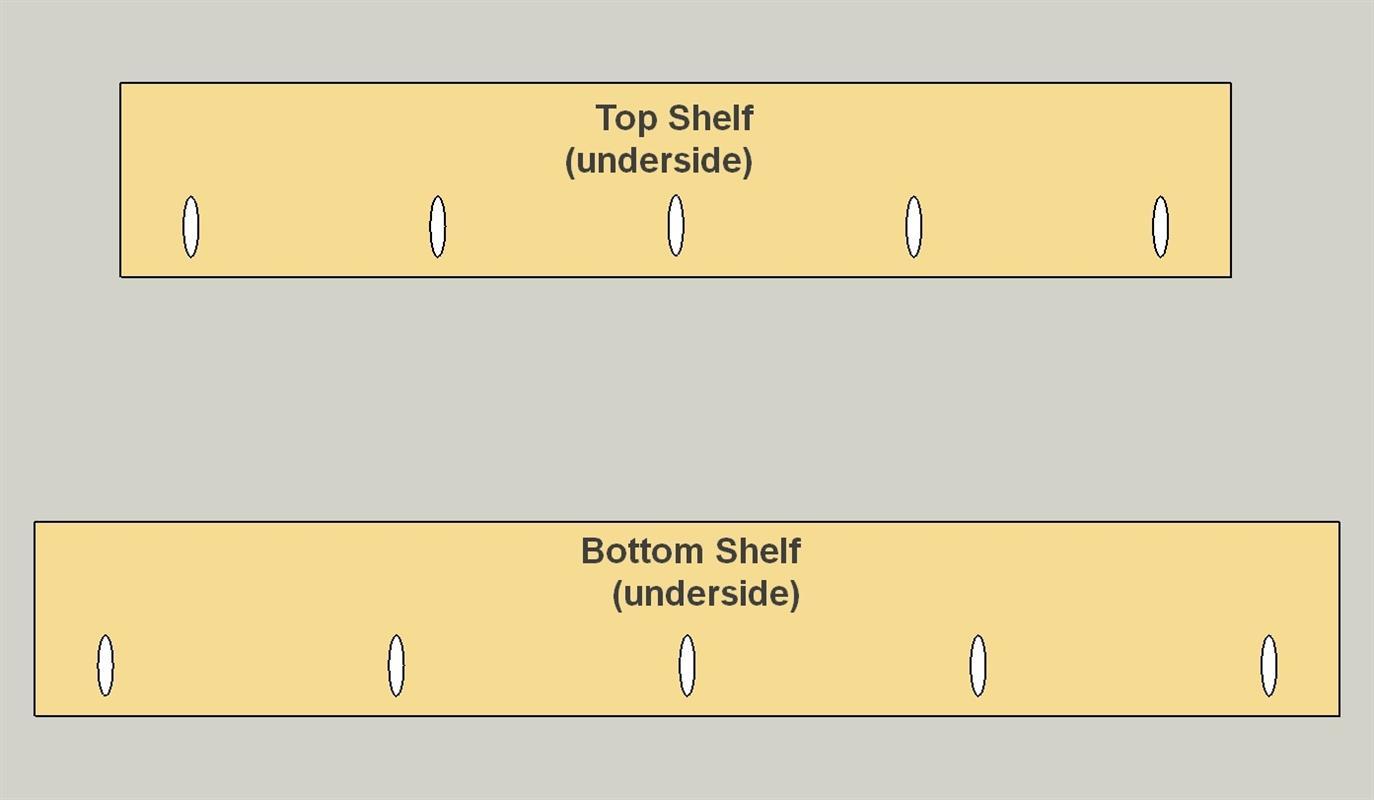
Using Cutting Diagram 1 as a guide, cut one Top Shelf and one Bottom Shelf to length from a 1x6 board. Then drill pocket holes in the Shelves, as shown.
-
Cut Shelf Dividers
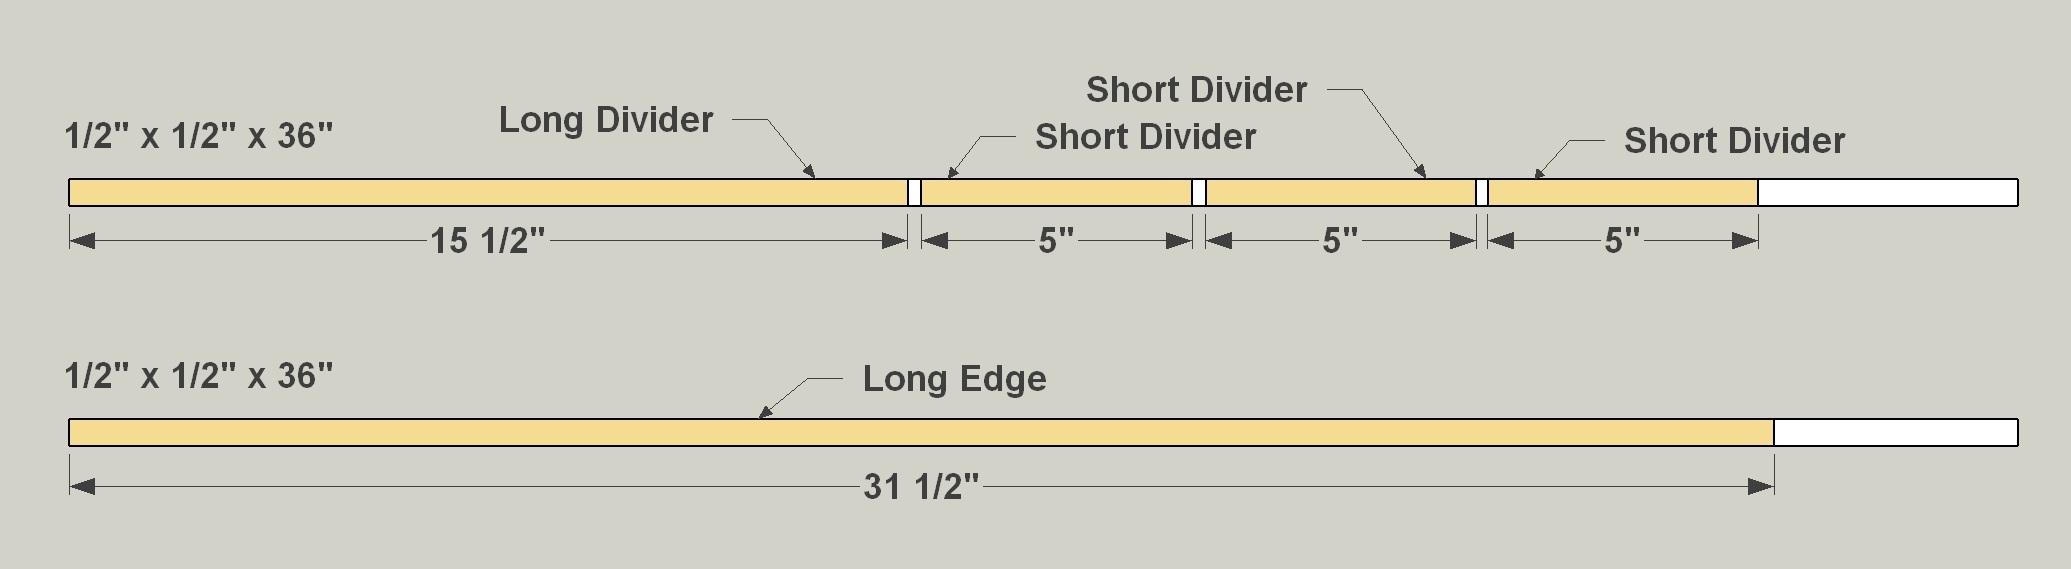
Using Cutting Diagram 2 as a guide, cut one Long Divider, three Short Dividers, and one Long Edge to length from a 1/2" square dowel.
-
Divide the Top Shelf
After sanding the Top Shelf, glue the Dividers to it, positioning the Dividers as shown. Rather than using clamps, try masking tape to hold these pieces in place as the glue sets.
-
Cut the Pencil Box Parts
Using Cutting Diagram 1 as a guide, cut one Box Front, one Box Outside, one Box Inside, one Box Center Divider, and one Box Divider to size from a 1x6 board to create the pieces shown.
-
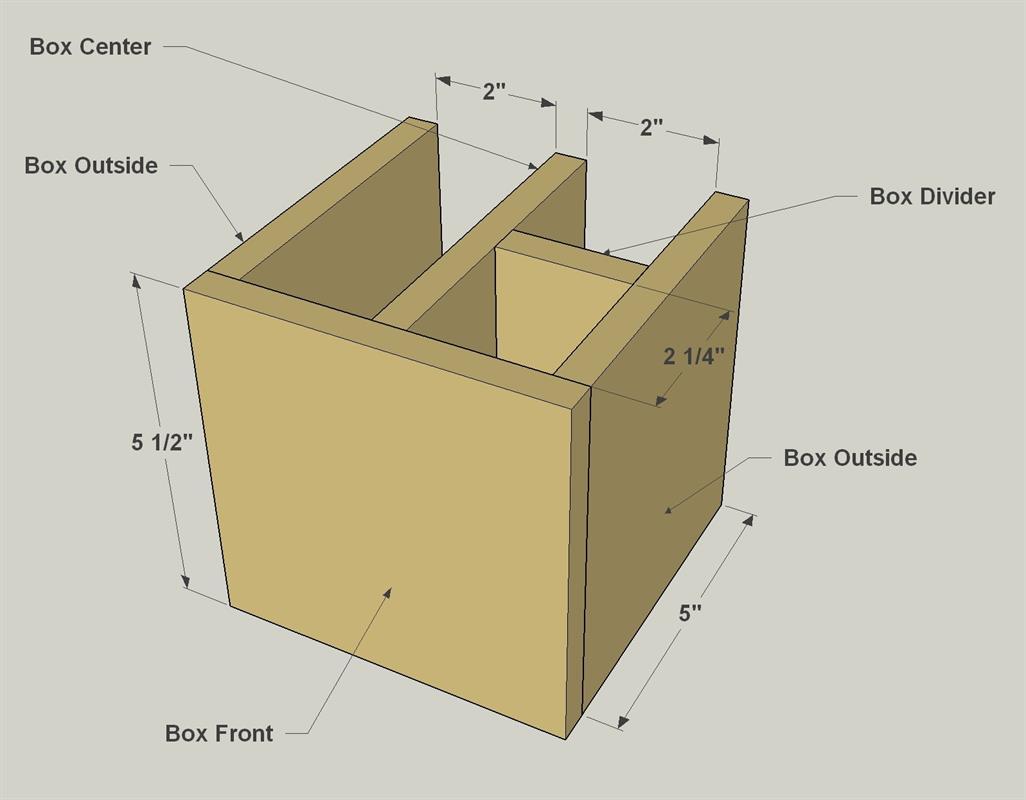
Assemble the Pencil Box
After sanding the parts, glue the Pencil Box together, positioning the pieces as shown. Once again, tape can be a good way to hold the pieces as the glue sets. Make sure the whole box assembly is square before the glue dries.
-
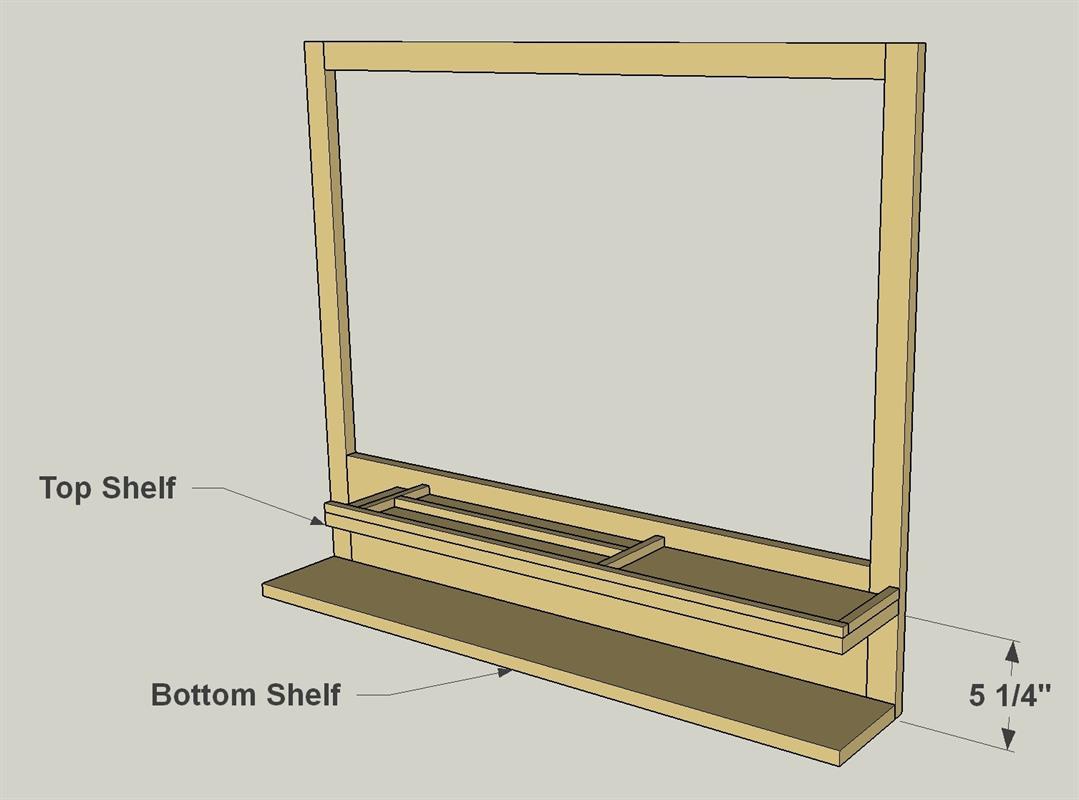
Attach the Shelves
Attach the Top Shelf and Bottom Shelf to the frame assembly using 1 1/4" pocket-hole screws.
-
Add the Pencil Box
Attach the Pencil Box by gluing it to the shelves and the frame.

-
Paint to Please
Once the glue sets from attaching the pencil box, you can do any touch-up sanding, and then paint the message center to suit your style. Stain is another option, as well.
-
Prepare the Chalkboard and Cork
Use a 24"x36" piece of galvanized metal, or cut one to size, to create the Metal Panel. After cleaning the metal (see the Tip) paint it with chalkboard paint. Also cut four cork squares to the size shown. Glue them in pairs to double the thickness and create two cork boards.
Tip: Proper Metal Prep
Be sure to clean up your galvanized metal to remove any oil or residue that could prevent paint from sticking. To do that, first sand the face you intend to paint with medium-grit paper. Then use denatured alcohol and a rag to clean the surface. Once the alcohol evaporates, you can apply paint that will stick!
-
Attach the Metal Panel
After the chalkboard paint dries, you can screw the Metal Panel to the back of the frame. To do this, position the Panel, and then drill pilot holes through the metal at each corner. Be careful not to drill through the wood frame as the bit breaks through the metal. Attach the panel corners with 5/8" pan head screws. Then drill several more pilot holes along each edge of the metal, and add more screws to secure it to the frame. Finally, use spray adhesive to attach the cork panels.
-
Add the Hangers
To finish up, add a pair of D-ring picture hangers to the back of the frame, and it's ready to hang on your wall.