

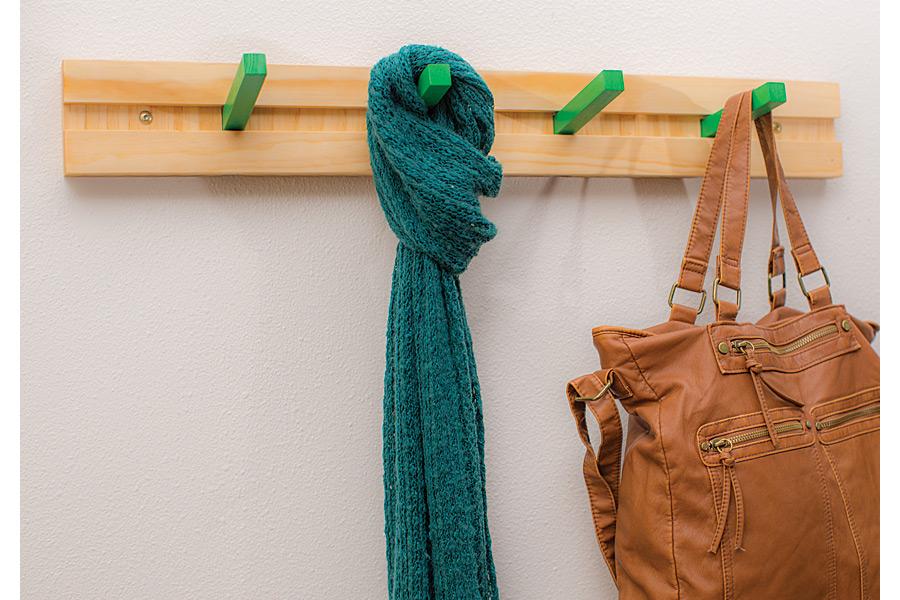
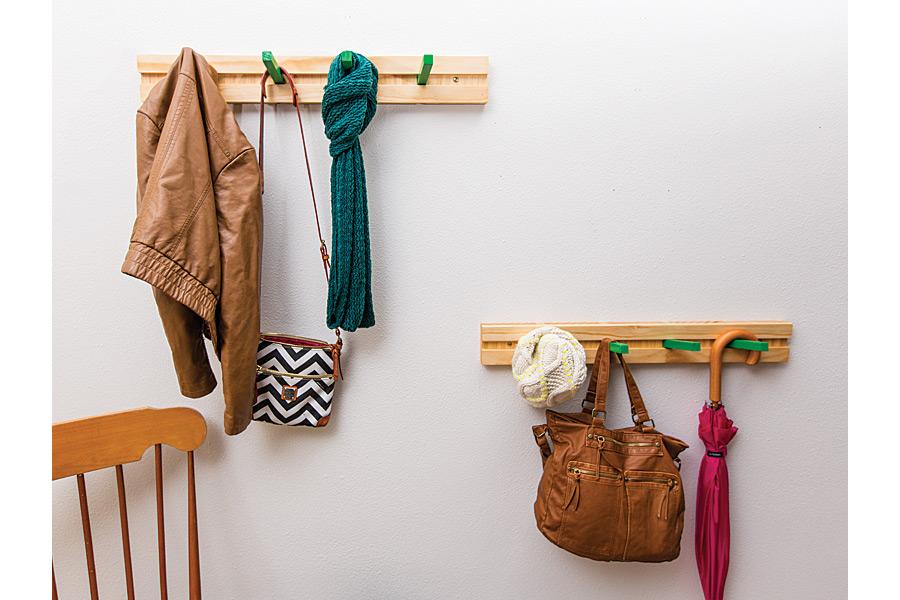
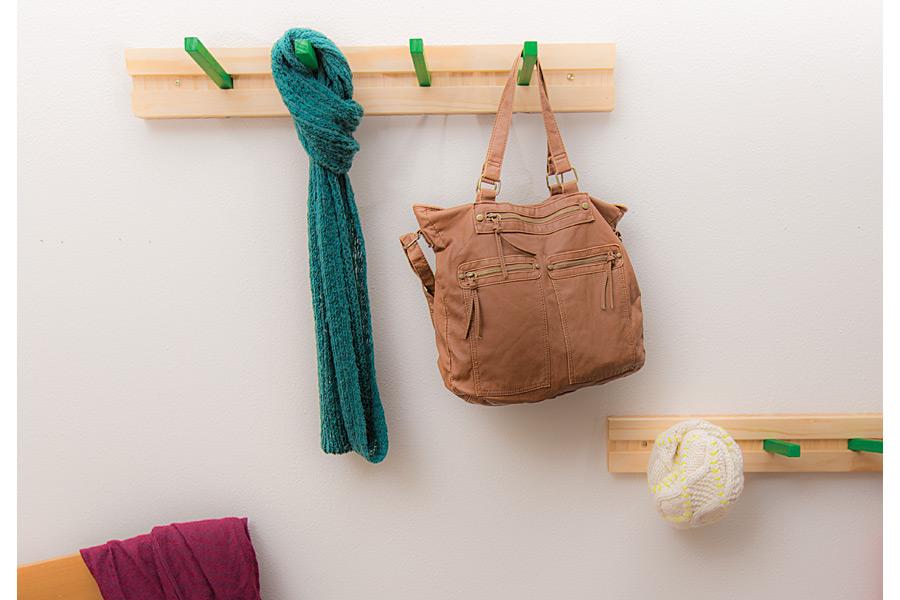


Here’s a fun way to create hanging storage for coats, scarves, purses, and more. This coat rack is easy to build, and it can be customized to match your space and style.
Tools
Kreg Tools

Other Tools
-
Miter Saw

-
Tape Measure
-
Drill (cordless)
-
Sander
Materials
Wood Products
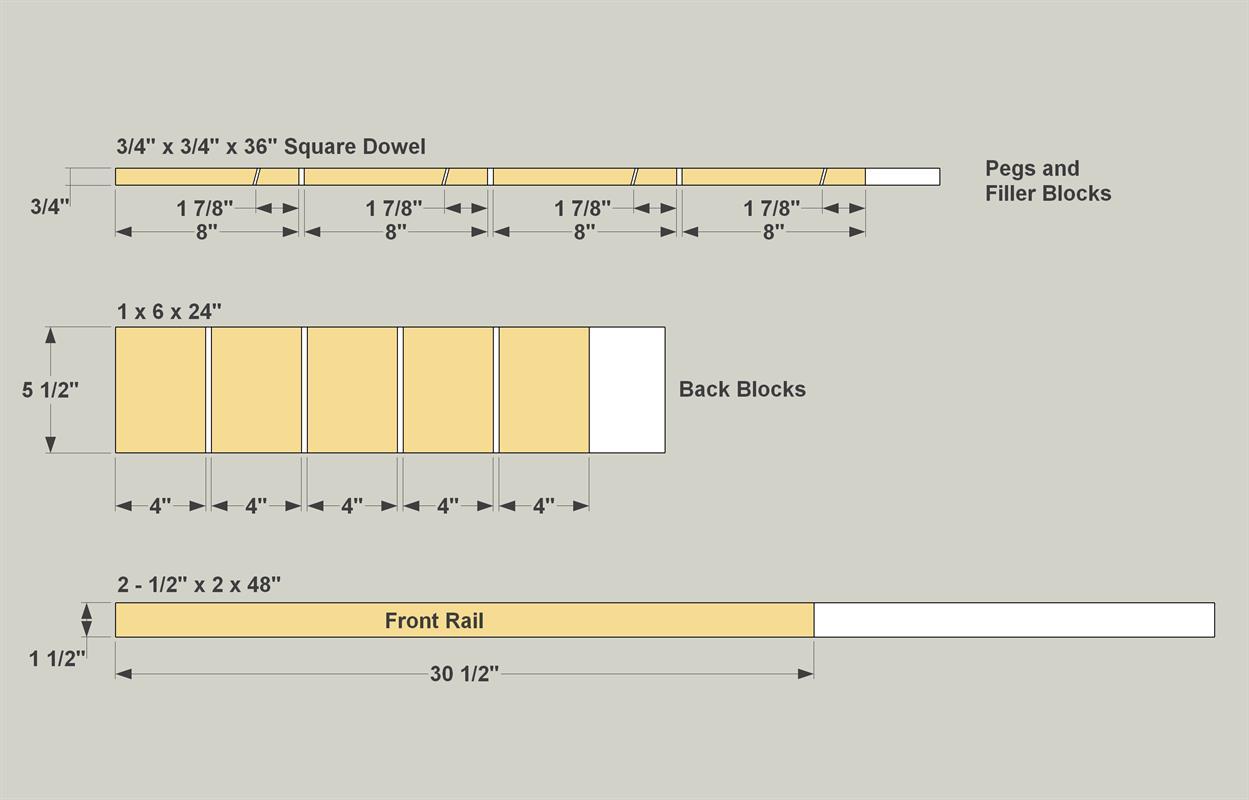
- 1 Board , 1x6 , 48"
- 2 Board , 1/2" Thick , 36"
- 1 Square Dowel , 3/4" x 3/4" , 48"
Hardware & Supplies
- 1 Wood Glue
- 1 Paint or Finish
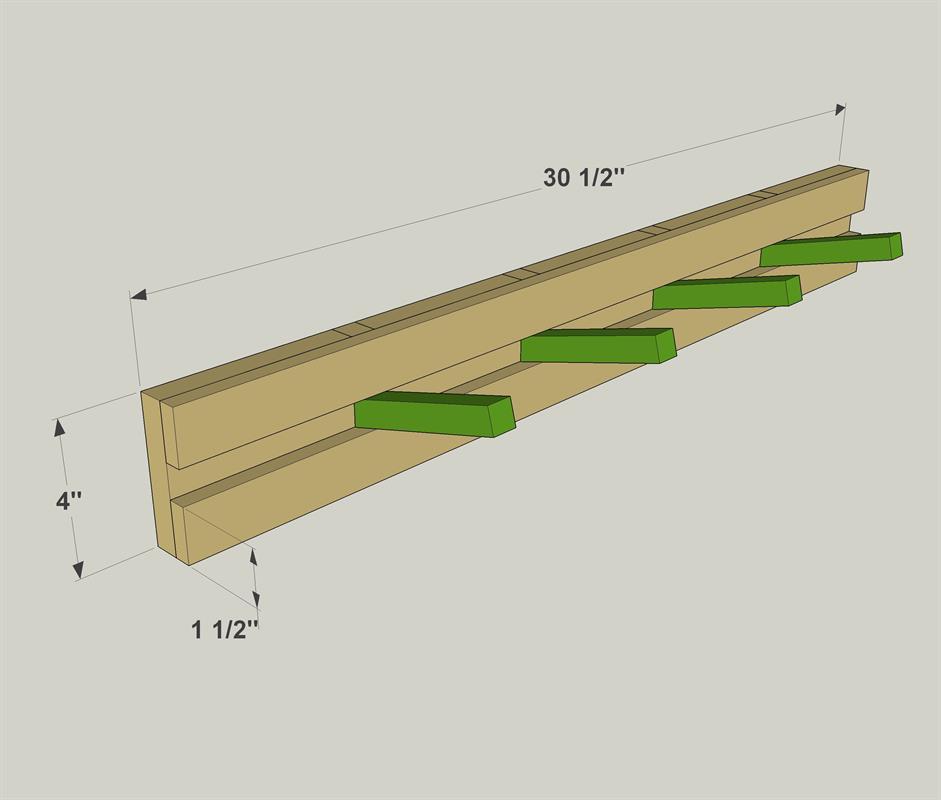
Cut List & Parts
- 2 Front Rail , 1/2" x 1 1/2" x 30 1/2"
- 5 Back Block , 3/4" x 5 1/2" x 4"
- 4 Peg , 3/4" x 3/4" x 5 3/4"
- 4 Filler Block , 3/4" x 3/4" x 1 7/8"
Directions
-
Cut Back Project Parts
Cut five Back Blocks to length from a 1x6 board, as shown in the cutting diagram. Also cut two Front Rails to length from 1/2" x 2 board. Then you can cut pieces that will be used to make the Pegs and Filler Blocks. They start out as four oversize pieces cut to 8" long from a 3/4" square dowel, as shown in the cutting diagram. Sand all of the pieces smooth after cutting.
-
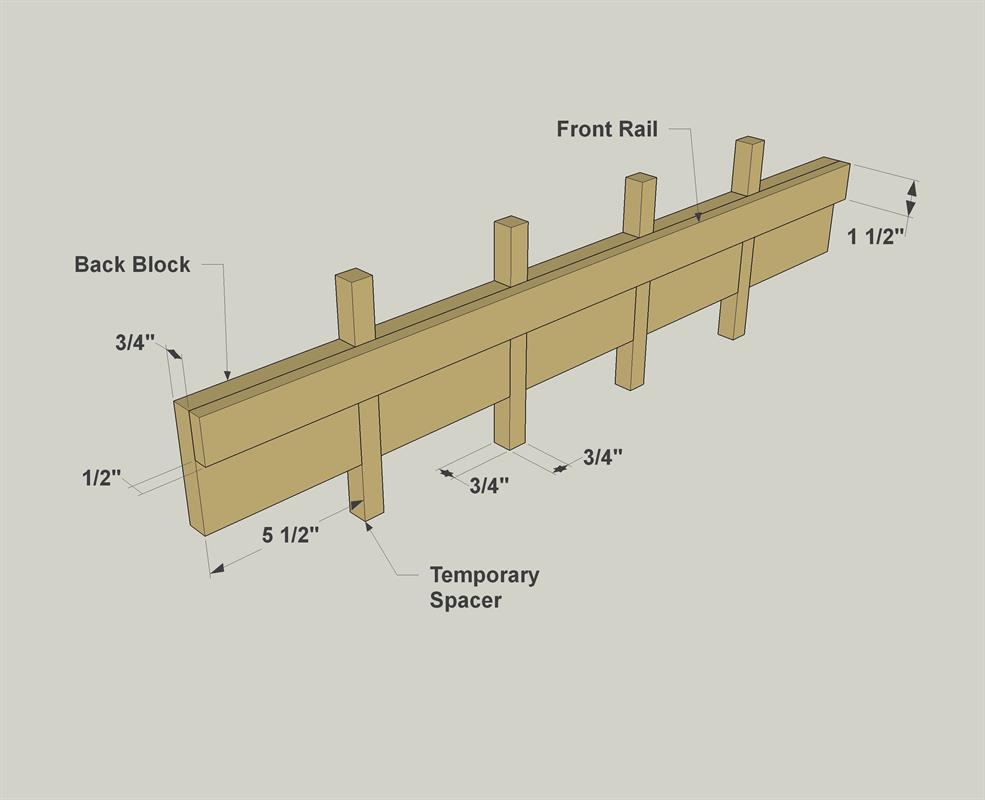
Attach the Back Blocks
Using the 8" dowel pieces as spacers, glue the Back Blocks to the Top Front Rail. Make sure the Back Blocks are flush with the upper edge of the Top Front Rail.
-
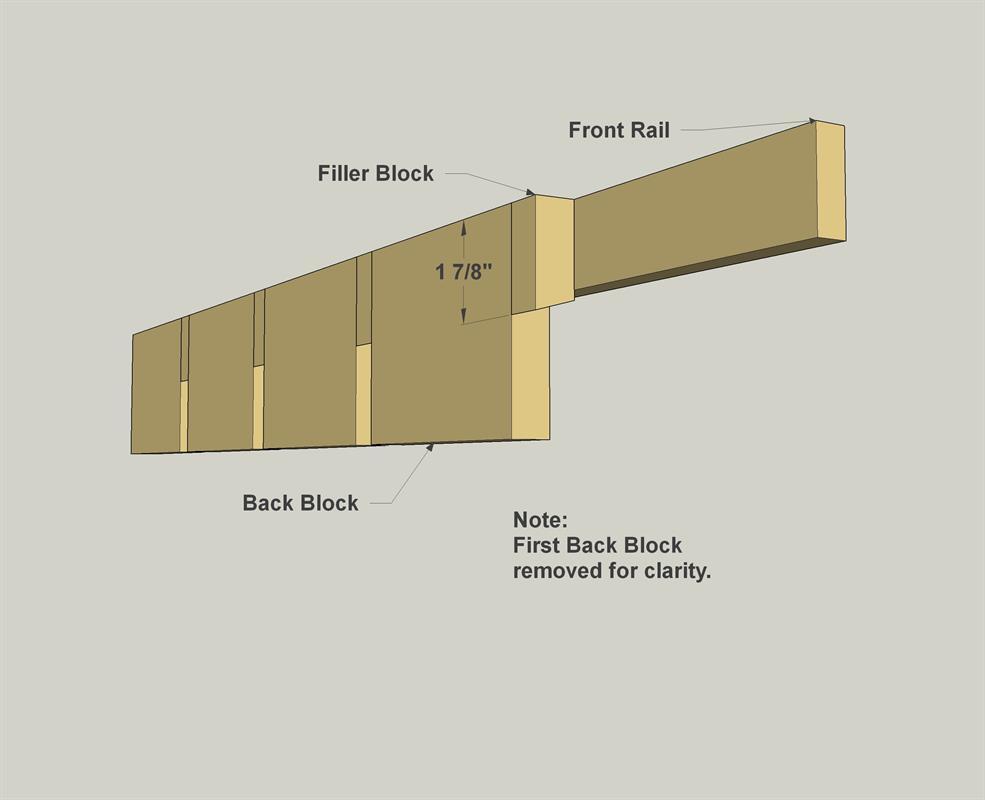
Cut the Filler Blocks and Pegs
From the 8" dowel pieces, cut four Filler Blocks to length. To do this, set your miter saw to a 15° angle, and then cut the Filler Blocks to length, as shown in the cut diagram. From the leftover part of the dowel, cut four Pegs to final length. To do that, reset your miter saw for a square cut, and cut the end of the dowel piece opposite the angled end. Then you can sand the Pegs and Filler blocks smooth.
-
Attach the Filler Blocks
Glue the Filler Blocks in place so that they are flush with the top of the Back Blocks. Make sure that the angled end is down, and that the angle faces forward.
-
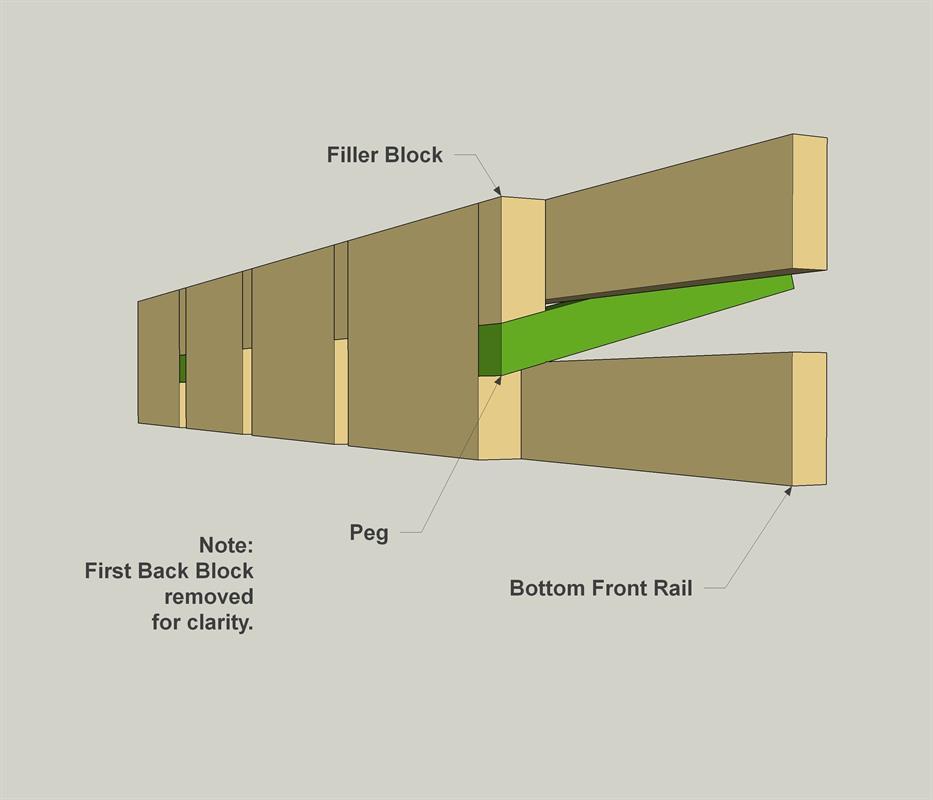
Set the Bottom Rail
Set Pegs in the first and last positions, making sure they tip upward and are flush with the angled bottom end of each Filler Block. Now set the Bottom Rail in place and make sure the Pegs can slip in and out easily. Glue the Bottom Rail to the Back Blocks.
-
Paint, Finish and Install
After the glue sets, you can doing any final sanding that’s needed. Then paint and finish your coat rack as desired. We gave the Pegs color by spraying on green paint, and then finished the rest of the rack with a clear oil finish. After the paint and finish dry, you can mount the coat rack to the wall. Just drive a couple of screws through the Back Blocks and into wall studs. Or install wall anchors, if needed, and drive screws trough the Back Blocks into the anchors.