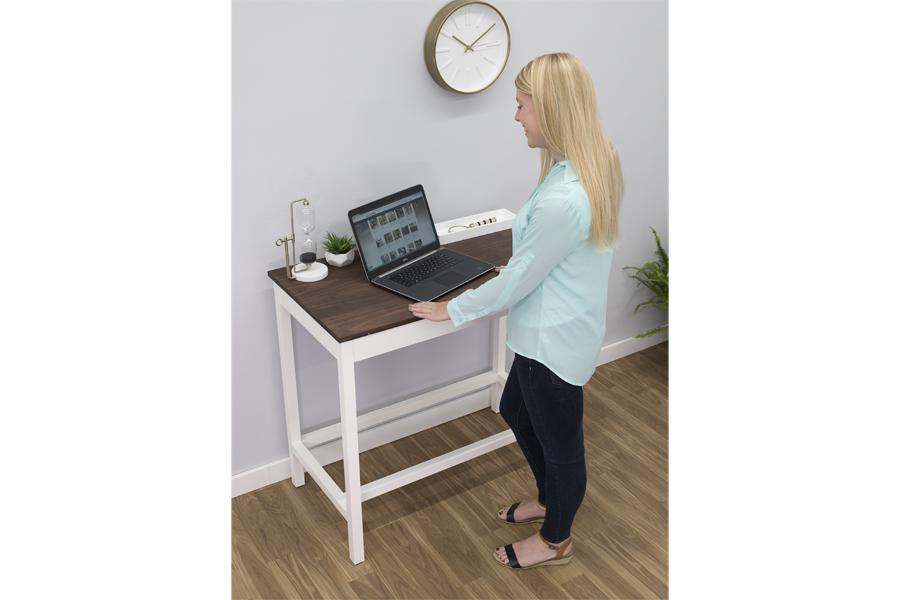
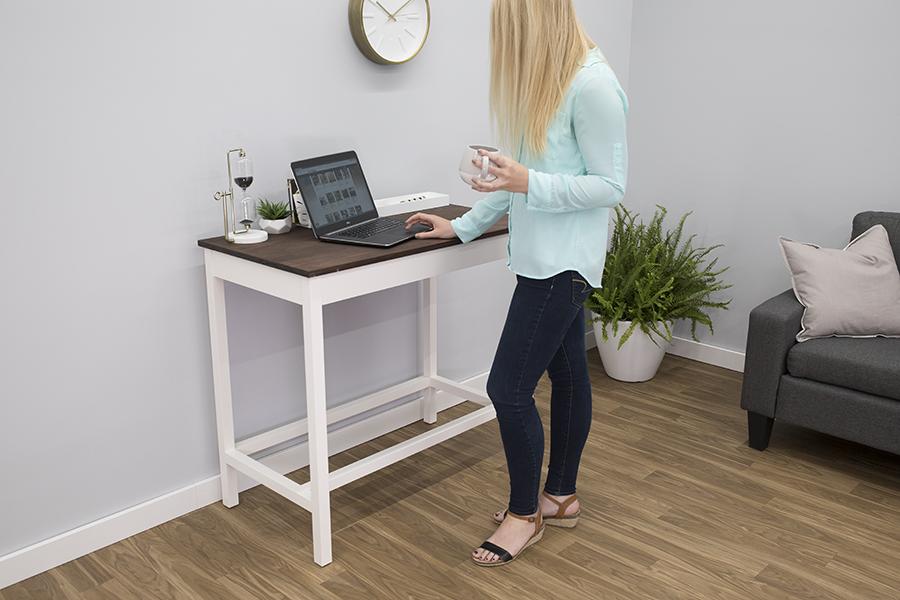
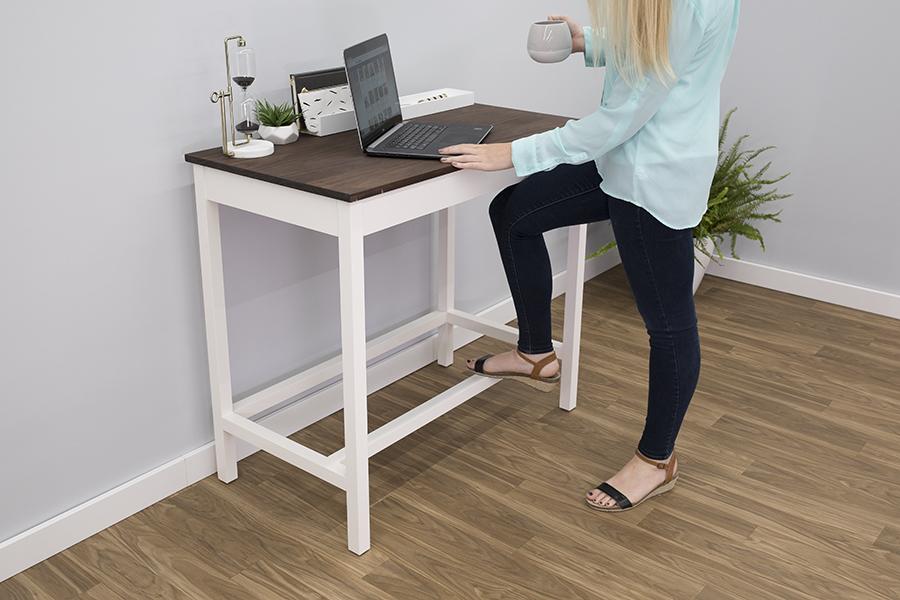


This great-looking standing desk keeps you on your toes while you stay on top of tasks. You can build one in no time with a Kreg Jig®, a few power tools, and eight boards from the home center. It’s even easy to customize your desk to match your height by making the legs taller or shorter.
Tools
Kreg Tools


Other Tools
-
Circular Saw (corded)

-
Miter Saw
-
Square
-
Tape Measure
-
Drill (cordless)
-
Sander
Materials
Wood Products
- 4 Board , 2x2 , 72"
- 2 Board , 1x4 , 72"
- 2 Board , 1x6 , 96"
Hardware & Supplies
- 1 100-count box 1 1/4" coarse-thread Kreg Screws
- 1 50-count box 2 1/2" coarse-thread Kreg Screws
- 16 1 1/2" flat-head wood screws
- 1 Wood glue
Cut List & Parts
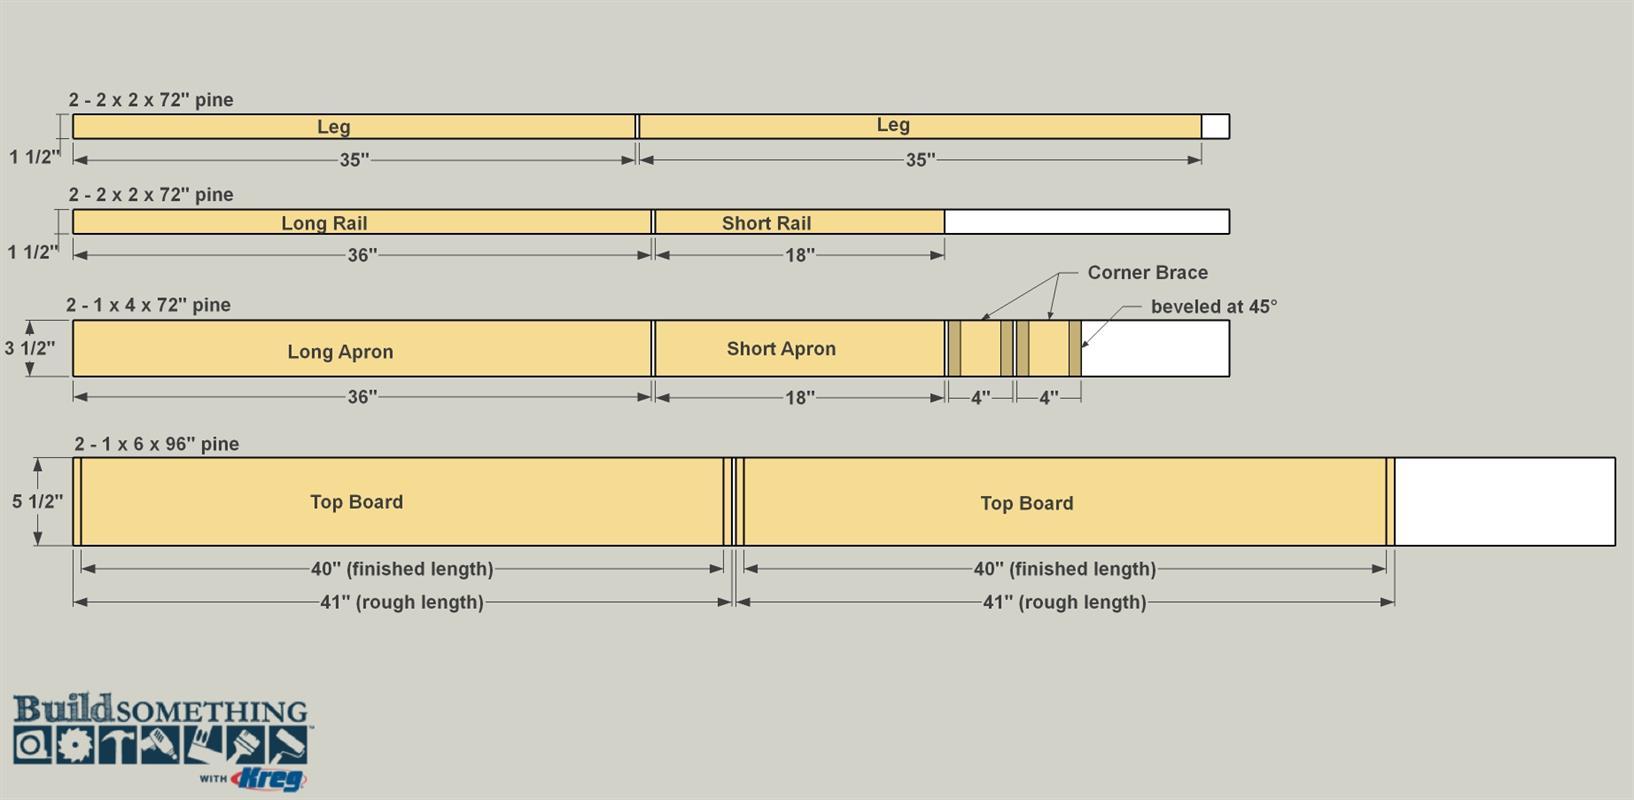
- 4 Leg , 1 1/2" x 1 1/2" x 35" pine
- 2 Long Rail , 1 1/2" x 1 1/2" x 36" pine
- 2 Short Rail , 1 1/2" x 1 1/2" x 18" pine
- 2 Long Apron , 3/4" x 3 1/2" x 36" pine
- 2 Short Apron , 3/4" x 3 1/2" x 18" pine
- 4 Top Plank , 3/4" x 5 1/2" x 40" pine
- 4 Corner Brace , 3/4" x 3 1/2" x 4" pine
Directions
-
Cut the Legs
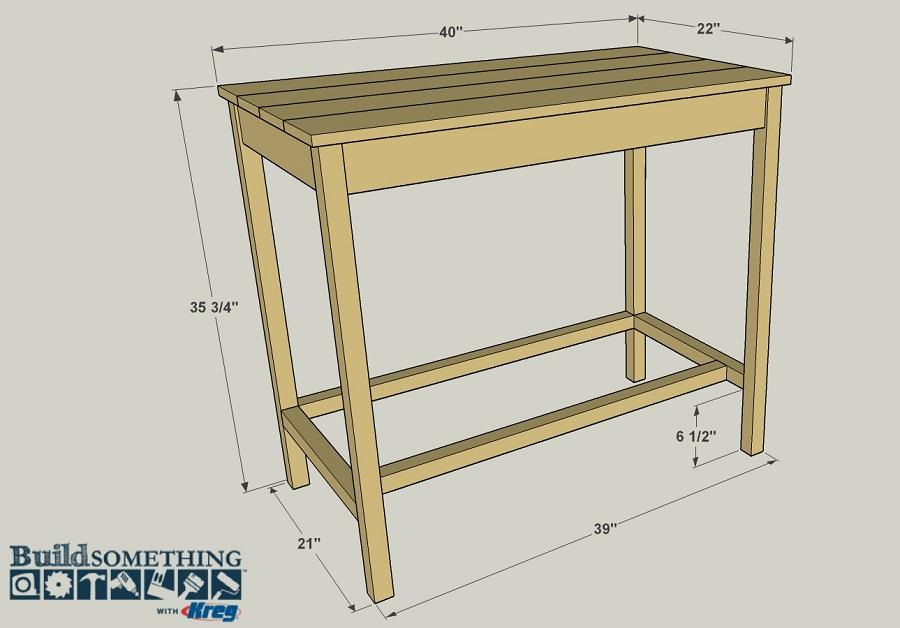
Cut four Legs to length from 2x2 pine boards, as shown in the cut diagram. Then sand the Legs smooth. NOTE: We made the Legs 35" long, which puts the finished desk height at 35 3/4".That height works great for average-height men and women. If you’re taller or shorter, you can add or subtract a couple of inches from the length of the Legs. If you’re making the Legs longer than 35", you’ll need to cut them from 96" 2x2s instead of the 72" 2x2s that are specified.
-
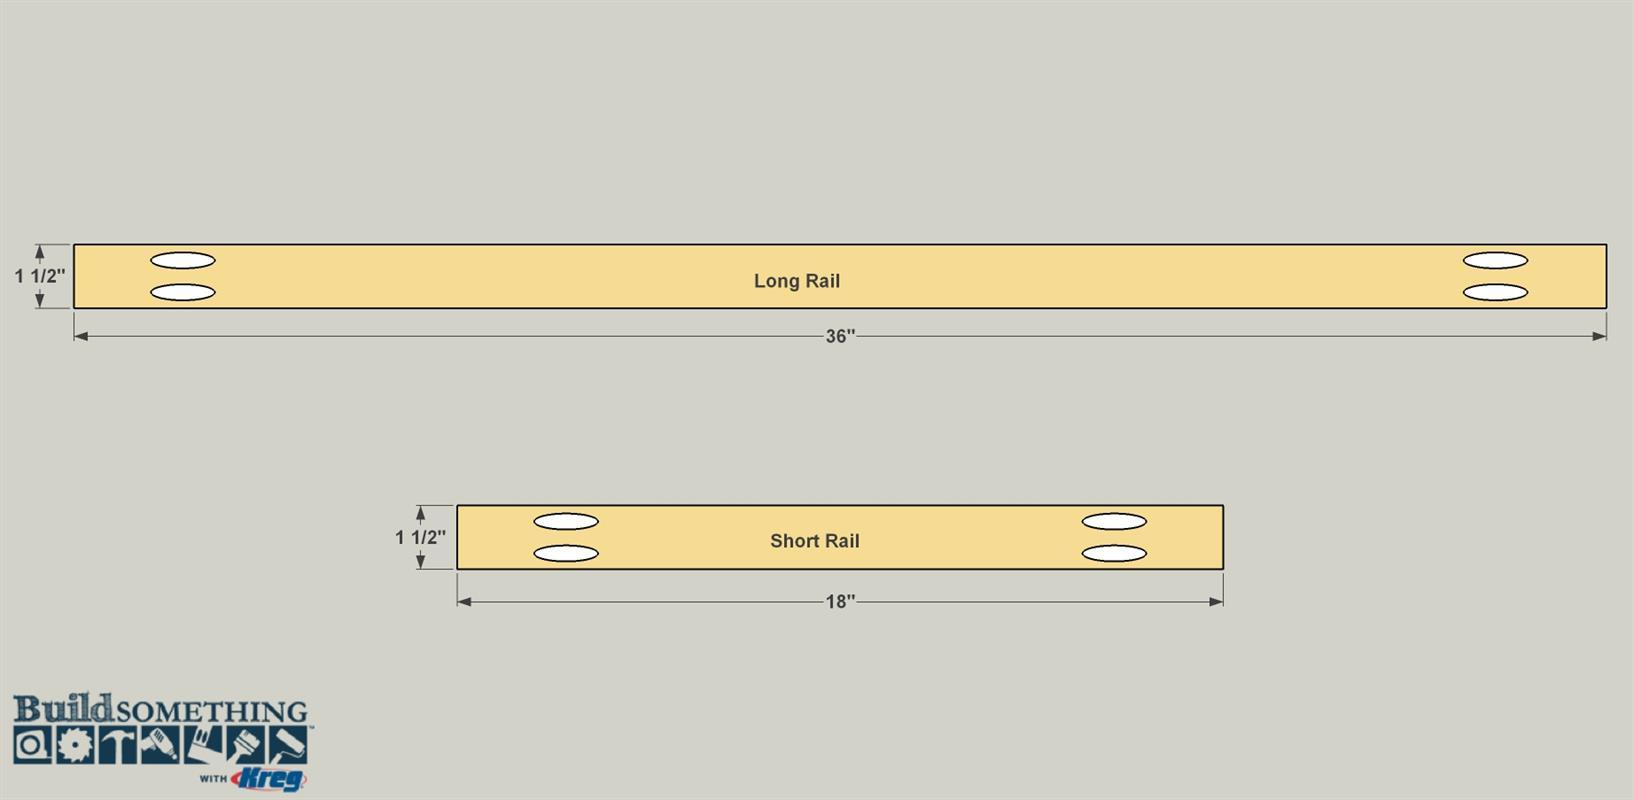
Make the Rails
Cut two Long Rails and two Short Rails to length from 2x2 pine boards, as shown in the cut diagram. Set your Kreg Jig® and bit for 1 1/2"-thick material, and then drill pocket holes on each part at the locations shown. Sand all of the Rails smooth.
-
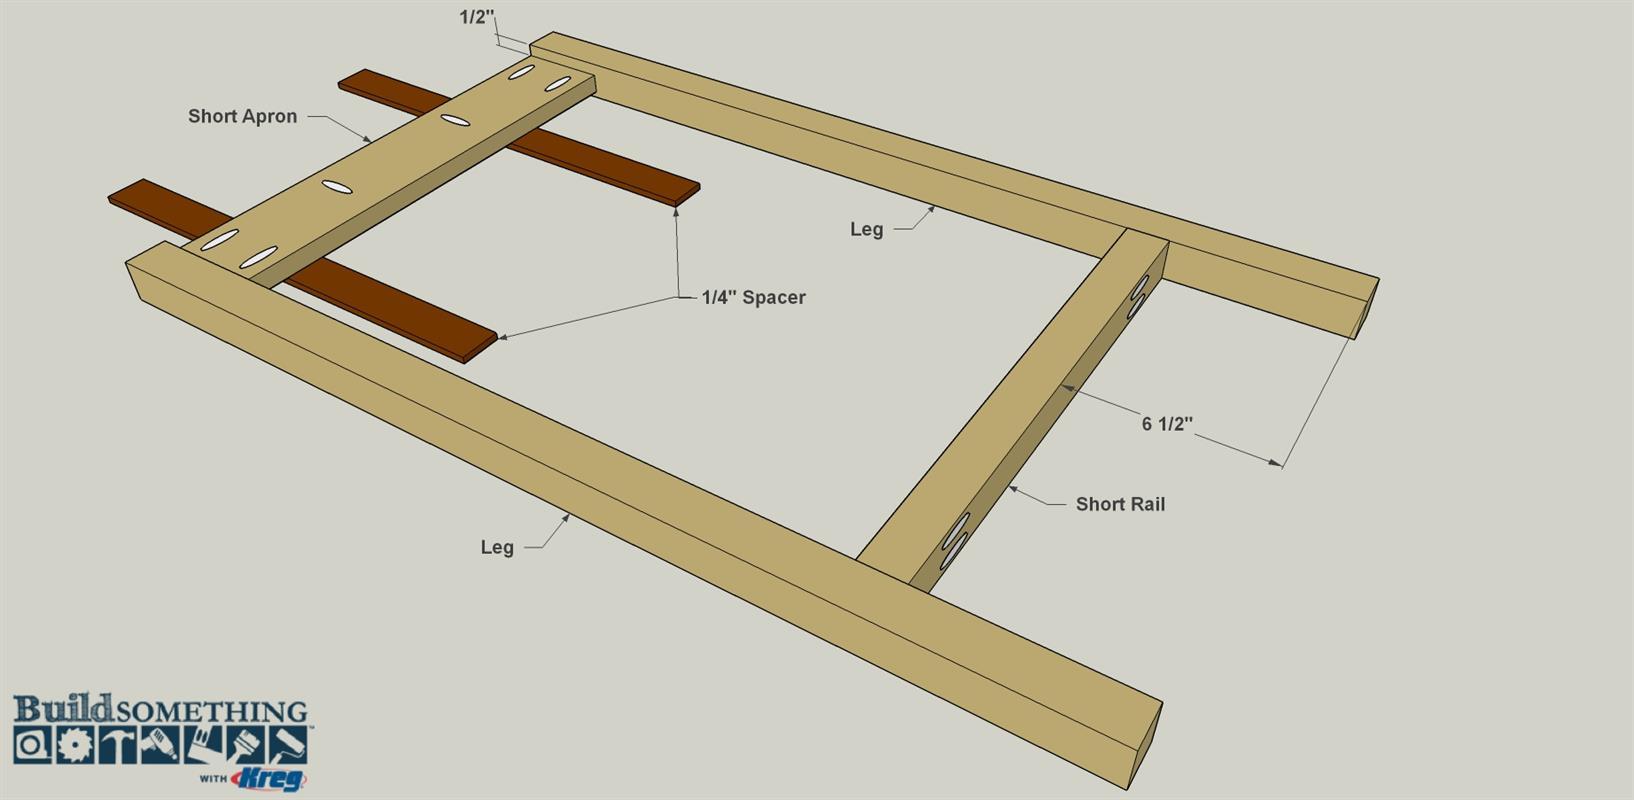
Assemble the Sides
Lay two Legs flat on a work surface, and then place a couple of 1/4"-thick spacer in between them, as shown. Spread glue on the ends of one Short Apron, and then position it between the Legs so the upper edge of the Apron is flush with the upper end of the Legs. Make sure the pocket holes along the edge are oriented correctly for attaching the desk top later. Attach the Apron to the Legs using 1 1/4" coarse-thread Kreg Screws. Next, spread glue on the ends of one Short Rail, and then position it between the Legs as shown. Secure the Rail to the Legs using 2 1/2" coarse-thread Kreg Screws. Repeat this process to make the second side assembly.
-
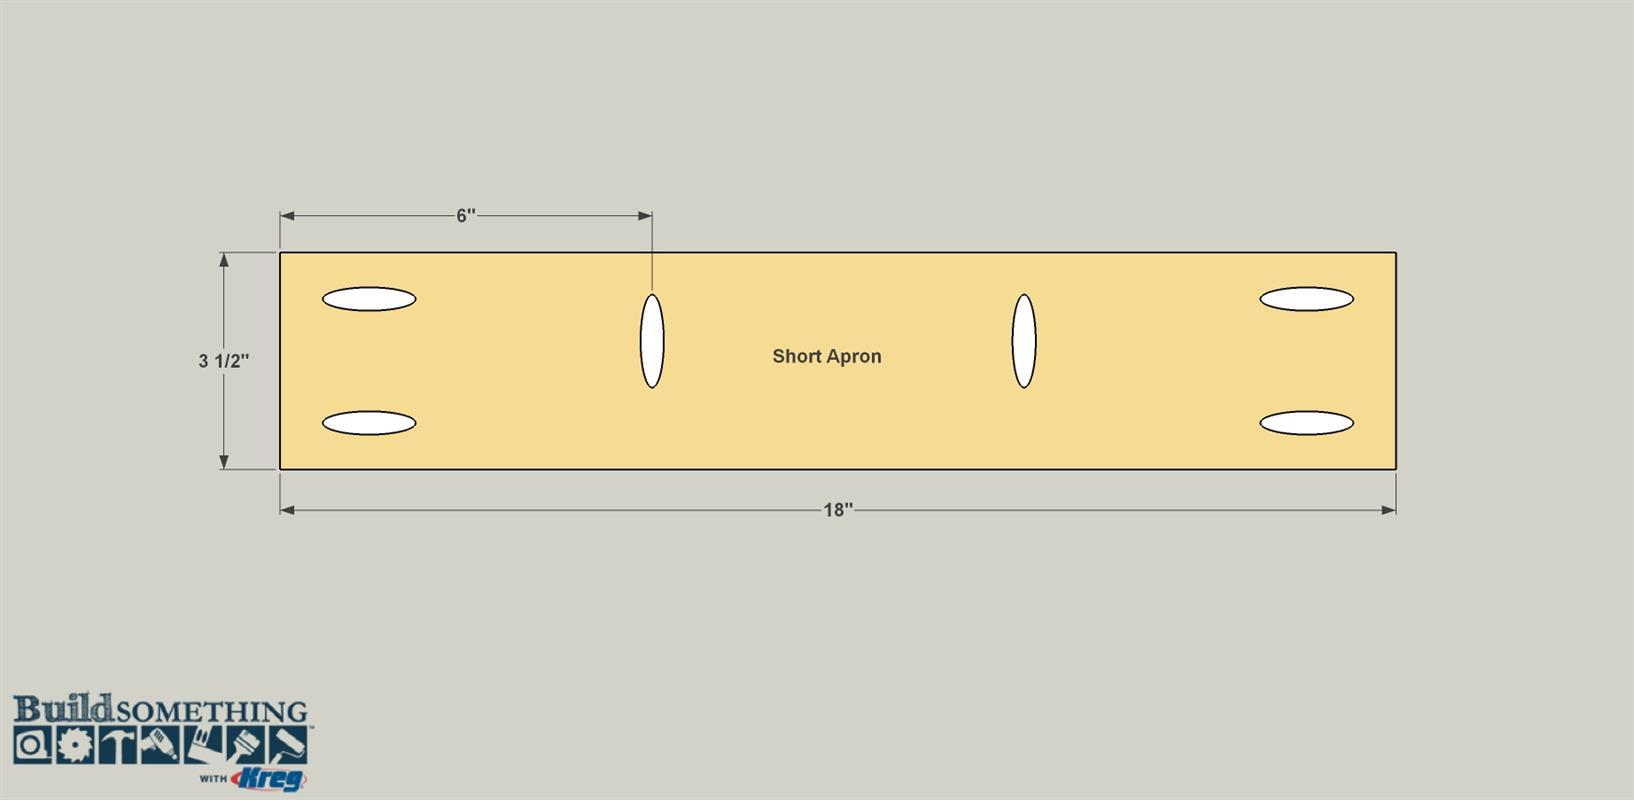
Make the Short Aprons
Cut two Short Aprons from 1x4 pine boards, as shown in the cut diagram. Now reset your Kreg Jig and bit for 3/4"-thick material. You’ll be able to keep this setting for the remainder of the project. Then drill pocket holes where shown. Sand the Short Aprons smooth.
-
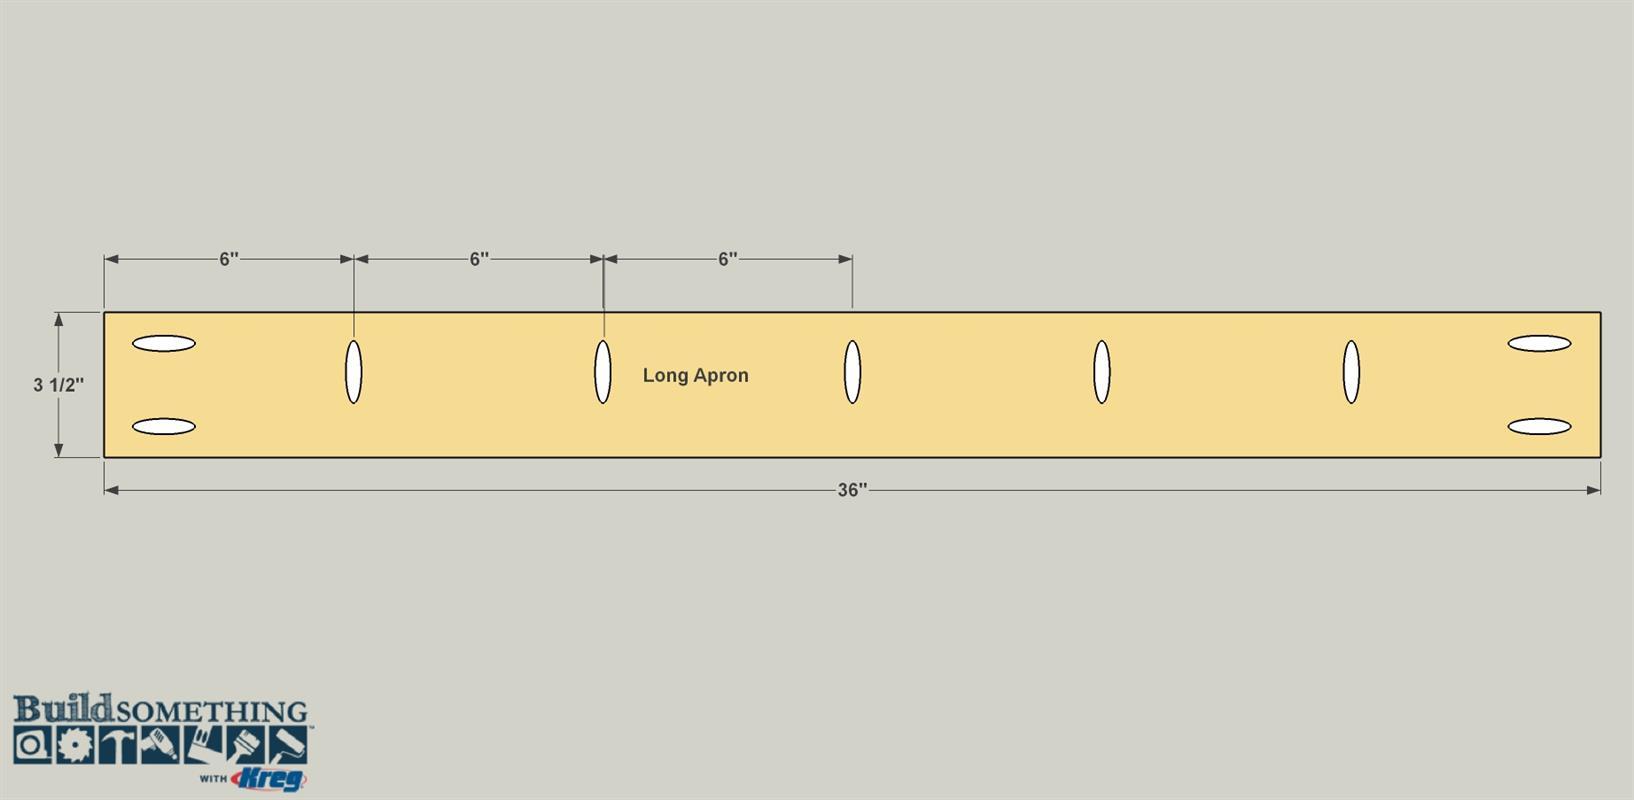
Make the Long Aprons
Cut two Long Aprons from 1x4 pine boards, as shown in the cutting diagram. Drill pocket holes at the locations shown, and then sand the Long Aprons smooth.
-
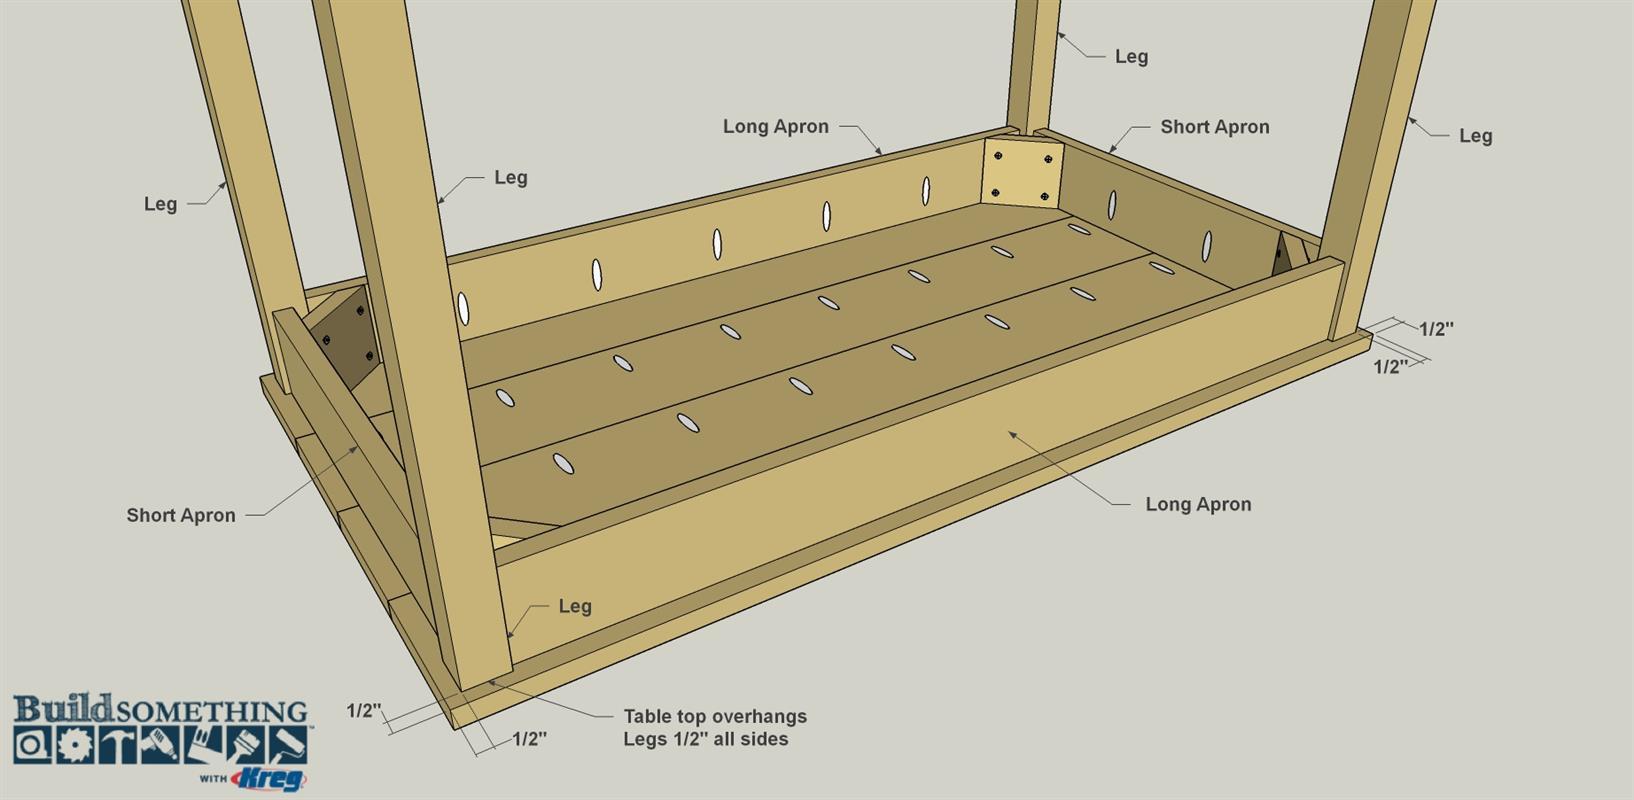
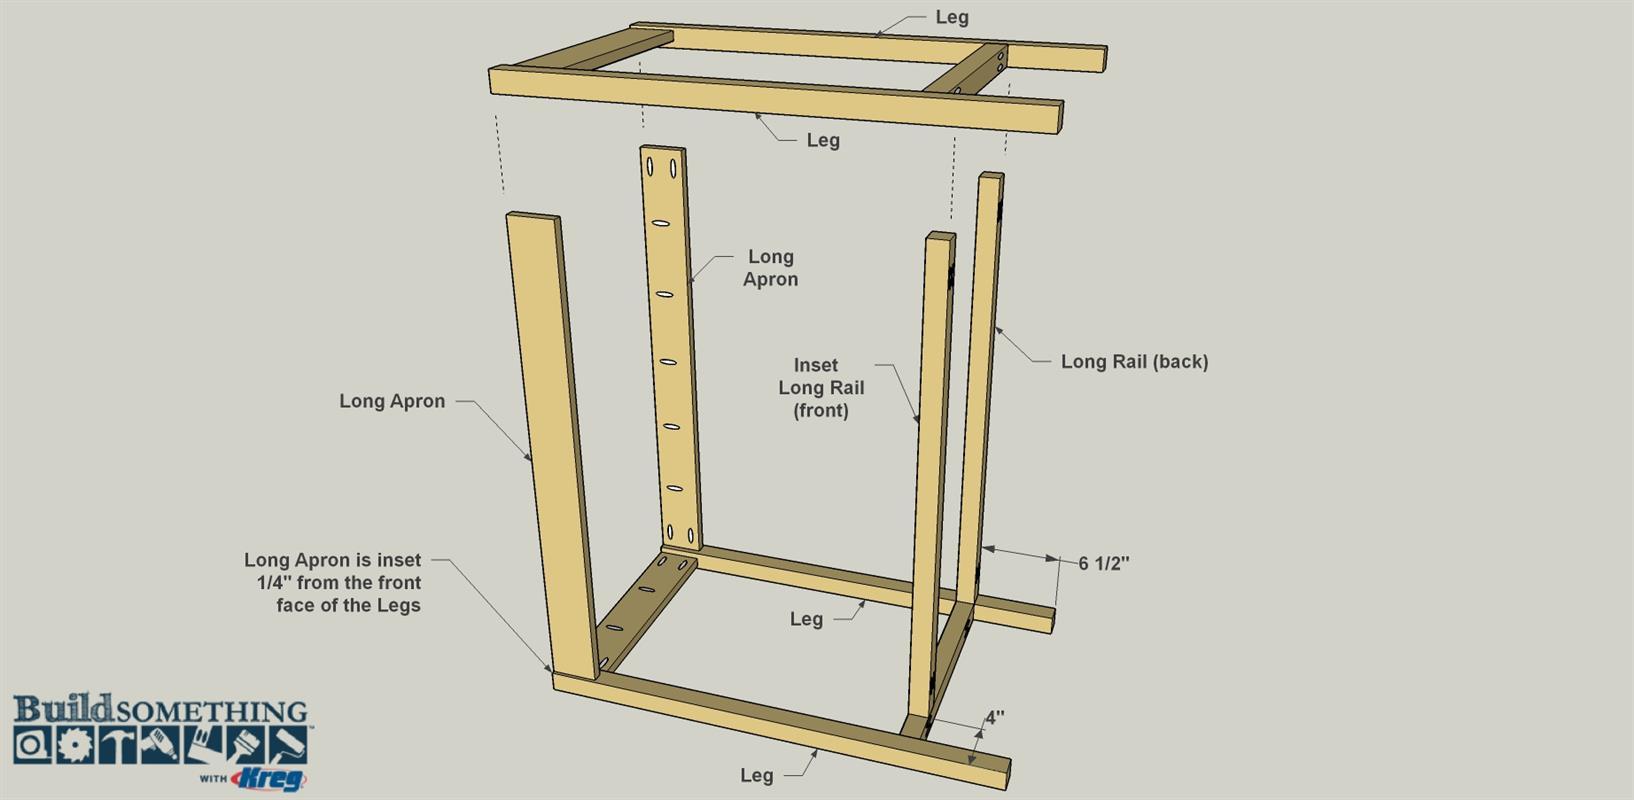
Complete the Base
Position one Long Apron so it is inset 1/4" from the Leg face, as shown, and the pocket holes along the edge are oriented correctly. Spread glue on the end of the Long Apron, and then attach it to the Leg using 1 1/4" coarse-thread Kreg Screws. Repeat the process for the second Long Apron. Now position one of the Long Rails so it’s set back from the front Leg, as shown. That locates this Long Rail at a handy place to rest your foot, if desired, as you work at the desk. Glue and screw it to the Short Rail using 2 1/2" coarse-thread Kreg Screws. Position the other Long Rail, which doesn’t get inset, and, then glue and screw it to the rear Leg. To complete the base, add the second side assembly.
-
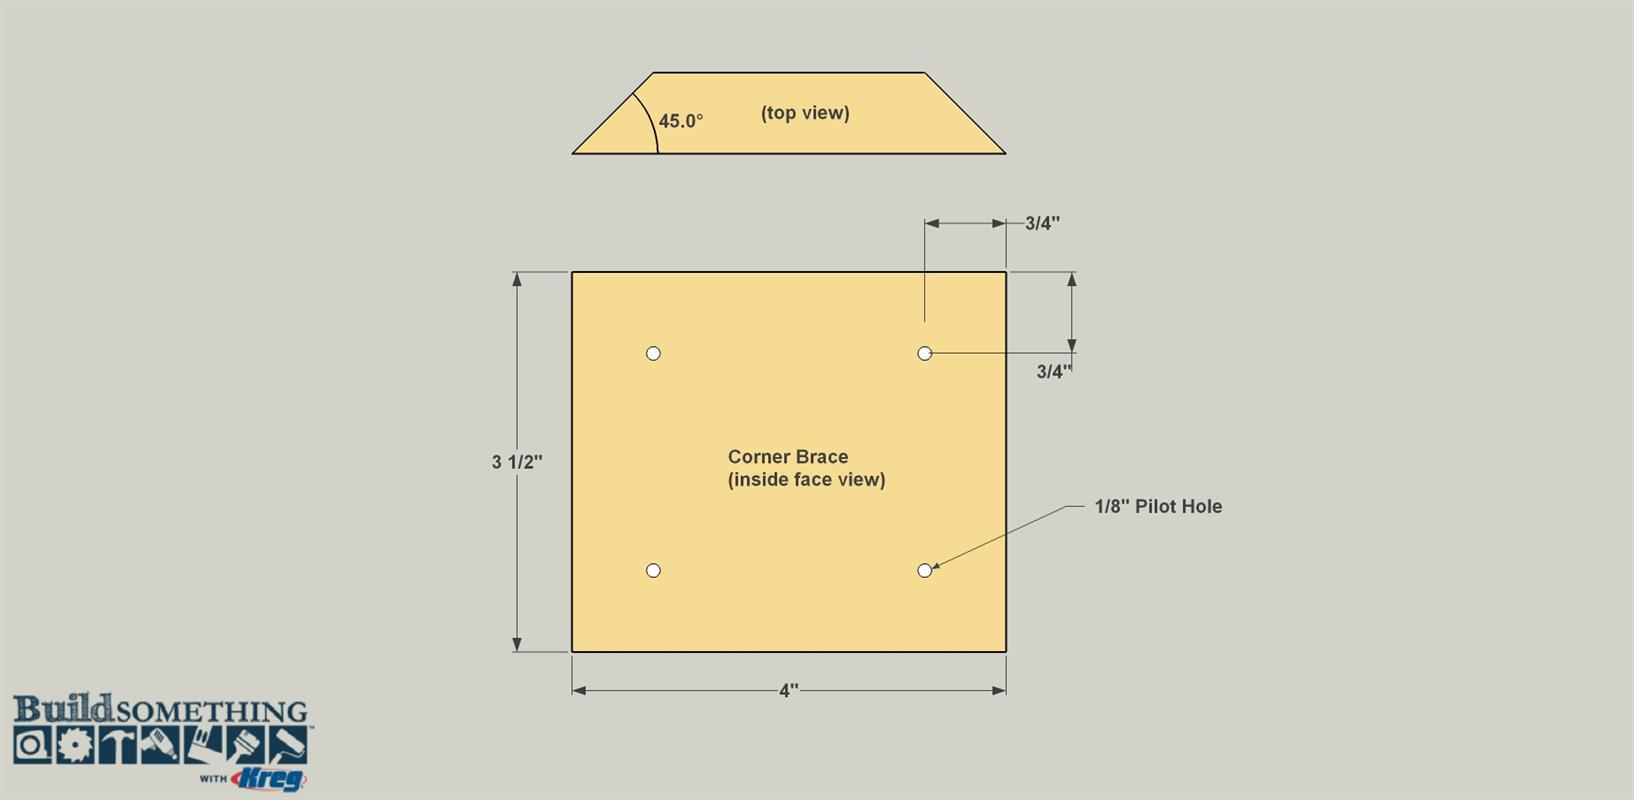
Make the Corner Braces
Cut four Corner Braces to size from 1x4 boards, as shown in the cut diagram. Note that each end is beveled at 45°. You can learn more about cutting bevels in the how-to video below. Drill four 1/8" pilot holes perpendicular to the flat face at the locations shown. Sand the corner braces smooth.
-
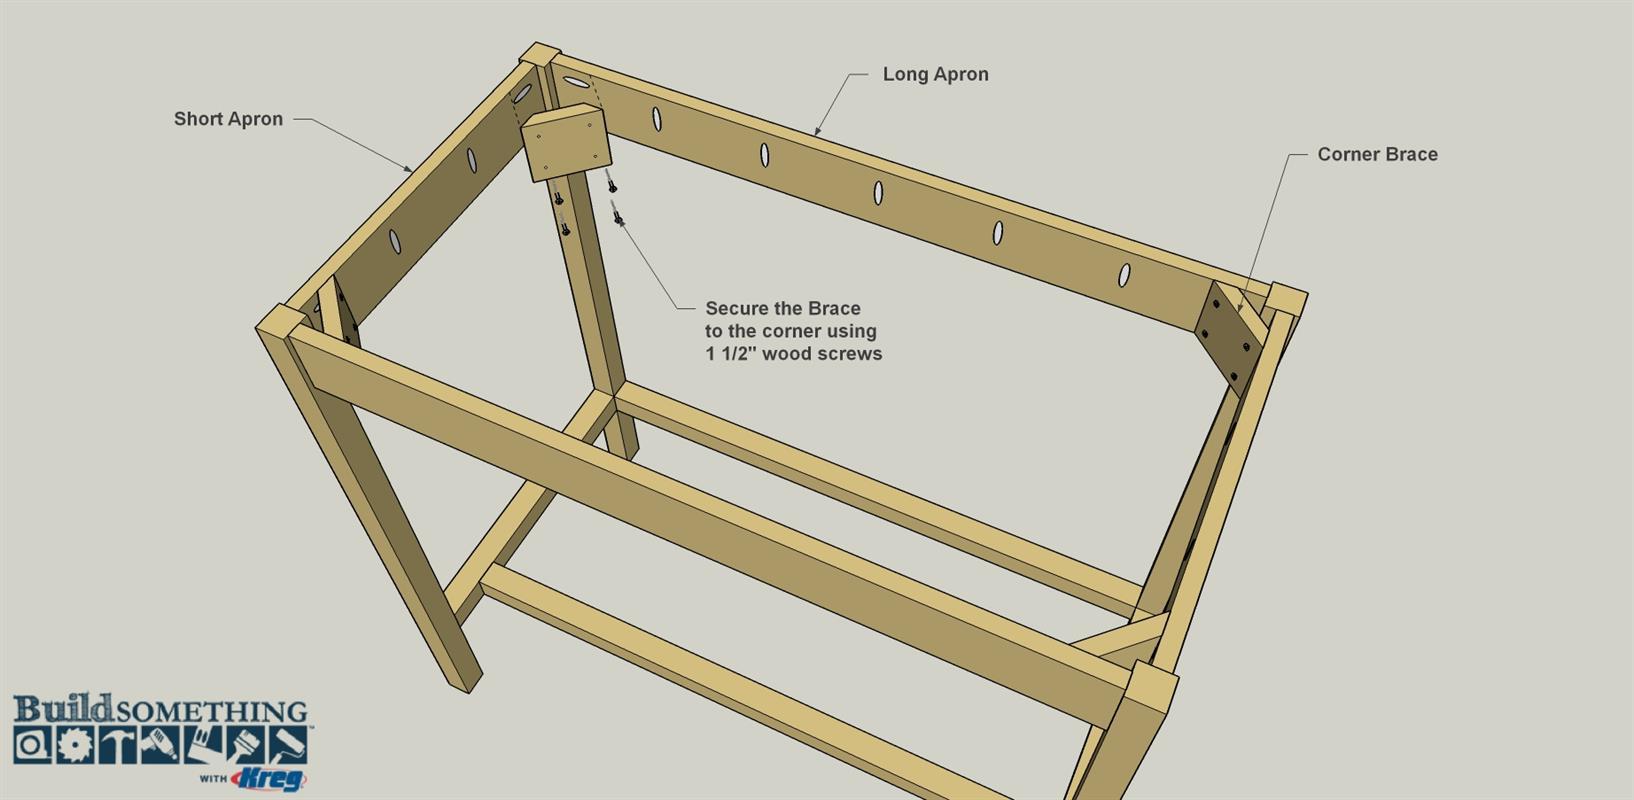
Install the Corner Braces
Before you attach the Braces, make sure your base is square. (Learn more in the video below.) Measure the distance diagonally from the outside of one Leg to the outside of the opposite Leg. Then measure across the other two Legs. If the dimensions are equal, the base is square. If the dimensions are different, clamp diagonally across the opposing Legs that have the larger measurement, and then tighten the clamp until the dimensions become equal. Spread glue on the ends of two Corner Braces, and attach them using 1 1/2" flathead wood screws. Remove the clamp, and then attach the other two Braces. If you plan to use different finishes for your desk top and base, as we did, now is a good time to paint or stain the base.
-
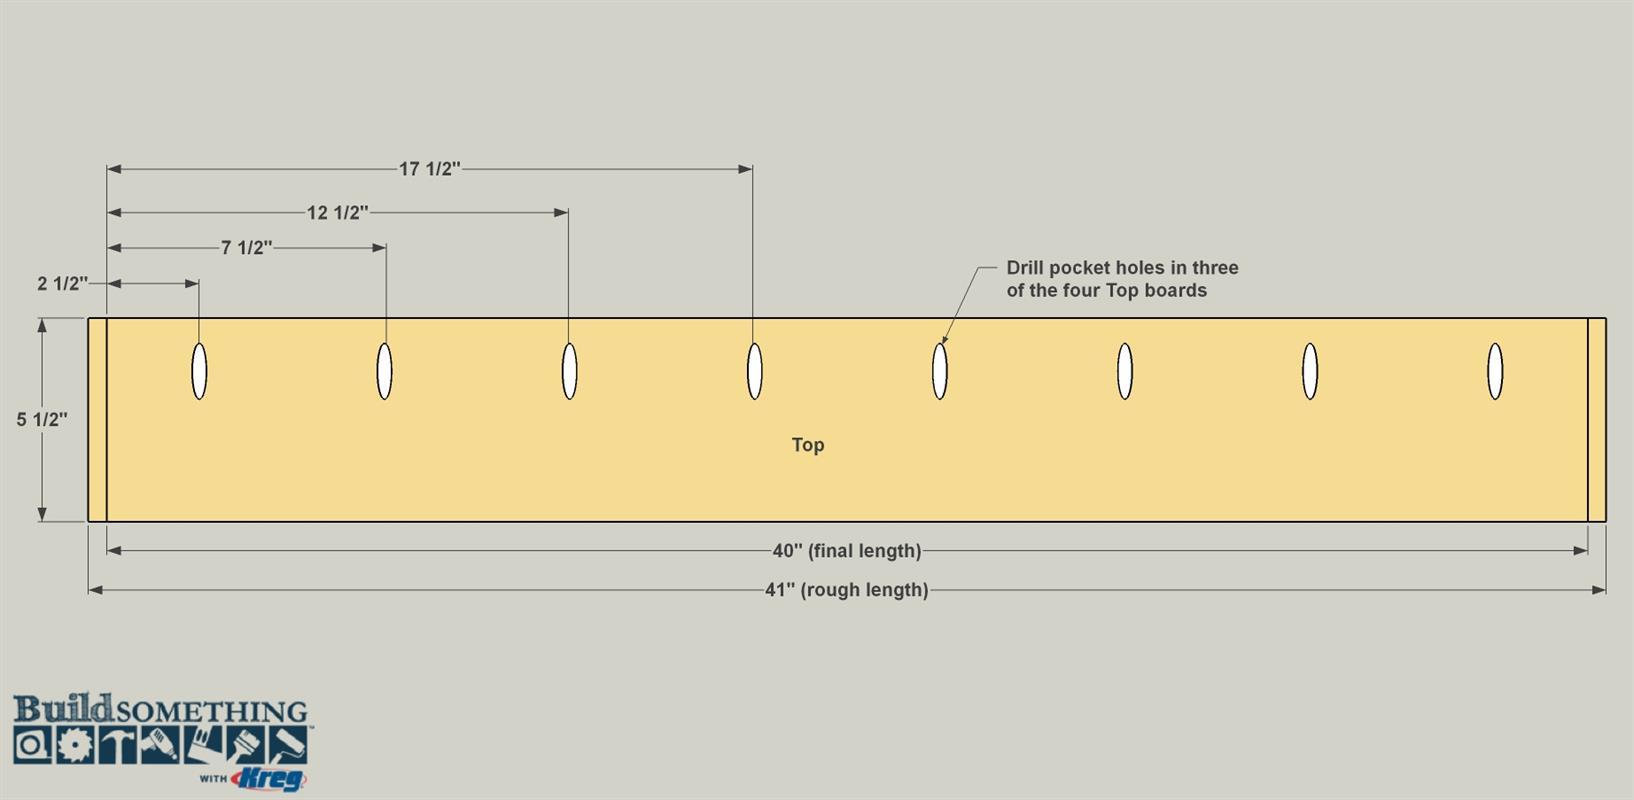
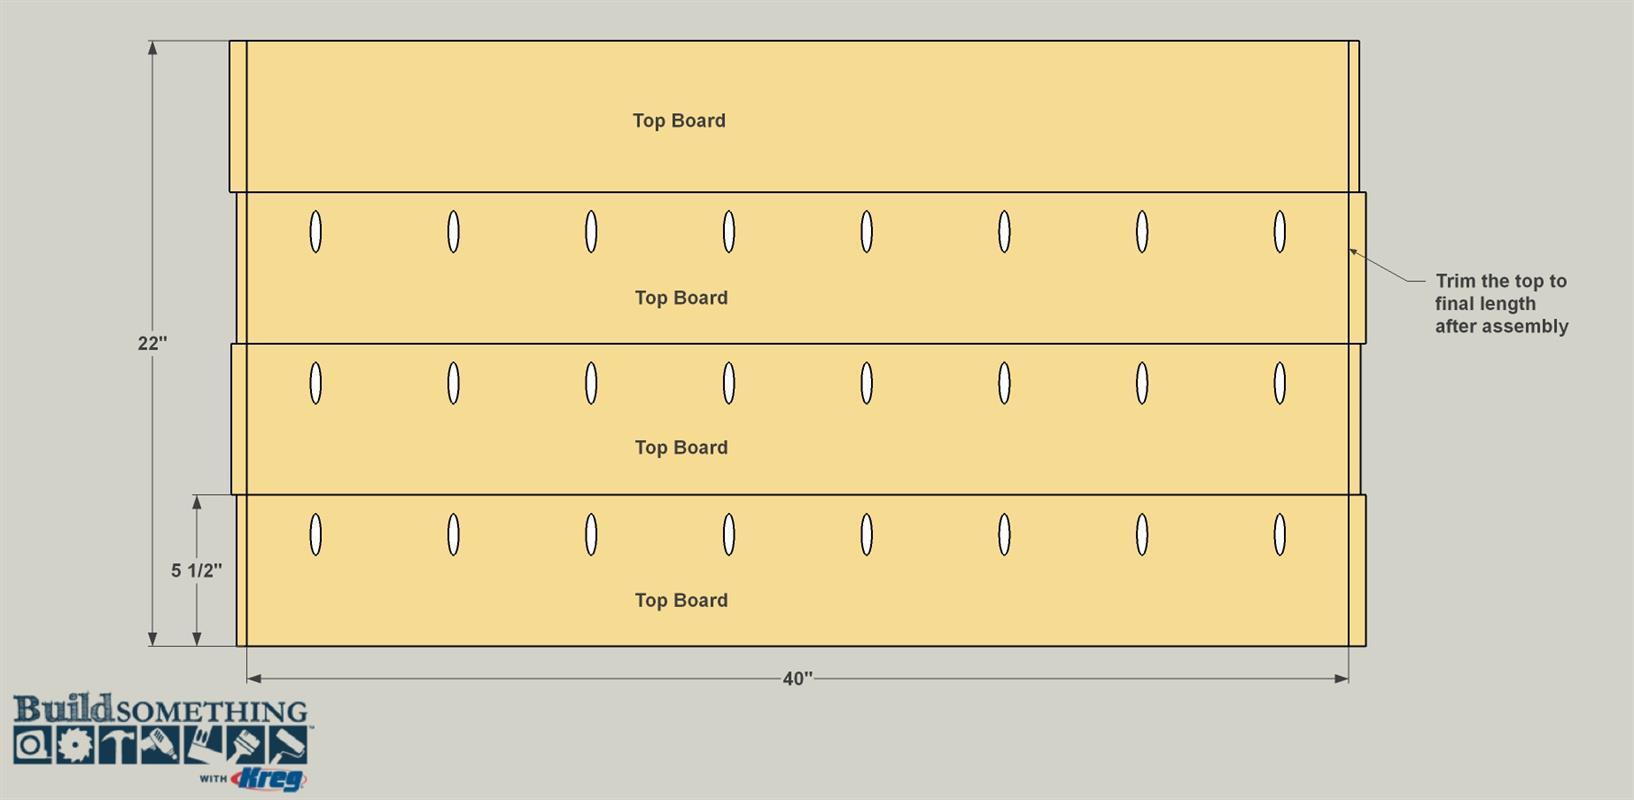
Make the Top Planks
Cut four Top Planks from 1x6 boards as shown in the cutting diagram. We made the Top Planks 1" extra-long at first. That way, when you assemble the top later, you don’t have to worry about all of the ends being exactly aligned. You can just trim each end of the assembled to get the ends perfectly flush. After cutting the Top Planks to rough length, drill pocket holes at the locations shown in three of the four boards. The fourth board doesn’t need holes.
-
Assemble the Top
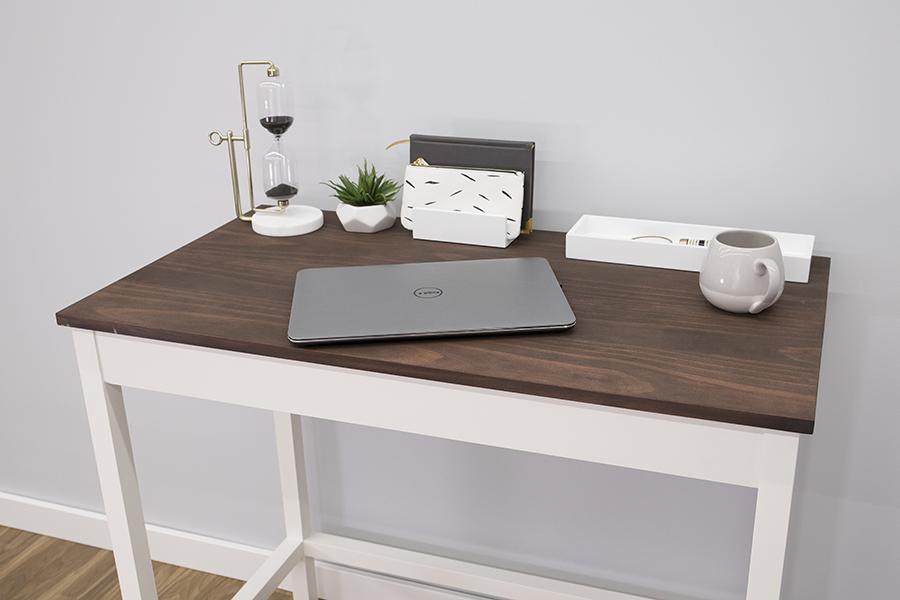
Spread glue along one edge of the Top Plank without pocket holes. Then position the first plank with pocket holes against this plain board, and attach it using 1 1/4" coarse-thread Kreg Screws. Use clamps to hold the faces as flush as possible, but don’t worry about the ends being exact. Repeat this process to add the other two Top Planks. Then mark the final length of the assembled top, and it to length using a circular saw. A guide track for your circular saw, such as the Kreg Accu-Cut™, is great for ensuring a nice, straight cut. Finally, sand the top as needed to make the faces flush and to achieve a smooth upper surface. Then stain or paint the top as you wish.
-
Attach the Top to the Base
Once your paint or stain dries, place the top assembly face down on a flat work surface. Position the base on the top so that there is a consistent overhang, as shown. Then secure base to the top using 1 1/4" coarse-thread Kreg Screws—but no glue.