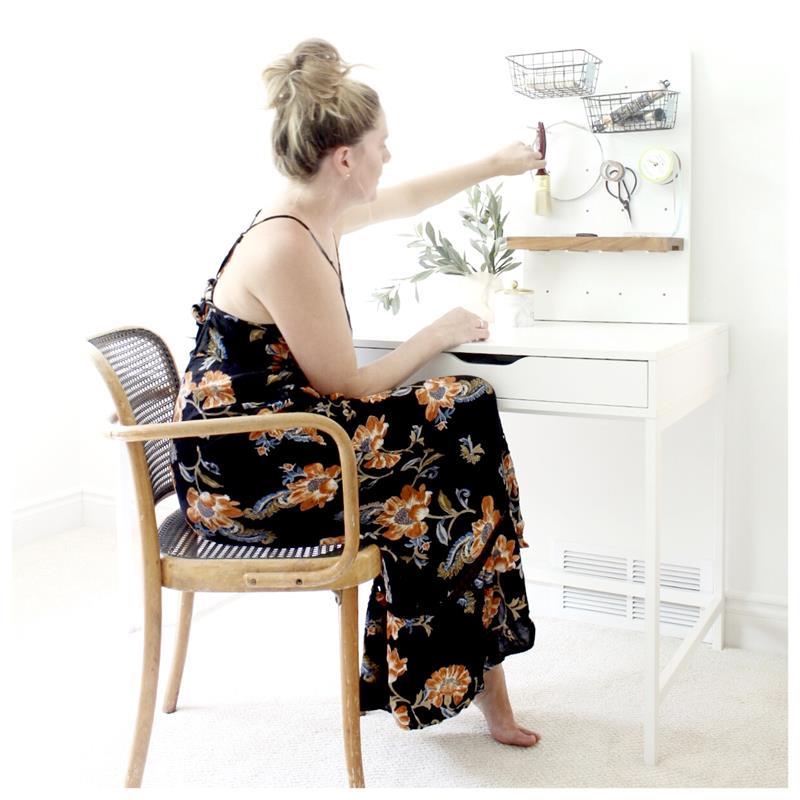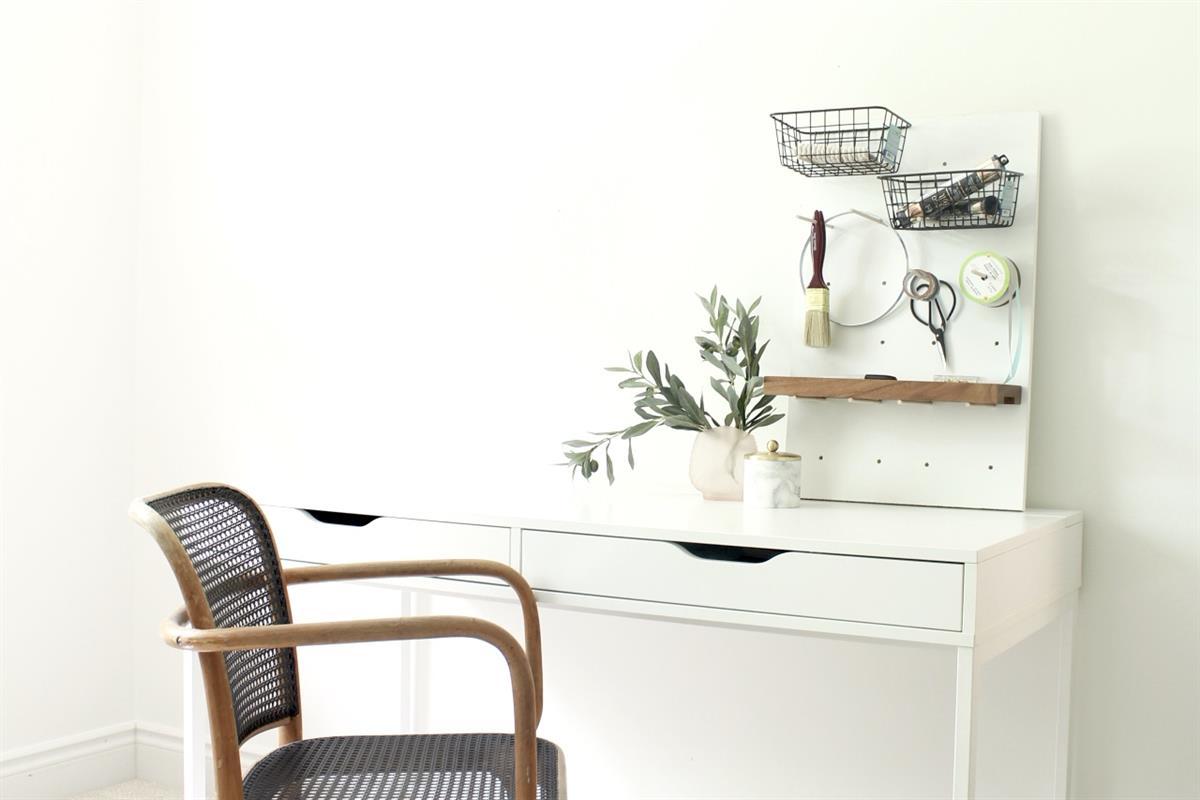
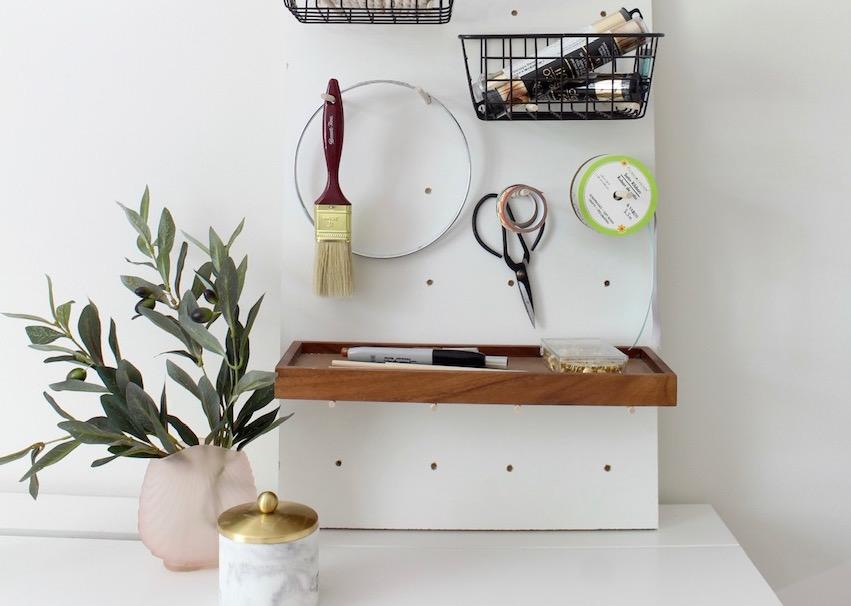


This easy and fun DIY Craft storage center is the perfect solution to keep your craft supplies, like ribbon, paint brushes, scissors etc. organized and accessible.

Materials
Wood Products
- 1 MDF , 2x3 , 24"
Hardware & Supplies
- 24 Wood Dowels 1/4 diameter
- 2 Wire baskets
- 1 Wood shelf
Directions
-
Step 1: Layout Your Plan
This may seem like a silly step but it will help ensure your end product suits your storage needs. Start by laying out all your craft supplies, then pull out your most used items, like scissors, pens, glue etc. Determine whether they should be placed in baskets or hung off hooks etc. and draw a rough idea of what your ideal craft storage center would look like. Remember, Don't stress too much, this project is customizable so you can adjust it any time.
-
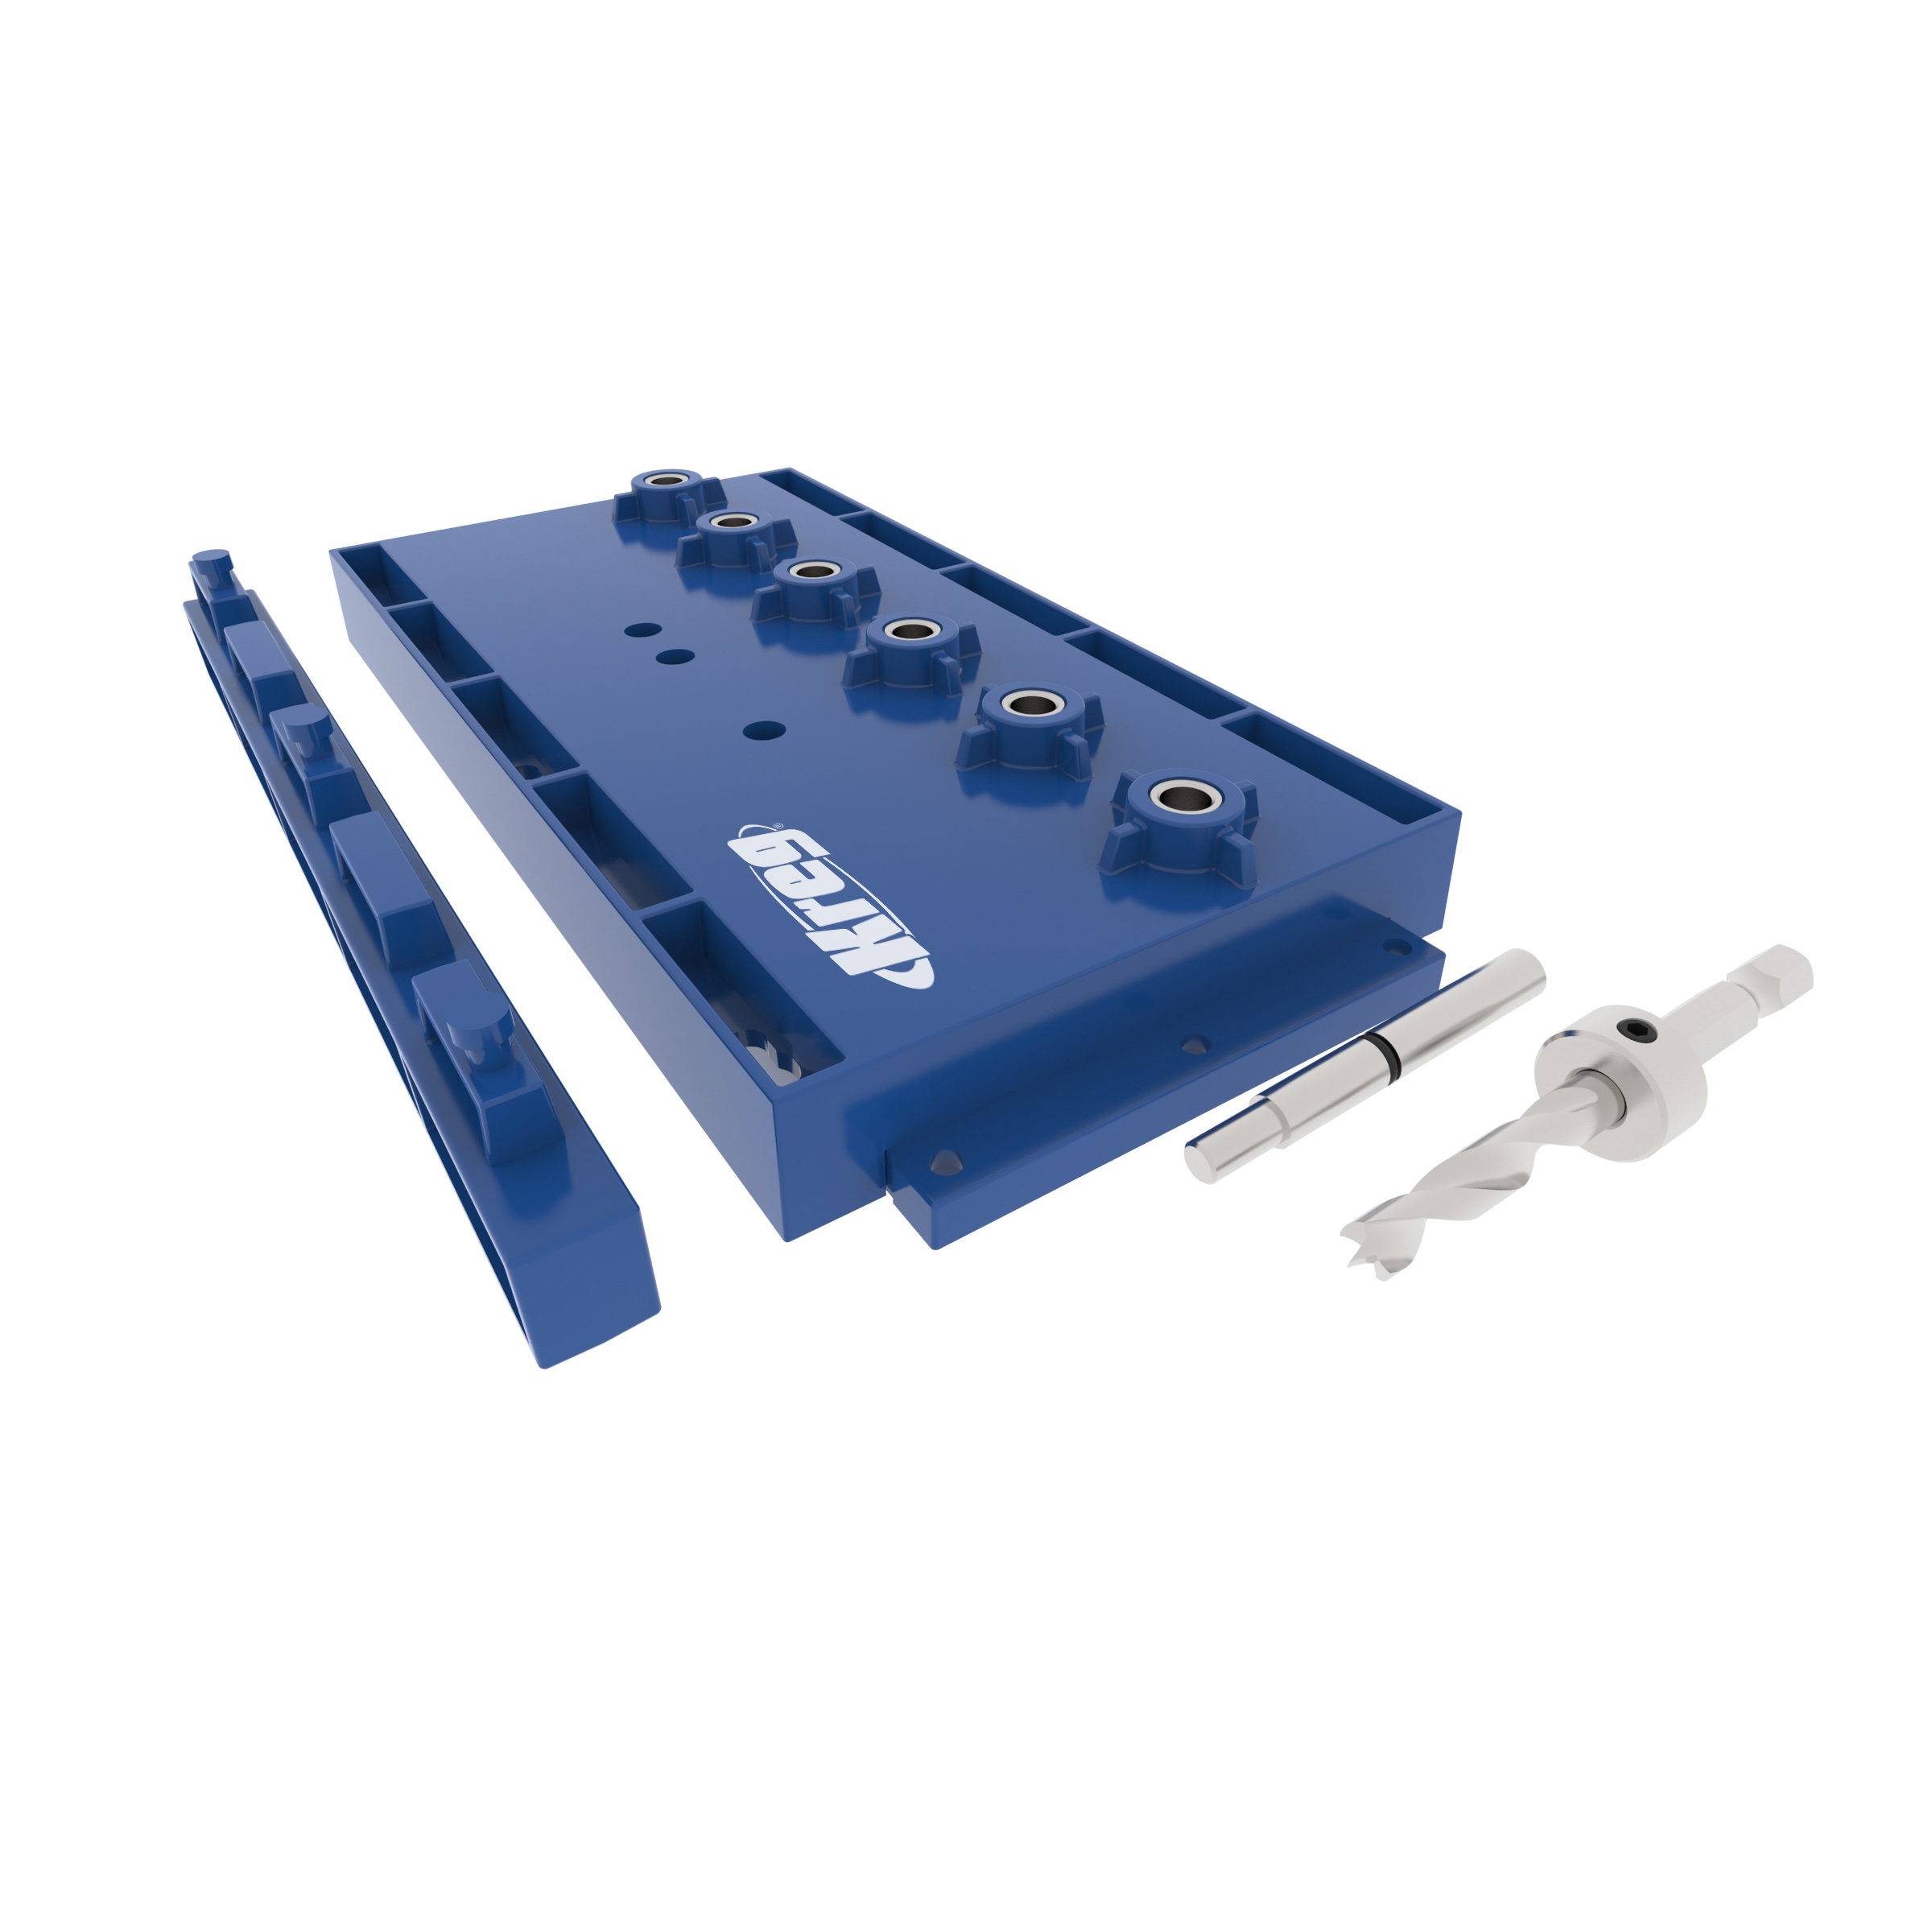
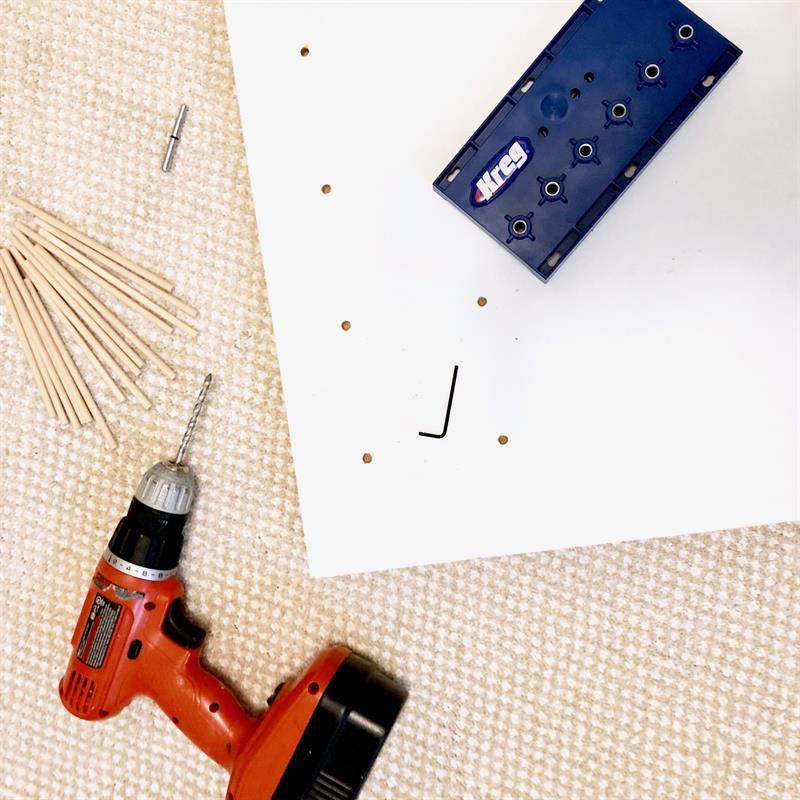
Step 2: Drill Peg Holes
Now that you know what you want your craft center to look like you can simple drill your holes using the Kreg Shelf Pin jig. I wanted my holes to be fairly far apart so I drilled every third hole and used the locating pin to ensure proper spacing. Be sure to use the stopper that comes with the Kreg Shelf Pin jig to ensure you do not drill all the way through your material.
-
Step 3: Add Pegs and Organize
Insert your pegs into the holes according to your original plan. Cut the pegs or dowels down to any size you like. Add your craft supplies and adjust the pegs as necessary.