

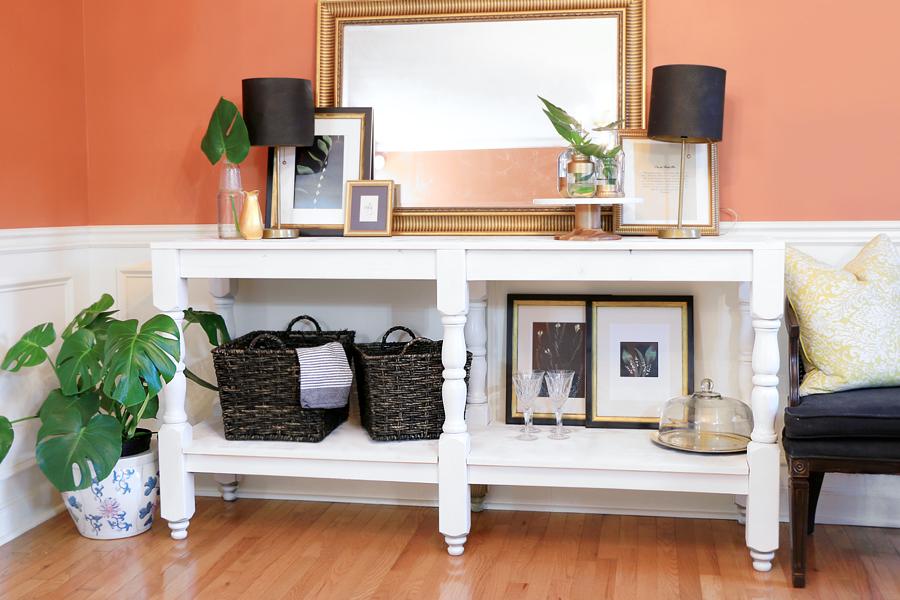
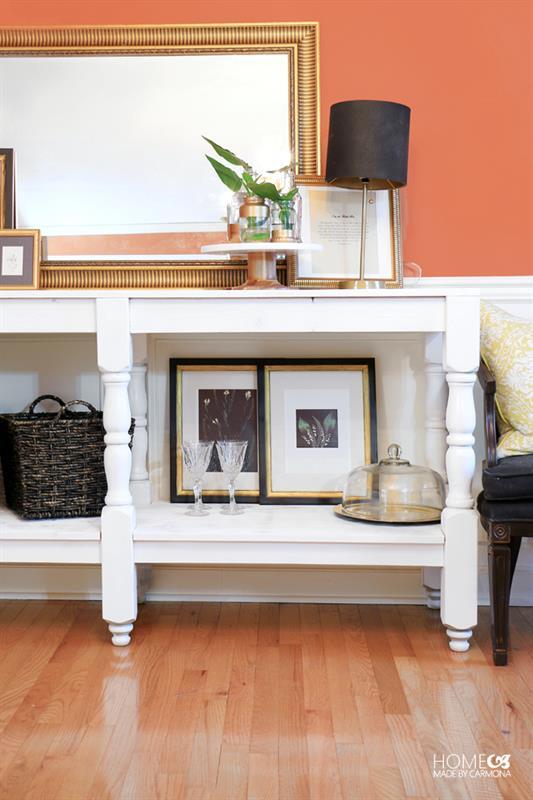


Create an elegant rustic styled buffet for your dining room with this easy tutorial. Or use this plan to create the perfect entry console table, or kitchen island! The sky is the limit…
Tools
Kreg Tools


Other Tools
-
Jigsaw

-
Tape Measure
-
Drill (corded)
-
Sander
Materials
Wood Products
- 2 Board , 2x4 , 96"
- 2 Board , 1x3 , 96"
- 2 Plywood , 3/4" x 20" Stain Grade Panel , 72"
- 6 Board , 4x4 , Deck or Bannister Posts
Hardware & Supplies
- 20 2-1/2" Kreg Screws
- 20 1" Kreg Screws
- 20 1-1/4" Kreg Screws
- 1 Paint or Stain
Directions
-
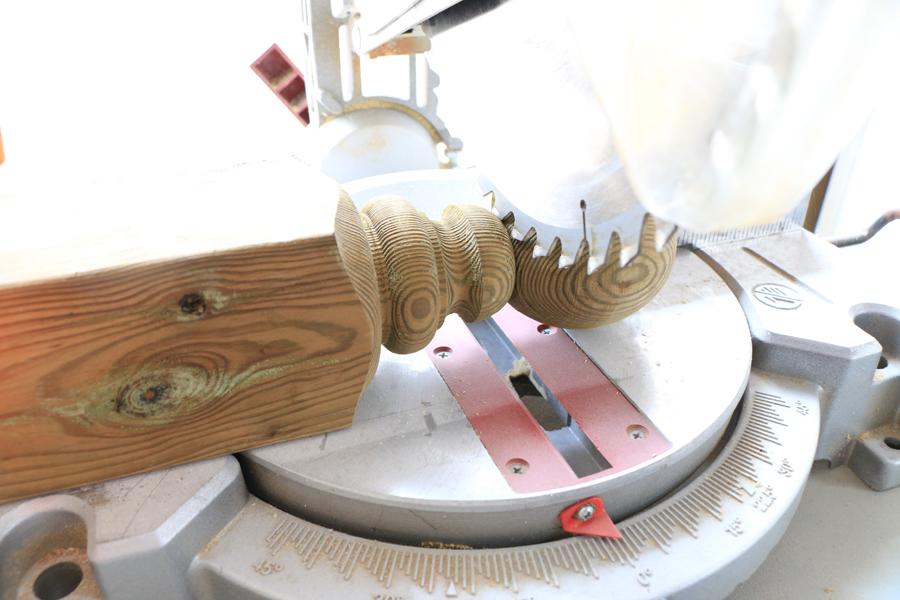
Cut The Finial Top
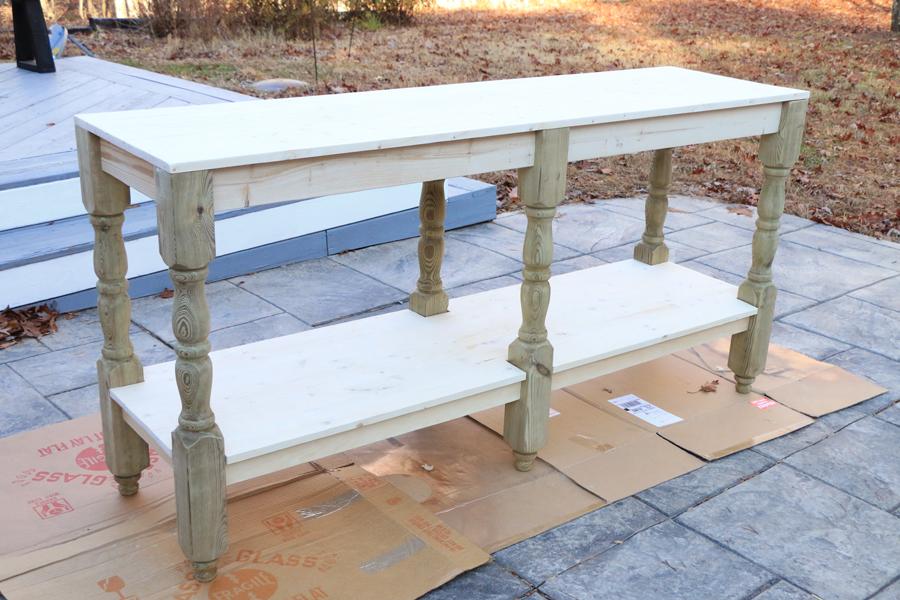
These colonial style posts have a ball finial on top which will need to be cut off. The remaining piece will become the foot of your buffet table.
-
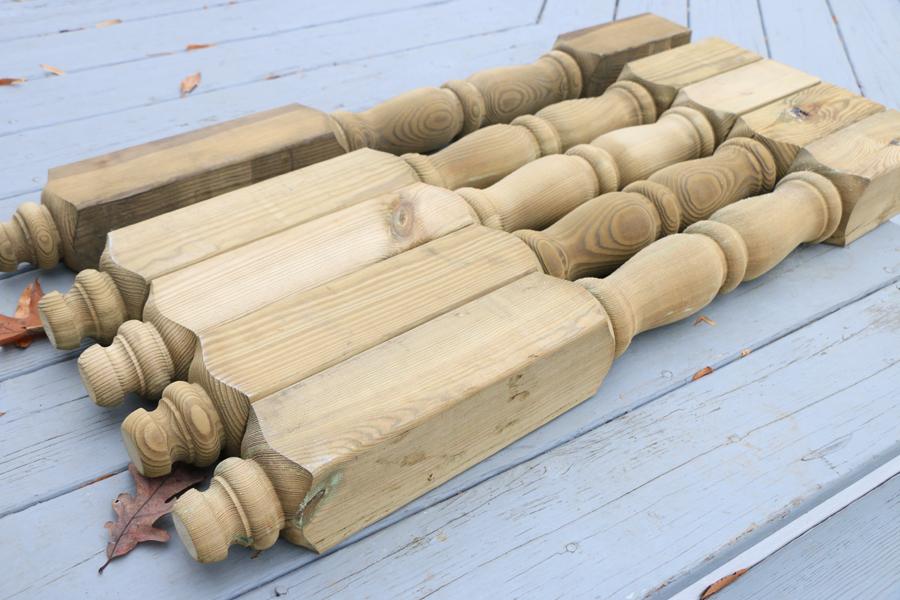
Cut The Legs To Size
Once the finial ball top has been trimmed off, measure from top to bottom and cut the legs to 35 inches in height. (34" for a counter top height, or choose 30" for console table height)
-
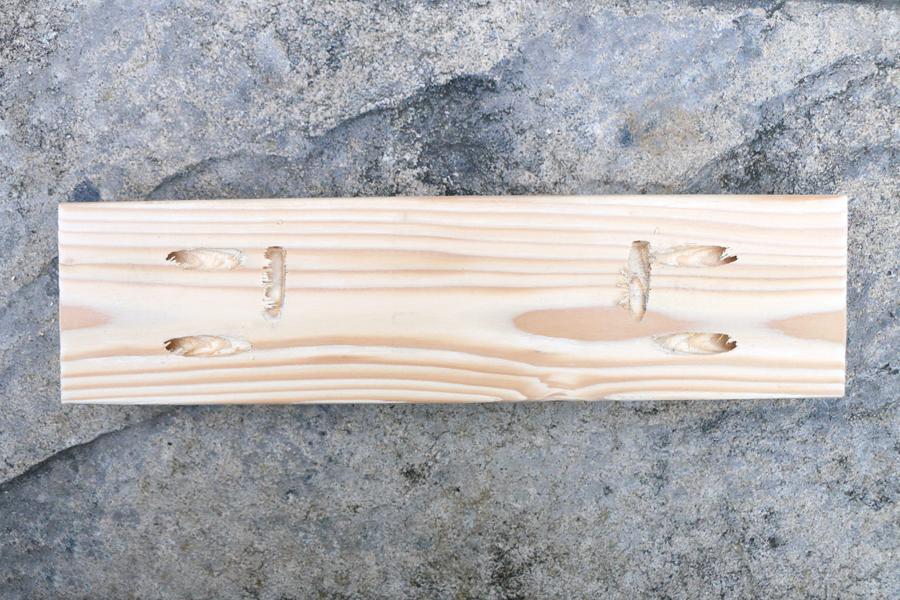
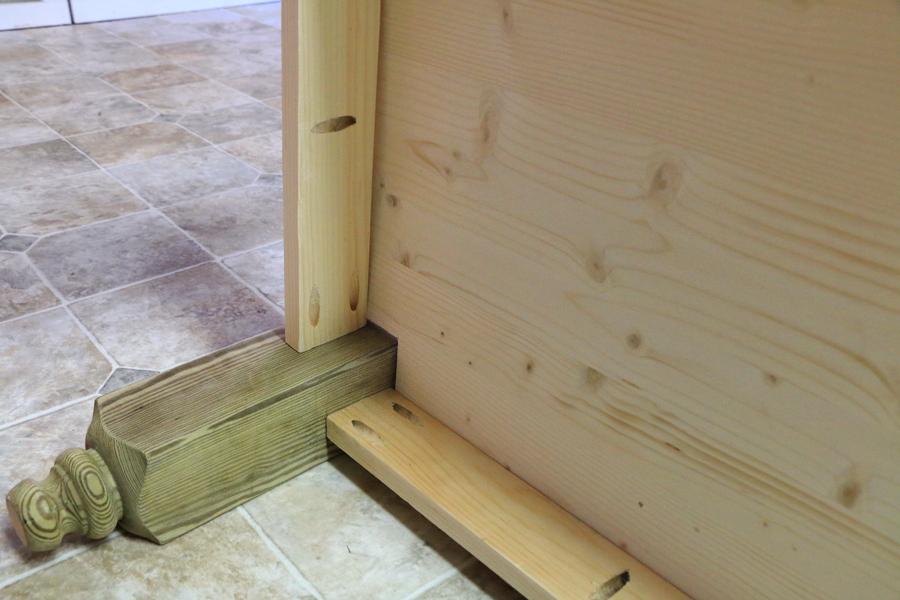
Cut 2x4's & 1x3's
Using the provided cut list, cut each of your 2"x4" and 1"x3" boards to size. Then using a Kreg jig, drill pocket holes into either end, and some shallow pocket holes into one side, as shown.
-
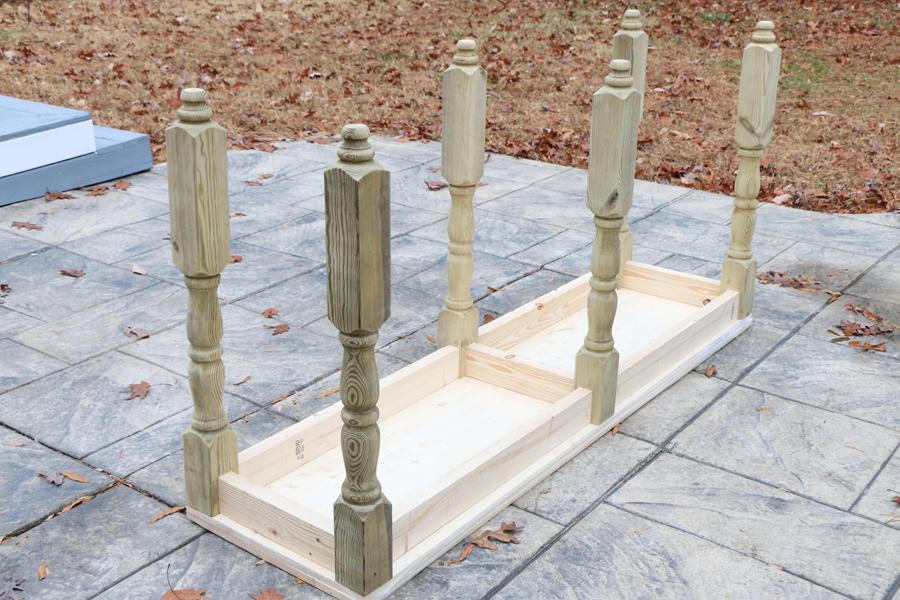
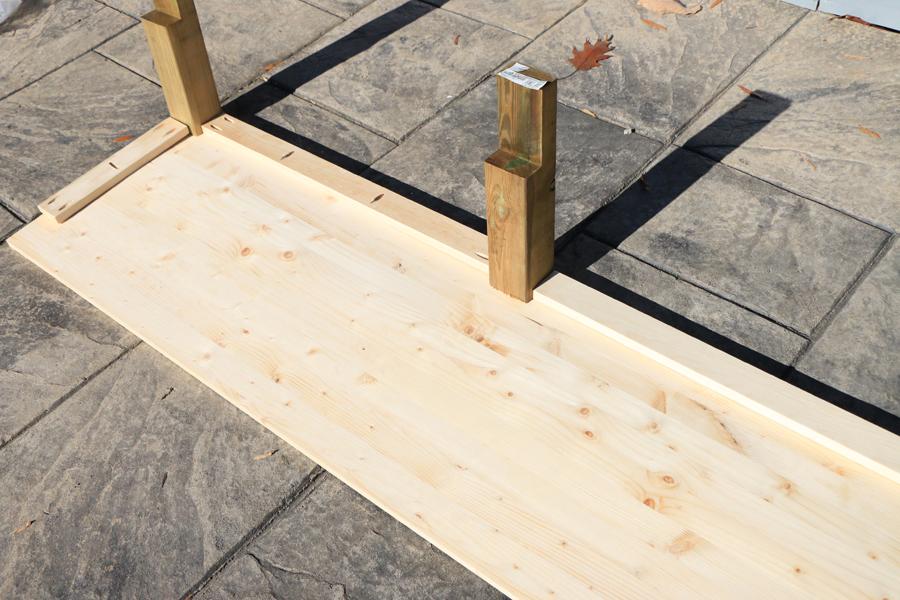
Lay Out 2x4's
Double check all your cuts by positioning the post legs and 2"x4" boards on the buffet top. If everything was cut properly, it should all fit with less than a 1/4" overhang on the tabletop (or should be flush). Recess the 2"x4" boards by 1" on all sides so that they are somewhat more centered with the legs.
-
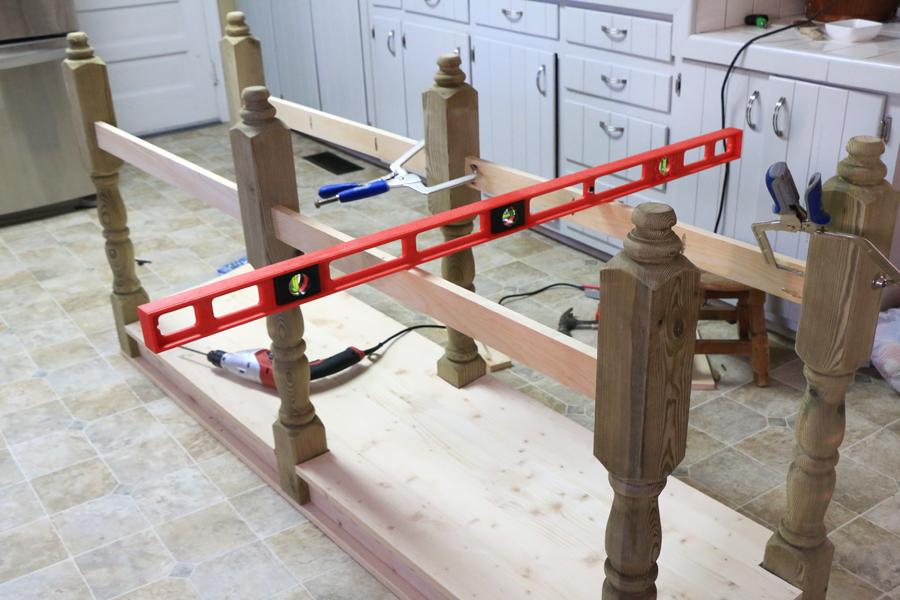
Attach Legs & Top Half
If everything measures properly and is perfectly centered on the buffet top, you may begin screwing the pieces together via the pocket holes. Assemble the entire top half on level ground.

-
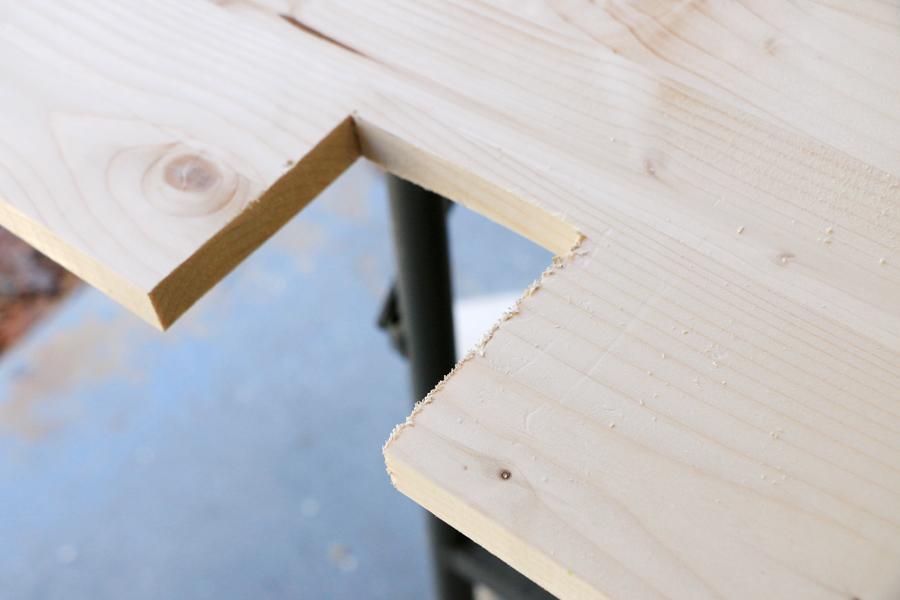
Cut Bottom Shelf
The second 6 foot plank (the one not being used as the buffet table top), will need cutouts where the legs will be. Place the leftover pieces of your post on the four corners and trace, then use the 1"x3" boards to determine where the middle post sits, and trace.
-
Cut Bottom Shelf #2
Using a jig saw, cut out the traced pieces. Tip: It helps to add an extra 1/4" of wiggle room for when you have to install the bottom shelf.
-
Add 1x3 Bottom Supports
Now that first half of your buffet has been assembled, it is time to add the bottom supports and shelf. Measure and mark 1" in, and 6" down on each leg post. This is your indicator of where the 1"x3" boards should be attached. Be sure that the two bottom supports are level to each other. Only attach the long 1"x3" pieces, the two short side pieces will be attached later.
-
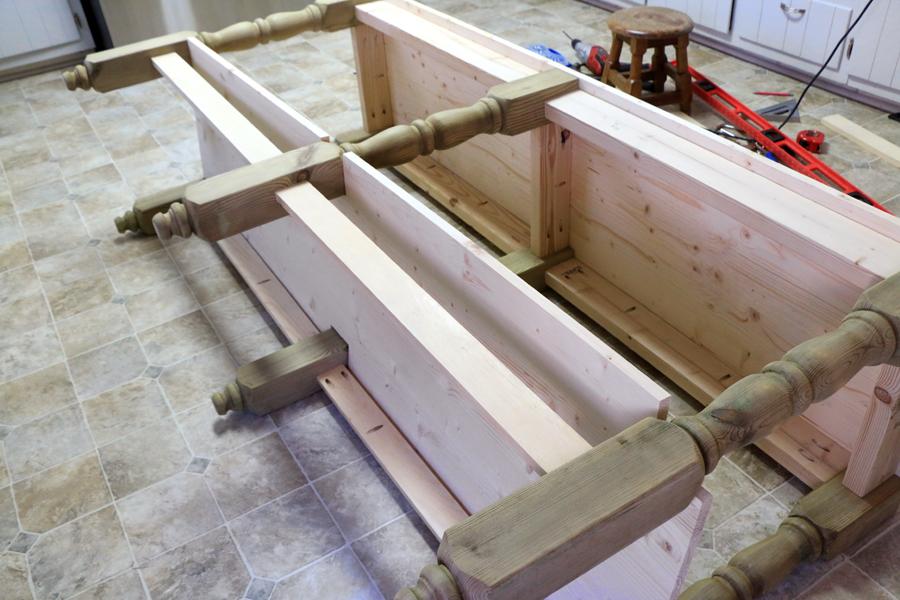
Attach Bottom Shelf
Slide the bottom shelf under the bottom supports you just added, and turn the entire unit on it's side. This makes attaching the bottom shelf easier. The shelf should overhang the 1"x3" supports, and be attached via the pocket holes at the bottom.
-
Attach Side Supports
Now you can add the short 1"X3" pieces to the sides and screw into the bottom shelf.
-
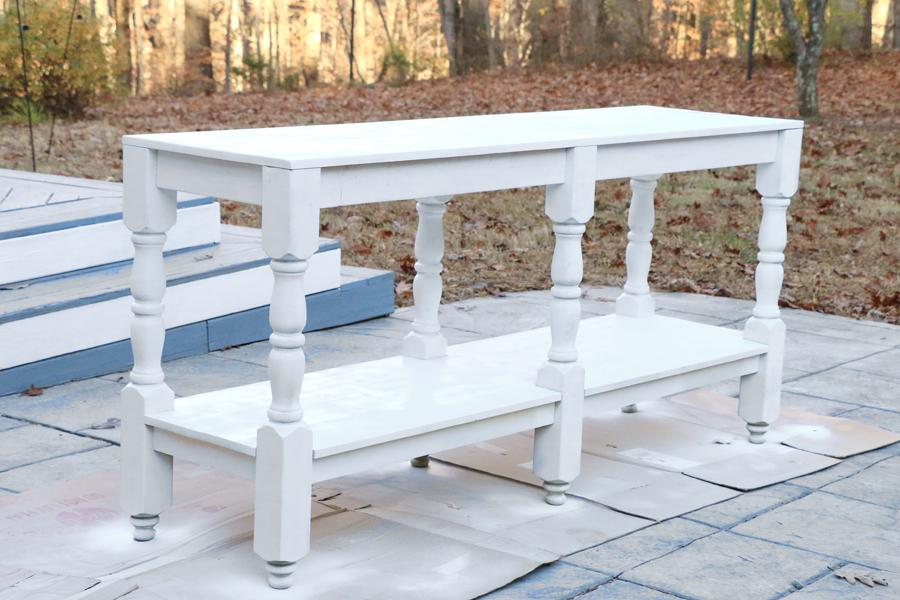
Paint or Stain
Take this bad boy outside, sand, and paint or stain it to the color of choice! Don't forget to seal it with a good polyurethane, and allow it to dry the appropriate length of time before using.
