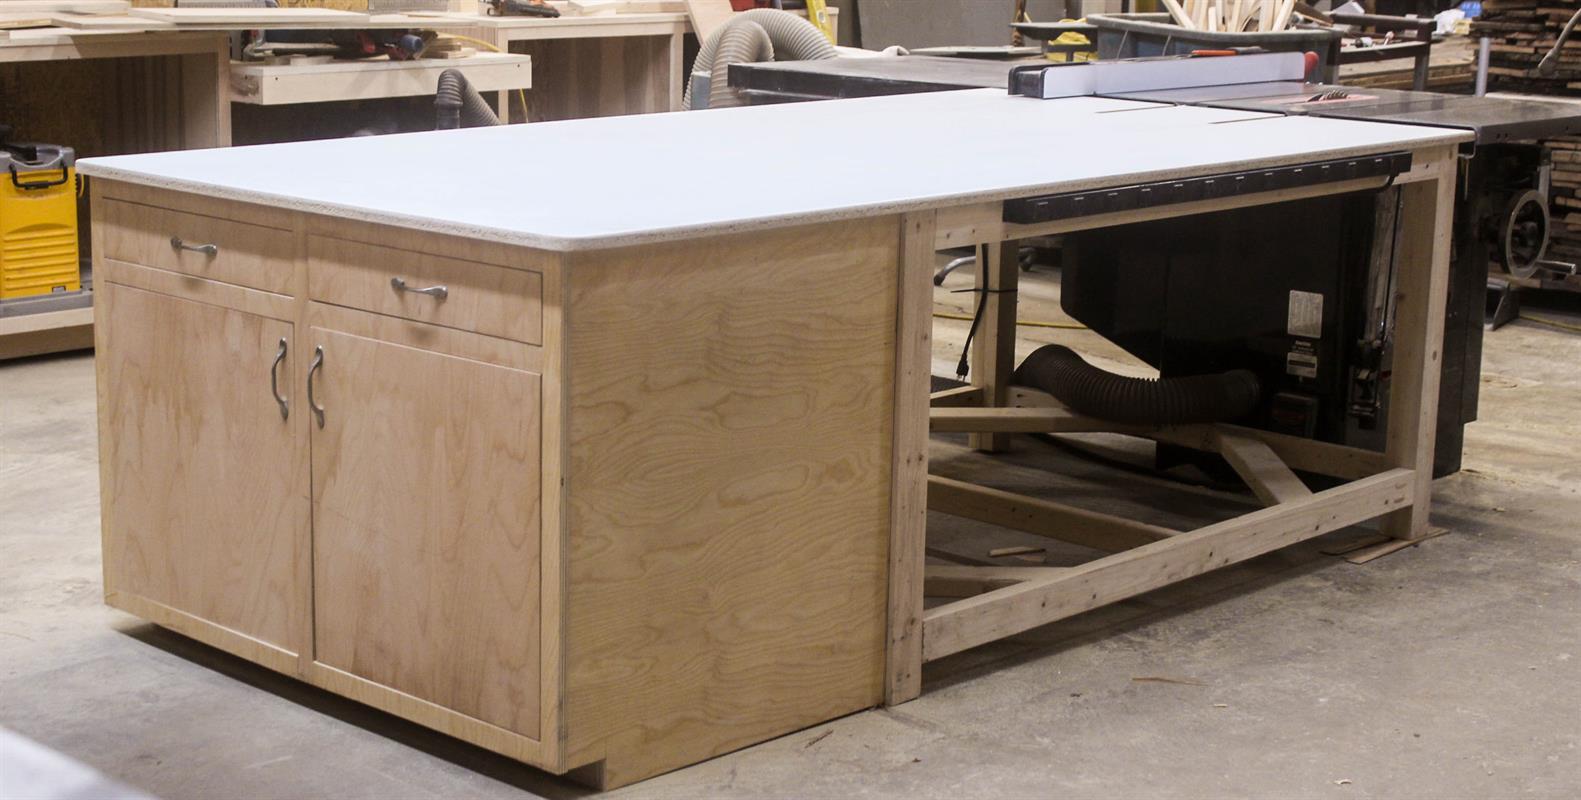


Build a simple tablesaw outfeed table using pocket holes, 2×4’s , and plywood. This whole build is made using the KREG Foreman and KREG Hardware Installation products.
Tools
Kreg Tools

Other Tools
-
Jigsaw

-
Jointer
-
Miter Saw
-
Square
-
Table Saw
-
Tape Measure
-
Track Saw
-
Clamps
-
Drill (cordless)
-
Impact Driver
-
Nail Gun
-
Router
-
Air Compressor
Materials
Wood Products
- 1 Plywood , 3/4" Thick , Full Sheet
- 1 Plywood , 3/4" Thick , Half Sheet
- 12 Board , 2x4 , 96"
- 1 Melamine , 3/4" Thick , Full Sheet
Hardware & Supplies
- 2 Pairs 15" ball bearing drawer slides
- 2 Sets Inset European drawer hinges
- 4 Door handles
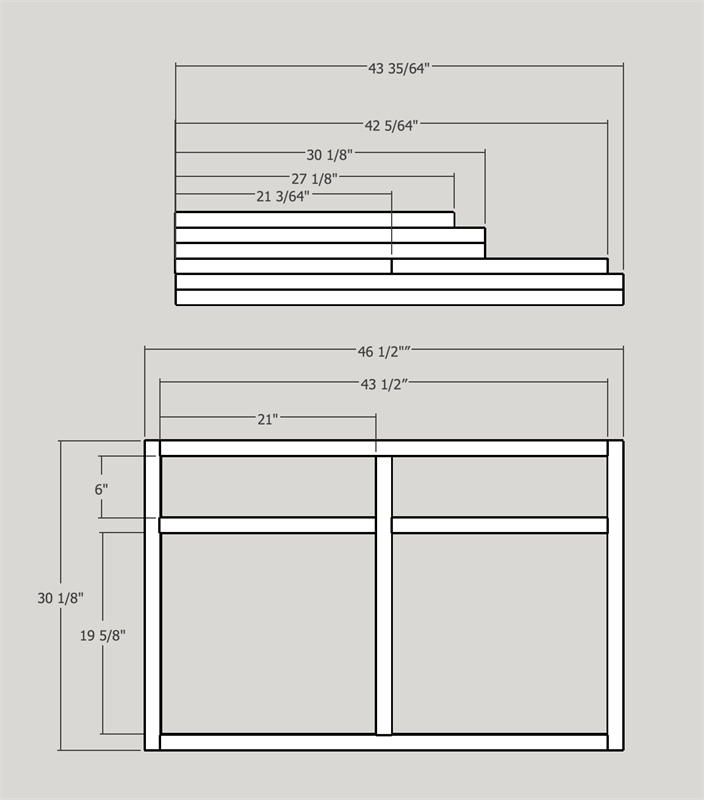
Cut List & Parts
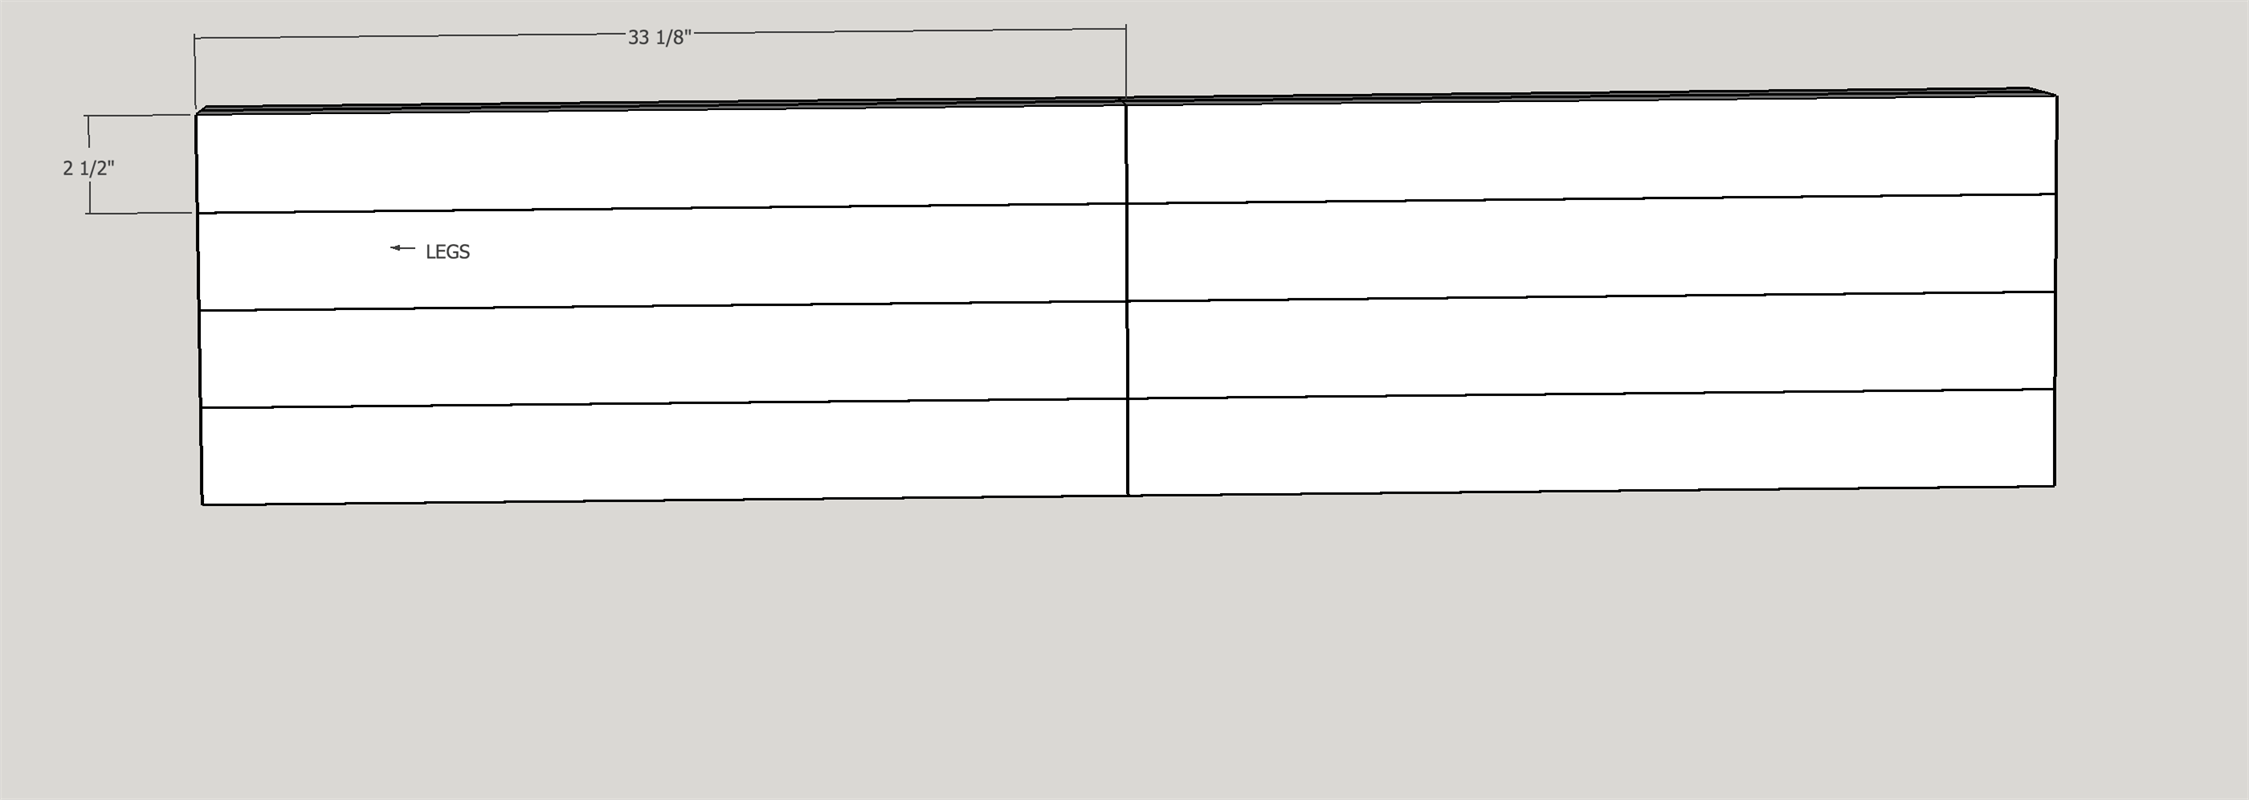
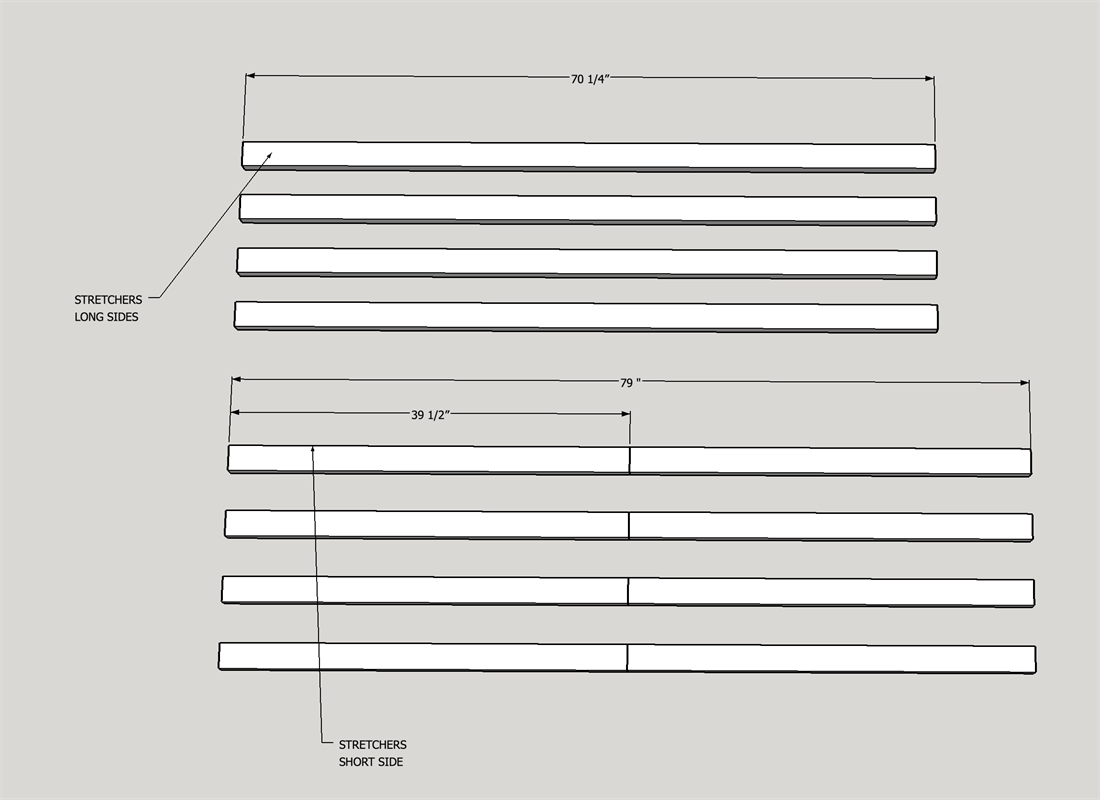
- 8 Legs , 33 1/8" x 2 1/2" 1 1/4"
- 4 Long Stretchers , 39 1/2" x 2 1/2" x 1 1/4"
- 4 Short Stretchers , 19 1/2" x 2 1/2" x 1 1/4
- 1 Cabinet Parts , See Diagram


Directions
-
Material List
For this Project you will need the following
Materials
- (12) 2" x 4" x 8' Dimensioned lumber
- (2) 4' x 8' x 3/4" Plywood ( Grade choice is up to you)
- Glue
- Pocket Hole Screws
- 1 1/4" 23g Pin Nails
- (1) 4' x 8' x 3/4" Melamine
- (2) Sets Drawer Slides
- (2) Sets Door Hinges
- (4) Door/ Drawer Pull Hardware -
TABLE BUILD -Break Down Stock
- Begin breaking down your stock based on the height of your table saw and your flooring. Cut everything to rough length then final dimensions later
- Mill down 2x4 stock to 1 1/4" x 2 1/2"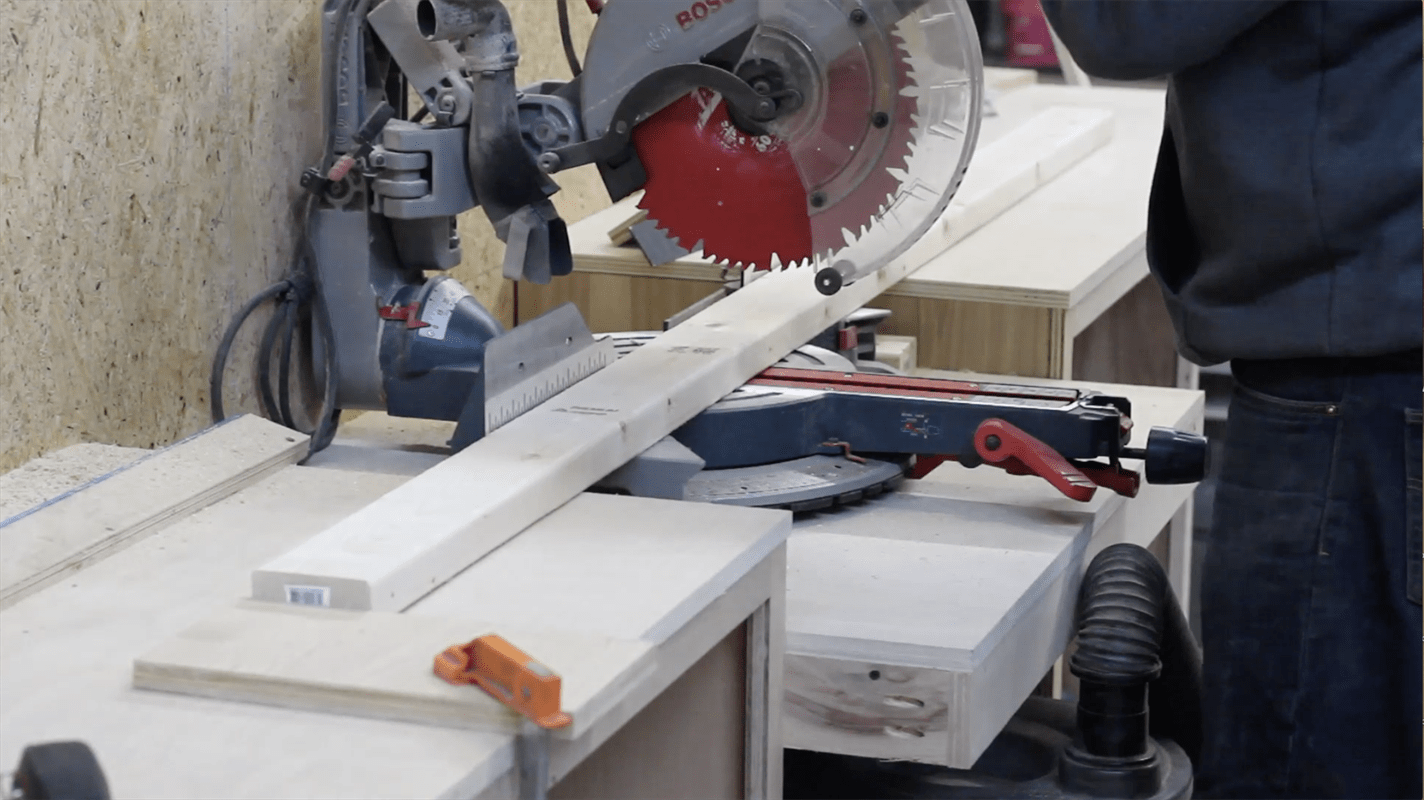
-
Glue Up Legs
- Glue up legs (Make same height of table saw and cut to final length after)
-
Dimension Stretchers
- Cut all stretchers to the length in the diagram
-
Pocket Hole Stretchers
- Pocket Hole Stretchers using KREG Foreman.
- Adjust Foreman for a deeper pocket hole than 1"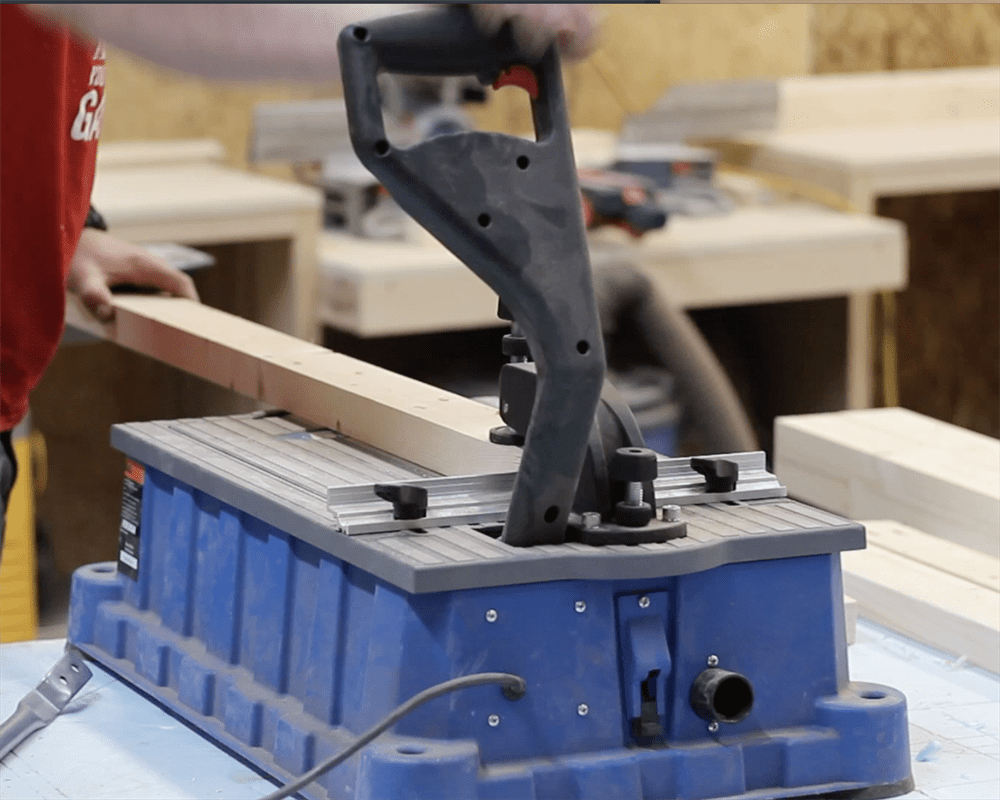
-
Cut Legs and Attach Stretchers
- Cut table legs to final dimension ( add adjustable feet if floor is uneven)
- Cut to 1" lower than table top height for addition of top thickness
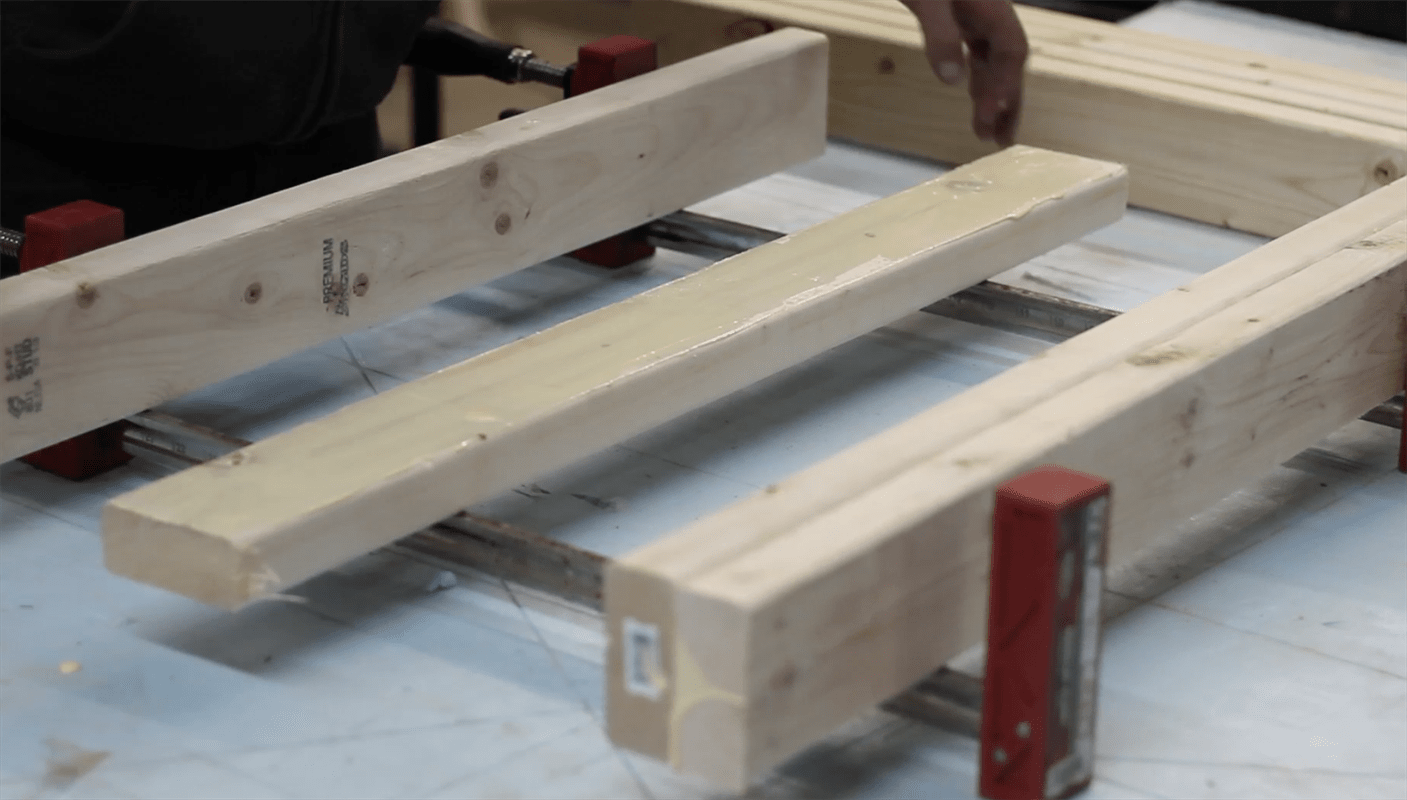
- Attach Stretchers using Pocket Hole Screws and glue
- Use a 4" spacer block on the bottom for shelf height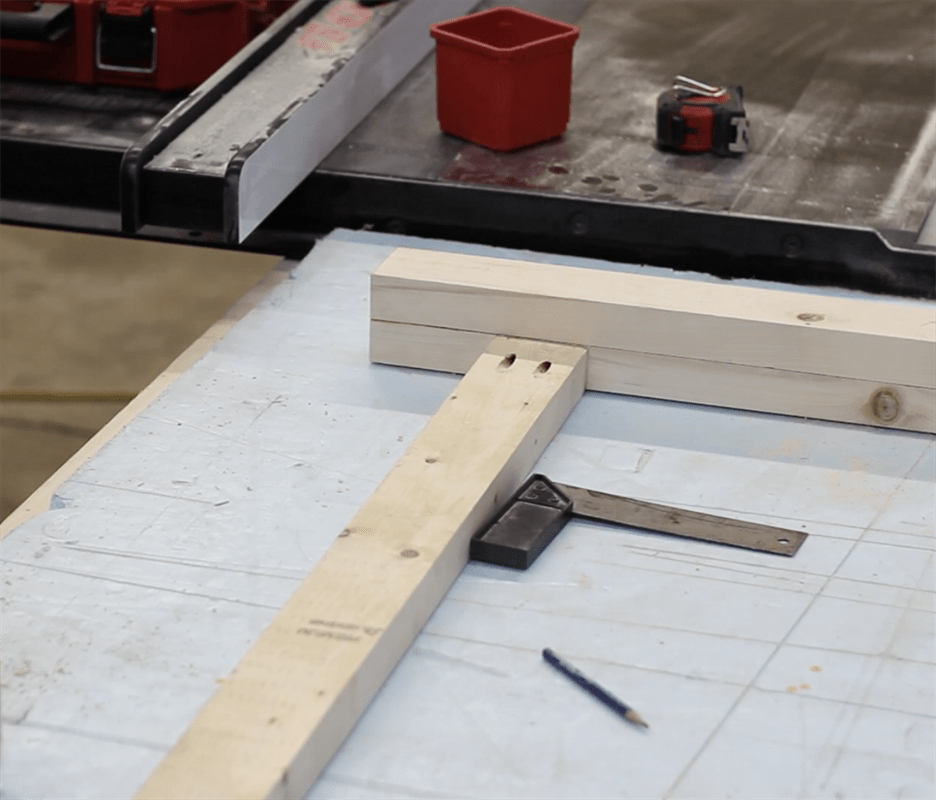
-
Add Cross Bracing
- Add cross bracing in between long stretchers
- Cross bracing dimensions are on a project basis, measure the distance in between stretchers and cut to length.
- This can be any dimensioned stock or scrap wood in shop (I used old 2x3's cut to 41 1/2")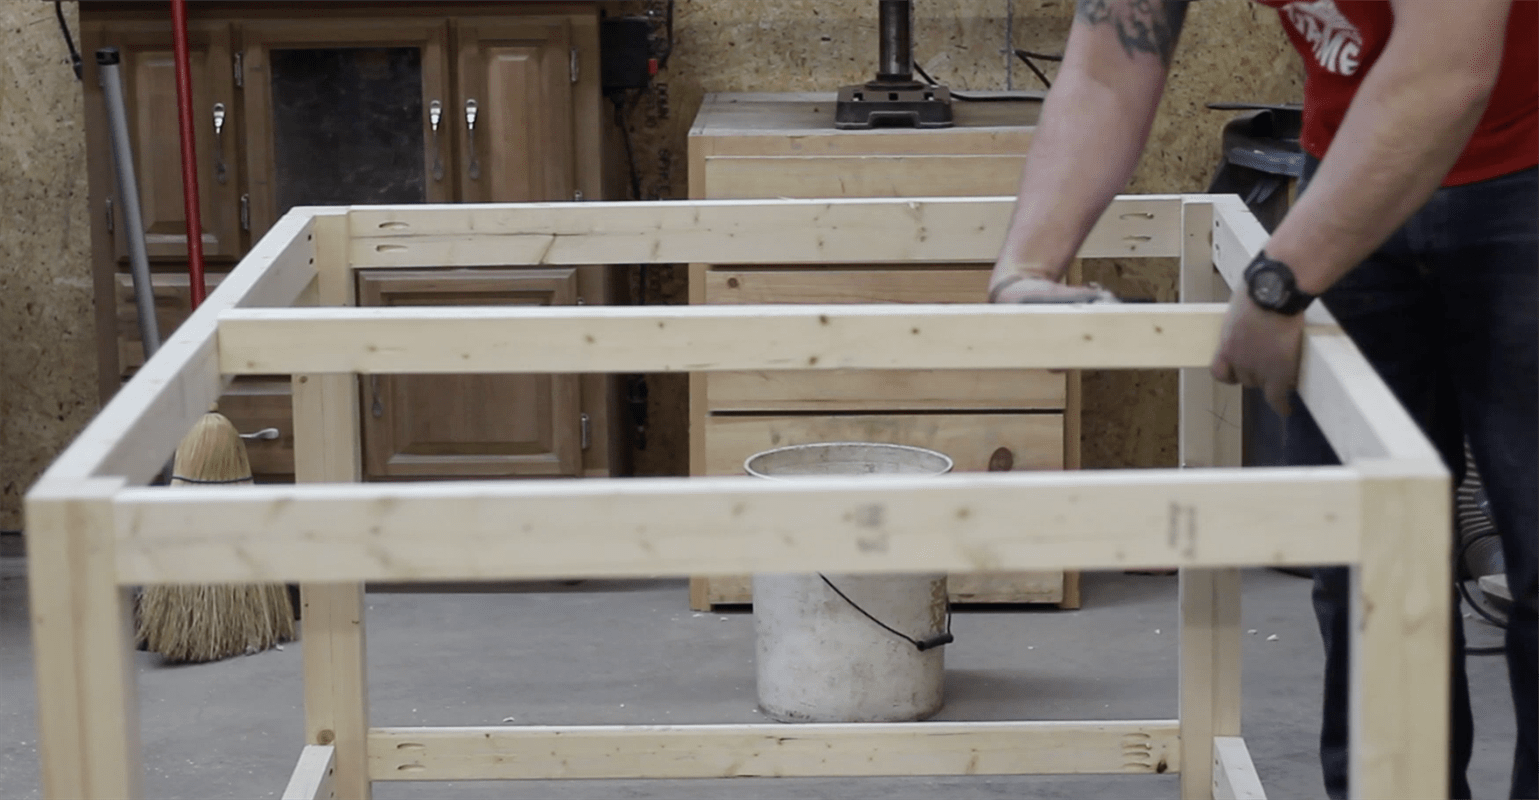
-
Add Corner Gussets
- Using left over scrap from stretchers, cut 45* corner braces to whichever length you desire
- Add Pocket Holes and Attach with glue and screws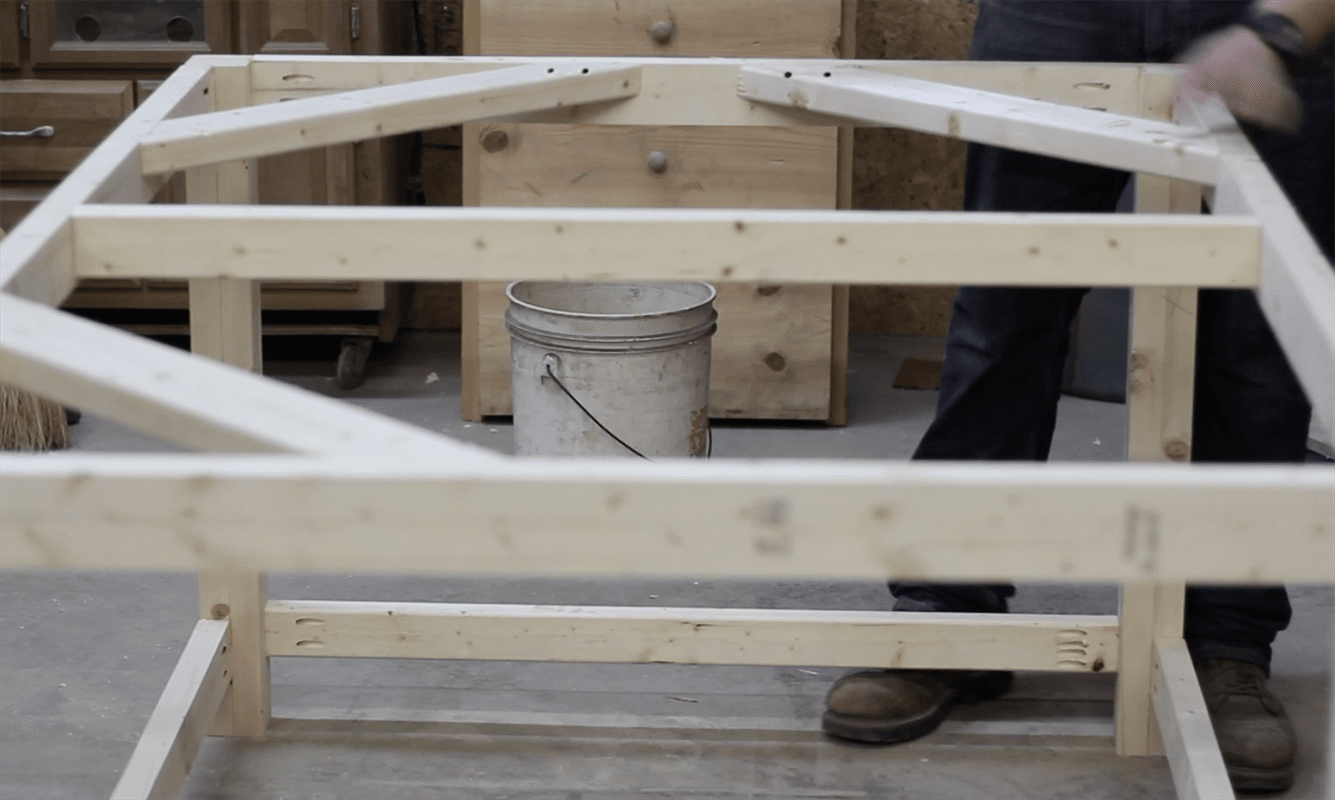
-
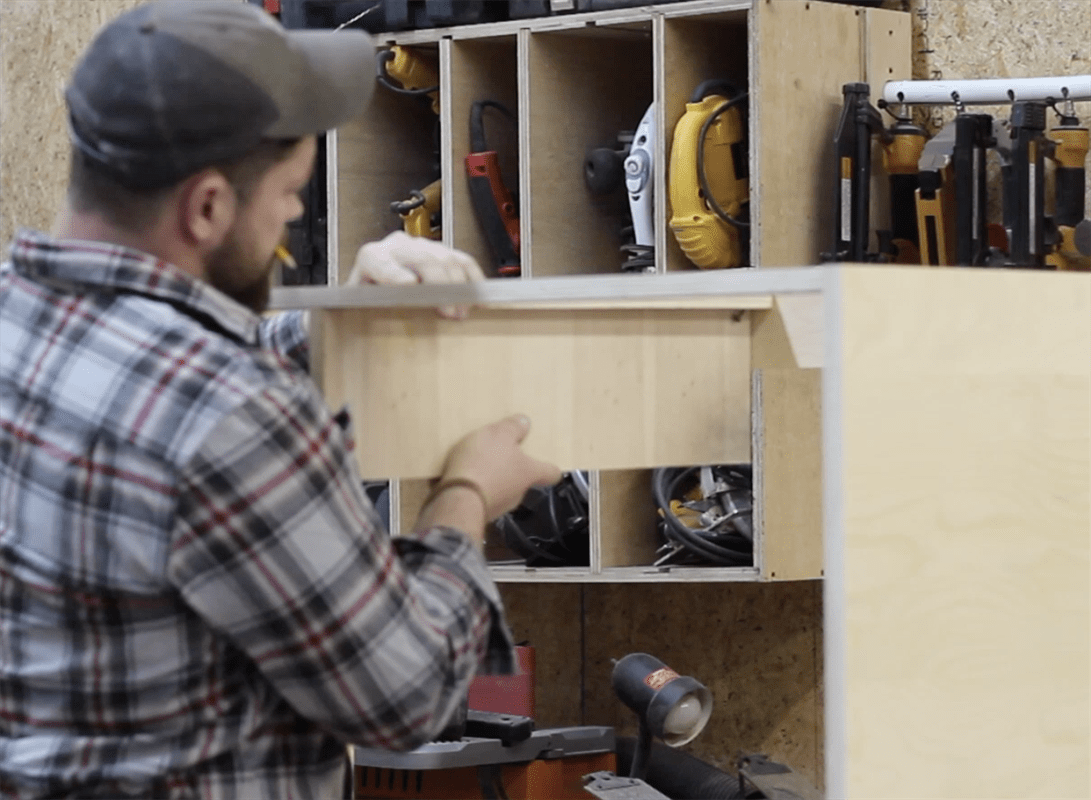
CABINET BUILD - Break Down Ply
- Break down sheet goods into dimensioned parts
- I use a track saw and table saw for final dimensions
- recommend cutting from 2 sheets but can be done with 1 and leftover shop scraps for face frame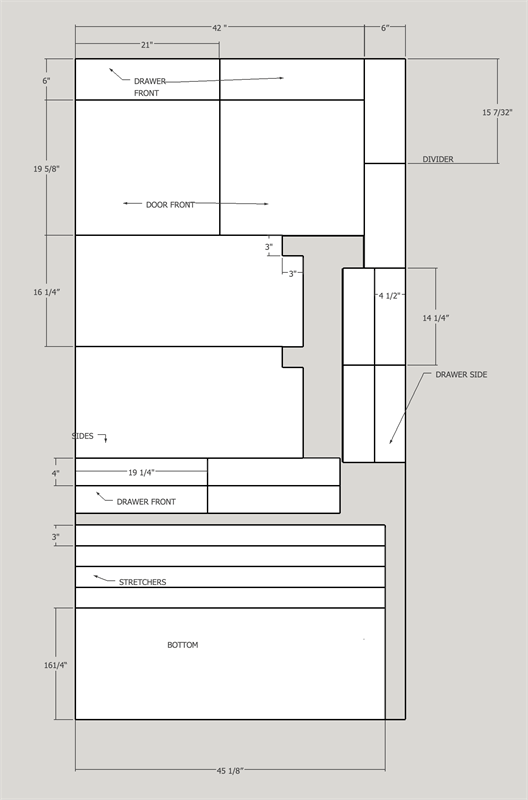
-
Pocket Hole Stretchers
- Pocket Hole stretchers.
- Add one stretcher to the toe kick
- add one stretcher to the top front (Flush with top of box)
- add stretchers to back (top and bottom flush with back)
- Cut 3" x 3" toe kick into sides with jigsawBOTTOM SHELF WILL SIT ON TOP OF STRETCHERS, BE SURE TO HAVE TOE KICK STRETCHER AND BOTTOM BACK STRETCHER ON CABINET BOTTOM WITH POCKET HOLES FACING IN
-
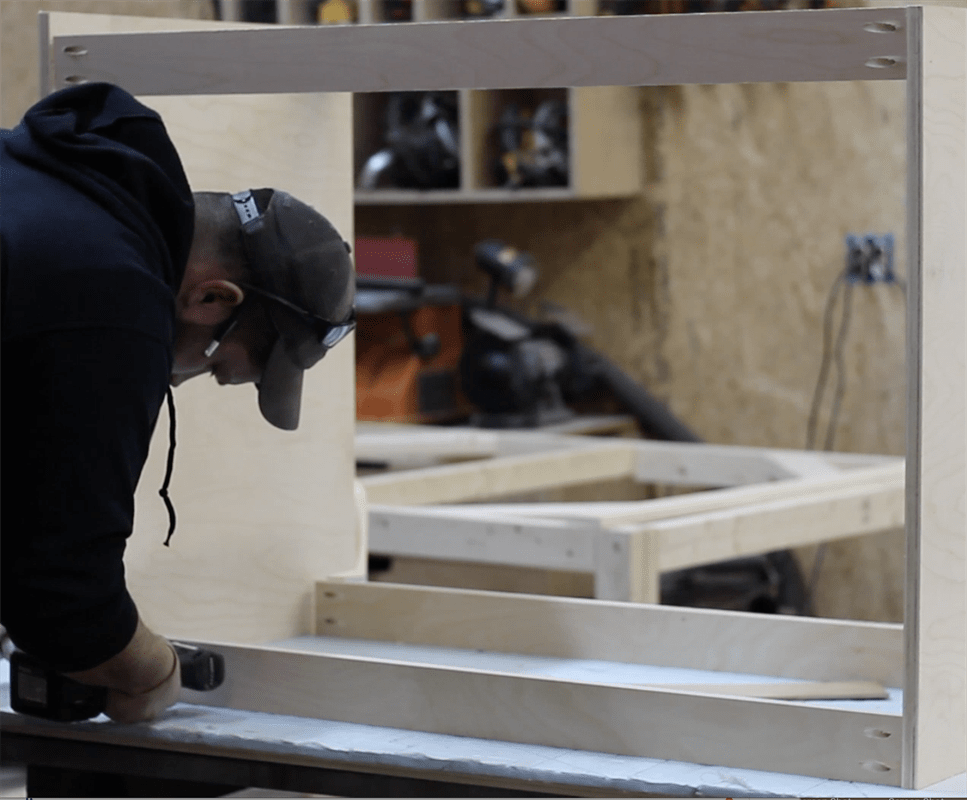
Cut and Glue Face Frame
- Using scrap hardwood or scrap plywood (or second sheet of plywood) cut and assemble face frame based on diagram.

-
Insert Bottom
- Insert cabinet bottom on top of stretchers.
- Apply glue and mark from top.
- Nail bottom into placeNOTE: Measure box interior, minor changes may affect precut size of bottom
-
Attach Divider
- Attach center divider for drawer slides with pocket holes in back and screws from top down front stretcher
-
Attach Face Frame
- Attach Face Frame with 1 1/4" 23g pin nails and glue

-
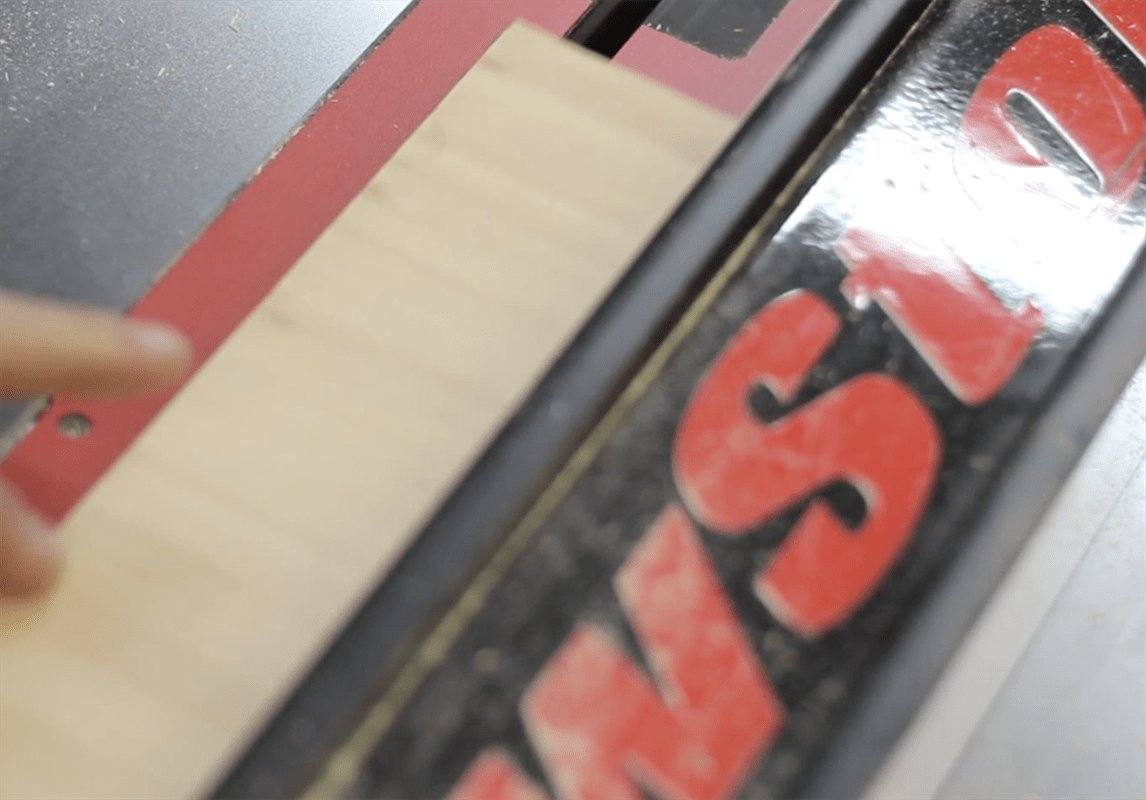
Cut Dados In Drawers
- Cut 1/2" Dado inset 1/4" from bottom of drawer sides and front
- pocket hole drawer sidesNOTE: Cut drawer backs 1/2" to allow bottom panel to slide in and screw from back
-
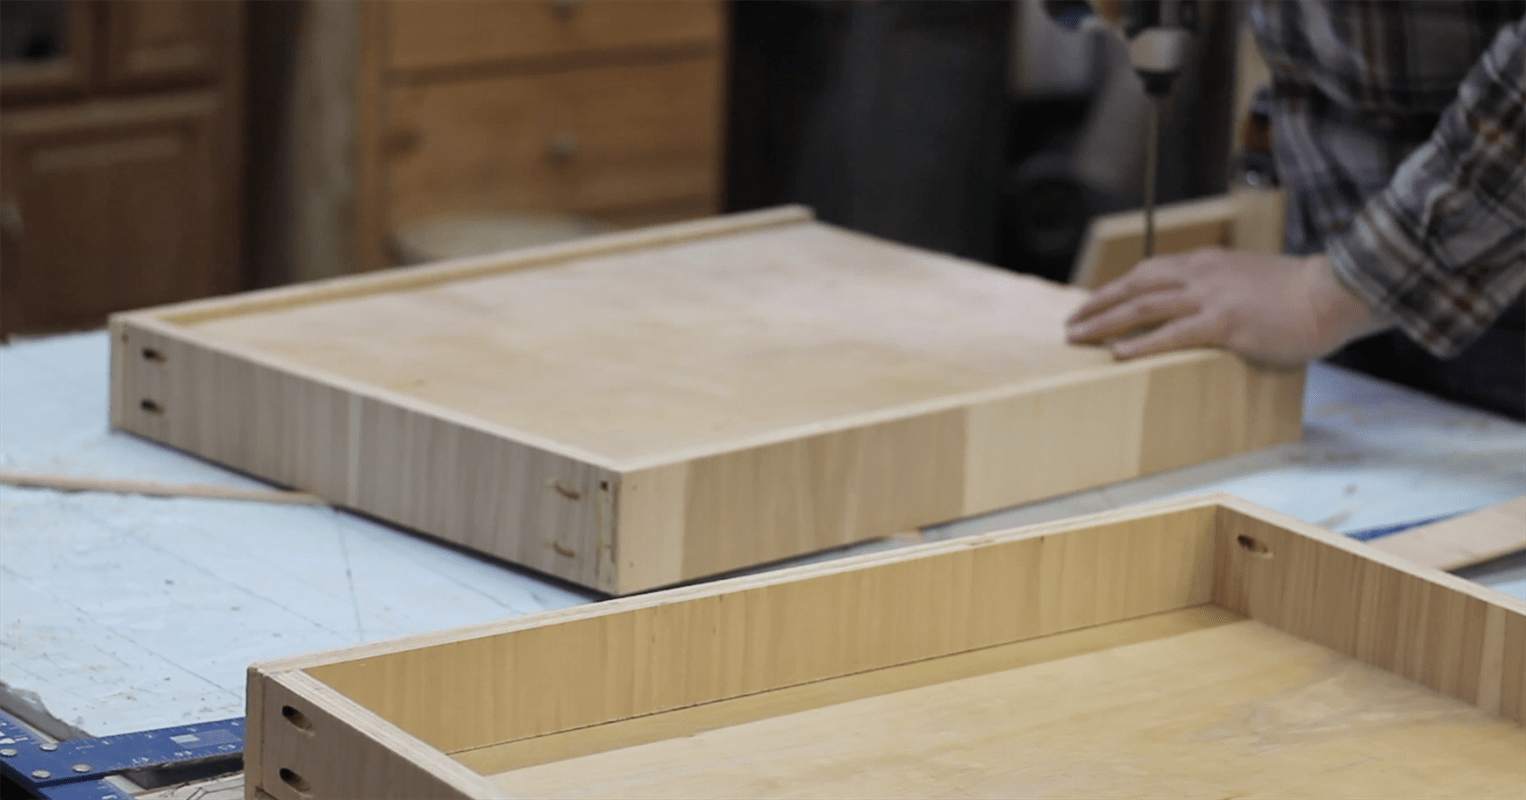
Assemble Drawers
- Assemble drawers with pocket holes on front and back
- Face pocket holes out
- Insert Bottom into dados- In photo you can see pocket holes facing out, bottom panel is slid in and attached with 2 screws from the bottom into the drawer back (the one you cut 1/2" short)
NOTE : Drawer box dimensions may change depending on slides. Typical Ball Bearing slides need 1" of total clearance (1/2" each side) so make drawer box width 1" short of face frame width
-
Attach Slides
- Using a flat surface and fully assembles slide, attach to drawer box.
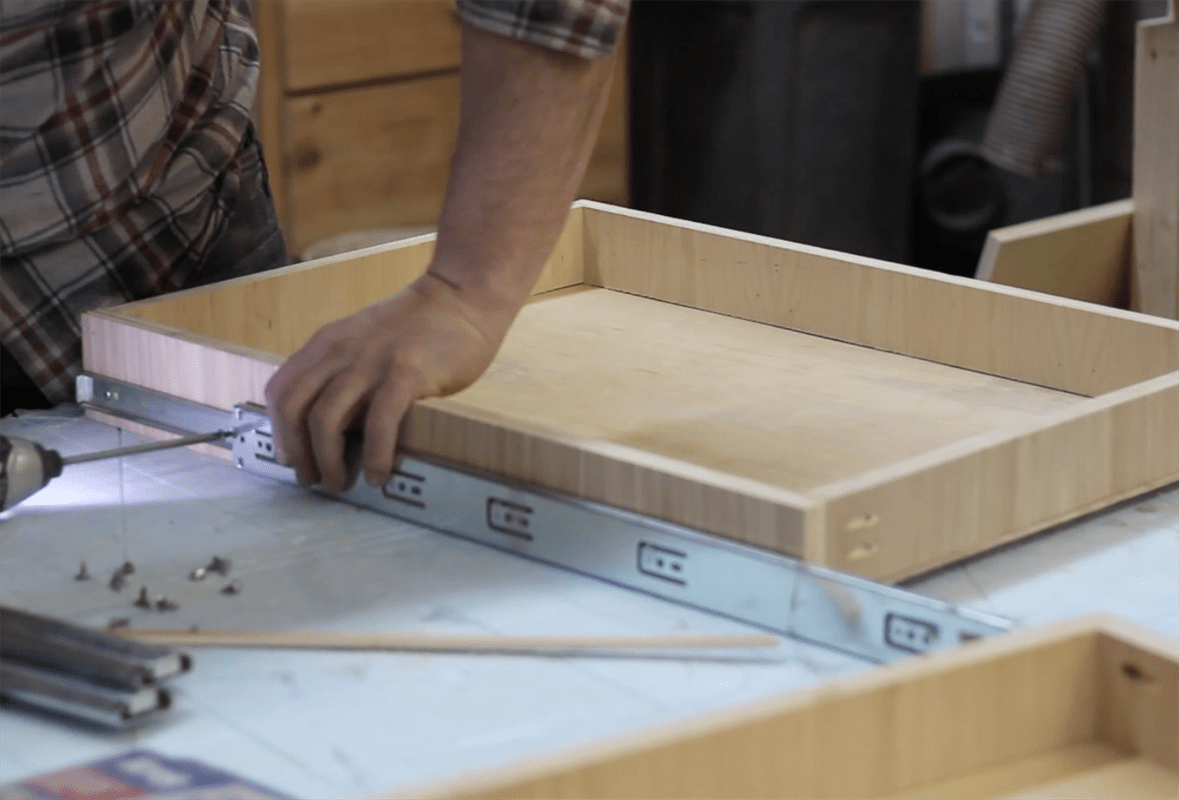
-
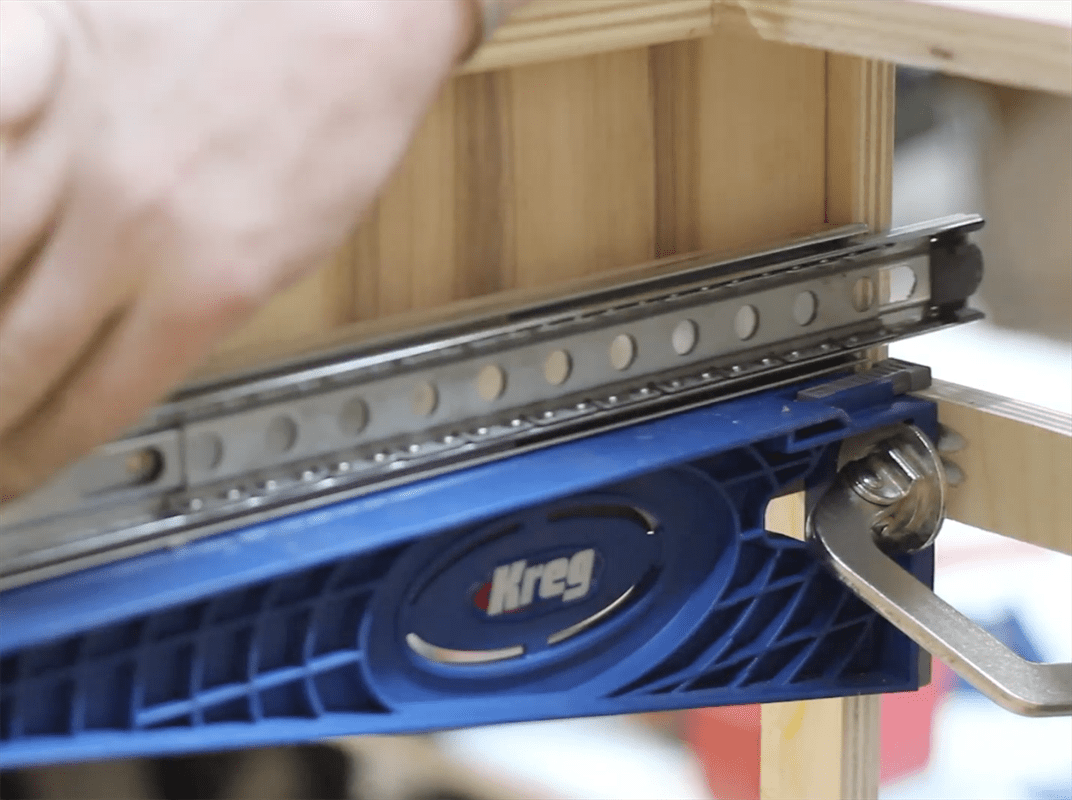
Attach Slides To Cabinet
- Using KREG Drawer Slide Jig attach slides to cabinet box.
- Insert drawer box, adjust accordinglyNOTE: You may need to shim out the interior of the cabinet box so the drawer slides are flush with the inside of the face frame. use scraps or whatever is lying around, glue and brads work
-
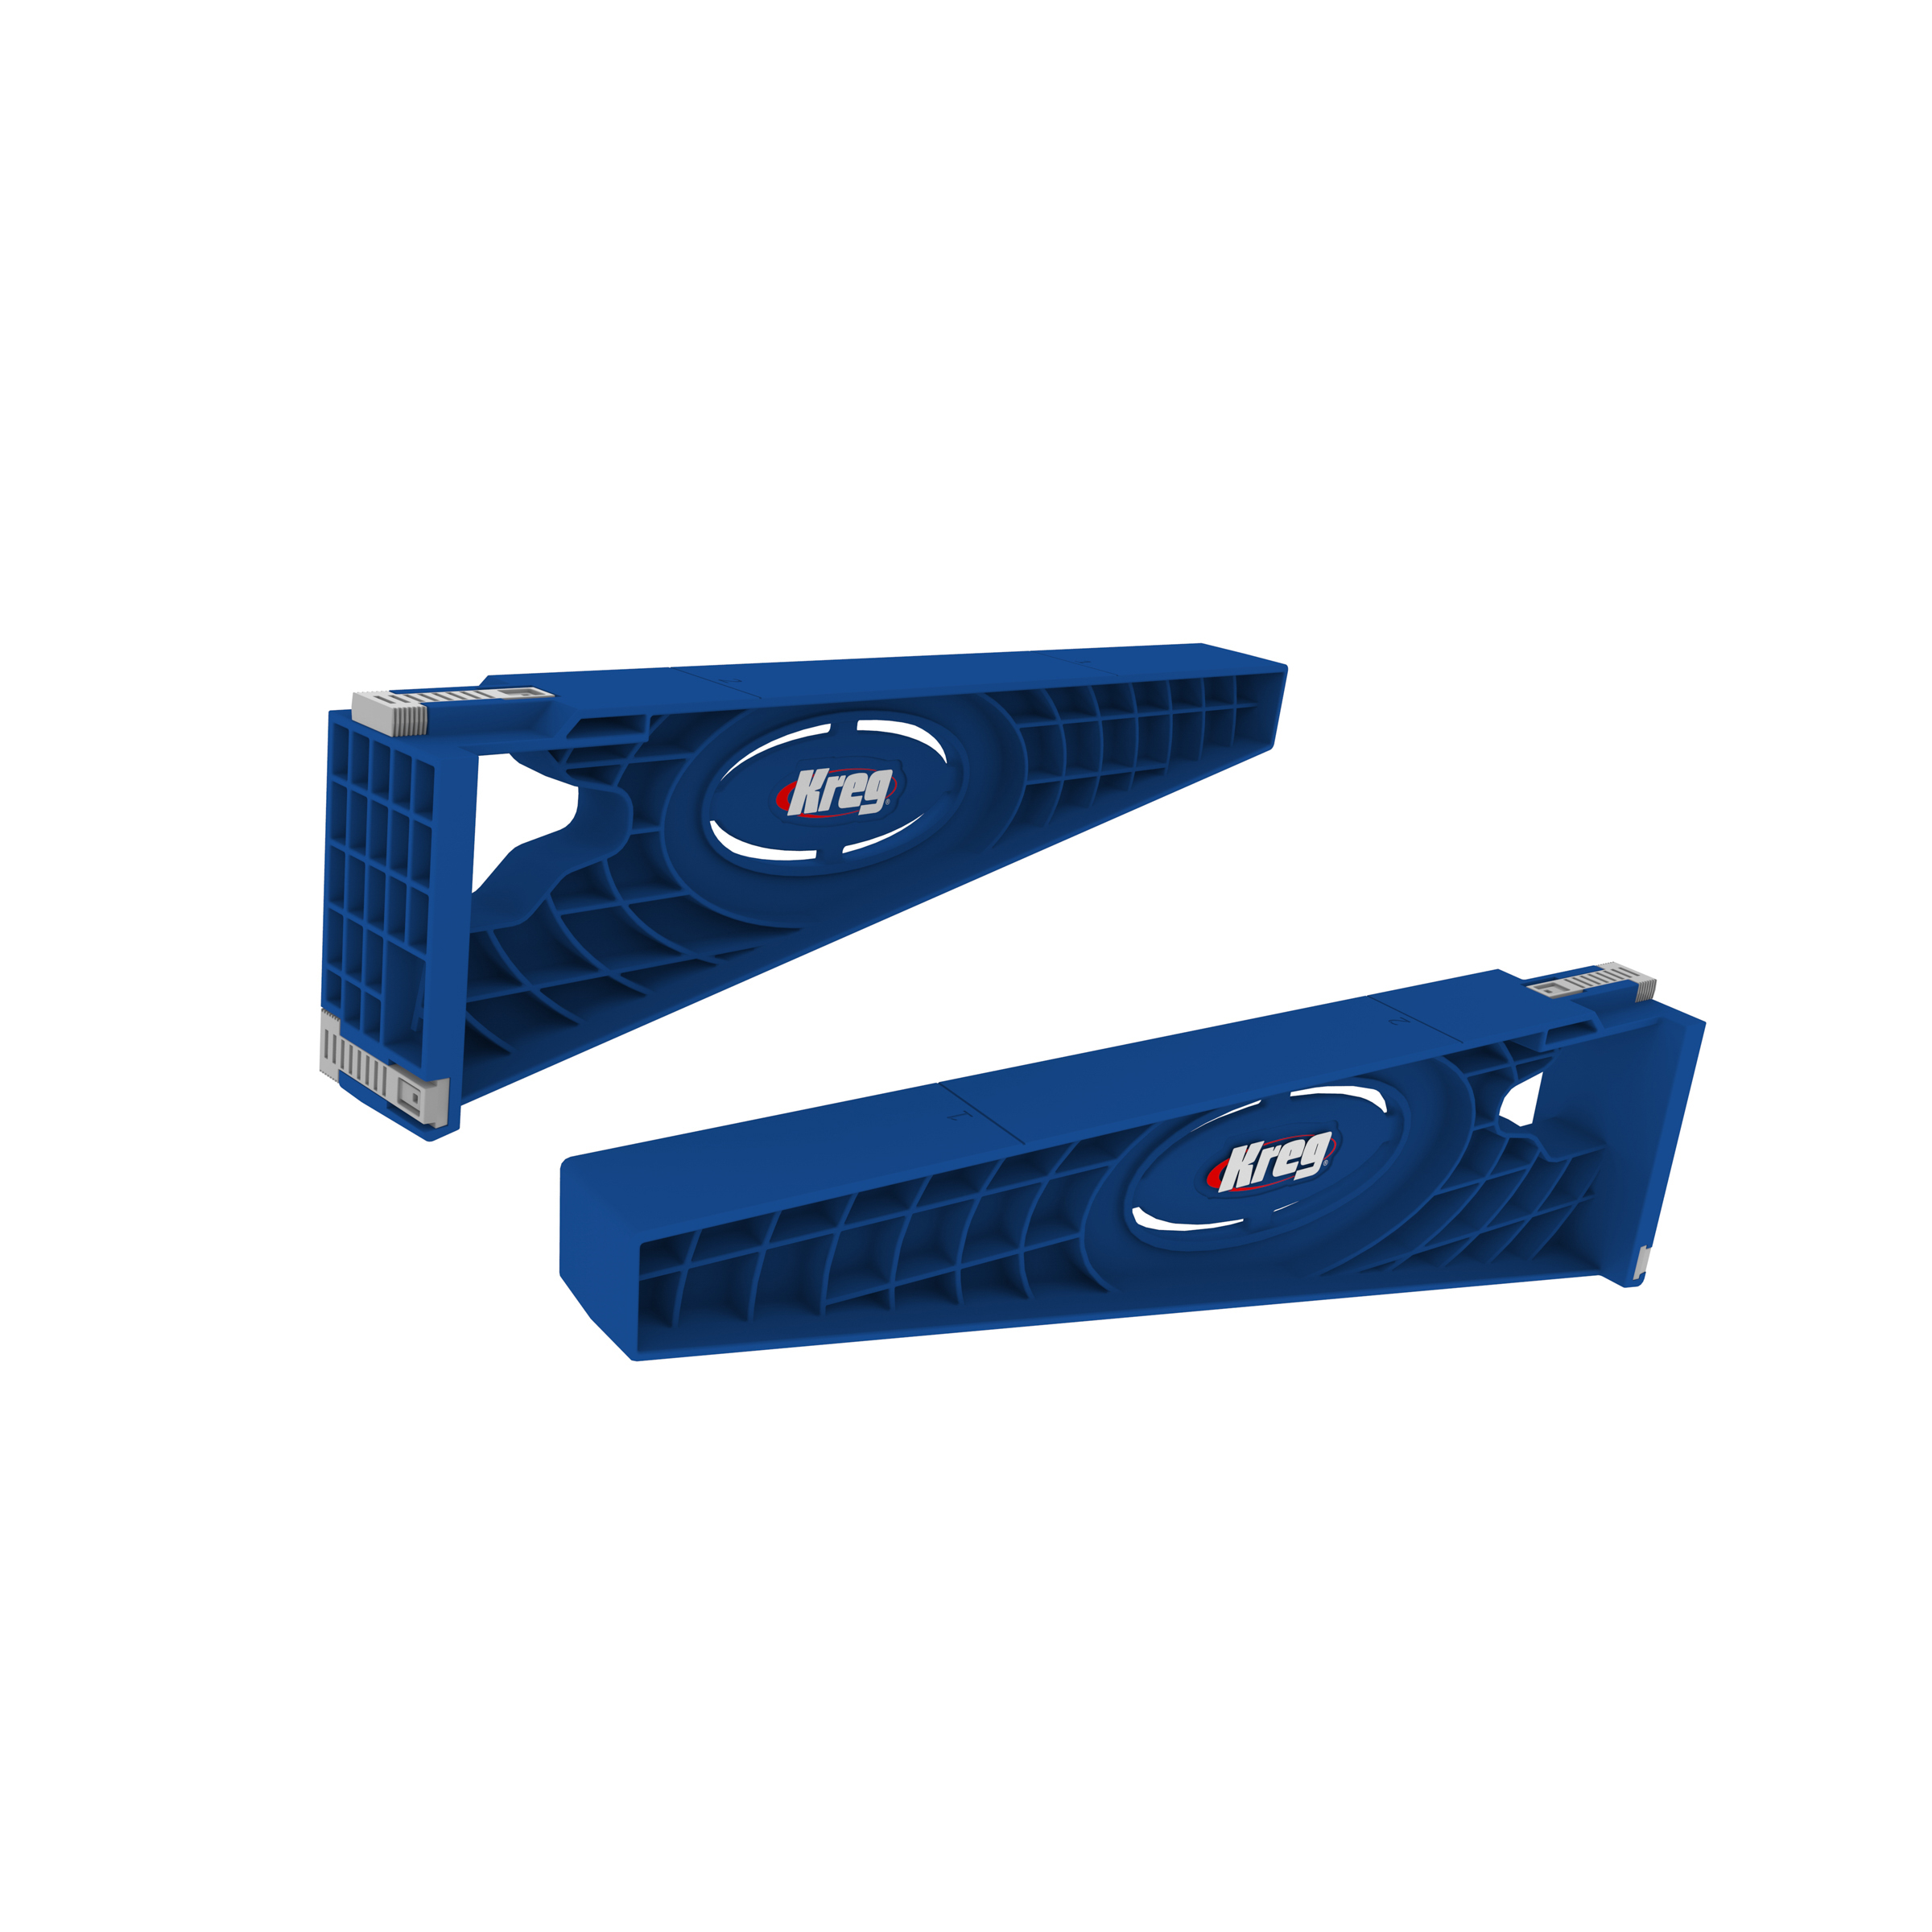
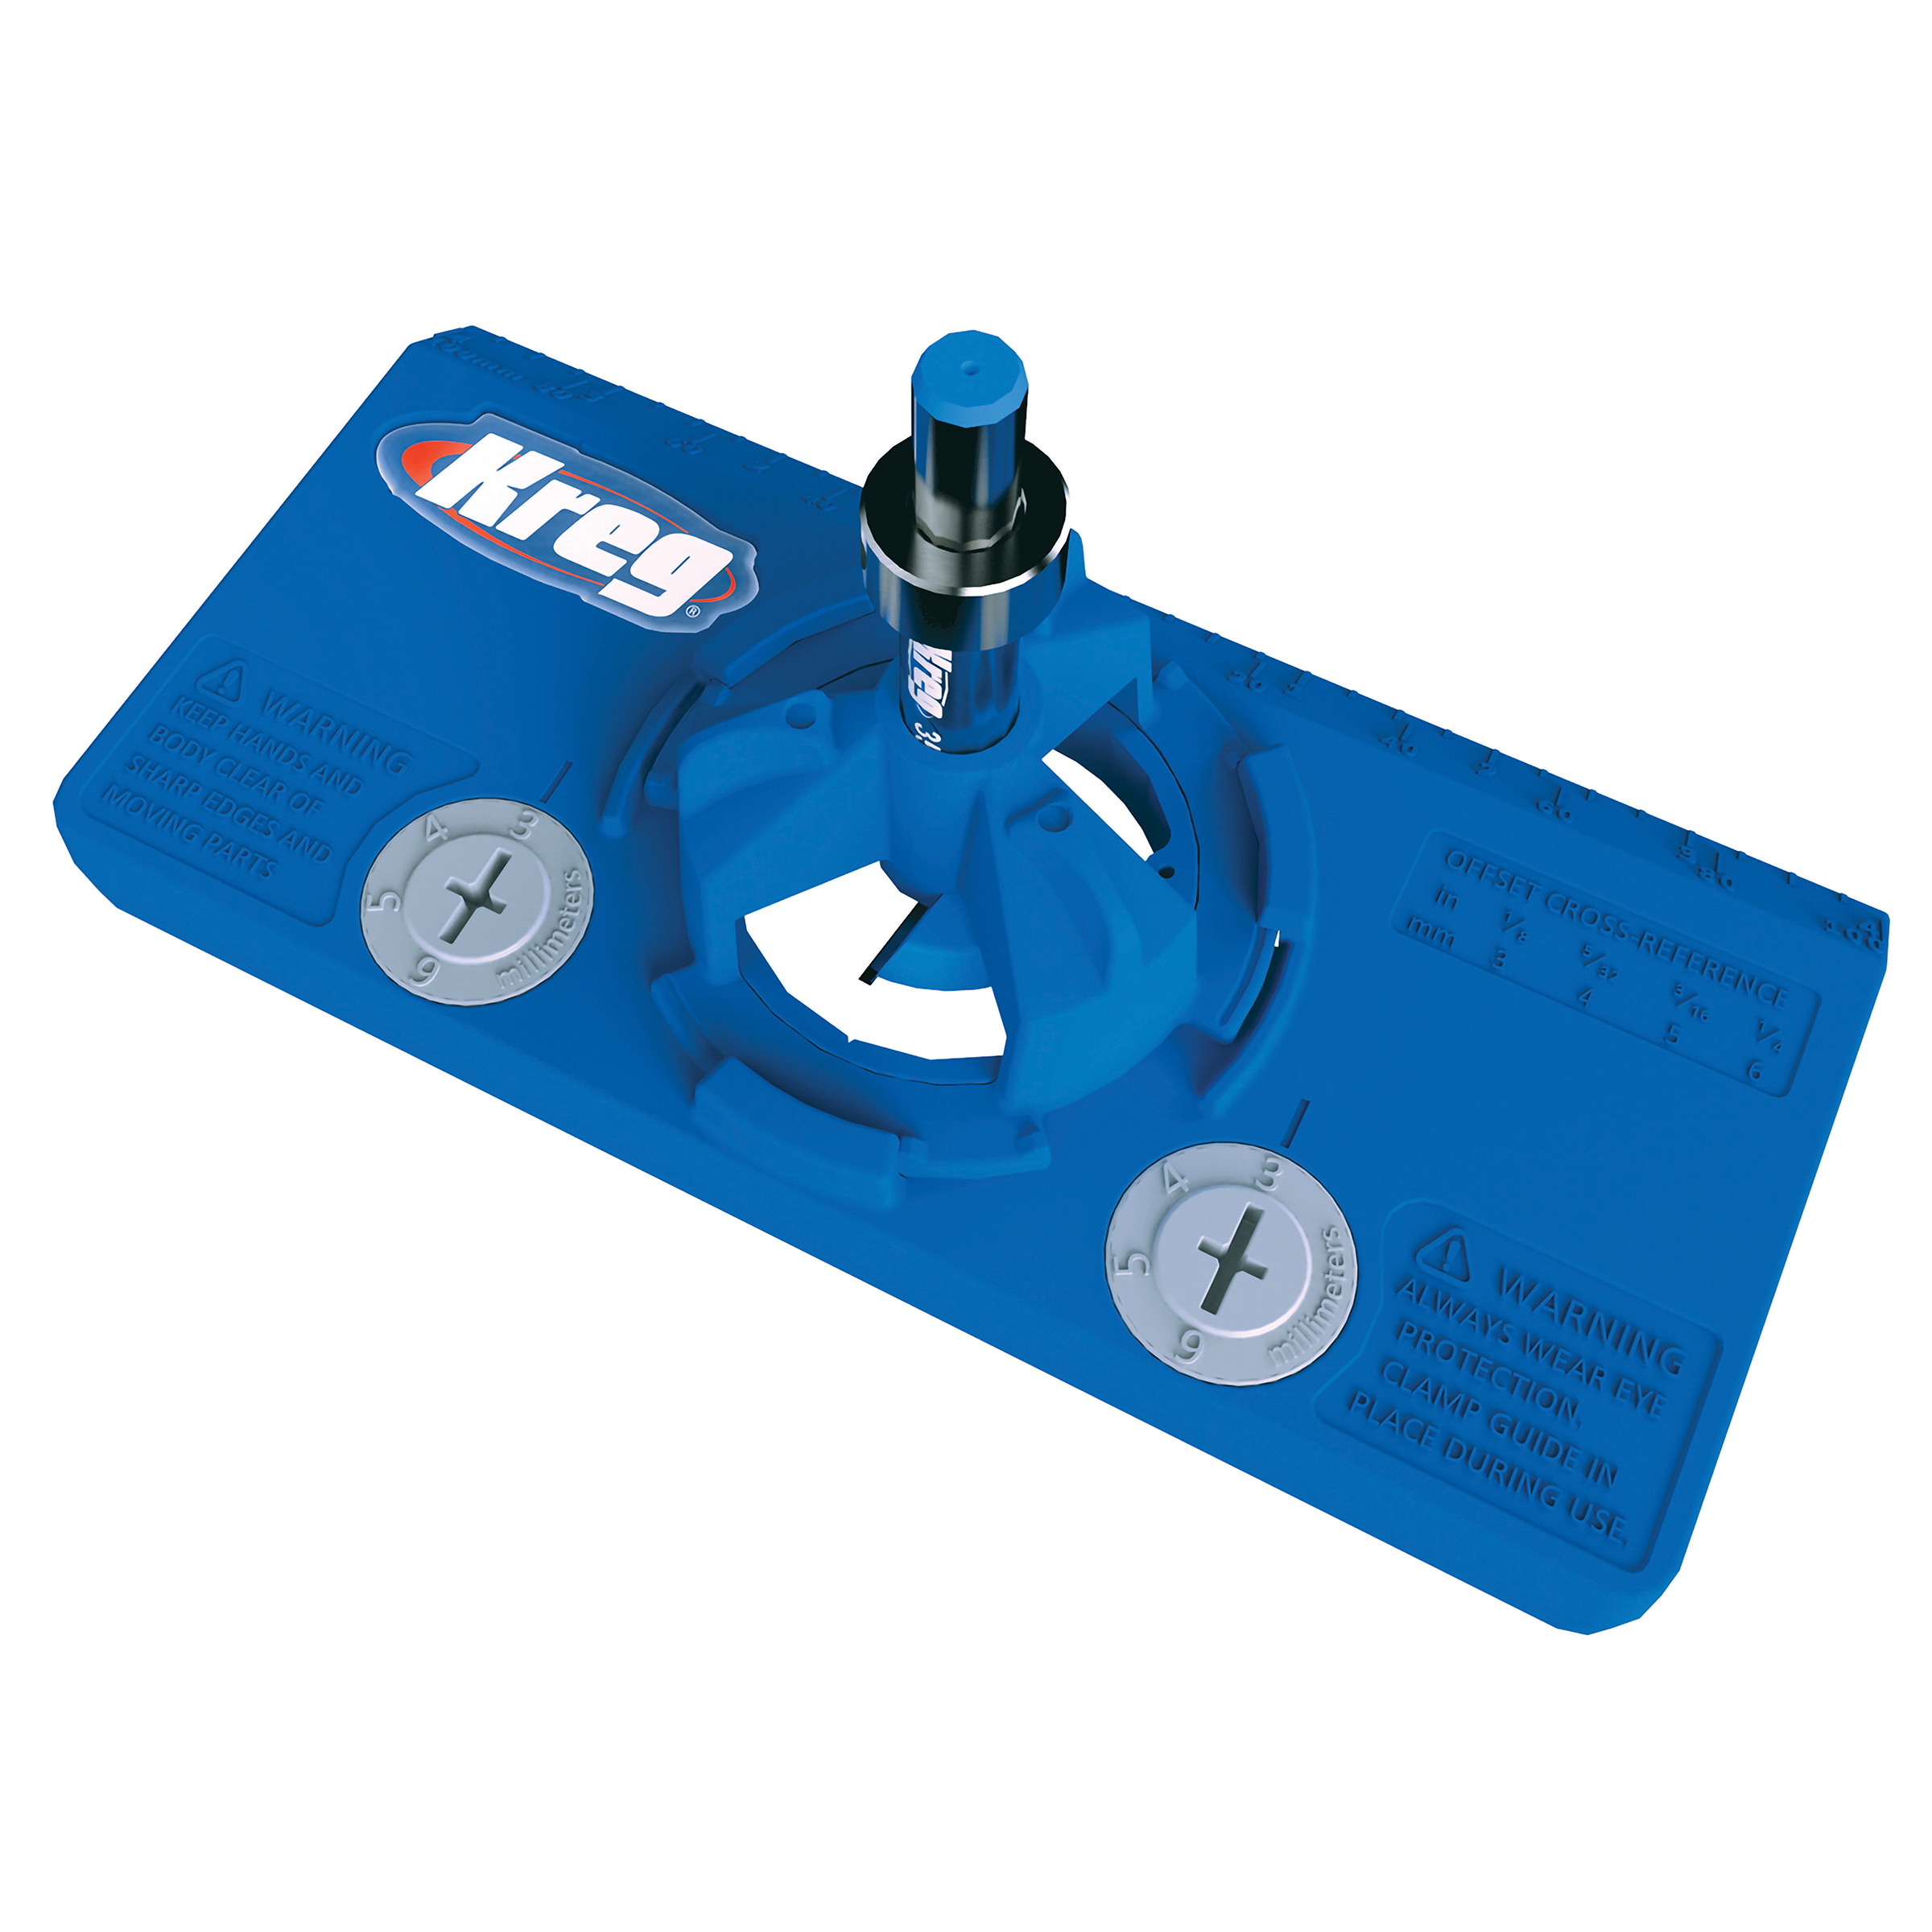
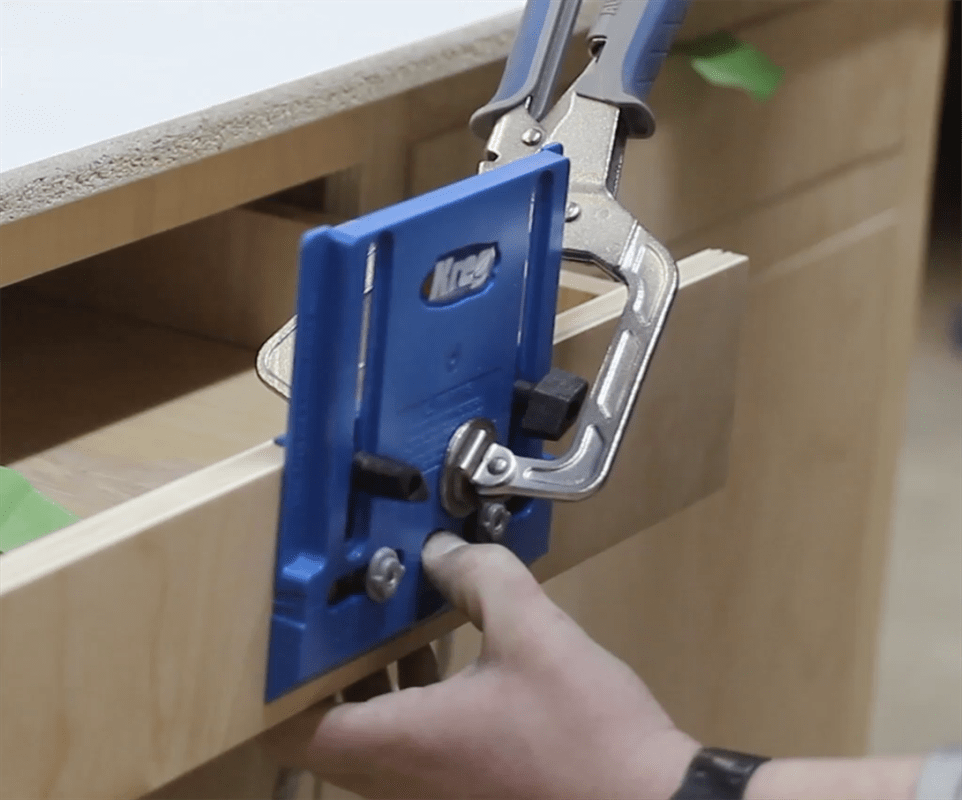
Drill and Mount Door Hardware
- Using KREG concealed hinge jig, mount hardware to doors.
- Install doors in cabinet box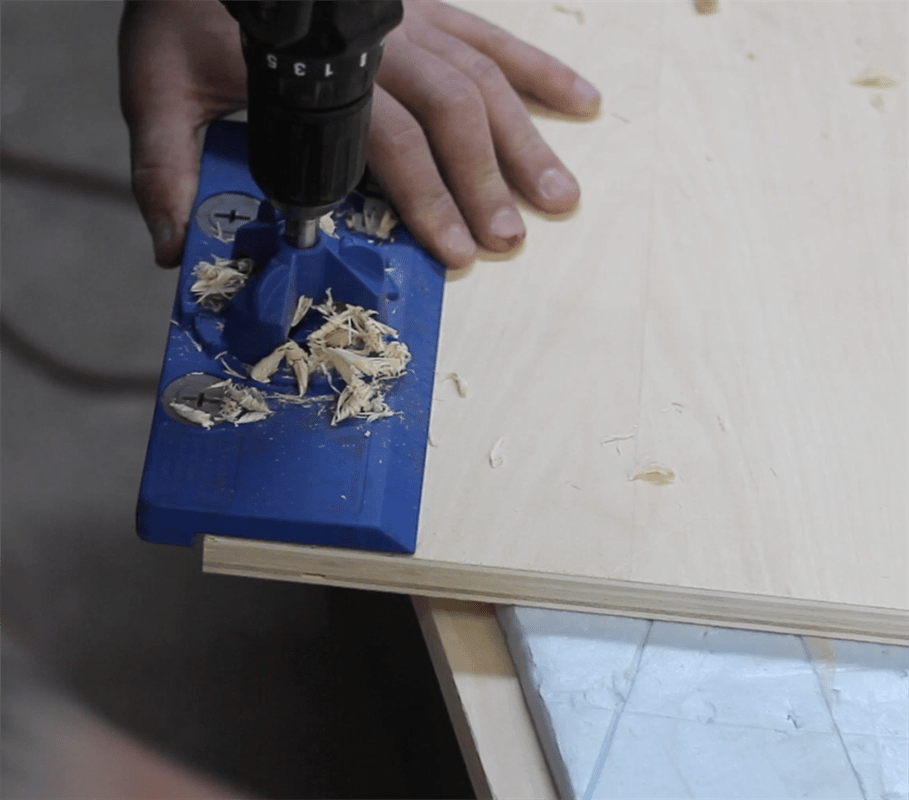
-
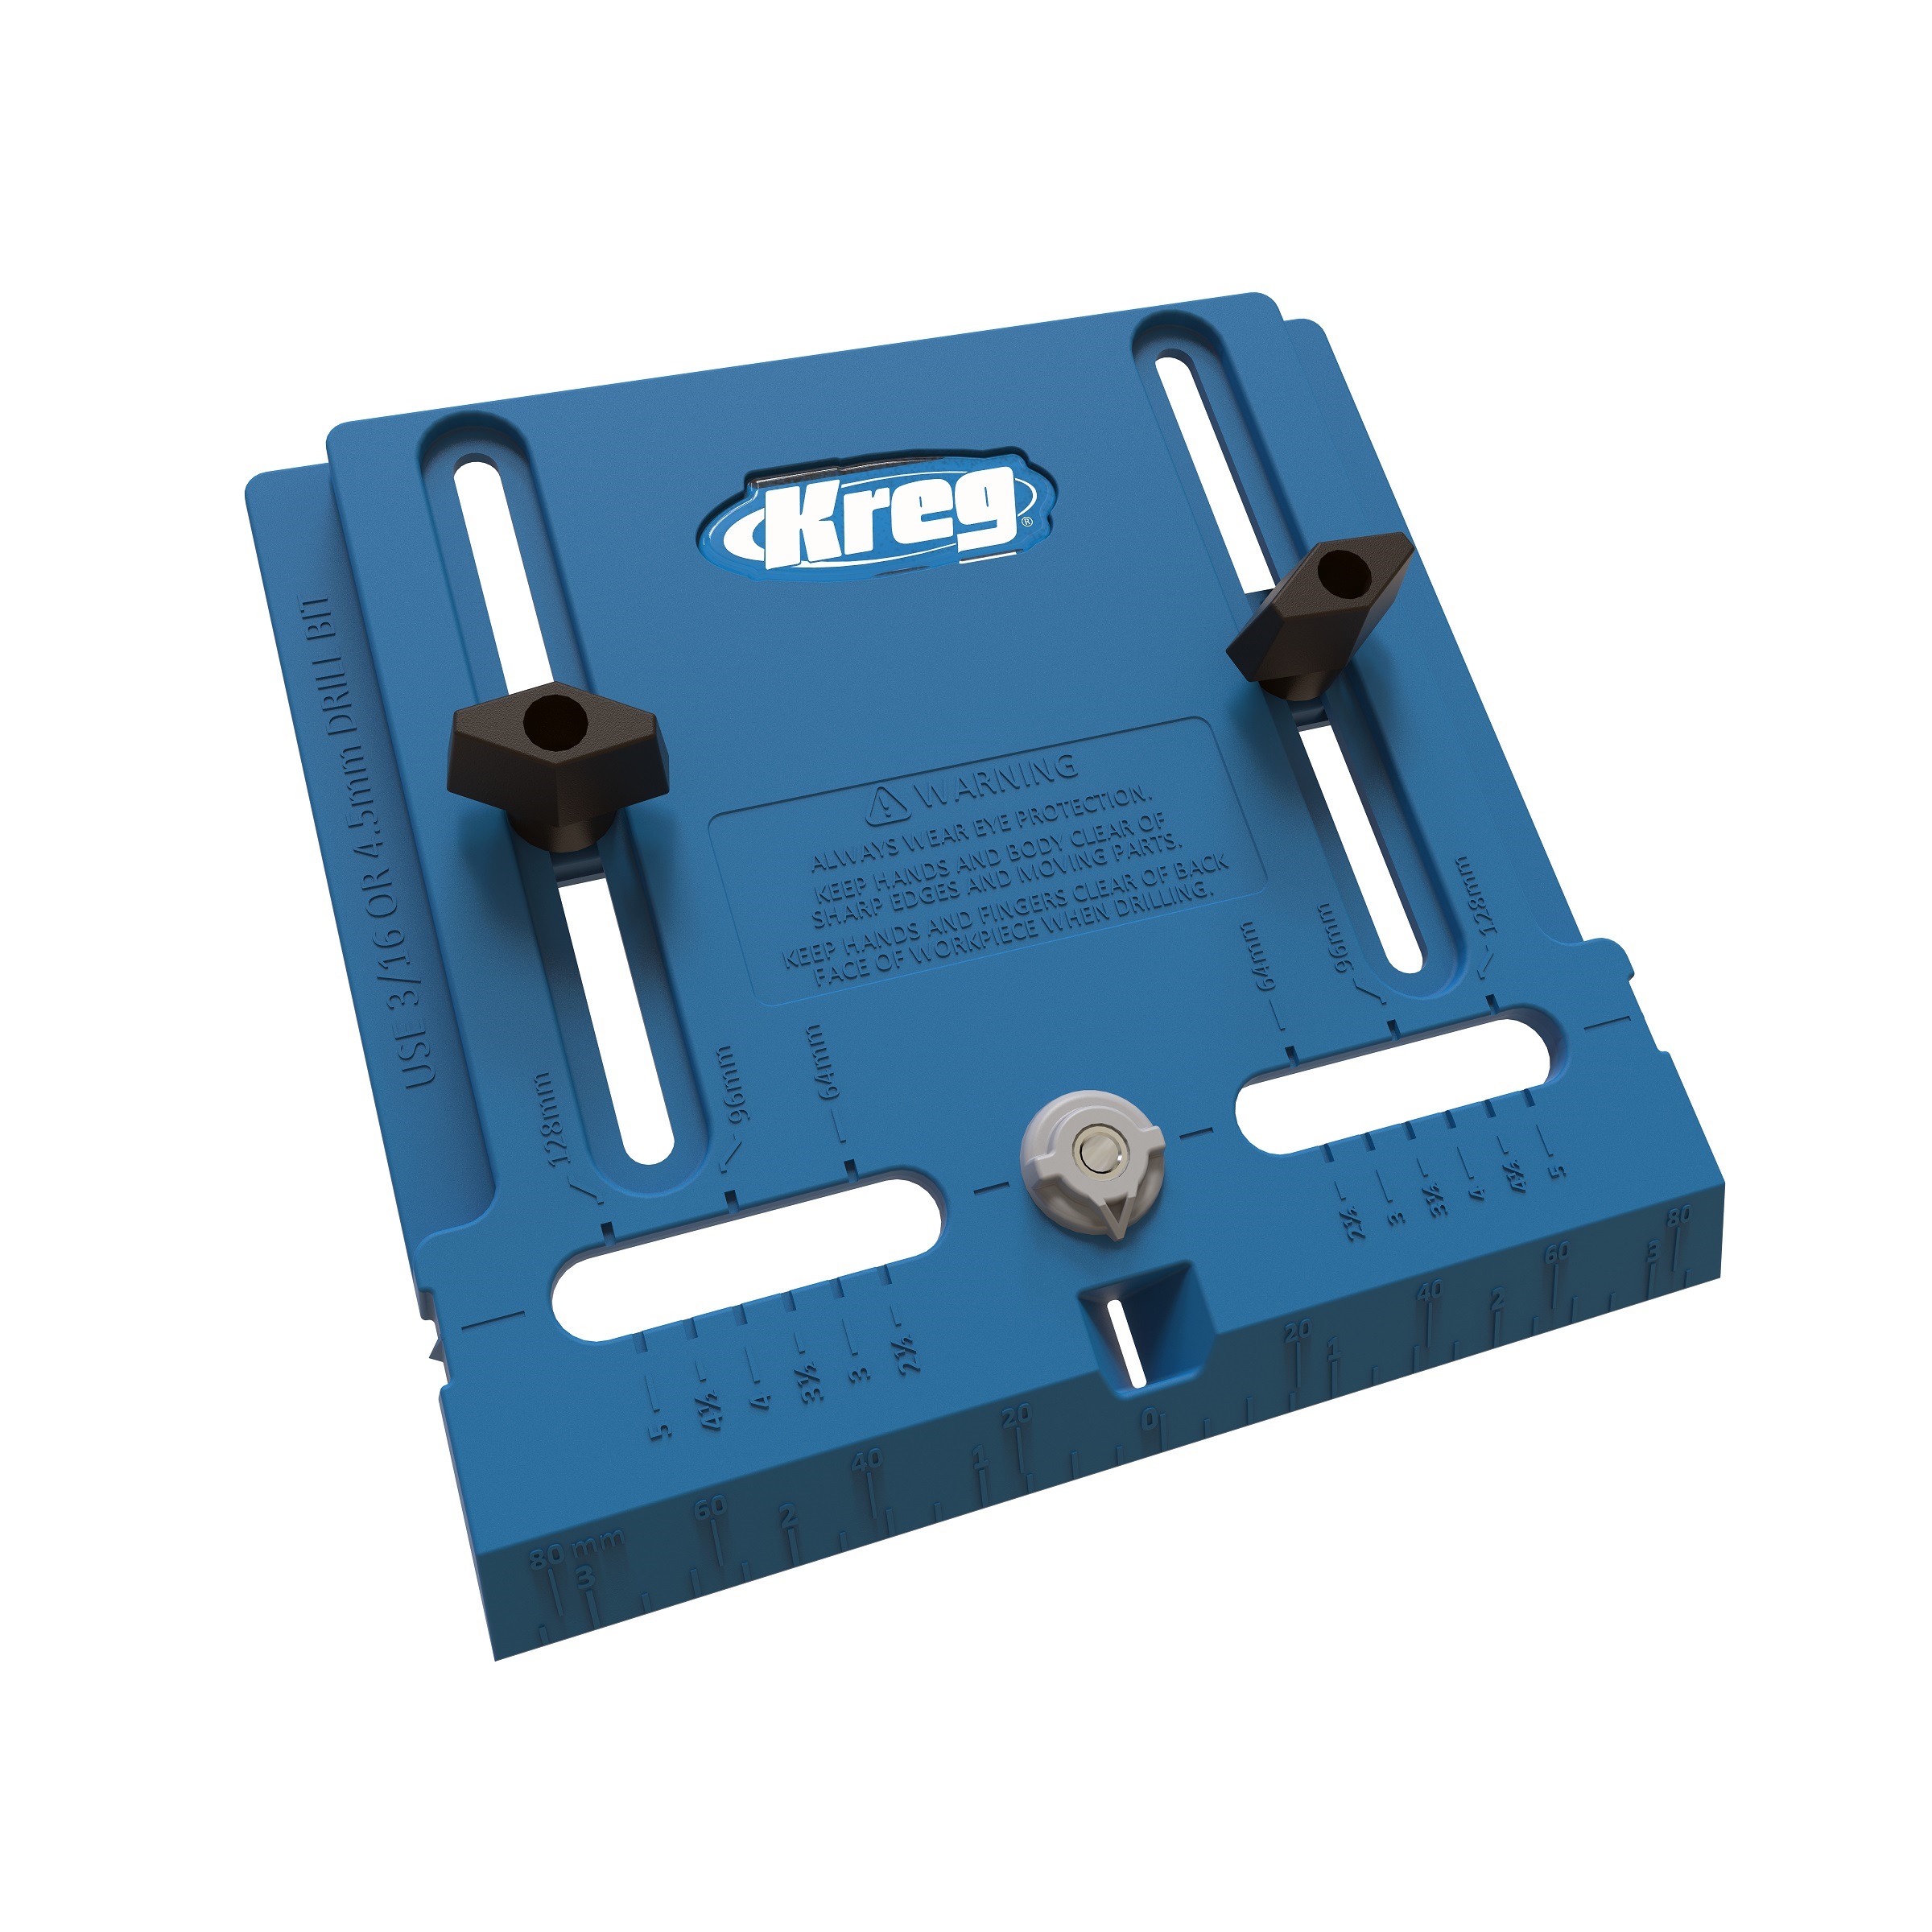
Install Pulls and Hardware
- Using KREG Cabinet Hardware Jig , Mount drawer and door handles
-
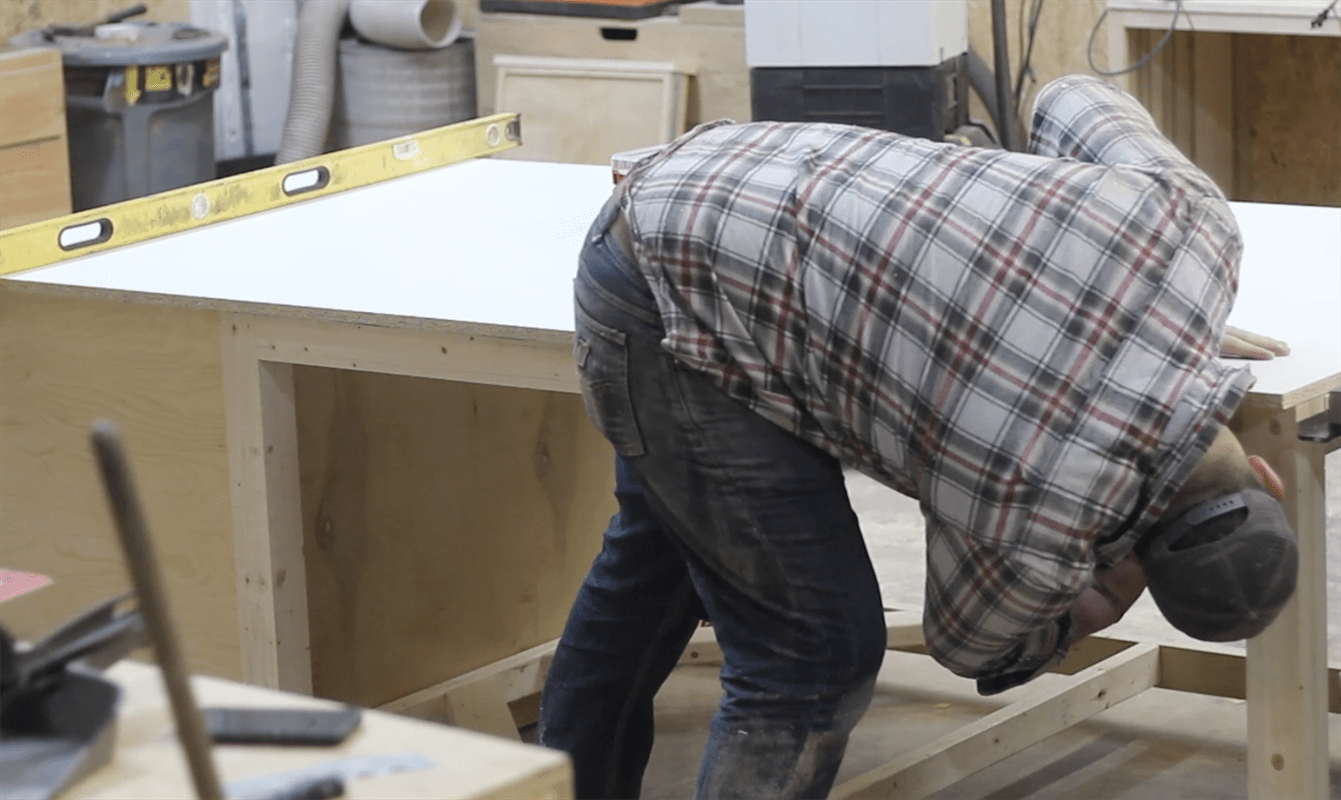
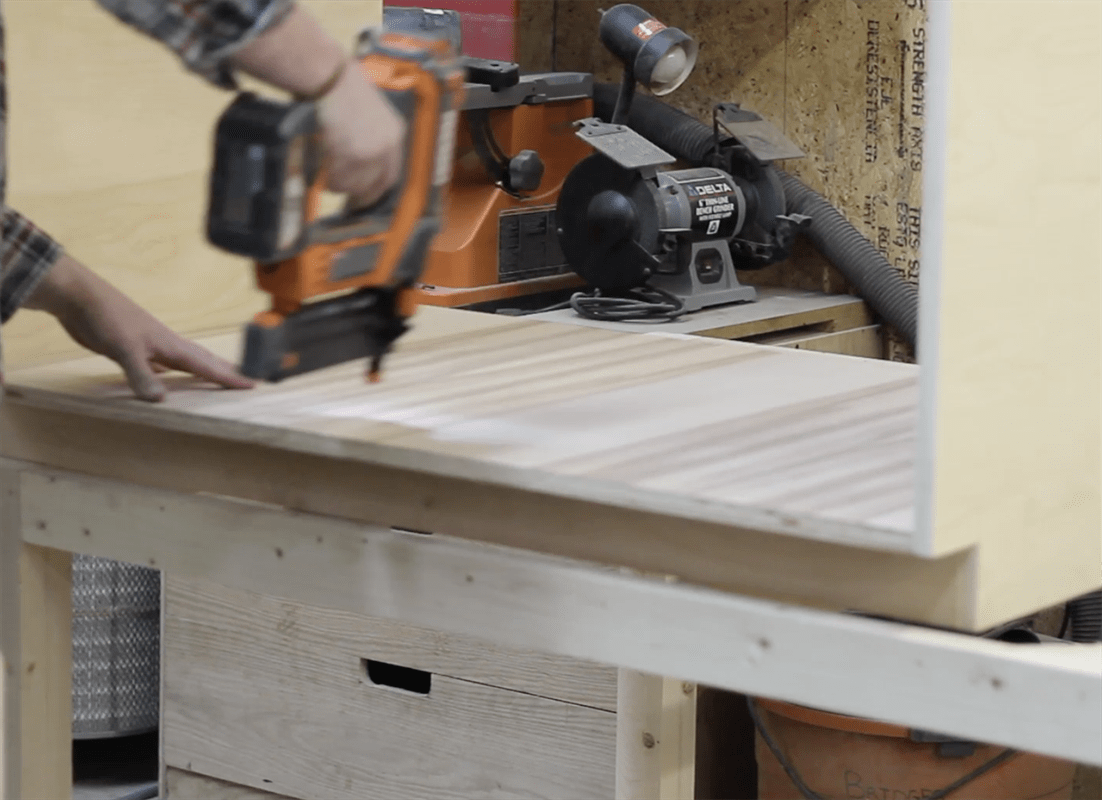
Add Top
- Cut Melamine top to size and attach from bottom.
- Should span from the cabinet all the way to table saw
- If cut tall, use router to create mitre gauge slots
- Round over edges on melamine and finish with 220 grit sandpaper